DeFi Overview Guide v0.1
First steps with our app made easy.
Introduction
DeFi Overview app was created to provide introduction into world of decentralized finance. It opens world of different finacial tools, which were originally accessible only to few people, to everyone. It gives you lot of opportunities, but it demands some degree of responsibility from you too, to prevent losing all your funds.
As the times flew, the app was extended with more general crypto currency topics, like news aggregator, exchange overviews, portfolio tracking, address tracking, and many others.
The main goal was not changed. We still want to bring you the useful tool, which provides you the latest DeFi updates, interesting stats, but we also try to be simple knowledge aggregator for newcomers into crypto currency space. We tried to collect all useful information about crypto currencies, DeFi and show it at one place. Due to this, the app might look like too heavy. Even we tried to do our best, not all features might be obvious.
For that reason, we come up with this guide. You do not need to read it all, if you see topic which is interesting, just click on it in the table of content on the left. We hope it will help you to understand possibilities, which this app brings and it will be one of the useful tools for your DeFi and crypto currency adventure.
You are using the app at your own risk. It is in development and you should consider it as experimantal app.
Home
Home section is the first screen you will see after running the application. It is divided into 3 sections: Watchlist, Coin List, Fees, and Investments. From thess screen you can track your favorite or most valued coins with their basic info.
Watchlist
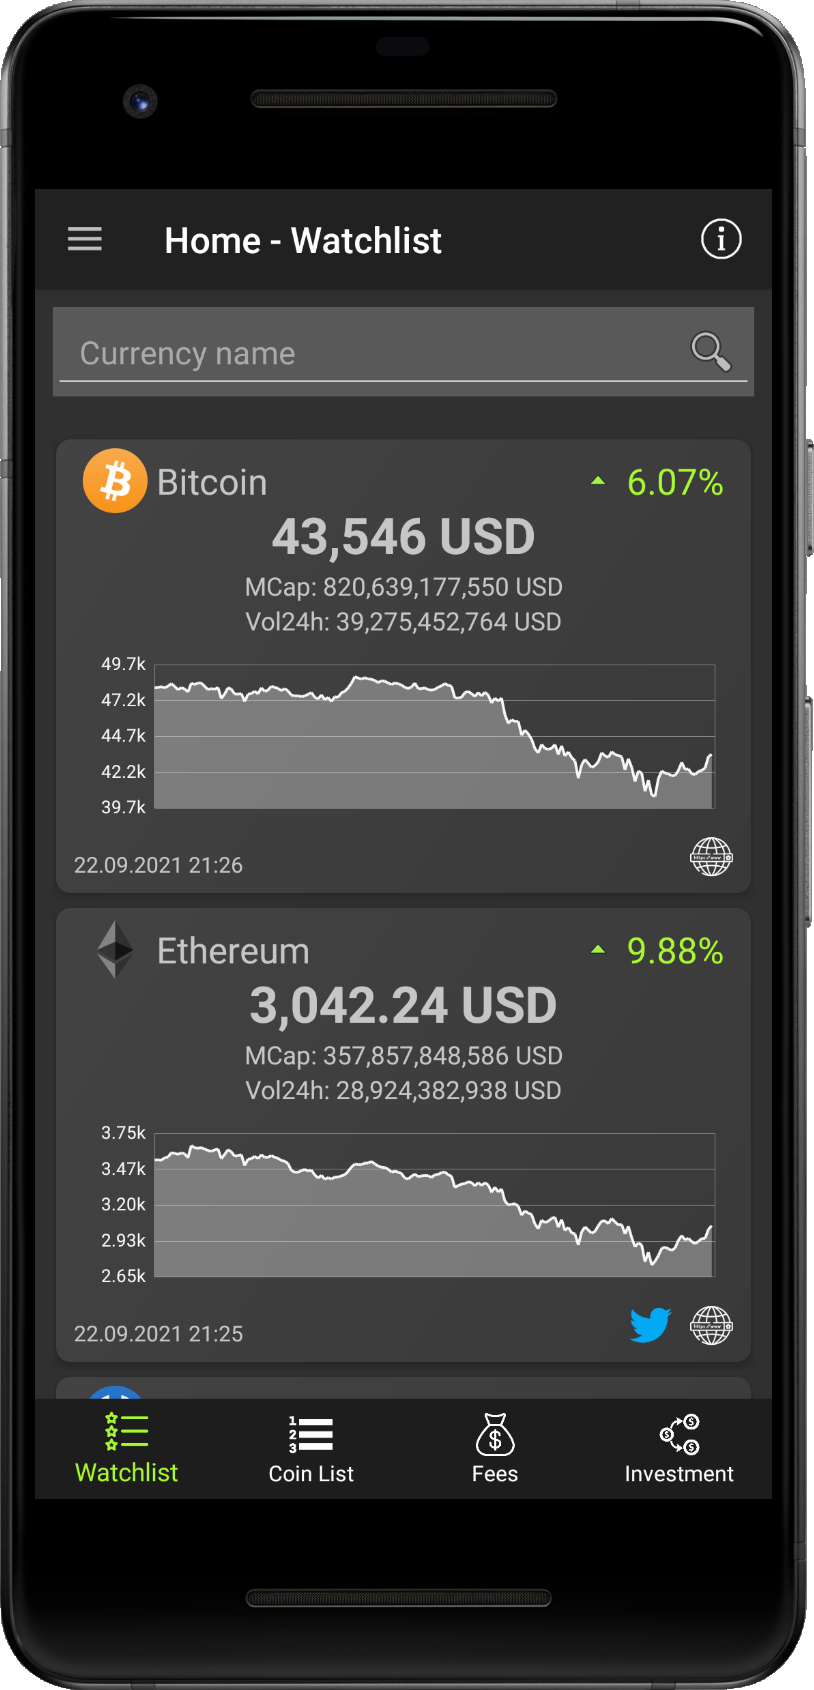
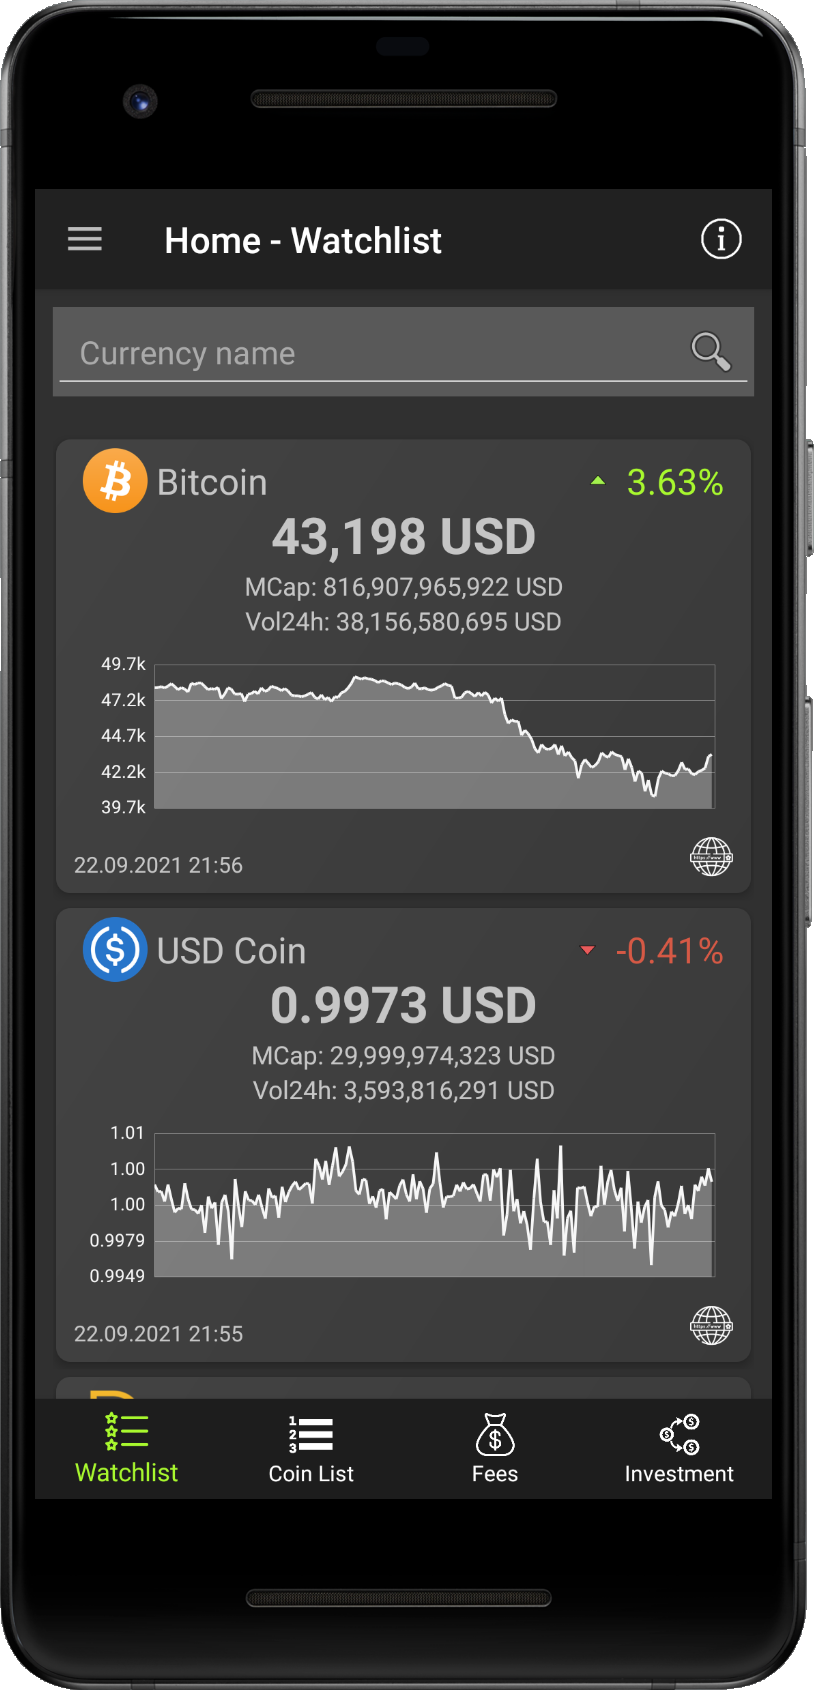
Watchlist is customizable list for simple tracking of coins you are interested in and it shows basic stats and price info.
For first run you can find a few pre-seleted coins here. You can maintain the list - add or remove coins as you wish.
List is sorted by the market cap by default.
- Logo and name in the top left corner
- Price change in 24h in the top right corner
- Current price centered on the second row
- Volume value in 24hcentered under the current price
- Date of update in the bottom left corner
- Link to homepage in the bottom right corner (if available)
- Link to twitter in the bottom right corner (if available)
You have two options how to add coin into your watchlist. First is through Coin Detail screen. Second is selecting coins from Coin List. You can see both options described bellow. As first option we show how to use serch bar together with Coin Detail:

- Step 1 - Tap into the search text field.
- Step 2 - Type the name (i.e. Ethereum) or code (i.e. ETH) of the coin you would like to add.
- Step 3 - Tap on the on the search button or on any option from drop down.
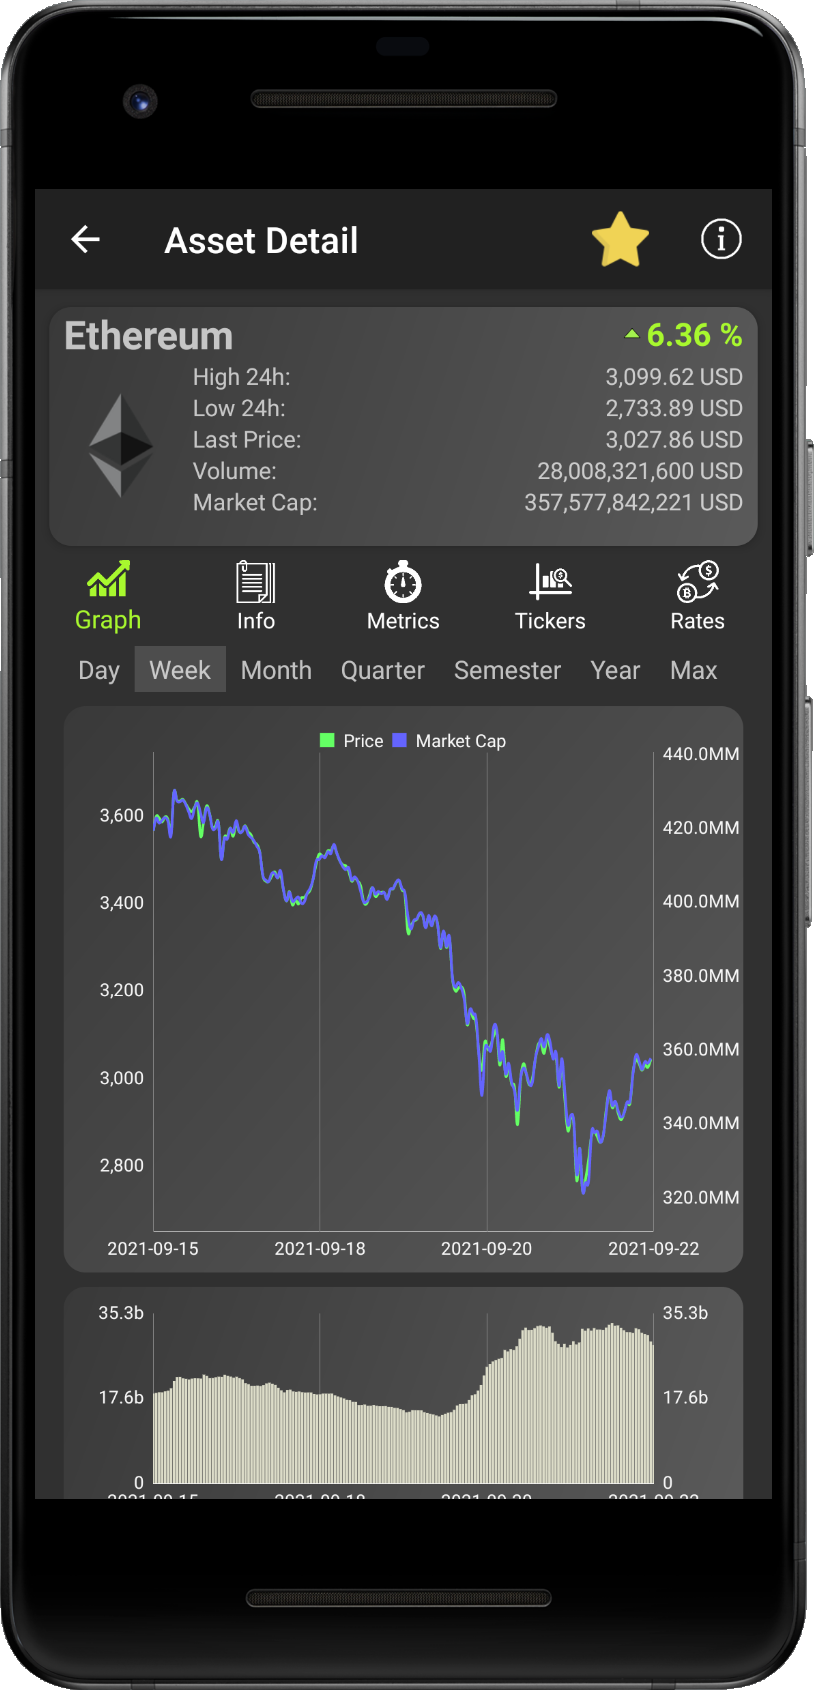
- Step 4 - Tap on the star in top right corner.
- Step 5 - If the star changed its color to yellow, you successfully added the coin into your watchlist.
- Step 6 - Tap on the back button to get back to your watchlist.
- Congrats - You should see added coin in your watchlist.
Second option is selecting coins directly from Coin List. You can use it in case when you are interested in coins with higher market cap, since the list is ordered by its value.

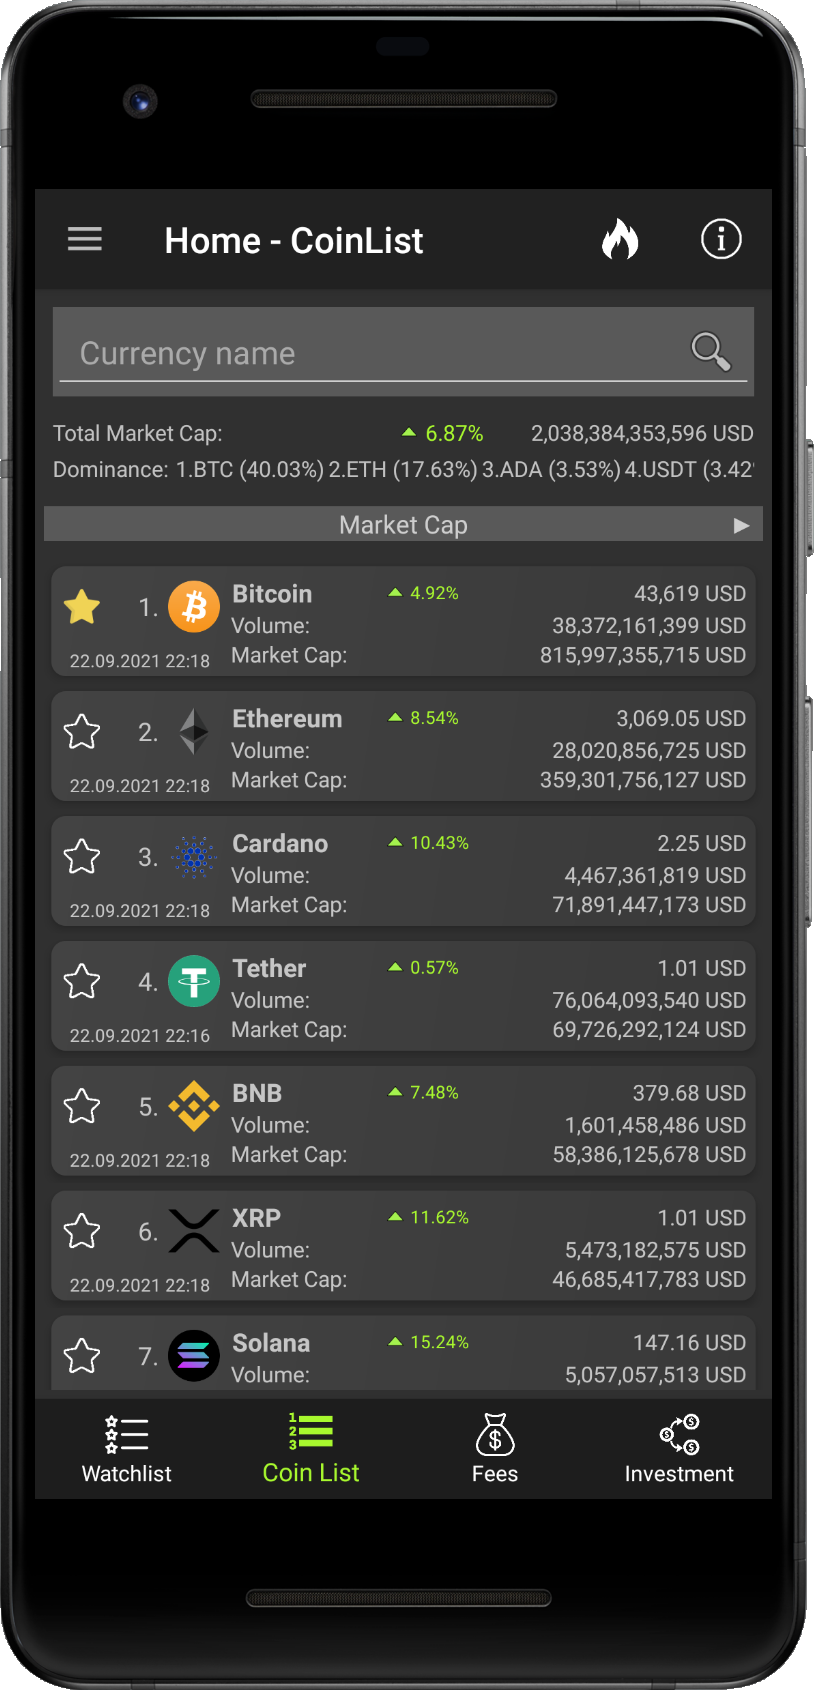
- Step 1 - Tap on the Coin List icon in the bottom menu.
- Step 2 - You should see list of coins as on the picture.
- Step 3 - Tap on the empty star of item you wish to add into the watchlist

- Step 4 - If the star changed its color to yellow, you successfully added the coin into your watchlist.
- Step 5 - Tap on the Watchlist icon in the bottom menu to return back to your watchlist.
- Congrats - You should see added coin in your watchlist.
Process of removing coin from your watchlist is the same as adding. You can choose either to use Coin Detail
or the Coin List approach.
The only difference is that the deselected coin should change the star color from yellow to transaprent. As it is shown on
following pictures:
- Step 1 - Tap on the on the yellow star of coin which should be excluded from your watchlist (see Ethereum).
- Step 2 - If the color of the star was changed from yellow to transparent, the coin was successfully removed.
- Congrats - You should see the removd coin is not in your watchlist anymore.
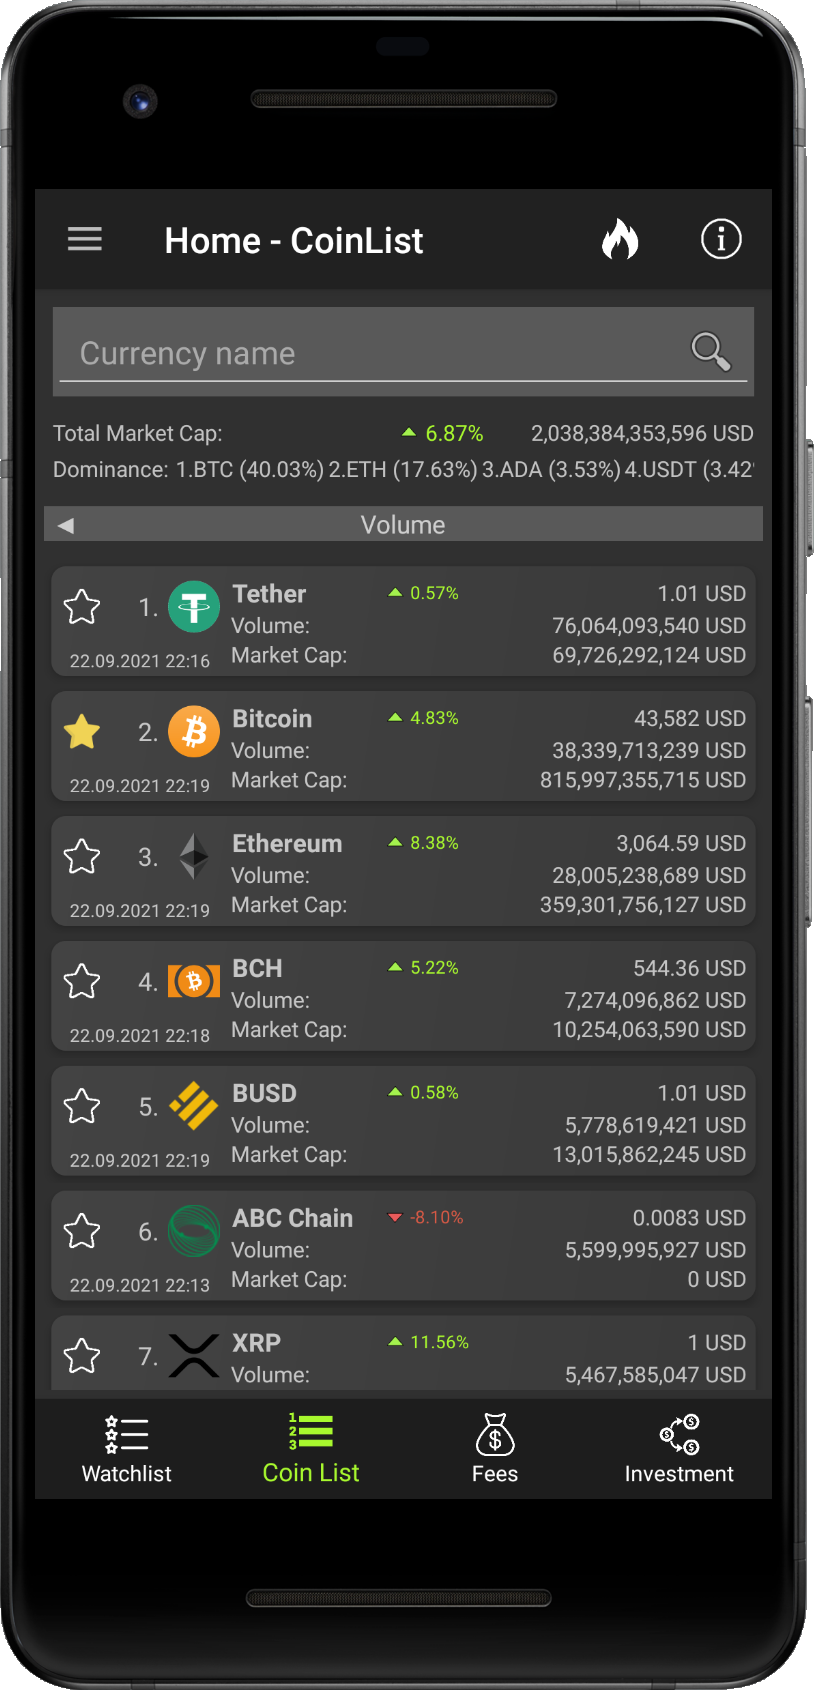
Coin List
Coin List section brings overview of the curypto currency market. You can search for coins with search panel
by entering coin name or its symbol (i.e. "Bitcoin" or "BTC"). It has the same funcionality as on the
Watchlist screen.
Market stats are shown below the search panel, such as Total market cap or
Coin Dominance in total market cap (share on the market cap). It is horizontal list,
if you swipe to the left you can see whole top ten projects.
You can list crypto currenceies by value of their Market cap or trading Volume
in last 24 hours. Swipe left or right on the list to see desired sorting.
If you tap on any item from coin list, you can get to the Coin Detail. As described in
Watchlist - Add coin, you can edit yor watchlist from here by tapping on the star icon .
Each item from the list then show data as: rank in market cap, logo and name, date of last data update,
current price and price change in last 24h, volume in last 24h and current value of market cap.
Data is fetched from Coingecko.
We offer option to see recently most trending crypto currencies on Coingecko. To see them follow steps described on pictures bellow.
- Step 1 - Tap flame icon in the top right corner.
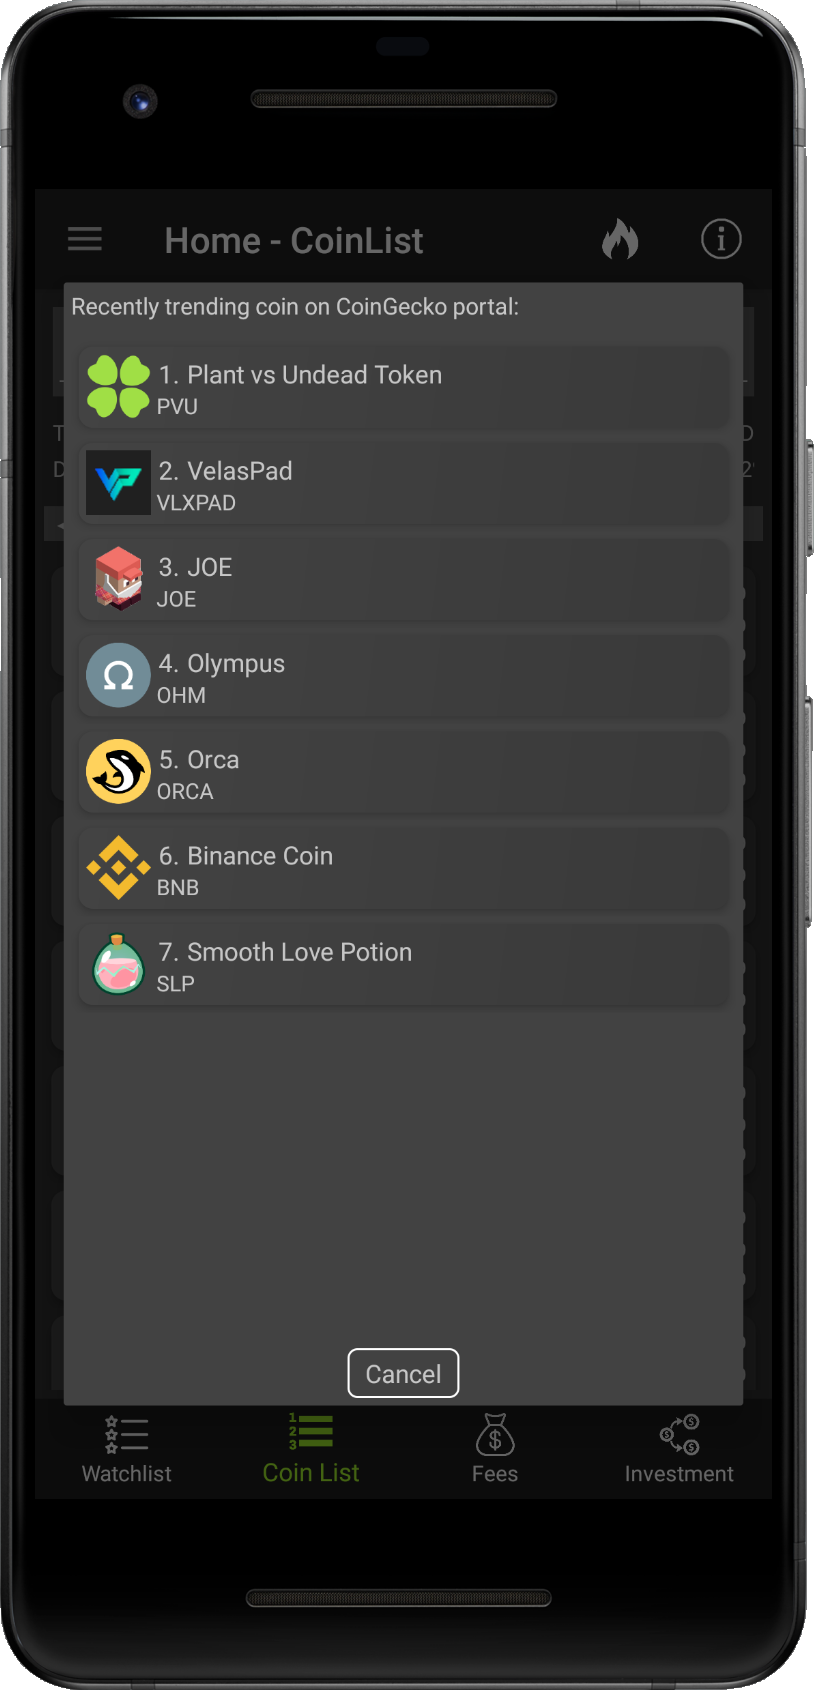
- Step 2 - Window with most trending coins on Coingecko is shown.
- Optional - To see Coin Detail, tap on the Coin from the list in the window.
- Step 3 - To close the window, tap on the 'Cancel' button.
- Step 4 - You see sorted list of crypto currencies again.
You can see sorted list by Market Capitalization of each crypto curreny or by its trading Volume in last 24 hours.
- Step 1 - Swipe to the left to see list sorted by trading Volume.
- Step 2 - Swipe to the right to see list sorted by Market Cap.
- Step 3 - You are back on list sorted by Market Cap.
Fees
Fees screen has two sections. First is Network, which shows price of transaction fees on different networks. Second shows
what was the value of fees in last 24 hours by netwoks and Crypto projects.
Network fees shows what is expected price per gas unit or Byte in case of Bitcoin. You can switch between networks
by tapping on on the newtwork icon, which you want to see.
Crypto project shows how much users paid for usage of the network or the crypto project, such as DeFi applications, in last
24 hours.
If you want to see more details about fees spend by users for using any Crupto project from list, just tap on the project and you will
be redirecte to the screen with the Crypto project fee detail.
Data is fetched from ZapperFi, CryptoFees
and Bitcoiner.live.
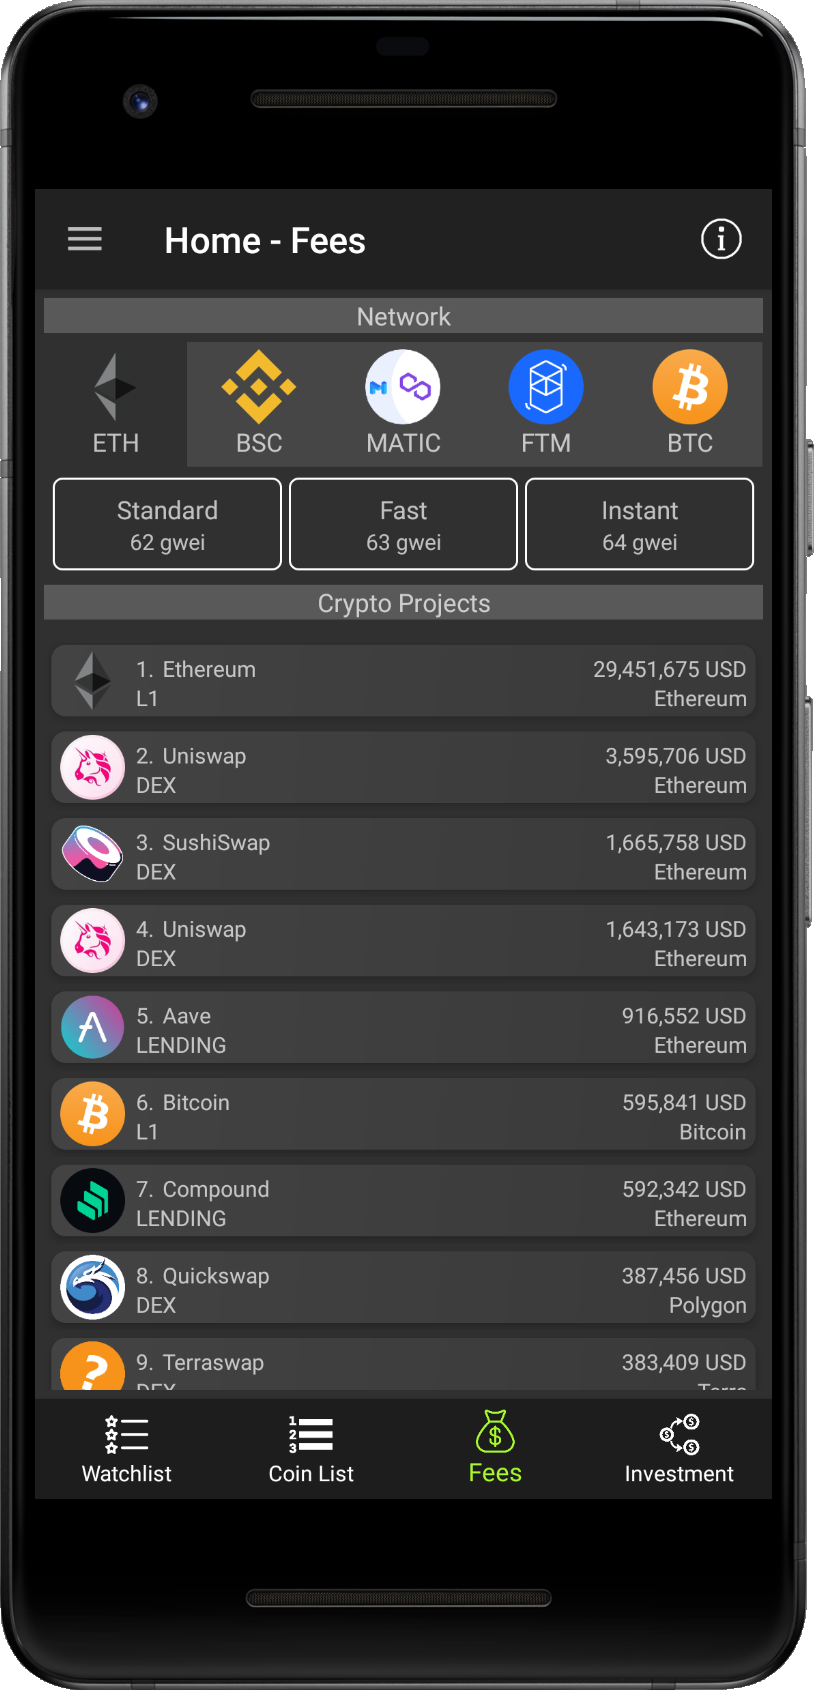
Network fees are shown in price per unit. Ethereum and other EVM (Ethereum virtual machine)
related networks set their price per gas in gwei. Final price of yor transaction
is set by units of gas * price of gas unit in gwei.
Bitcoin network works differently, there is shown price per Byte.
Final price per transaction is defined by size of transaction in Bytes.
To change network fees info, tap on the on of the network icon. Ethereum network is selected by default with highlighted background. To
see info about another network, follow next steps:
- Step 1 - Ethereum network is selected by default, price per gas unit is shown in gwei units.
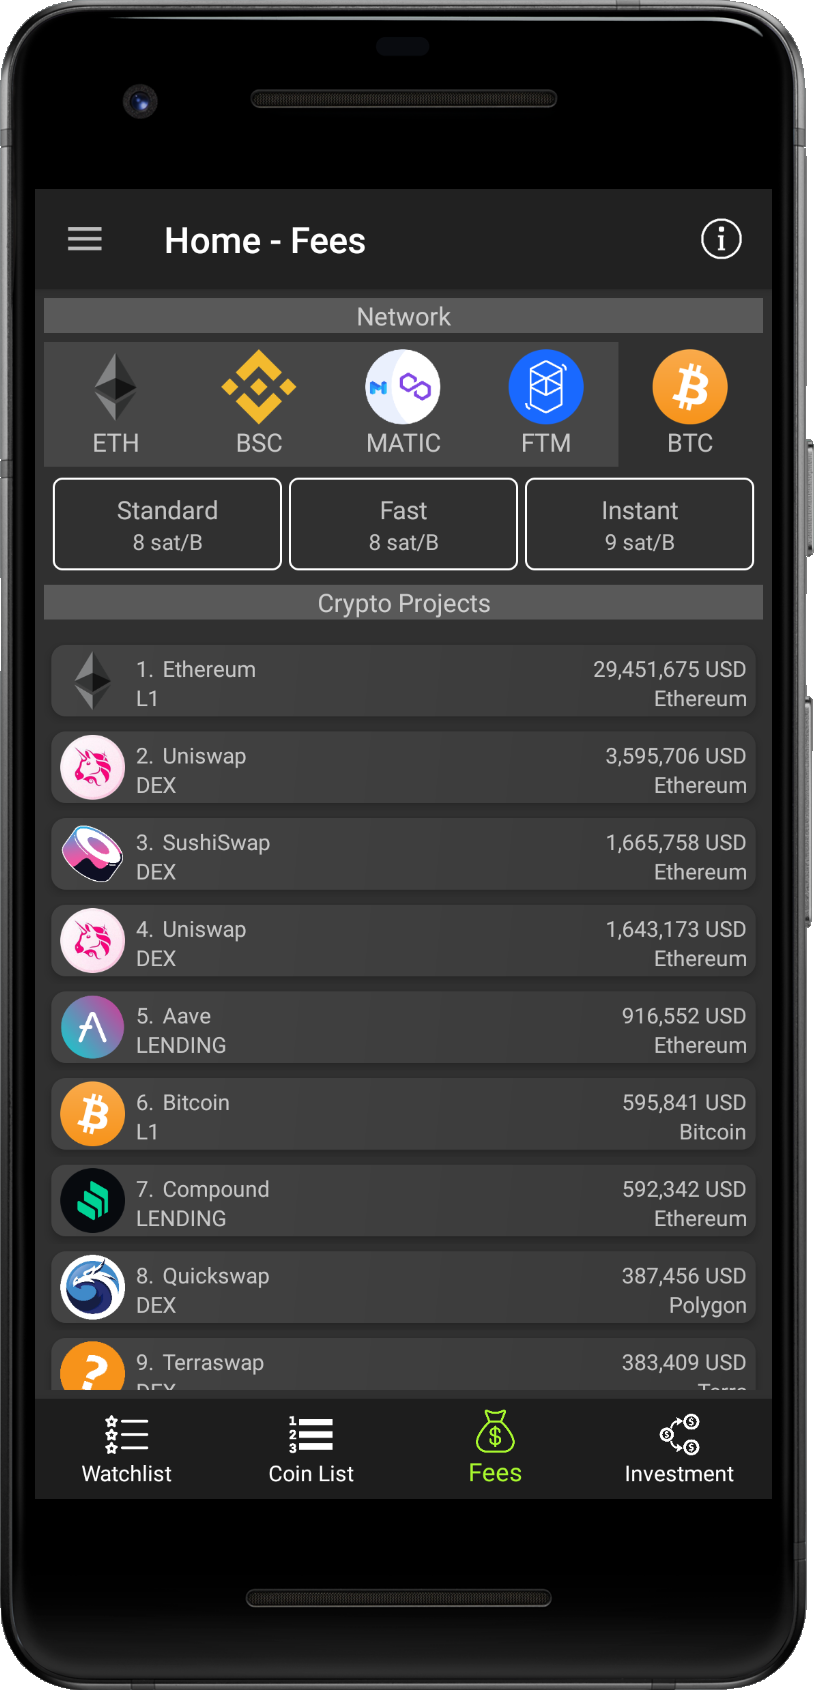
- Step 2 - Tap on the Bitoin icon, info about price per Byte of transaction is shown.
- Step 3 - Tap back to Ethereum icon, you can see Ethereum gass price again.
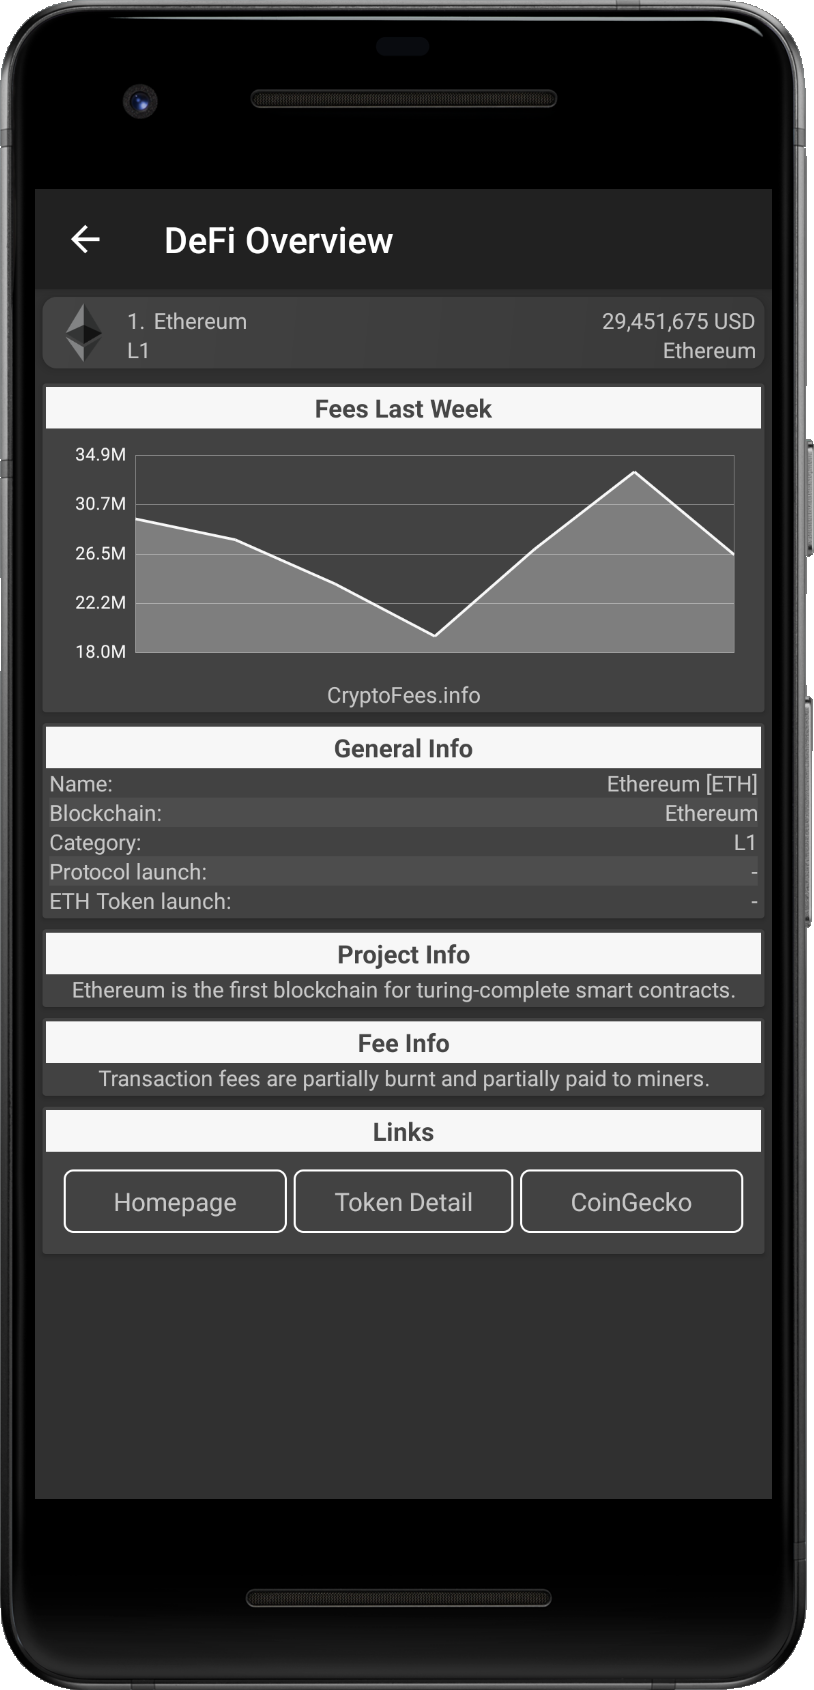
Detail screen provide basic info about the Crypto project and about the fees it generated. It is divided into a few parts, where you can find info about the project such as:
- Graph of generated fees in last week,
- General Info about the project,
- Project Info with description of the project
- Fee Info description of the project
- Links with more info about the project/token
- Step 1 - Tap on the graph and slide with your finger in X-axis (left/right) to get info about day you want to see.
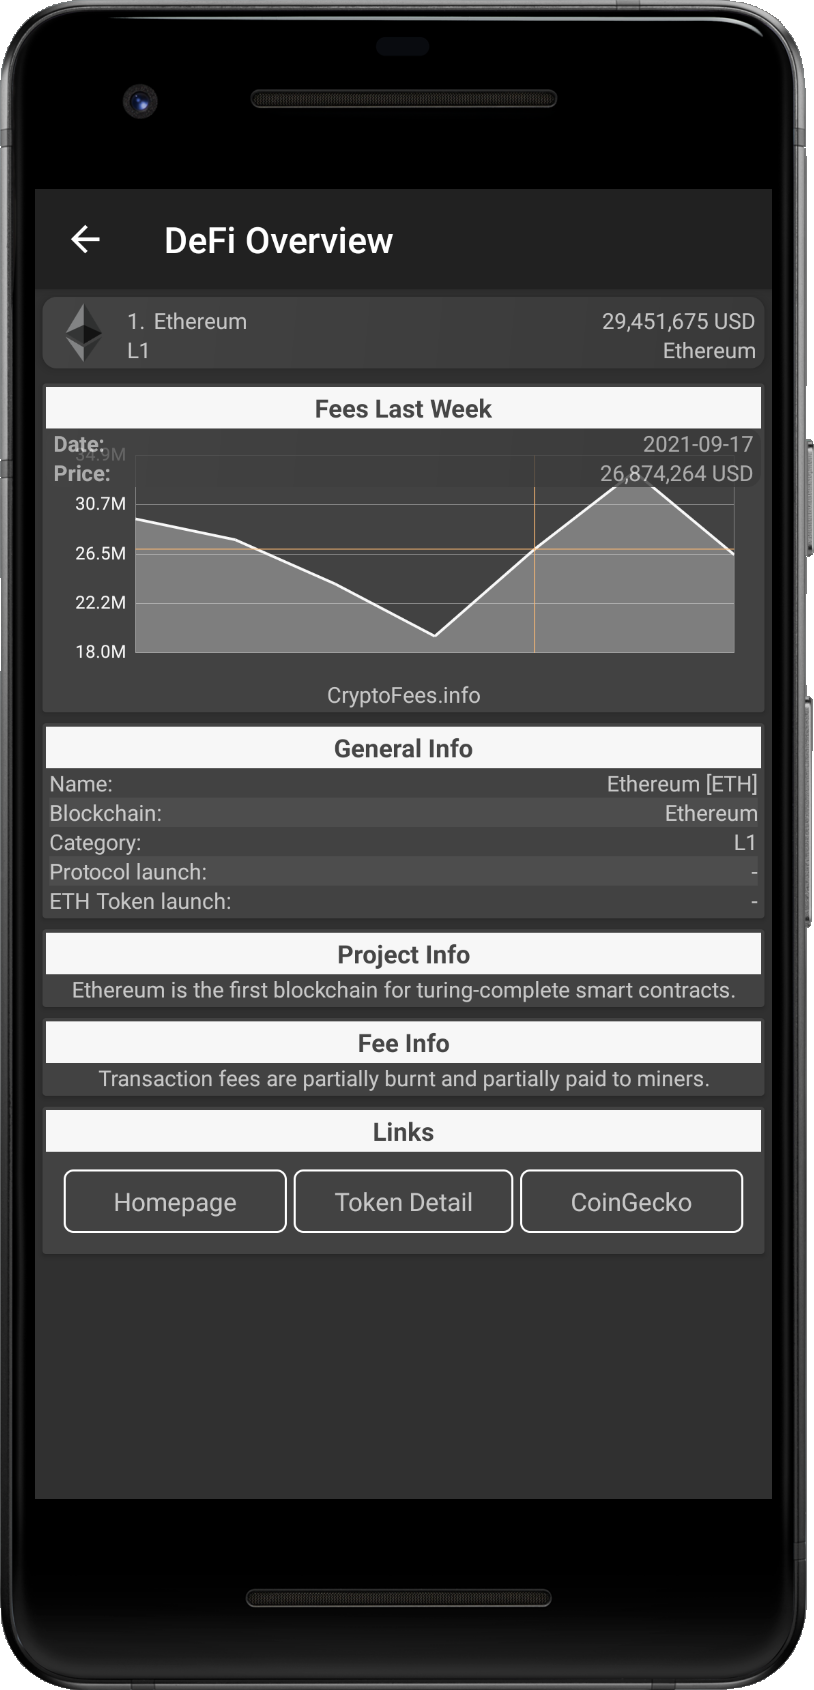
- Step 2 - Tooltip with data related to the selected day is shown (date and value of the fees).
- Step 3 - To hide the tooltip, tap again on the graph. Graph will be in intial state again.
Investment
Investment section brings overview of diferent investing products related to crypto currencies. It is divided into two parts: Derivatives and Indexes. Derivatives introduces crypto currency related products such as futures, or assset backed derivatives. Indexes part brings investing tools, which usually contains basket of multiple products related to crypto currency. Data is fetched from Coingecko.
Derivatives List brings you fresh data about crypto curreny derivatives products, collected from Coingecko.
This list provides overview of current state of derivatives products provided by different services and it is not customizable
in any way.
There is self explanatory legend on the top of the screen, which describes data shown per item.
As you can see, there is data as name of the product, name of the service which offers the product,
last time it was traded, etc.
If you want to know more info about derivatives products, please, visit the service/exchange directly. We do not privde more
data in the app for now.

Indexes List brings you fresh data about crypto curreny indexes products, collected from Coingecko.
This list provides overview of current value of index products provided by different services and it is not customizable
in any way.
There is self explanatory legend on the top of the screen, which describes data shown per item.
As you can see, there is data as name of the product, name of the service which offers the product,
last traded price, or type of the index.
If you want to know more info about listed indexes products, please, visit the service/exchange directly. We do not privde more
data in the app for now.

Coin Detail
Coin Detail section tries to aggregate all usefull information about the coin on one place. It is common struggle for new users
to get valid information about crypto projects.
Unfortunatelly many people fall into the trap of different influencers and
promoted scams. We tried to filter these garbages and use relevant data sources such as Coingecko and Messari and put them together.
Coin Detail is divided into 5 sections: Graph, Info, Metrics,
Tickers and Rates. Each section has commont part, which is the price panel on the top
of the screen.
To move between different sections, just tap on the icon of the section (i.e. to visit
Metrics). If you want to return back to previous the screen, tap on the arrow in the top left corner.
Price panel contains market related data such as highes and lowest price in last 24 hours, current/last price, current value of market cap
and volume of trades on exchanges in last 24 hours.
You can minimize this panel, if you tap on it, to see only current price. if you Want to extend it, you need to click on the panel again.
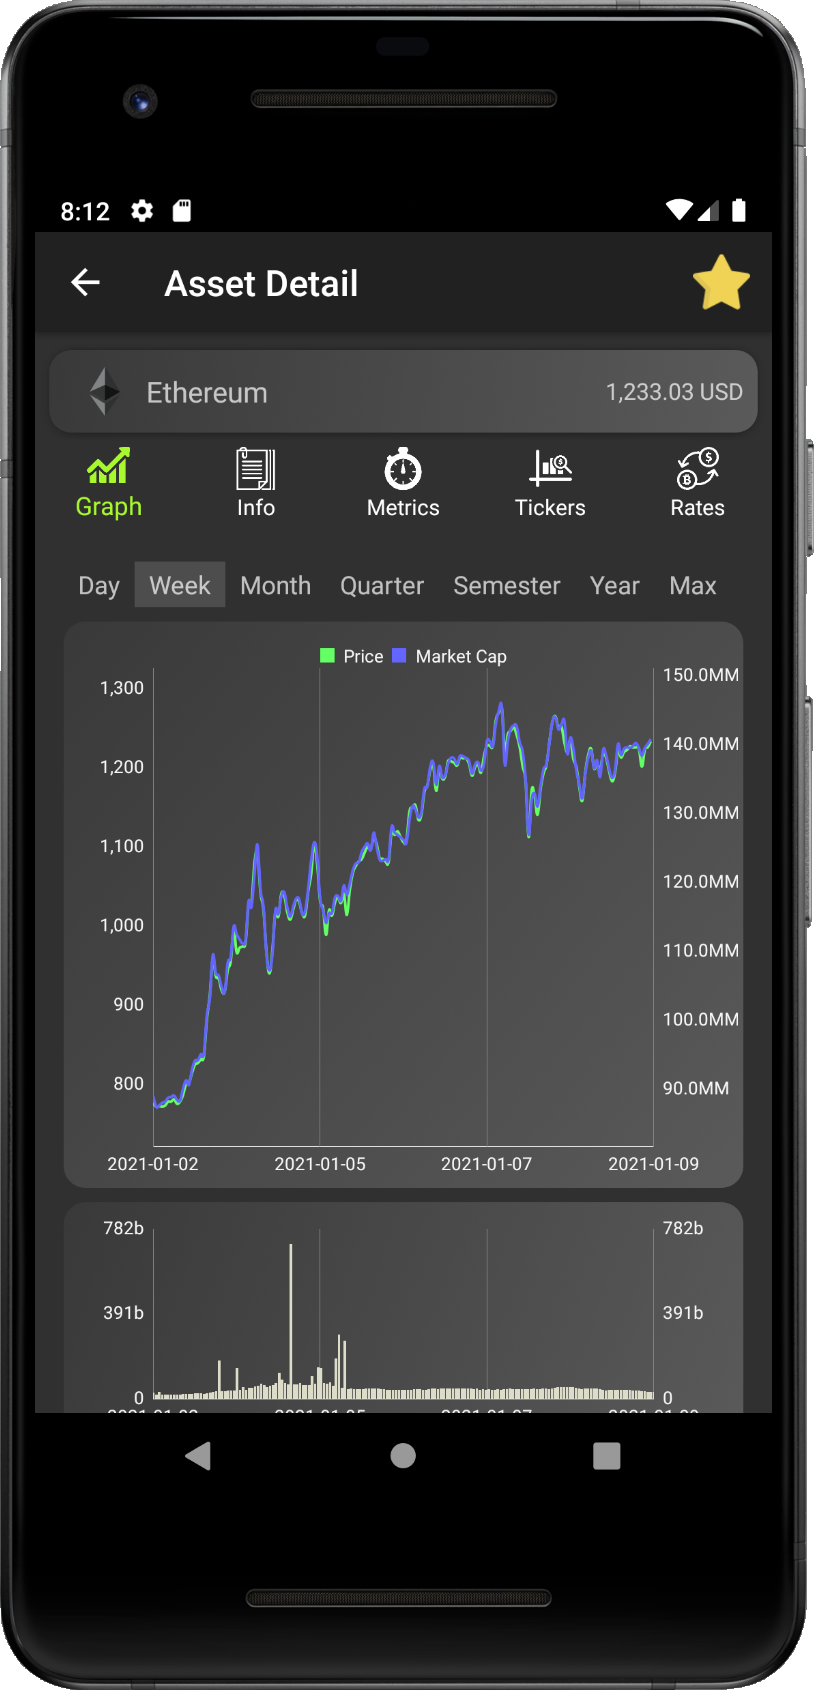
Graph
Graph section is quite simple. It contains common price panel and menu as described above. You can
find horizontal list of time periods under the menu. You can slide from left to ride to see all time period options to track.
Selecting of time period will reload data and update price chart combined together with market cap chart. It will reload volume
bar chart below also.
If you want to see exact numbers in chart, just tap on the chart and slide with your fingers to the desired place. It will show
semi-transparent popup with detailed info, as shown on pictures below. It works for both charts, price and volume.
- Step 1 - Tap on the graph, semi-transparent popup is show, drag your finger on screen and slide to the place you want to get details.
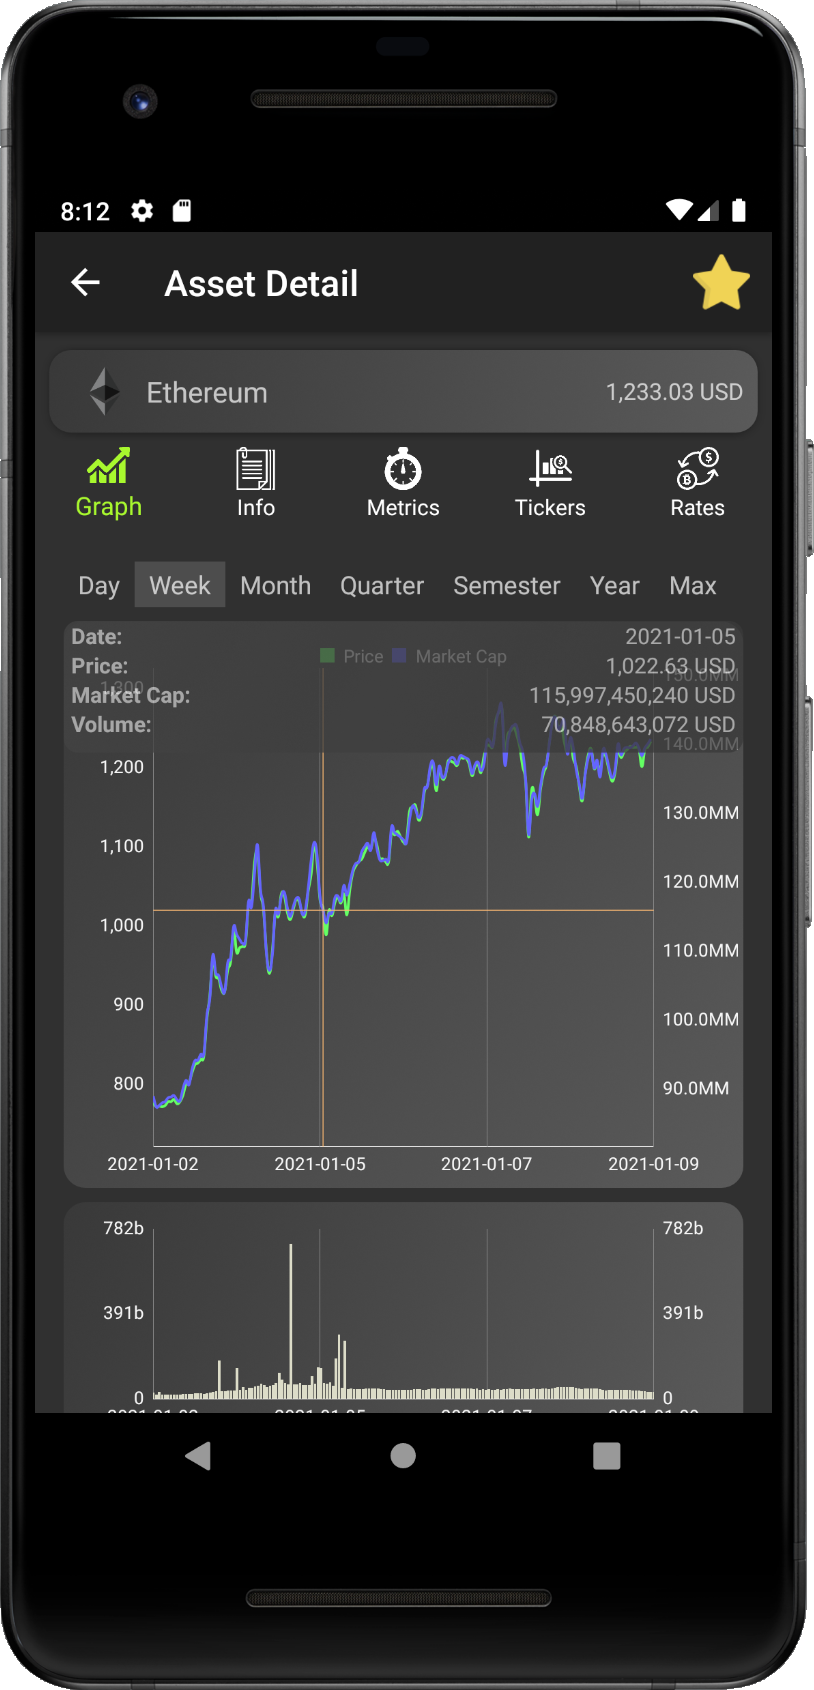
- Step 2 - You can lift your finger, popup will stay on the screen.
- Step 3 - If you want to hide the popup, tap on it.
- Congrats - You just explored graph section and learned how to read the graph.
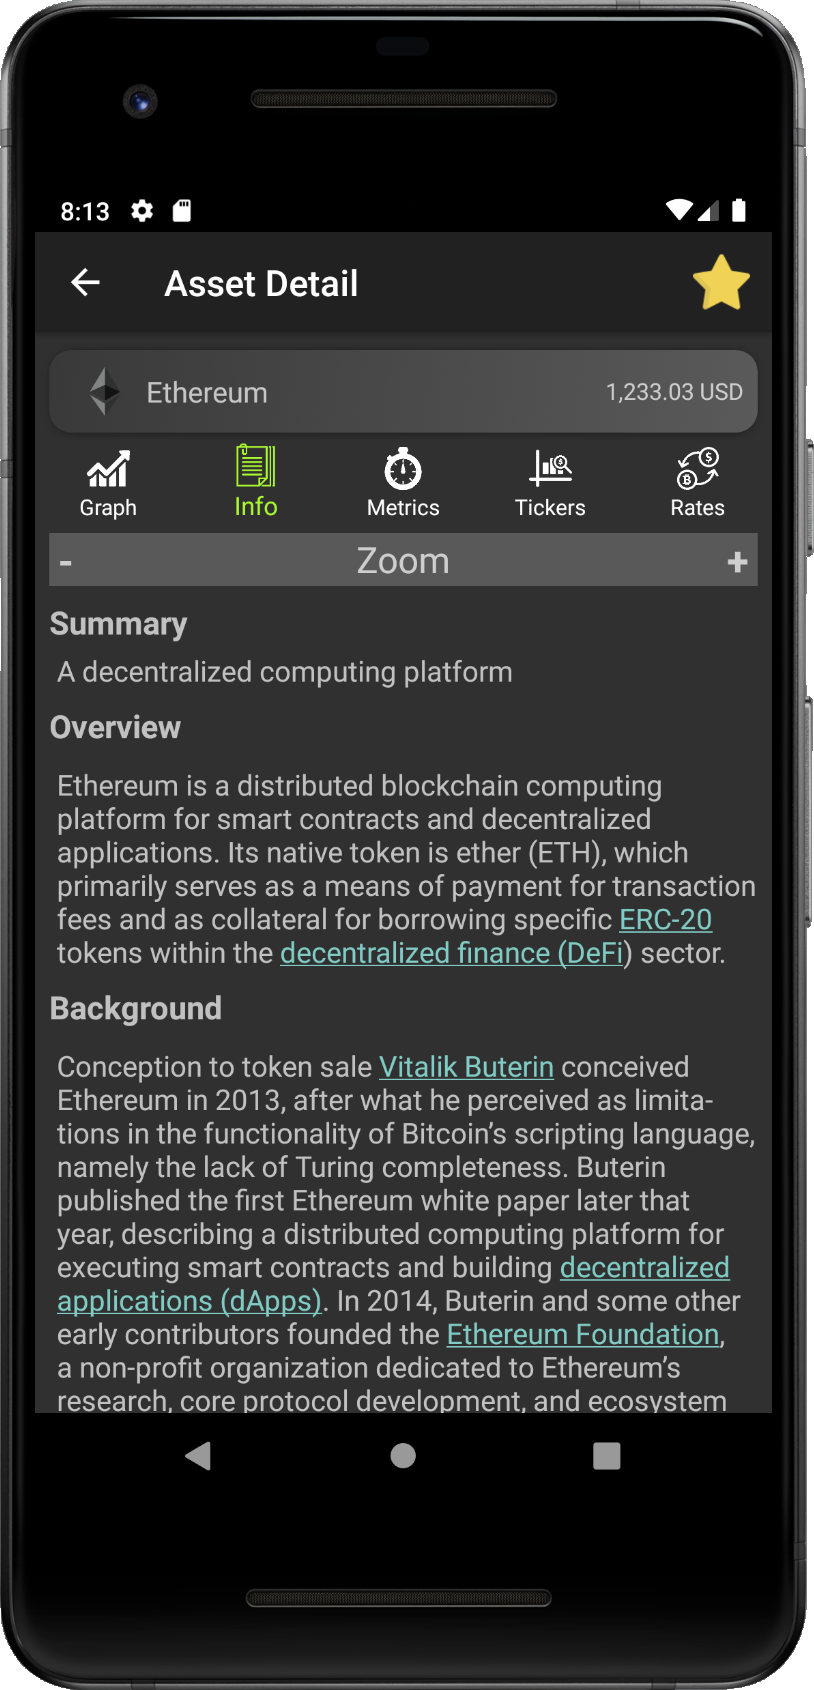
Info
Info section gives you more detailed description of the crypto project you are exploring. Data is fetched from the
Messari.
The first panel you can notice is the zoom panel. You can set the scale of the font size to be smaller
or bigger .
The info itself is then divided into following parts:
Summary
Short description to get basic idea about the project.
Overview
Key parameters and main properties of the project.
Background
Detailed info about history and description of the project.
Resources
Links to related websites i.e. homepage, whitpaper or social networks.
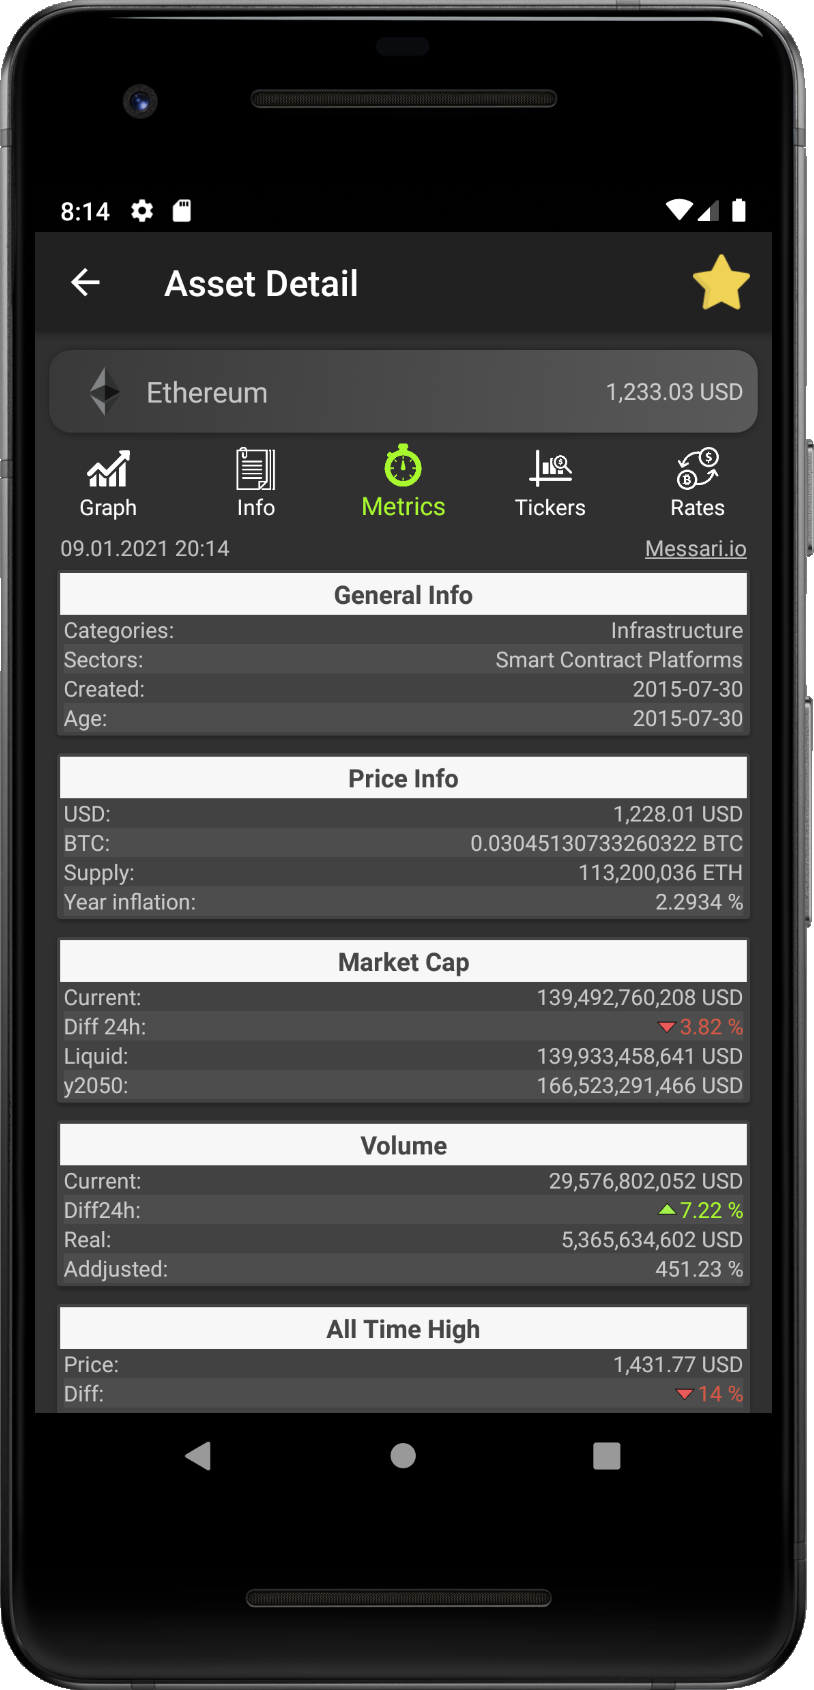
Metrics
Here in Metrics section we combine data provided from Messari and Coingecko. You can find here market data, data from blockchain, minig stats or develepment info. Metrics are divided into following blocks:
- General Info - info about the focus of the project and when it was created.
- Price Info - price stats, circulating supplies and expected yearly inflation.
- Market Cap - focused on market cap, its change and expected value in 2050.
- Volume - reported volume, real volume and change in last 24 hours.
- All Time High - data about highest price ever.
- All Time Low - data about lowest price ever.
- Volatility - price volatility in different time periods.
- On Chain Stats - data from blockchain as transactions, fees, etc.
- Staking - staking stats like min. amount, expected reward, etc.
- Mining - mining stats like algorithm, difficulity, expected costs, revenue, etc.
- Gihub - info about development, number of commits, etc.
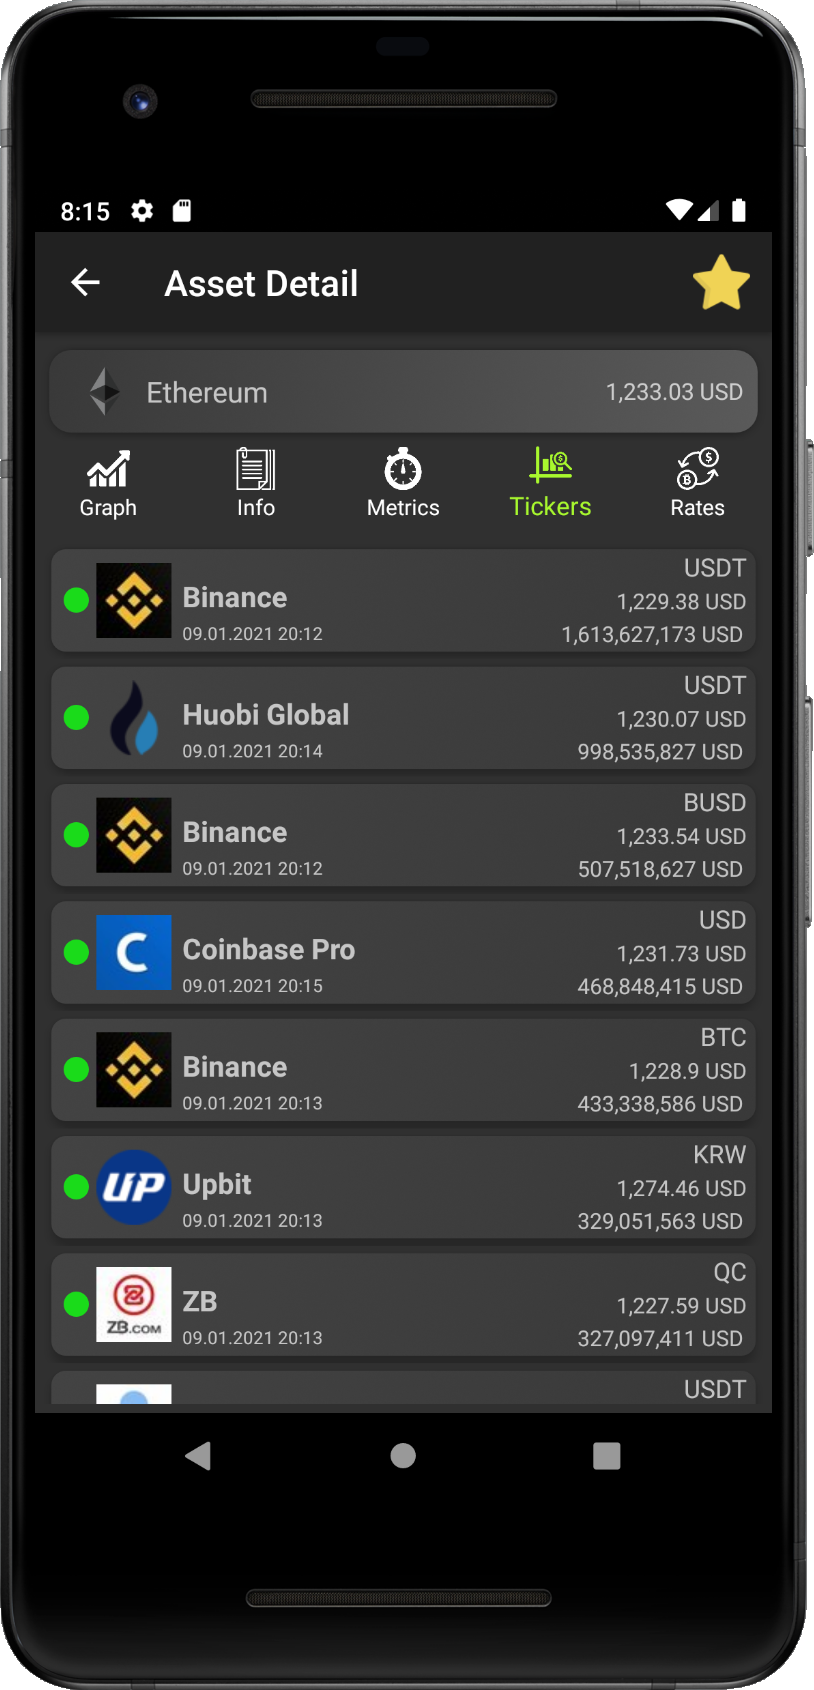
Tickers
Tickers section shows list of markets throught different exchanges, which offer markets with given coin. Data is fetched from
Coingecko service.
It is a little bit different from
Opportunities in Exchange section, where we explore orderbooks
directly.
Tickers are sorted by reported volume by exchange. However some volumes might be faked due to
wash trading. Coingecko
tries to indicate suspicious activity and rank reliability given markets.
The colored dot in each item them shows how healthy/valid the market is.
means healthy, indicates some suspicious activity and
shows you should rather stay away.
Each ticker contains: the mentioned health indicator, logo and name of the exchange, date and time
when data was udpated. On the right side, you can find the market name, where the given asset is traded, last price
of executed exchange and reported volume of the given market in last 24 hours.
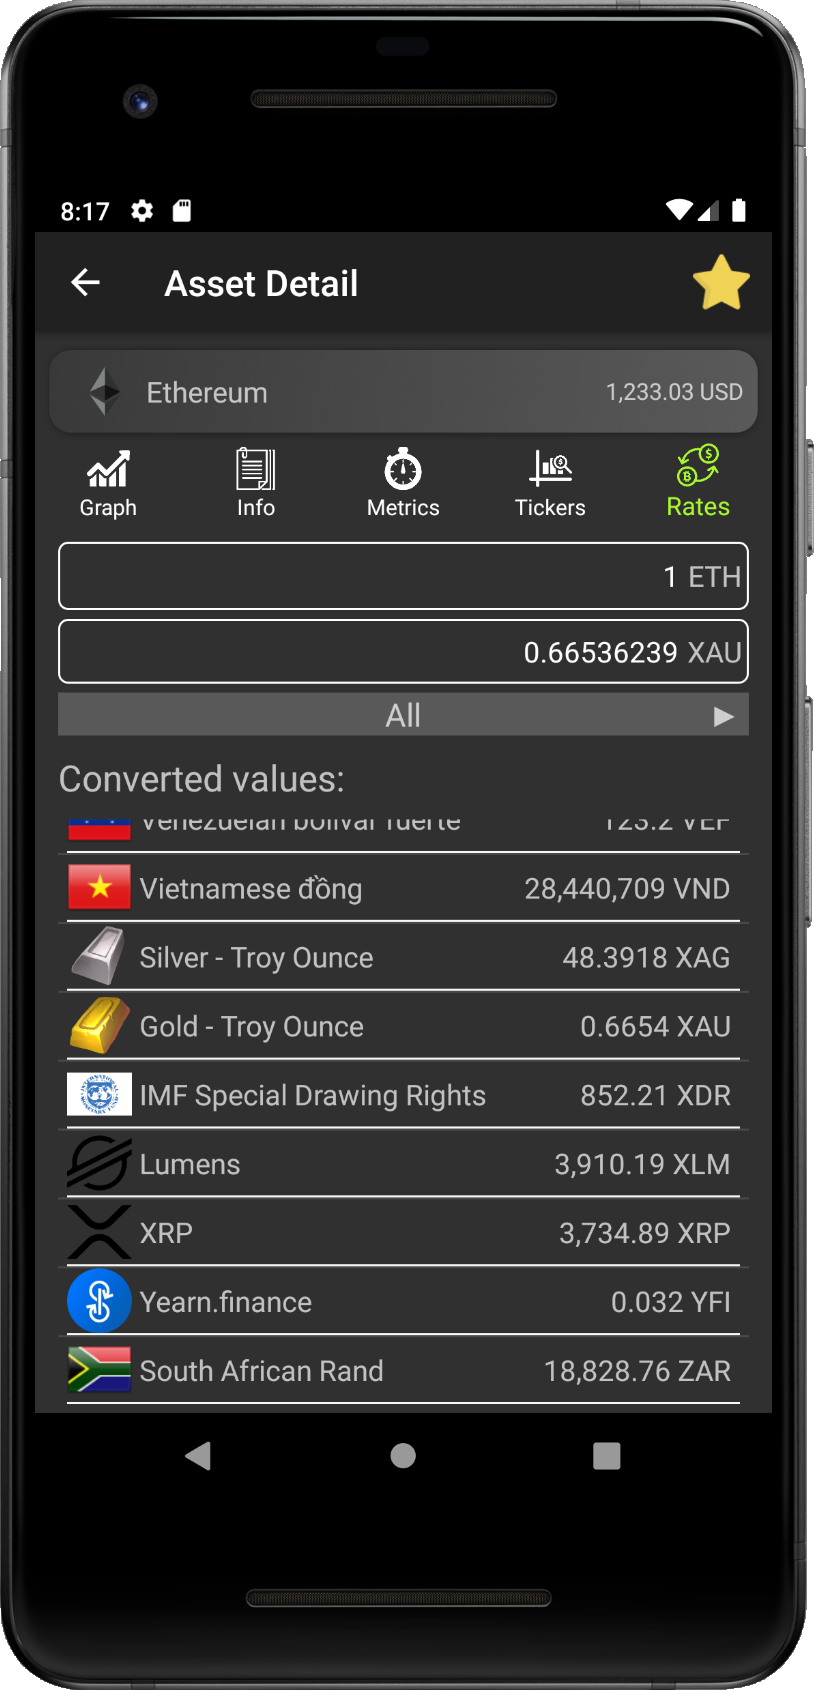
Rates
Rate section, as the name says, shows current exchange rates against other assets or currencies. Exhange rates are fetched from
Coingecko.
There are 2 text fields, where you can type any amount you would like to see converted into other asset value. It does not matter which
one you choose to fill. The value is automatically converted into second one immediately.
You can see exchange rate list under these text fields. There are other assets with the converted value into their units.
These assets are grouped into categories, which you can change by swiping to the left/right or by taping on the left
or on the right button.
If you would like to change default asset in the second text field (first is static and non-changable), just click on desired
asset (i.e. Silver - Troy Unce) from the list below the label 'Converted values'. When you tap on the asset, it will become
immediately the asset for the second text field.
DeFi
DeFi section introduces projects participating in the field of Decentralized Finance and shows the value, which each
project holds - Total Valule Locked (TVL). The TVL shows how much users deposited into the project.
For these who are not familiar with Decentralized Finance, we can recommend websites as
DeFi Rate, DeFi Pulse
or DeFi Prime as good source of information.
In short, DeFi stands for Decentralized Finance, which aims to provide known financial tools in decentralized manner. It means
it focuses to make these tools censorship resistant and accessible to everyone.
It brings advantages as freedom to use tools, which you might not access before, no need for KYC/AML verifications with option to
these tools 24/7 without need of any middleman.
On the other hand, it demands some responsibility form your side to use these products carefuly and to be aware of risks as smart
contract exploits, if the application is not secured enough, or exit scams.
DeFi section is divided into three sub-sections: Overview, Locked Value
and Services. You can find more about them in dedicated sections.
Overview
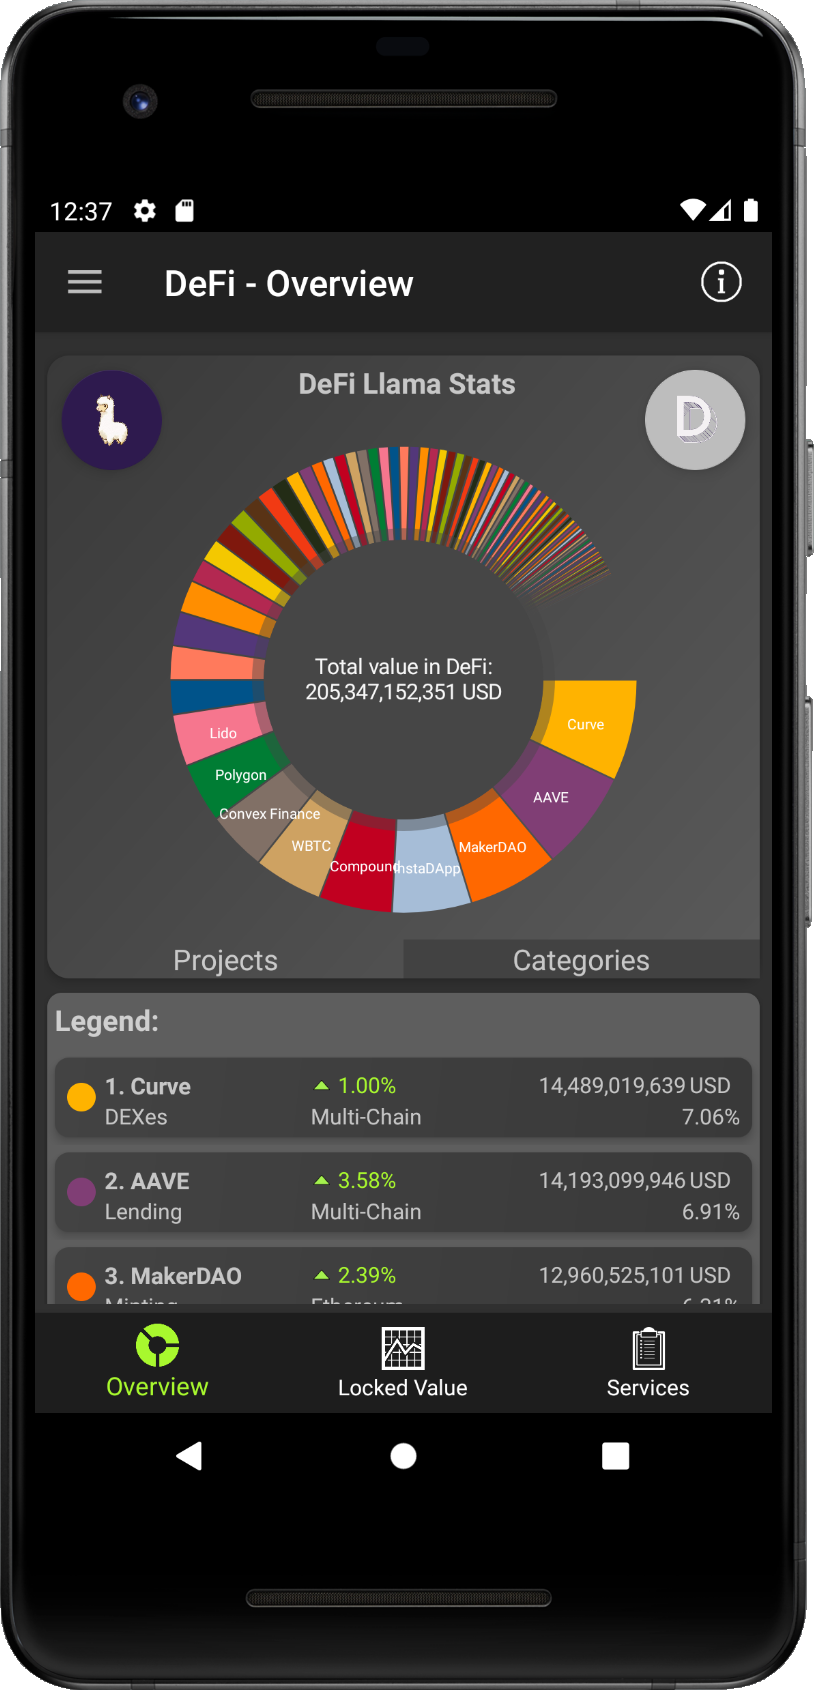
The Overview section shows us how the TVL of whole DeFi system is distributed between projects. We offer the option to fetch the
data from two sources: DeFi Llama and
DeFi Pulse. You can switch between them, if you tap on the dedicated
logo, with Llama for DeFi Llama (top left corner) data or with letter 'D' (top right corner) to get DeFi Pulse data.
Curently selected data source is highlighted with cloured logo.
The Overview screen contains Pie chart with the distribution of value among the DeFi projects. The total value can be found in the
middle of the Pie chart, under the label 'Total value in DeFi'.
If you are interested in value locked in single project, you can tap
on the project in the Pie chart. Then it will be highlighted together with displayed value in the middle of the chart. Another
option is to look it up in the Legend area, if you scroll down.
If you would like to check locked value by category of the listed projects, you can switch the tab to the 'Categories' which is
located directly under the Pie chart. You can swith between 'Projects' and 'Categories' overview as you wish.
The same as for projects can be applied for categories, too. If you would like to see value locked in single category,
you can tam on the Pie chart, or you can look the value up in the Legend list.
We offer you to get DeFi stats from two different sources. For now, DeFi Llama supports more blockchains and projects, on the other hand, DeFi Pulse tries to bring even more info such as descriptions and audit reports.
- If you enter the Overiew section, you will see distribution of locked value among DeFi projects. DeFi Llama data is fetched on this picture.
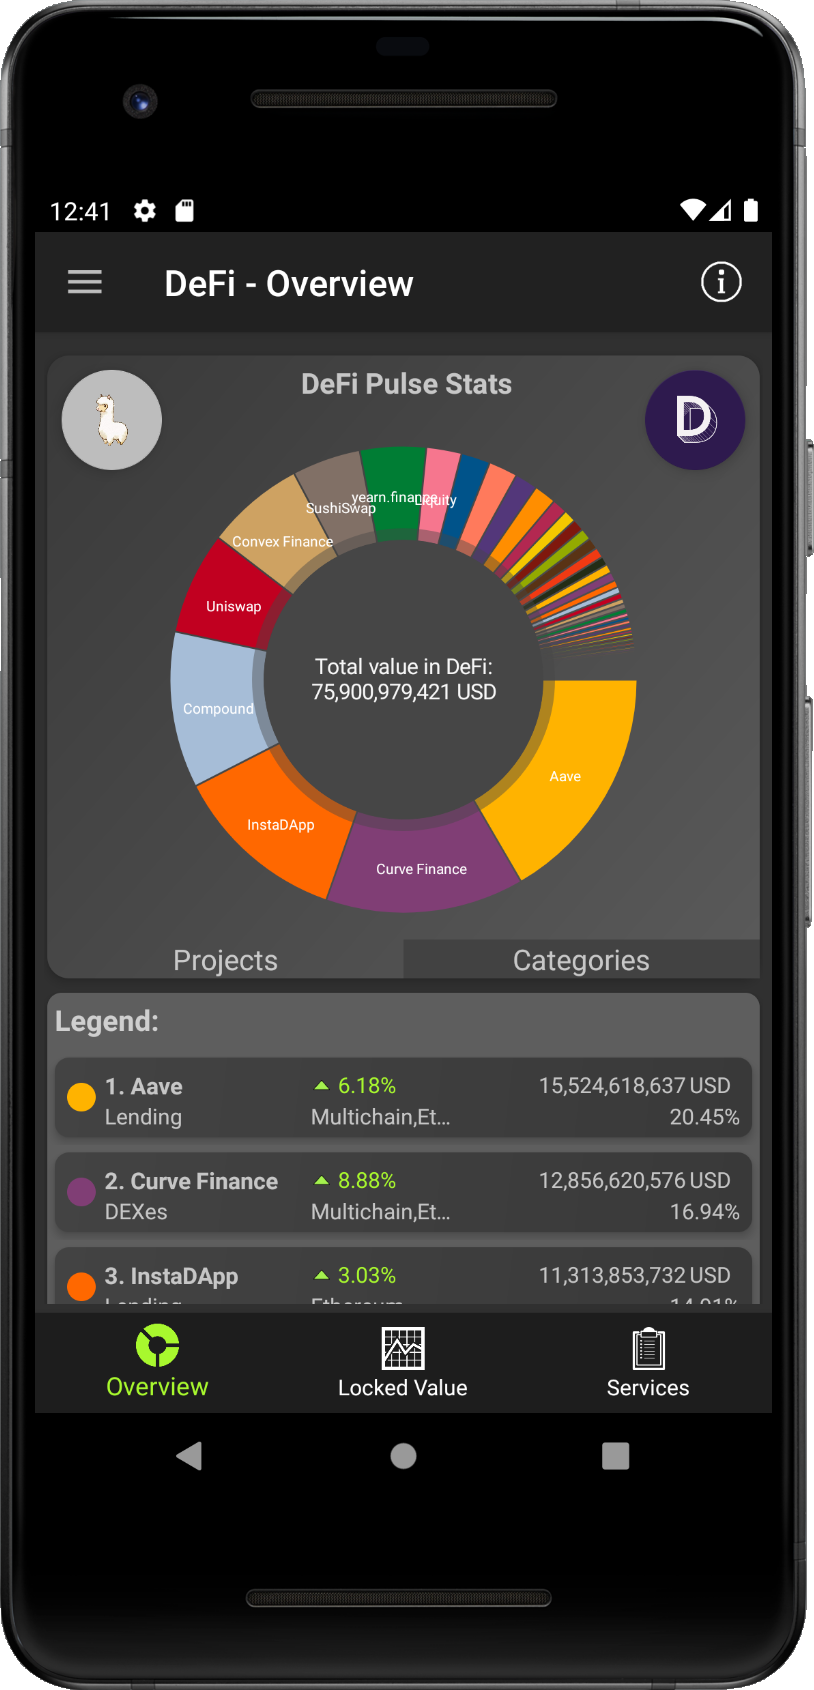
- To change data source to DeFi Pulse, tap on the icon with letter 'D' in top right corner. Icon will be highlighetd and data reloaded.
- To switch back to see DeFi Llama stats, tap again on the icon with Llama in top right corner. Icon will be highlighetd and data reloaded.
To see data per single projet, you can scroll down in Legend list. More comfortable might be to use Pie chart directly, with tap on the desired project in the chart. However some project holds a little value and might not be visible on the Pie chart. In that is it better to use the Legend list.
- Initially, the Total Value Locked across all DeFi projects is shown. If you want to see Value locked in single project, tap on the Pie Chart to selected project.

- Project will be highlighted (Curve Finance on the picture). And its values will be displayed in the middle of the Pie chart.
- To switch back to see the Total Value Locked across all DeFi projects, tap again on the Pie chart on the part with highlighted project. TVL for all DeFi projects is shown again.
You can switch between DeFi projects and DeFi categories to see, which field attracts the most value (lending markets, DEXes, etc). Again you can choose if you want to see DeFi Llama or DeFi Pulse Data.
- Initially you can see DeFi porjects TVL Pie Chart. To see DeFi categories TVL graph, tap on the 'Categories' tab bellow the Pie chart.
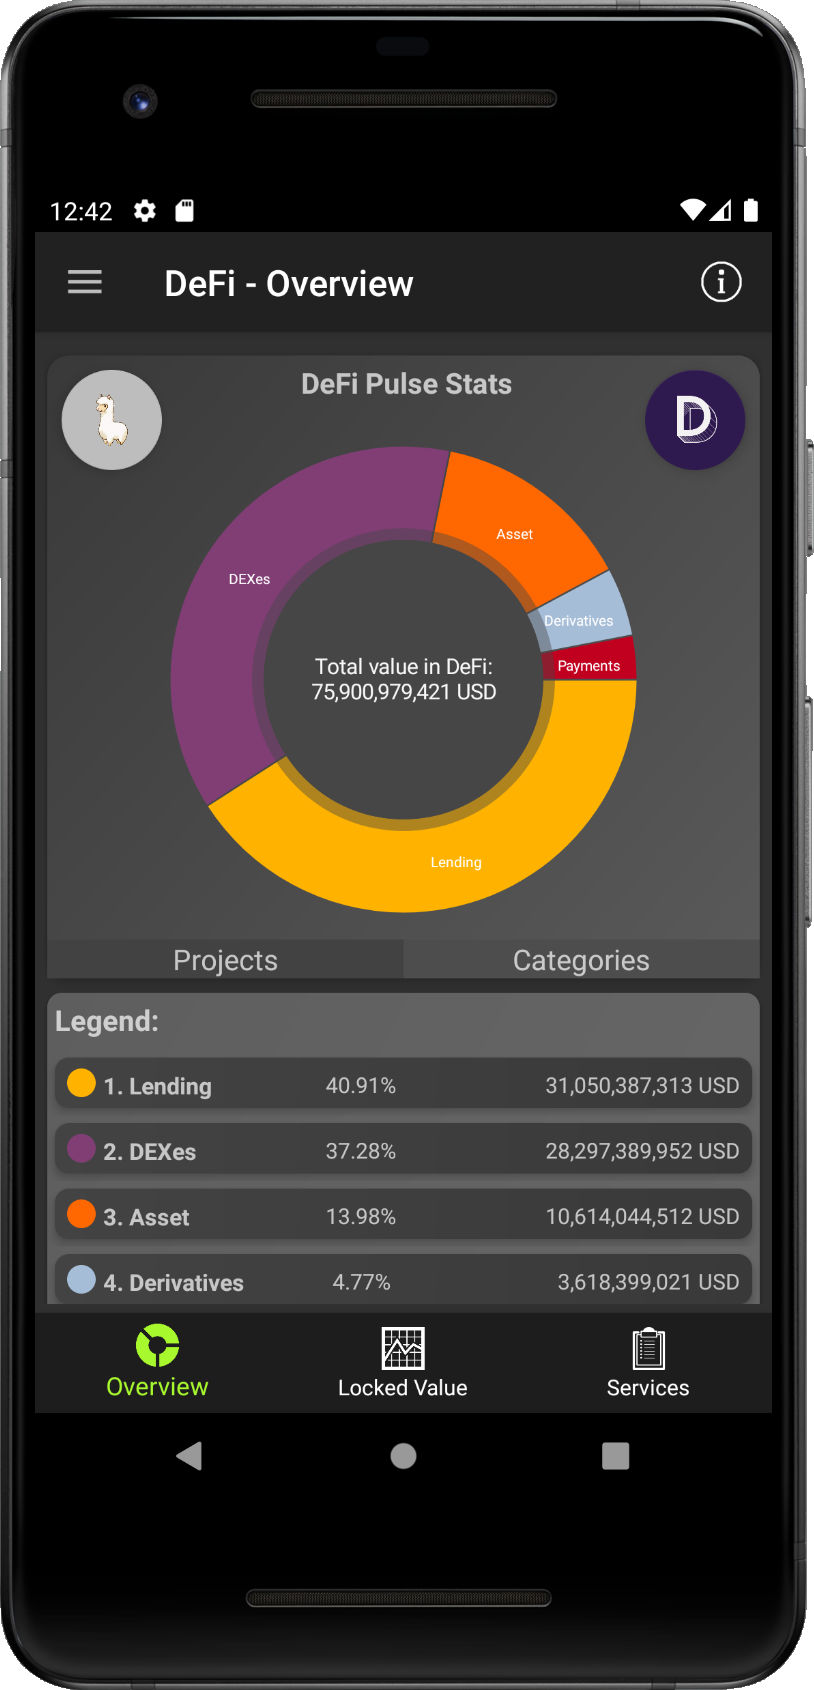
- Data will be reloaded and shown in the Pie chart. To see single category, tap on the its part in the Pie chart, the same as with DeFi projects. Category TVL will be shown in the middle of Pie chart. To see TVL of all categories, tap again.
- To see DeFi projects TVL Pie chart, tap on the 'Projects' tab bellow the Pie chart. Data will be reloaded and you will see the initial screen.
Locked Value
If you are interested in how it goes with Locked Value in DeFi in different time periods, this is the place for you.
Thanks to the data from DeFi Llama and
DeFi Pulse, you can track the value
locked per asset, such as ETH, BTC, DAI (currently only with DeFi Pulse) or you can track the total value, sum of all assets
(supported by both, DeFi Llama and DeFi Pulse).
This section contains graph area, where you can track the movemen of locked value in time. To get detailed info about
value from grah, you can tap on the line and semi-transparent popup with data will be shown.
It is the same behavior as in Coin Detail - Graph. If you want to hide the popup, just tap on it.
There is also DeFi Pulse logo in top right corner, if you would
like to check the source of data.
To change the tracked period, just tap on any od the option from horizontal list located below the graph, i.e. 'Max', which
will show how the value evolved since the inception.
Last part is legend to the grah. Here you can set, which assets or if (Total Value Locked) TVL, should be displayed in the
graph above. You can selet multiple options.
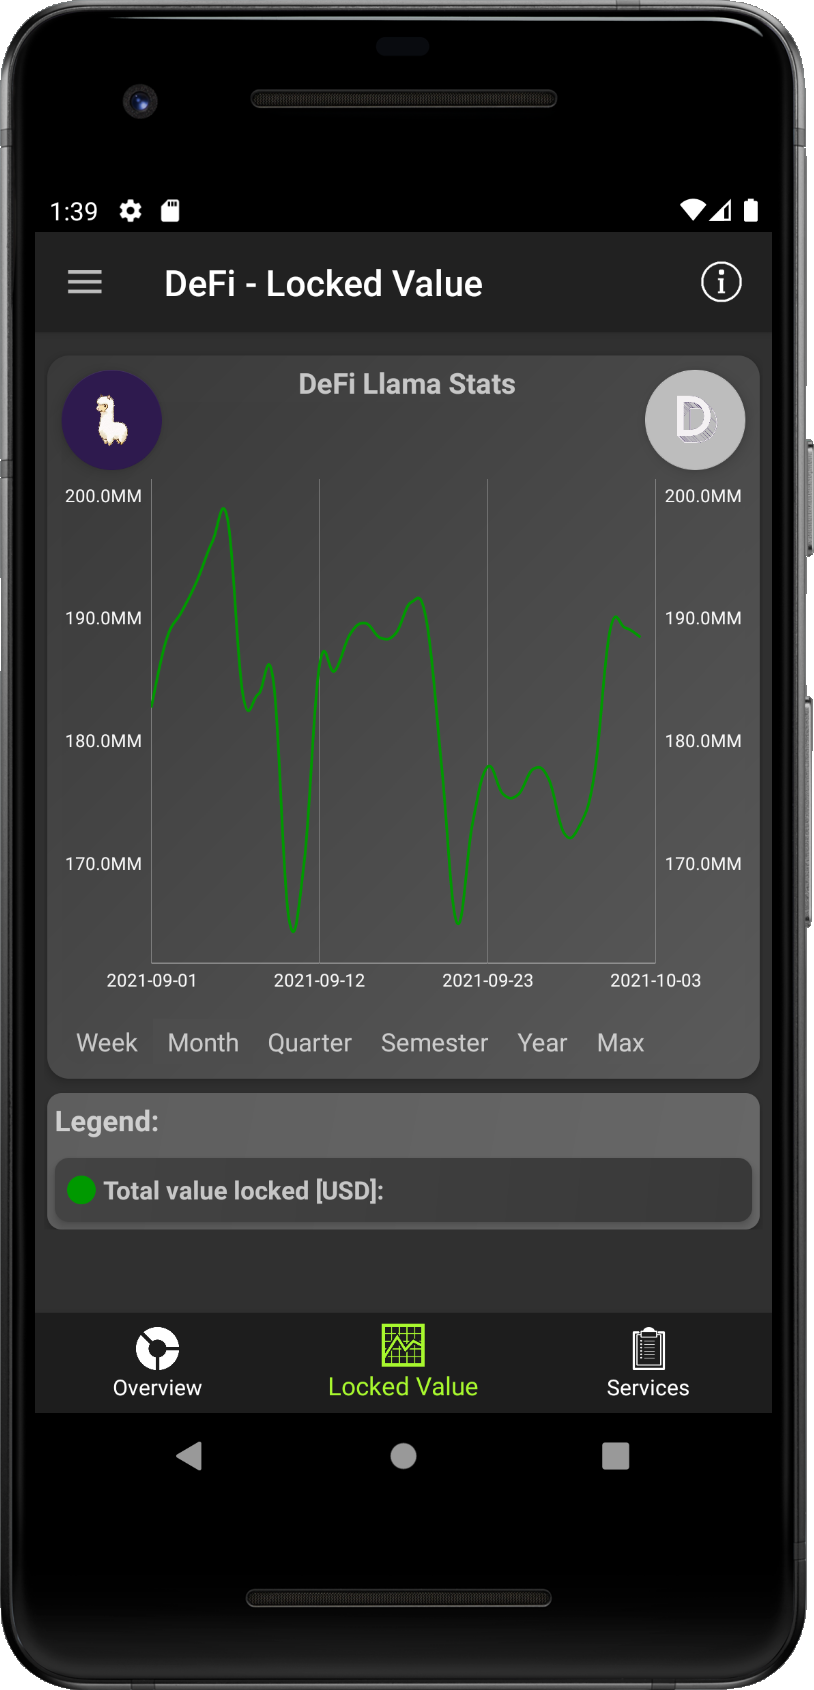
We offer you to get DeFi stats from two different sources. For now, DeFi Llama supports more blockchains and projects but supports tracking of the total value only, on the other hand, DeFi Pulse brings tracking both, of single assets and the total value.
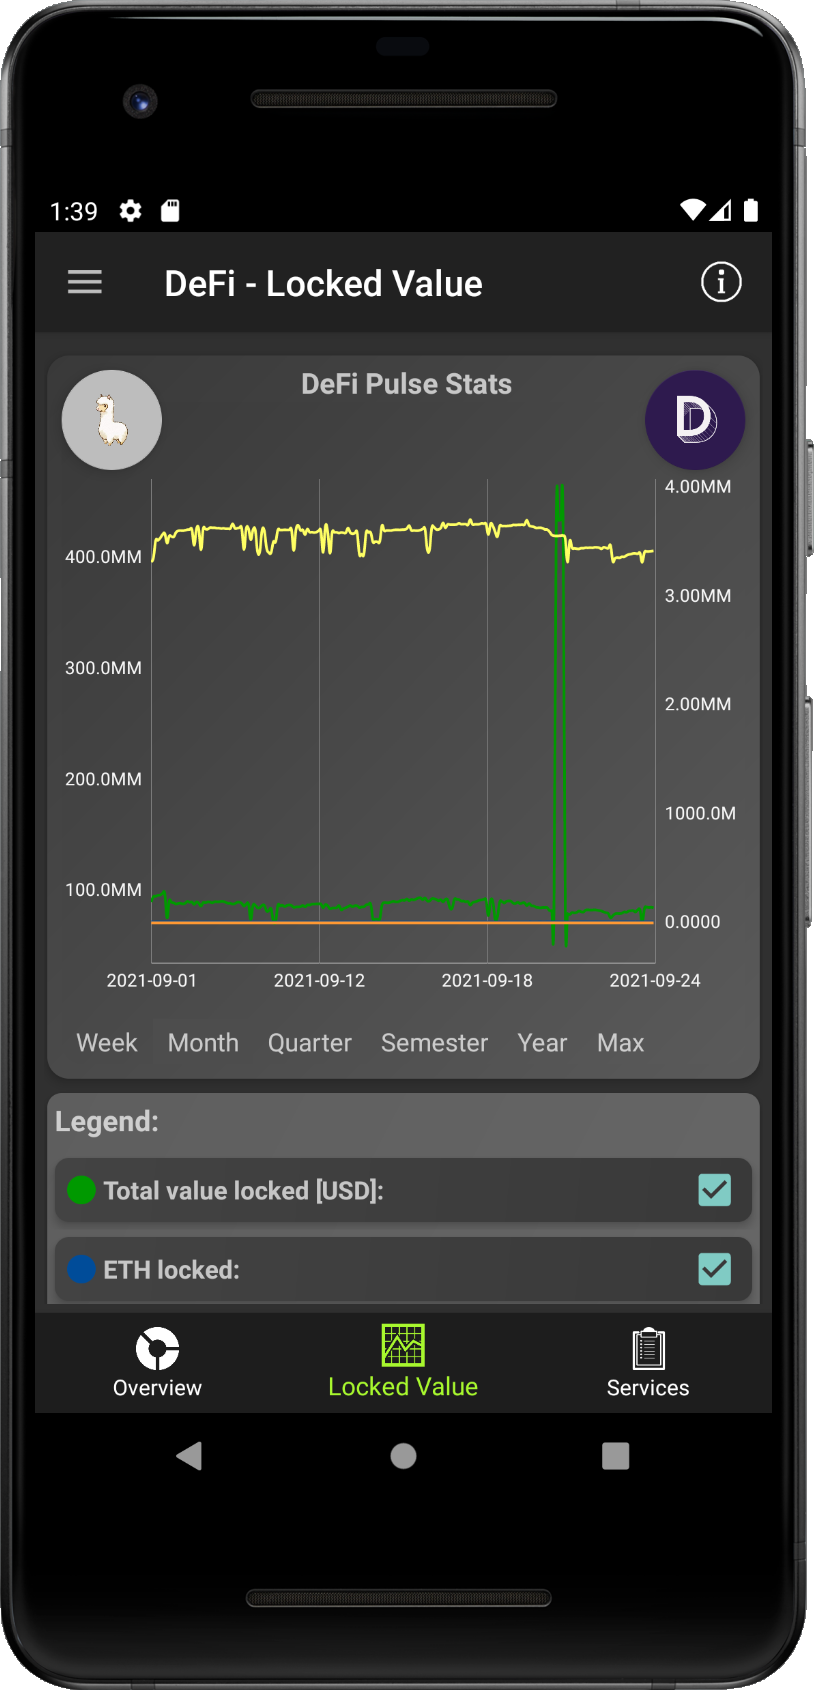
- Initially you can see Total value locked in DeFi projects fetched from DeFi Pulse. To switch data source, tap on the icon of Llame in top left corner.
- Data will be reloaded and shown in the chart and legend with trackded assets will be updated. To see exact value on the timelime, tap on the graph and tooltip with data will be shown. To hidde it tap on the tooltip again.
- To switch back to see data from DeFi Pulse, tap on the icon with letter 'D' in top left corner. Data will be reloaded and shown in the chart and legend with trackded assets will be updated.
This option is curently available only for DeFi Pulse data, because it tracks multiple assets locked in the DeFi space. To see how to adapt the graph, see the pictures below:
- Initially all assets are displayed in the graph. You can set the time range for the tracking of these assets from time range options listed below the graph.
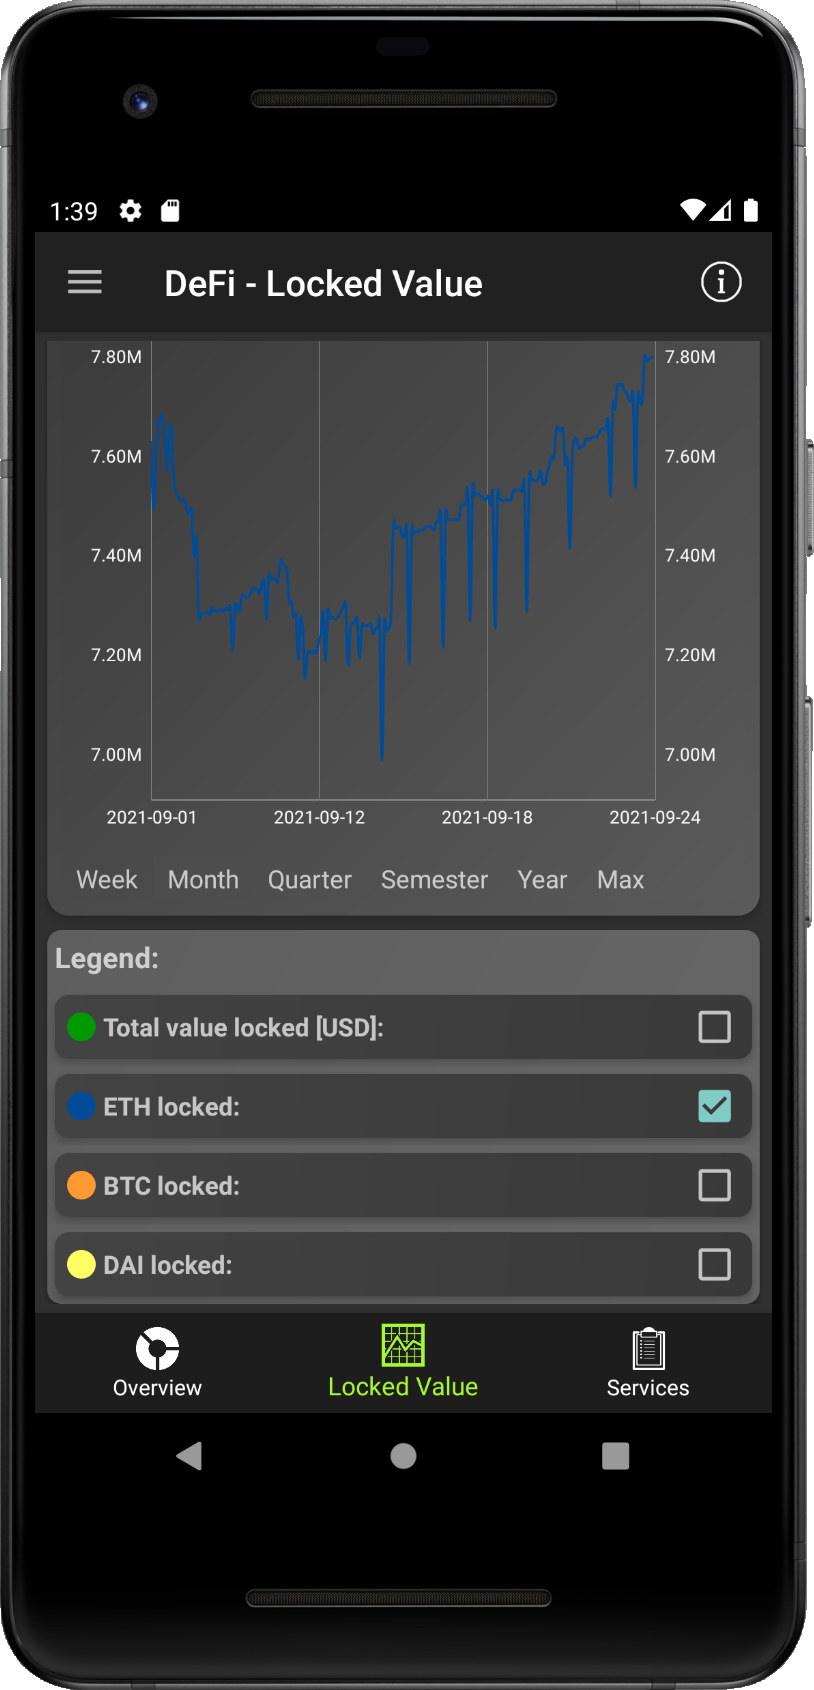
- If you want to see only some assets locked in the selected time range, uncheck the assets you do not want to see from the Legend list bellow the graph (here only ETH is checked, we will track amount of ETH locked DeFi the selected time range).
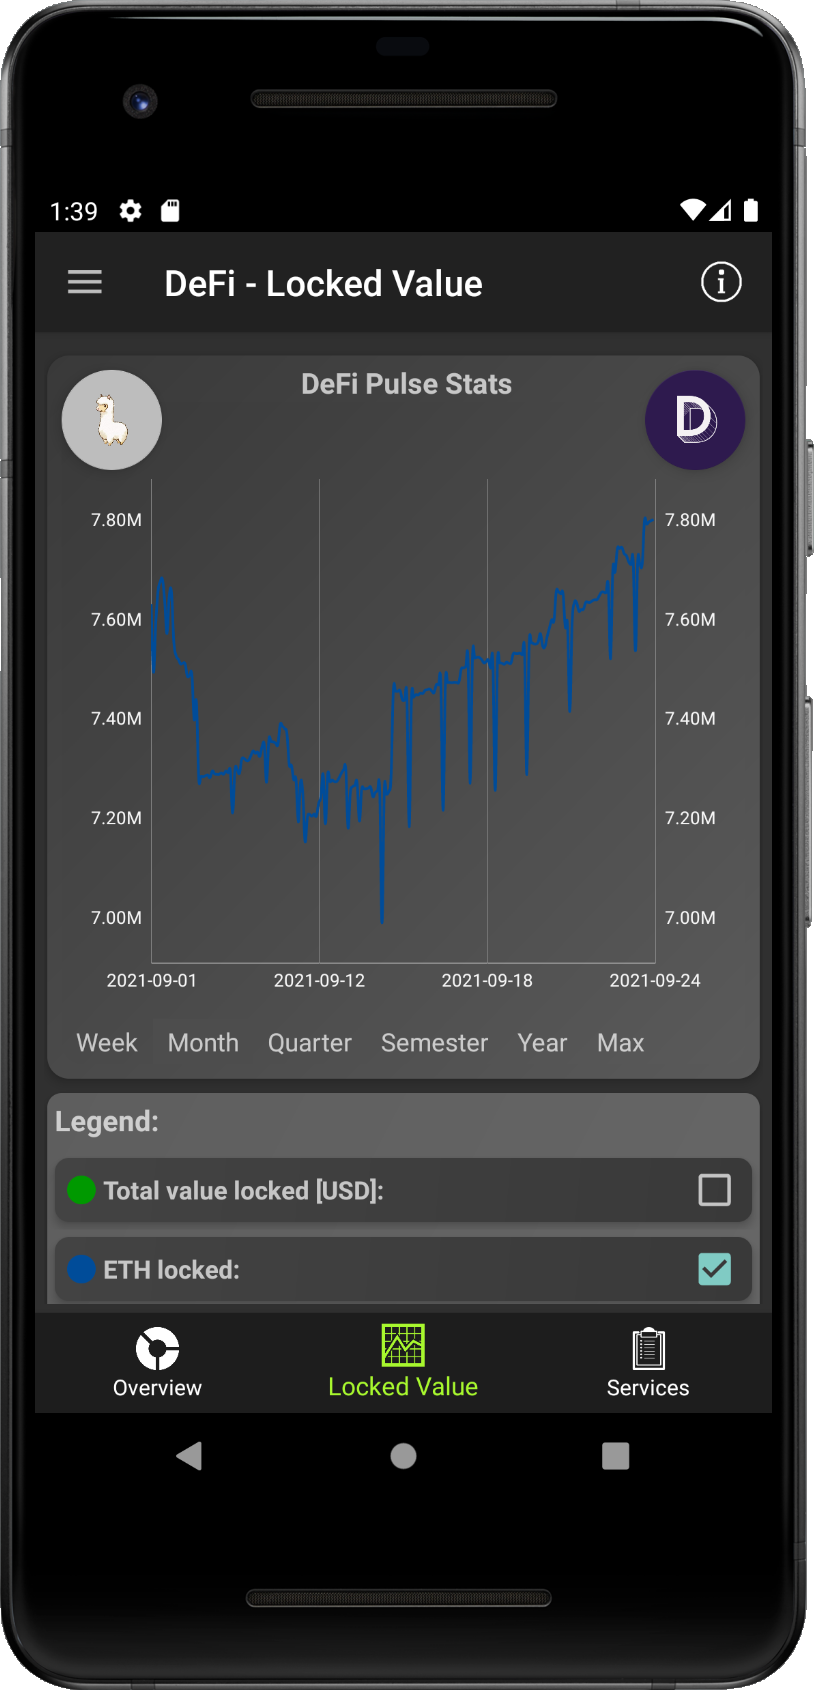
- Scroll up to see full graph of see how the amount of locked ETH was changing in selected time range. To get exact data in day on timeline, tap on the graph and slide (left/right) to the day you are interested in, it will be shown in popup.
Services
In this part we tried to collect most interesting DeFi projects across different blockchains. We try to bring
overview of DeFi or DeFi related services, which you can try or follow, on different platforms.
Projects are divided into categories, such as Decentralized exchanges, Lending services, Investing tools, Tutorials and
many others. You can switch between categories with simple swipe (left/right) or by tap on the left
or on the right button.
Each project contains short description to give you basic idea about it. You can see the detail, if you tap on the project
from the list. Then the detail popup window will be opened. There is the description and useful links, such as homepage of the service or
link to its twitter profile.
We try to maintain this list and keep it updated. If you will find there any suspicious projects, please, let us know to
re-evaluate it.
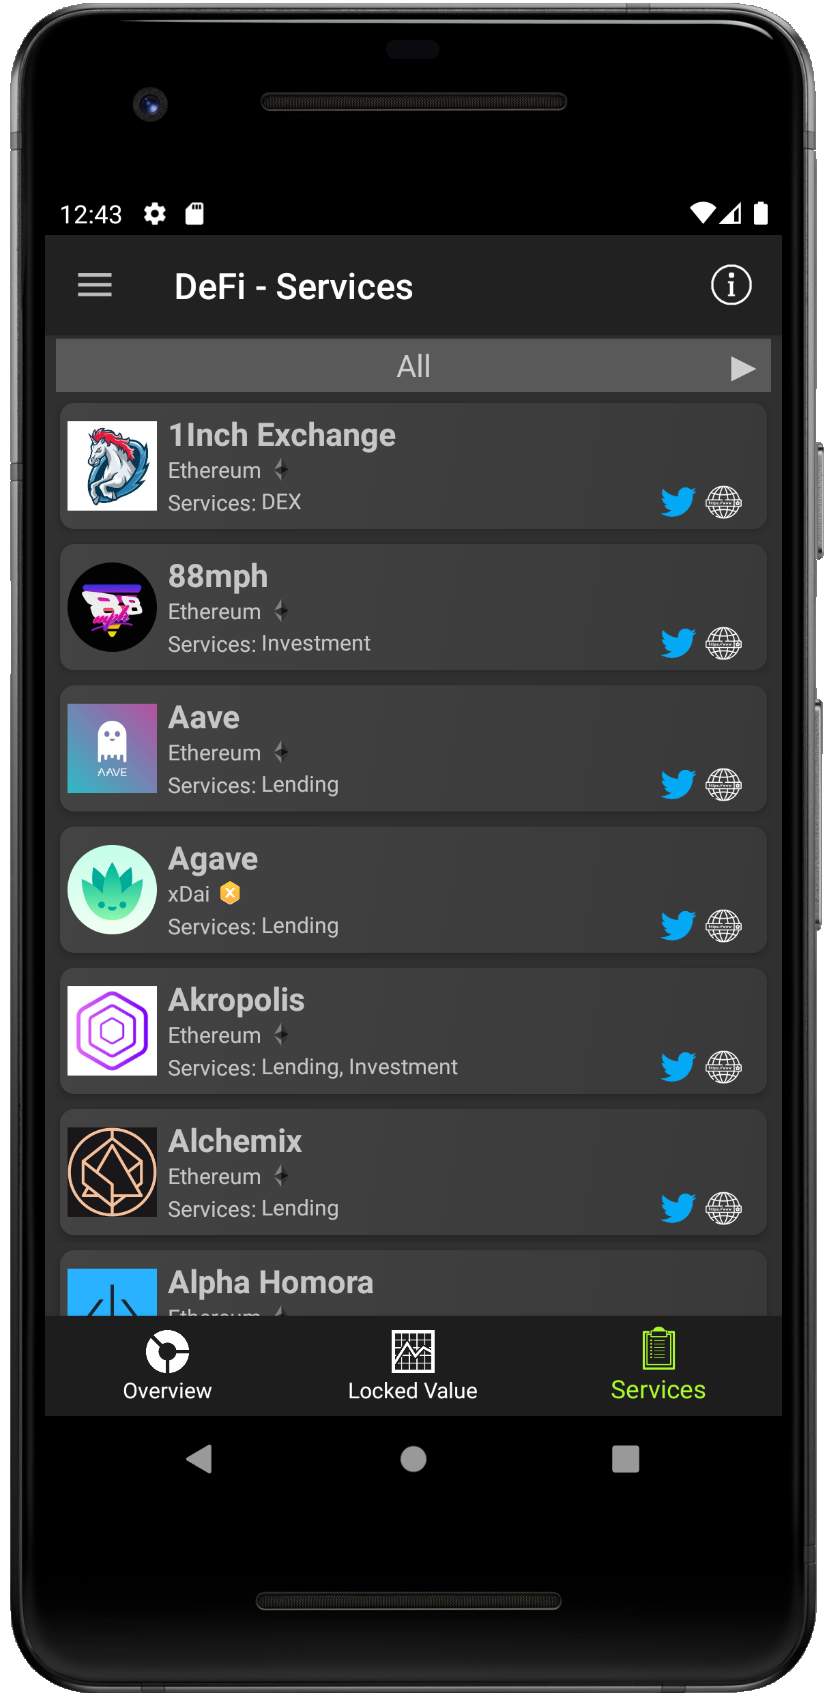
To see more info about any DeFi project from the list, just tap on it s record and popup window with details will be displayed, as shown on following pictures:
- If you want to see detail about any listed service, tap on the service record from the list.
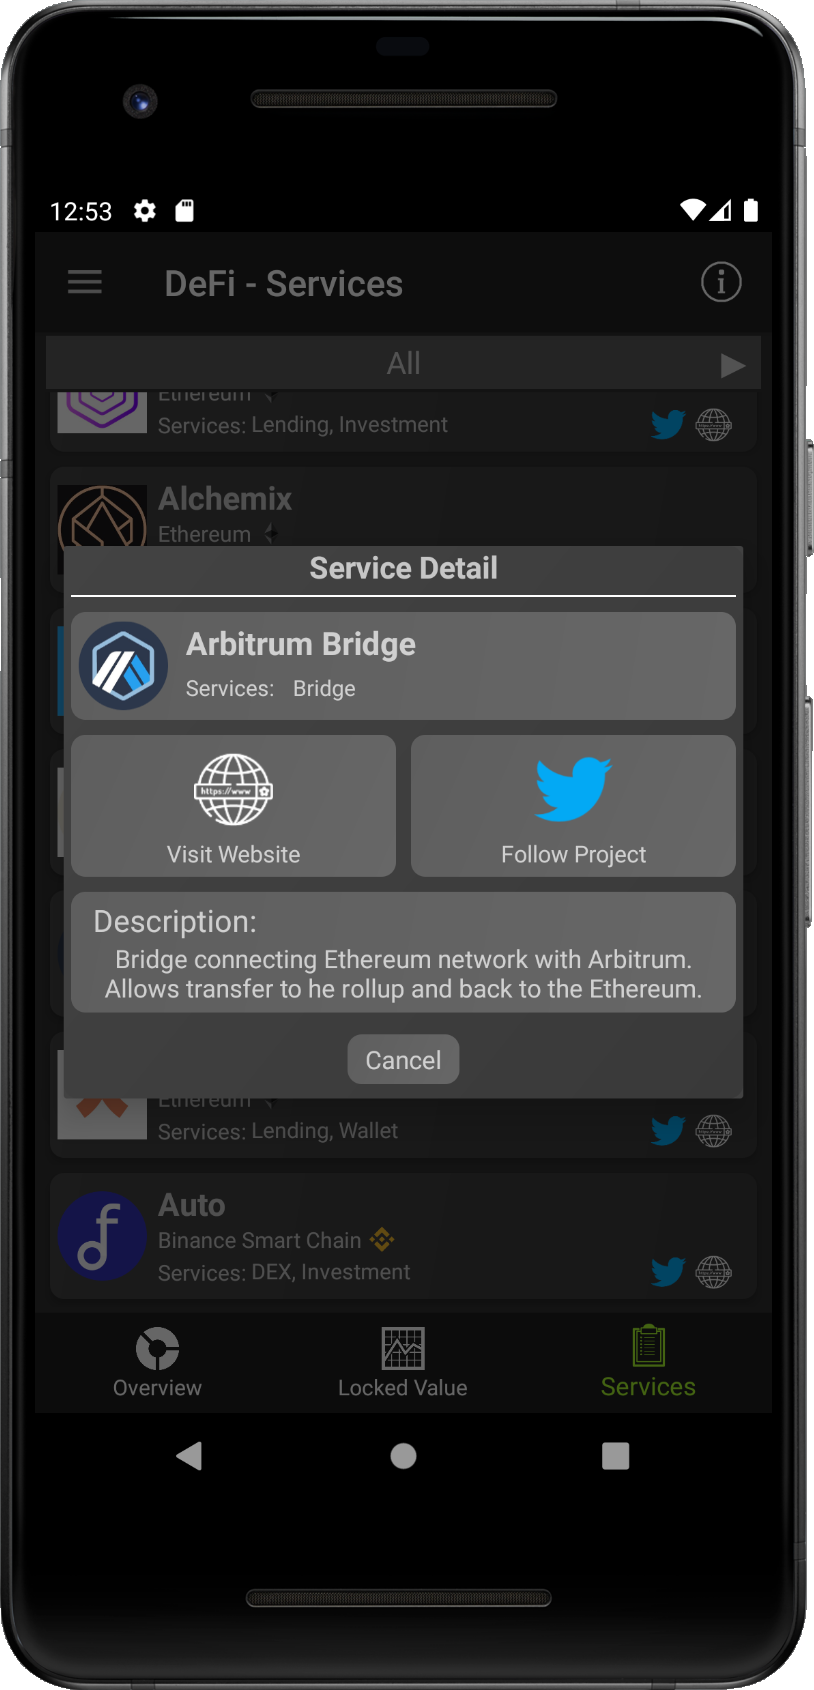
- Popup with brief info will be shown. To get back to the list, tap on the 'Cancel' button.
- You got back to the list of DeFi services.
News
News sections aims to provide recent news to the user. However, there are many news sources in many languages. Thus we decided to
give you an option to create own news feed from selected news sources in the My News subsection.
Unfortunatelly (or fortunatelly), crypto currency space and DeFi itself is very dynamic field, and it is worthy to
keep an eye on social media, where most of the recent events is discussed or announced.
Therefore we came up with idea to track most used social networks in the crypto currency world, Reddit and Twitter. More details
can be found in Social Networks part.
Last, but definetly not least, is the section of CoinGecko Beam. In this section you can find announcements
directly from dev teams.
My News
This section allows to users build up their own custom feed of news from their favorite news portals. If you want to edit
the list of tracked news sources, please, check the Add news sources to the news feed.
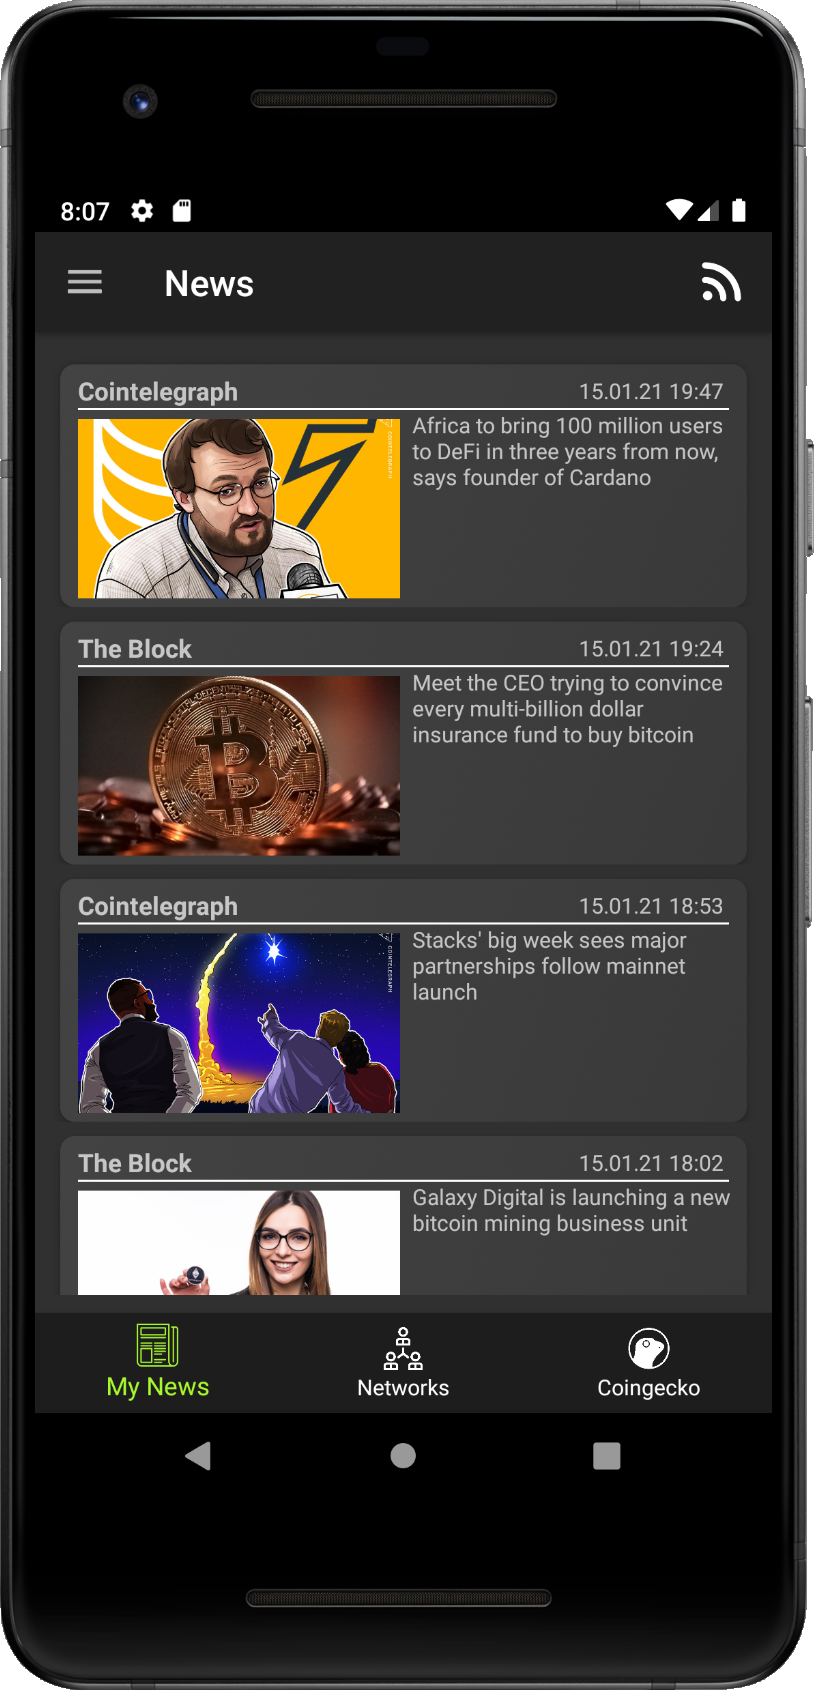
Articles from selected sources are collected and displayed together in the feed, ordered by the publishing time in descend order
(from newest to oldest).
It is possible to combine multiple sources in different languages in your feed. More about that can be found in
Add news sources to the news feed.
Each article in your feed is link to original artile on its website. If you want to see original article, tap on the article you
want to read and you will be redirected there.
Adding news sources is very similar to adding coins into the watchlist, described in a Add coins. You have two options how to add news source into your feed. First is from the news feed source list described in Step 4 below. Second is from the news source detail shown in Step 6. You can remove the news source from your feed in the same way.
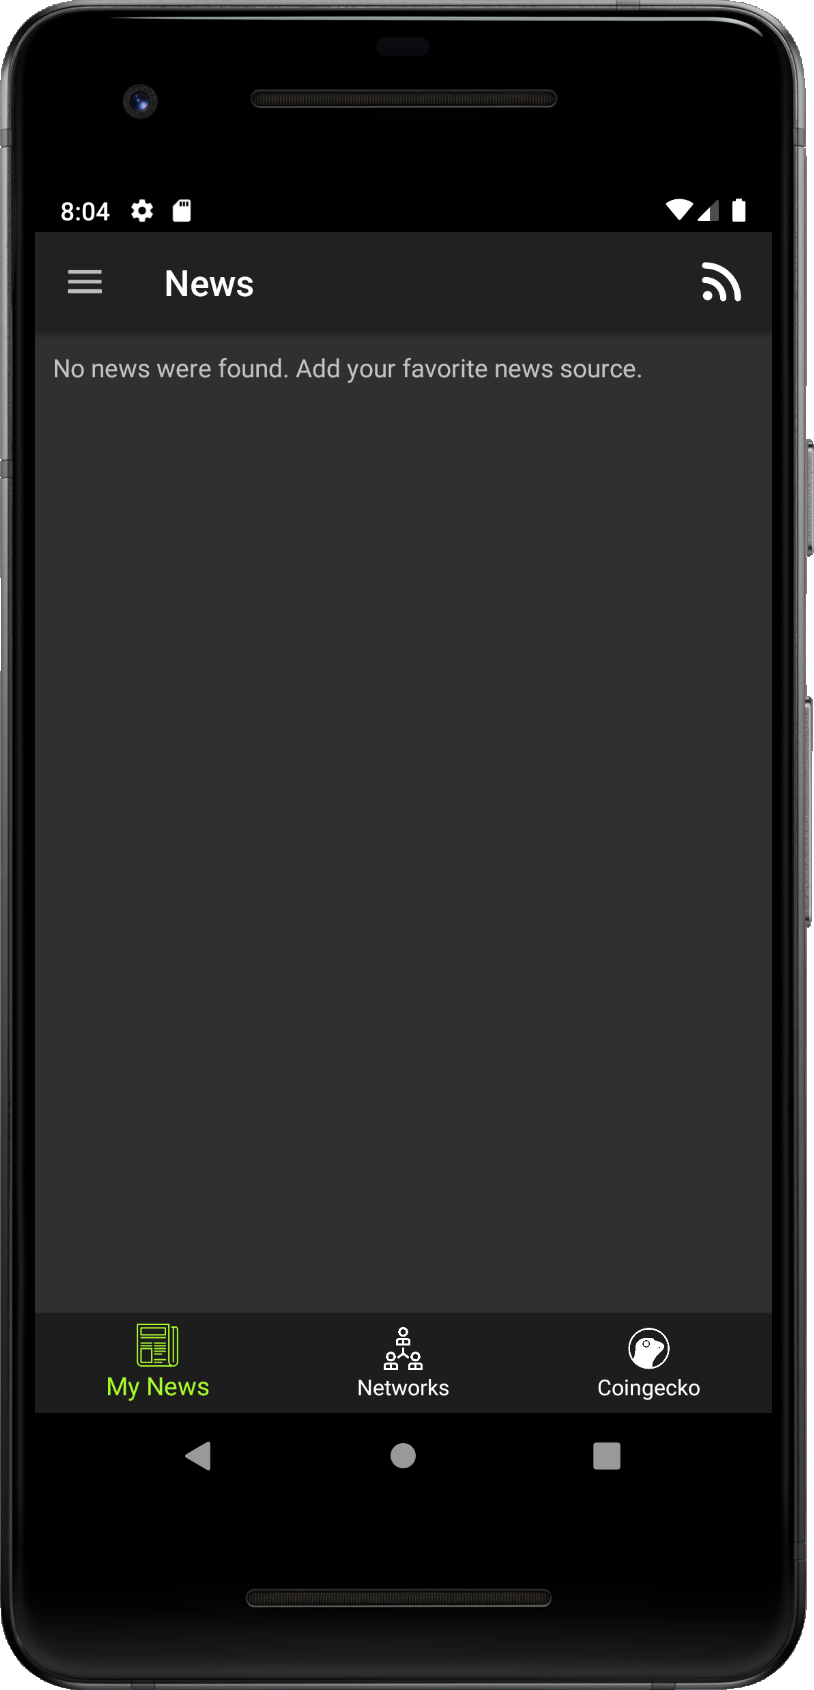
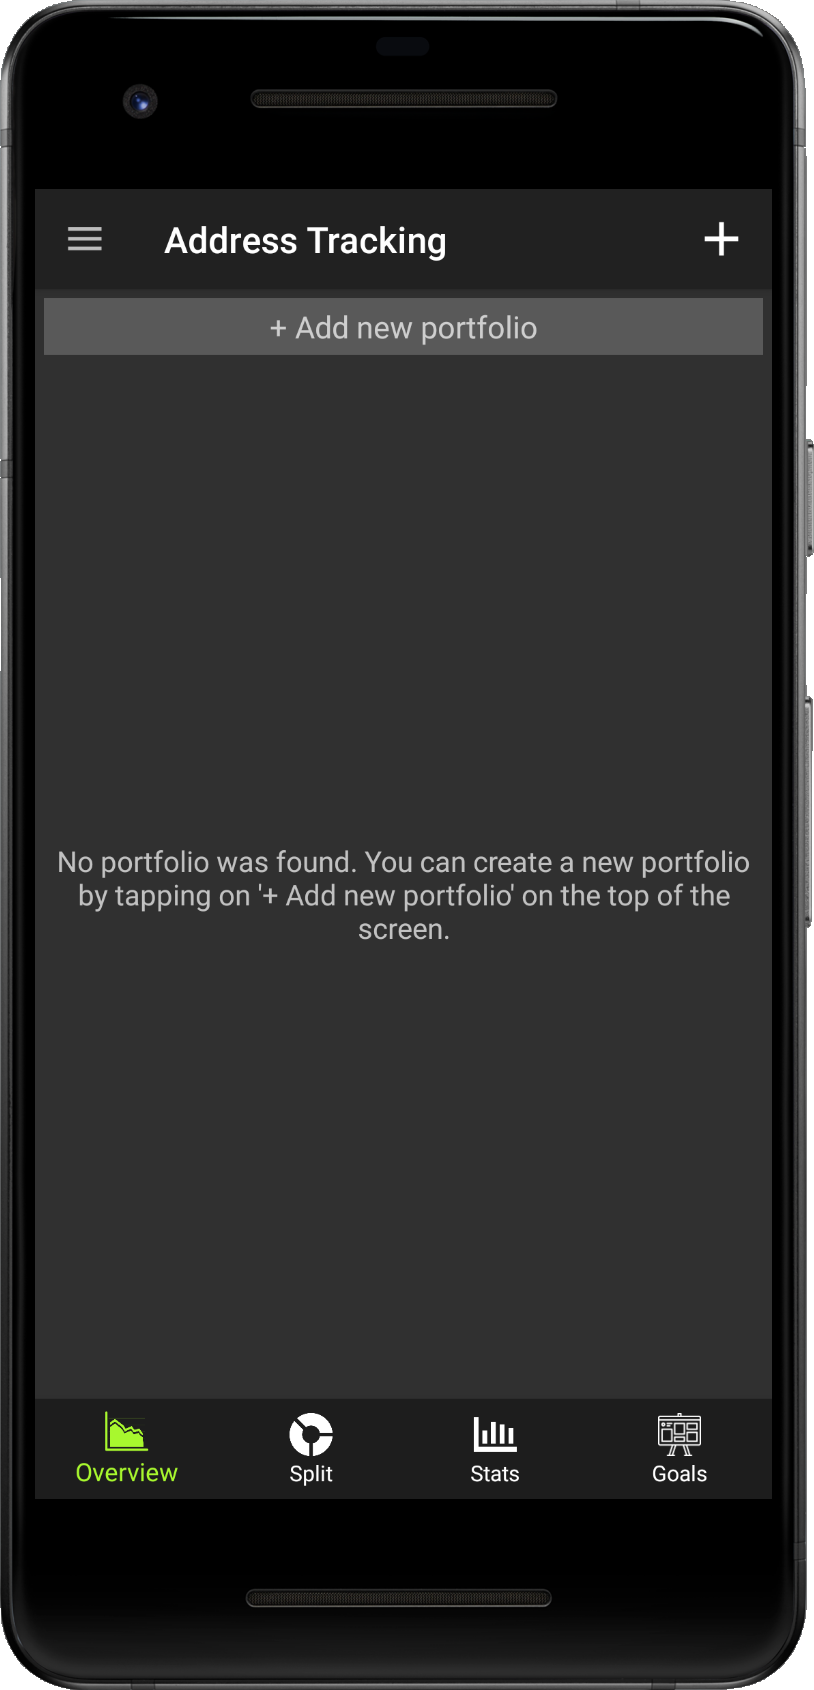
- Step 1 - When you open screen section for the first time, it will be empty.
- Step 2 - To add news source into your feed, tap on the RSS icon in the top right corner.
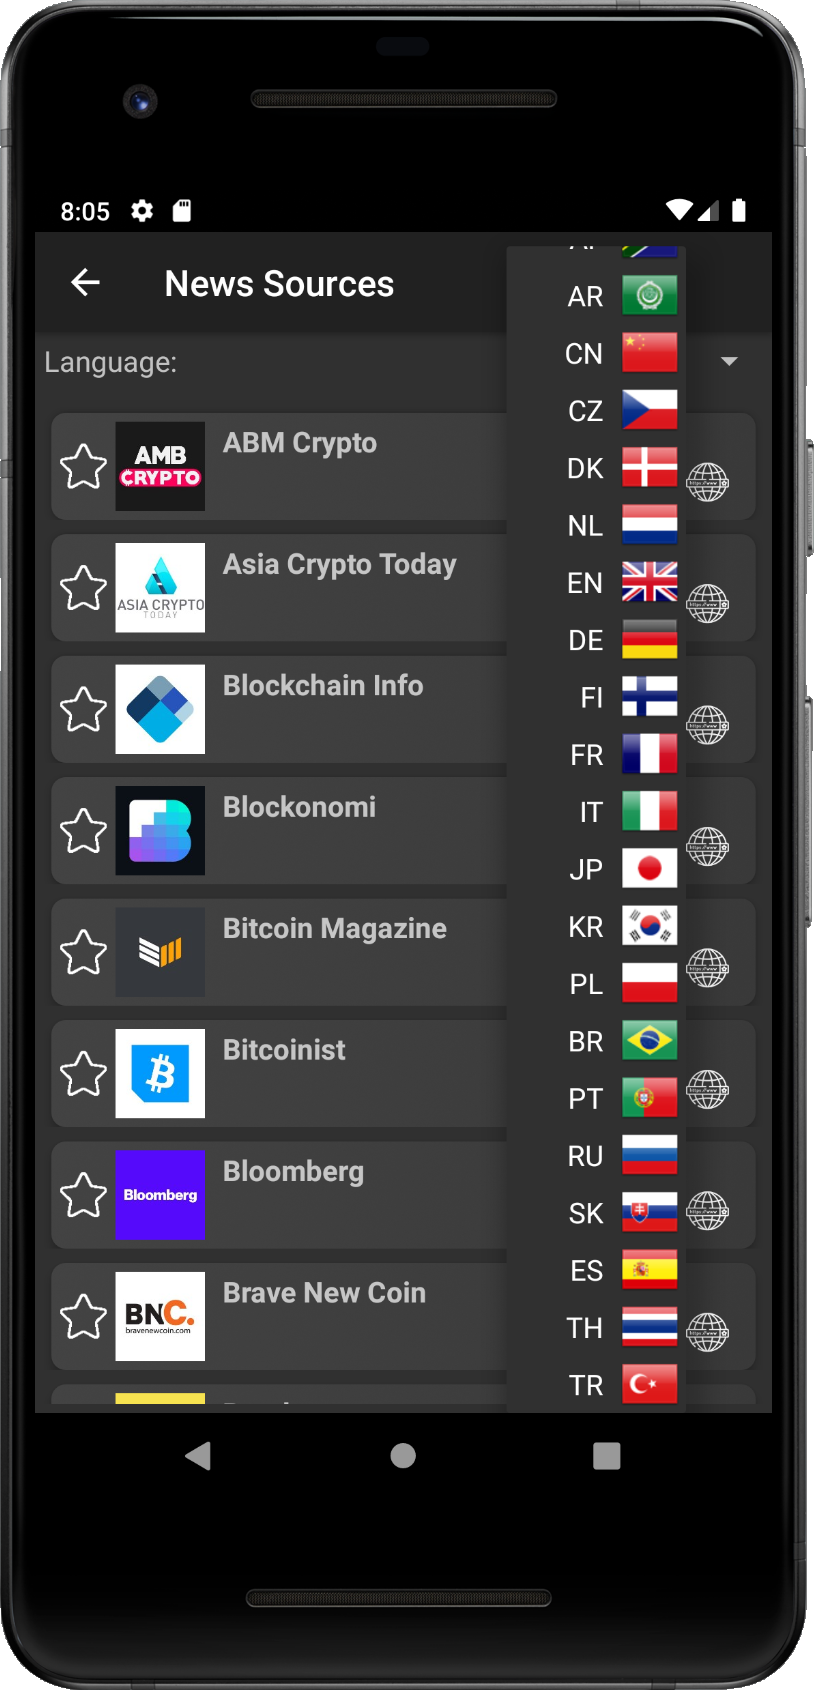
- Step 3 - Choose language of the news sources by selecting the flag in top right corner.
- Step 4 - You can add any news source into your feed, if you tap on the star (as in Add coin).
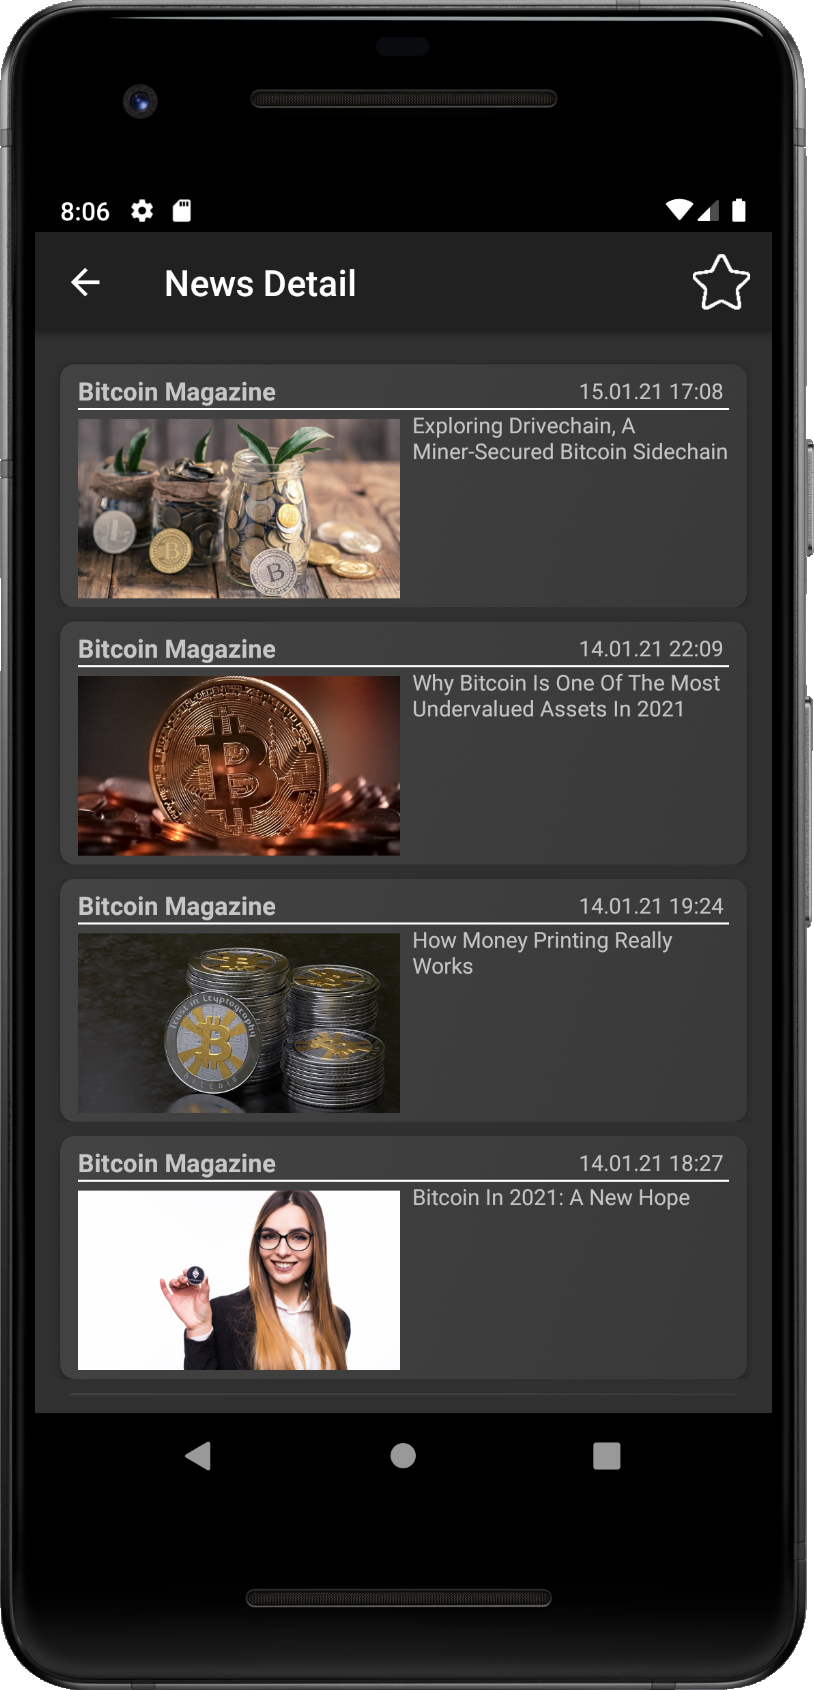
- Step 5 - Tap on the item from the news source list will open detail screen with recent articles.
- Step 6 - You can add add the news source into your feed, if you tap on the star (as in Add coin).
- Congrats - You set the your news feed with news sources you chose.
Social Networks
The aim of this sections is to bring the current and hottest topics from social networks. Currently we track 2 social networks,
which we believe are the most used for crypto currency and for DeFi -
Twitter and Reddit.
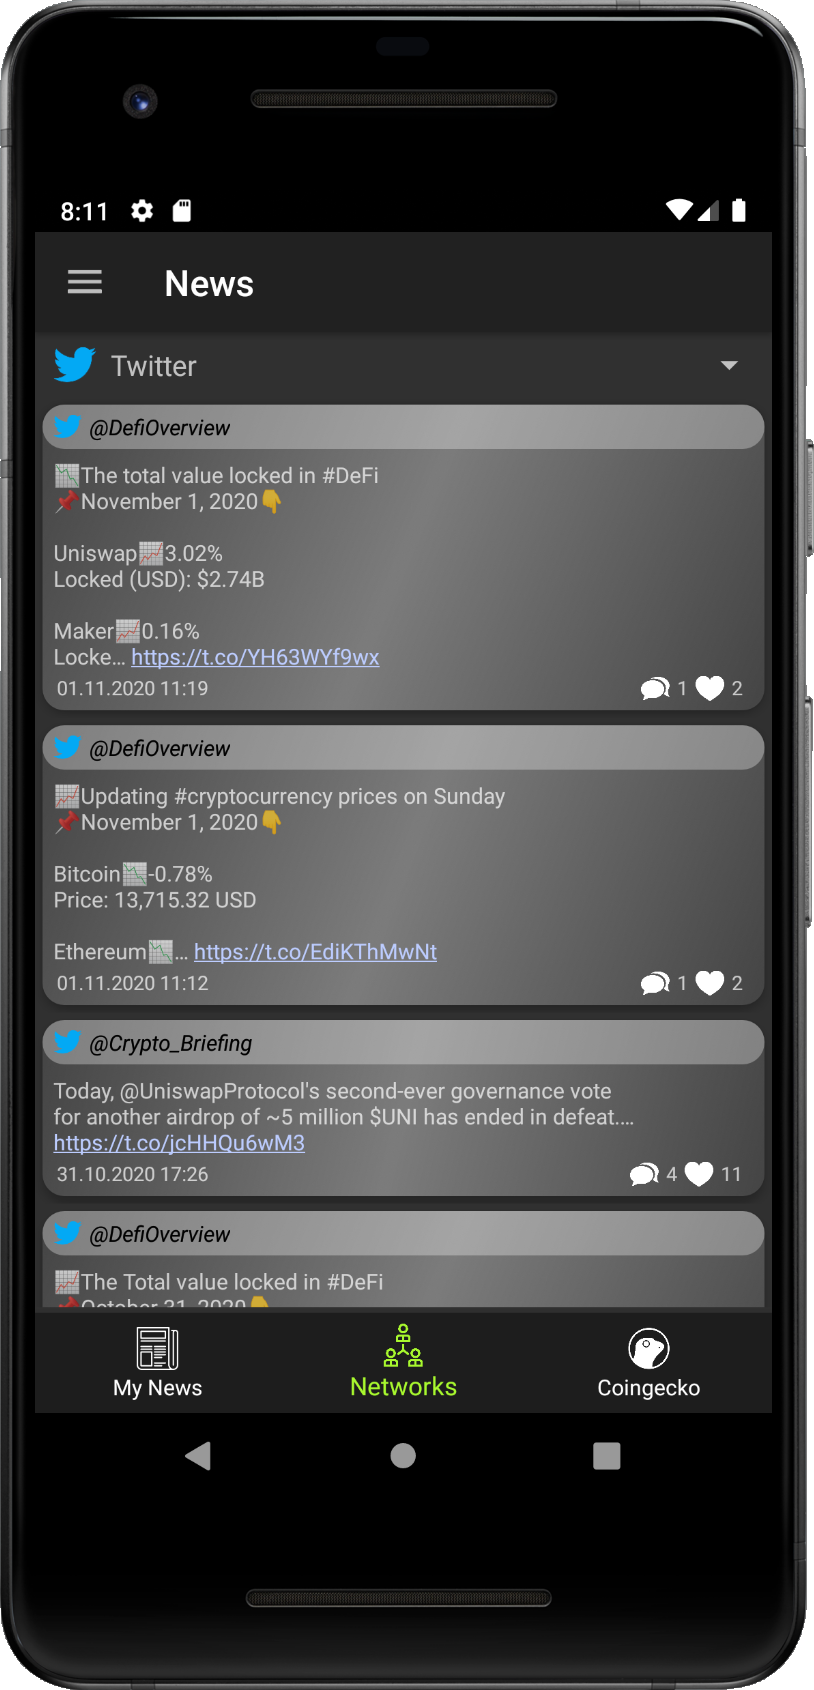
You can select the social network, which you want to check, on the top of the screen from the drop down. When you select the network, the
app will try to fetch latest posts and show them from the newest to the oldest.
For the Reddit option we check the most used subreddits, such as:
r/CryptoCurrency,
r/defi and
r/ethfinance. All shown items in the list are links to the original
posts.
Twitter option tracks tweets and re-tweets of our two accounts:
@CryptoCrabApp1 - developer account, where we share news about latest updates
and releases
@DefiOverview - community account, where we share news about our app, DeFi news
and other news related to the crypto currencies.
Each item contains basic info such as: twitter username or subreddit, posted message and picture, publishing date, likes and retweets or upvotes.
If you want to see more details, tap on the item from the list and you will be redirected to the original post.
CoinGecko Beam
CoinGecko beam section tracks announcements directly from dev teams through CoinGecko Beam
service.
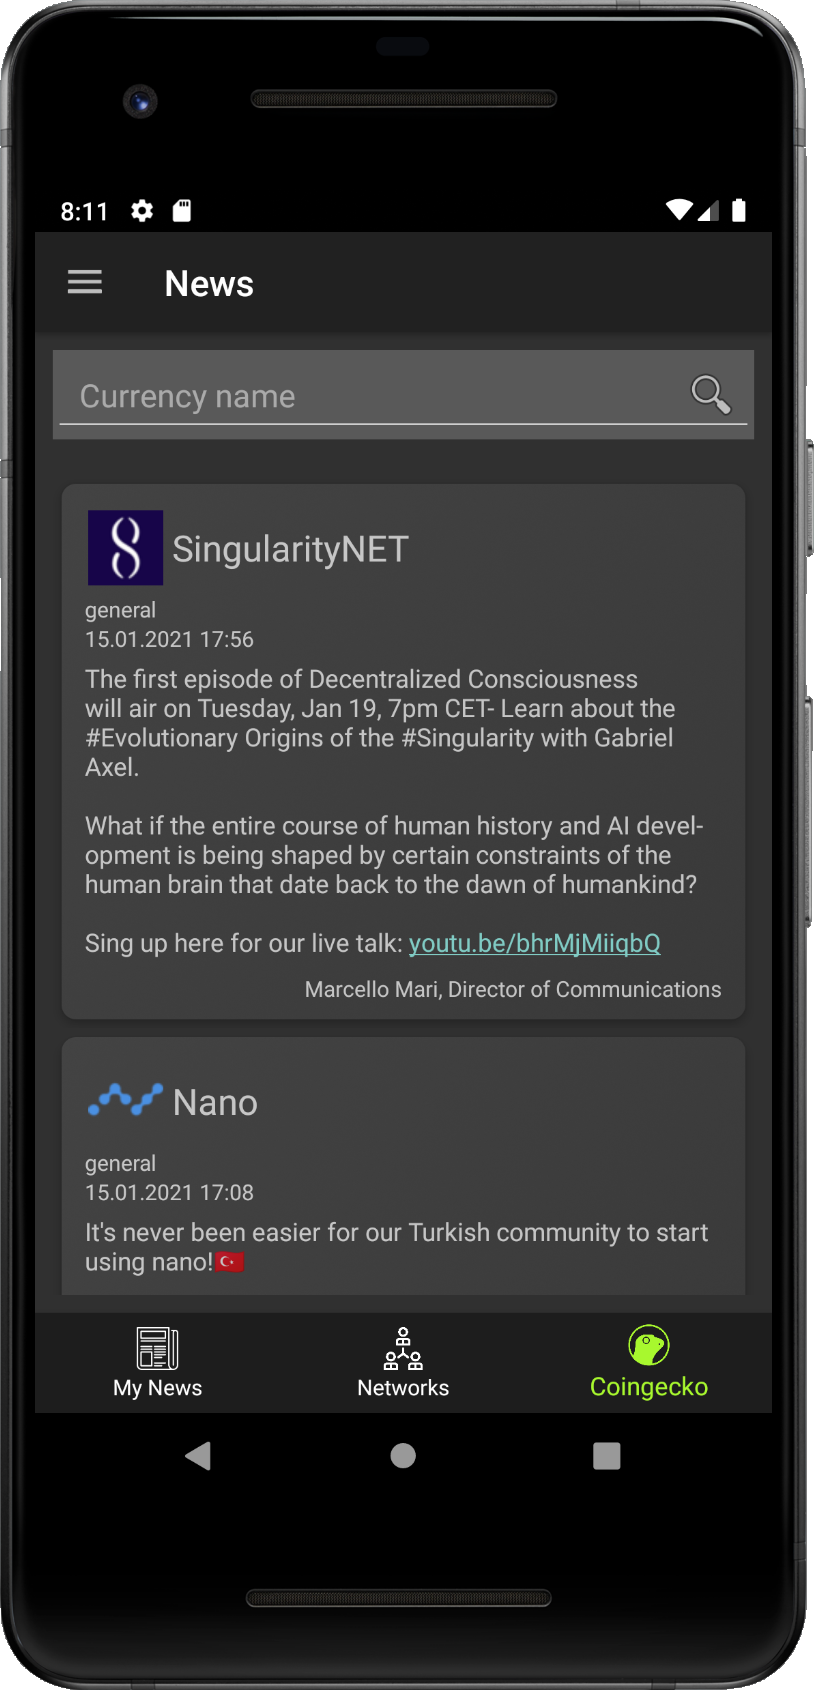
Announcements of all connected projects are loaded by default. However, you can filter the news by crypto currency project.
To filter announcements, type the name or code into the search field. Tap on the on the search button
or on any option from drop down (the same as searching coins in Add coin). If inserted coin has any announcements,
they will be shown in the list.
Announcements are sorted from the newest to the oldest. Each announcement contains basic info, such as:
Project name and logo,
Type of announcement,
Publishing time,
Description of the anounncement,
Person who released the announcement.
Exchanges
This section introduces services, which offers you different ways, how to buy or sell crypto currency. It is divided into four
parts.
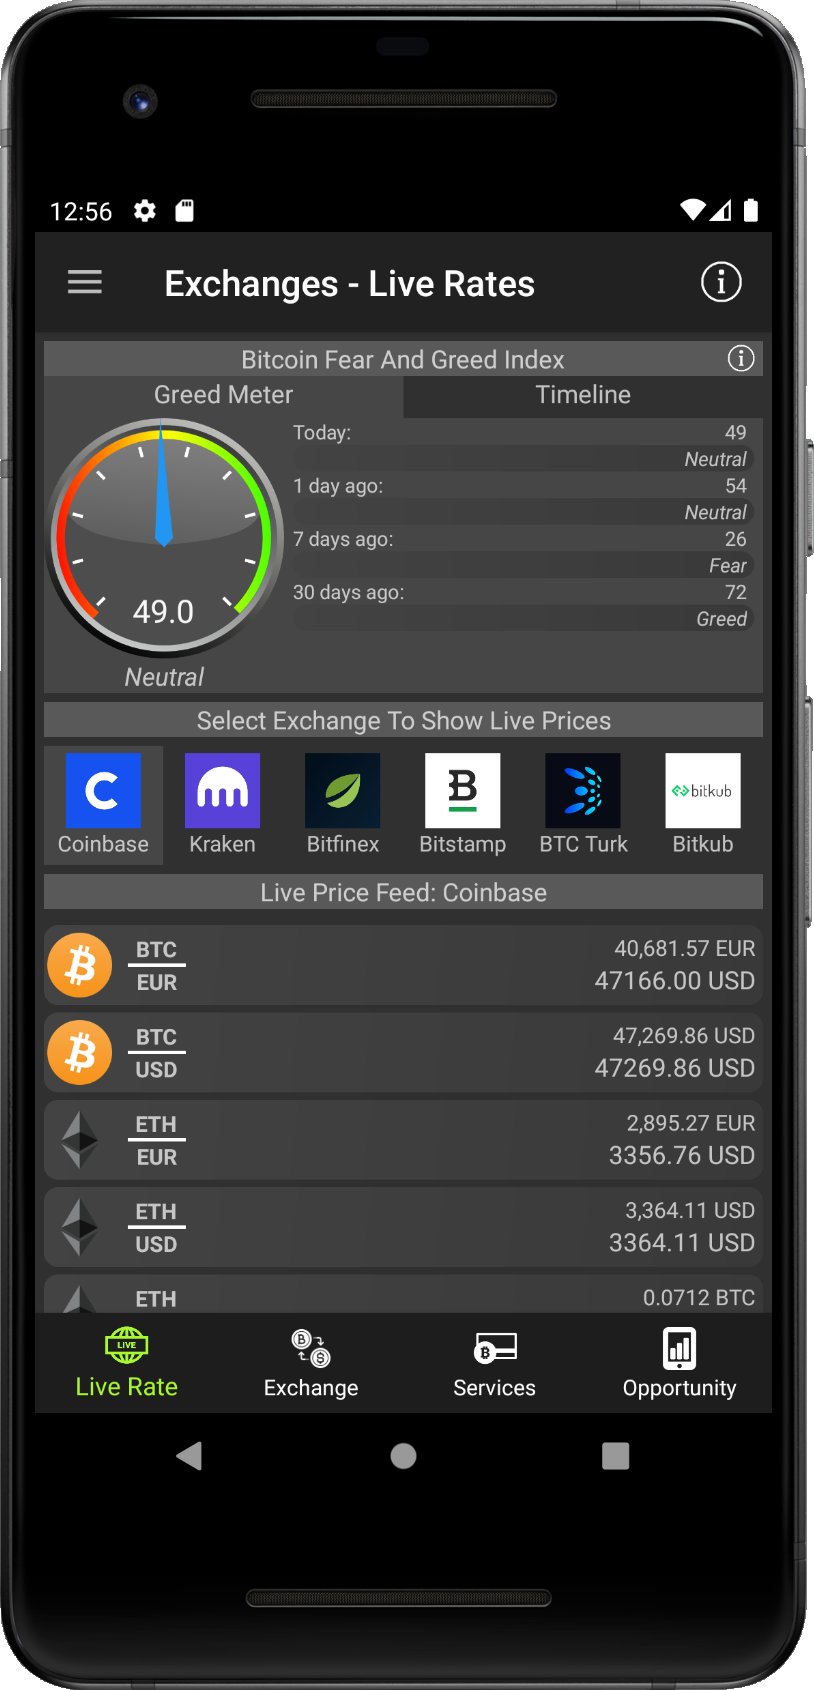
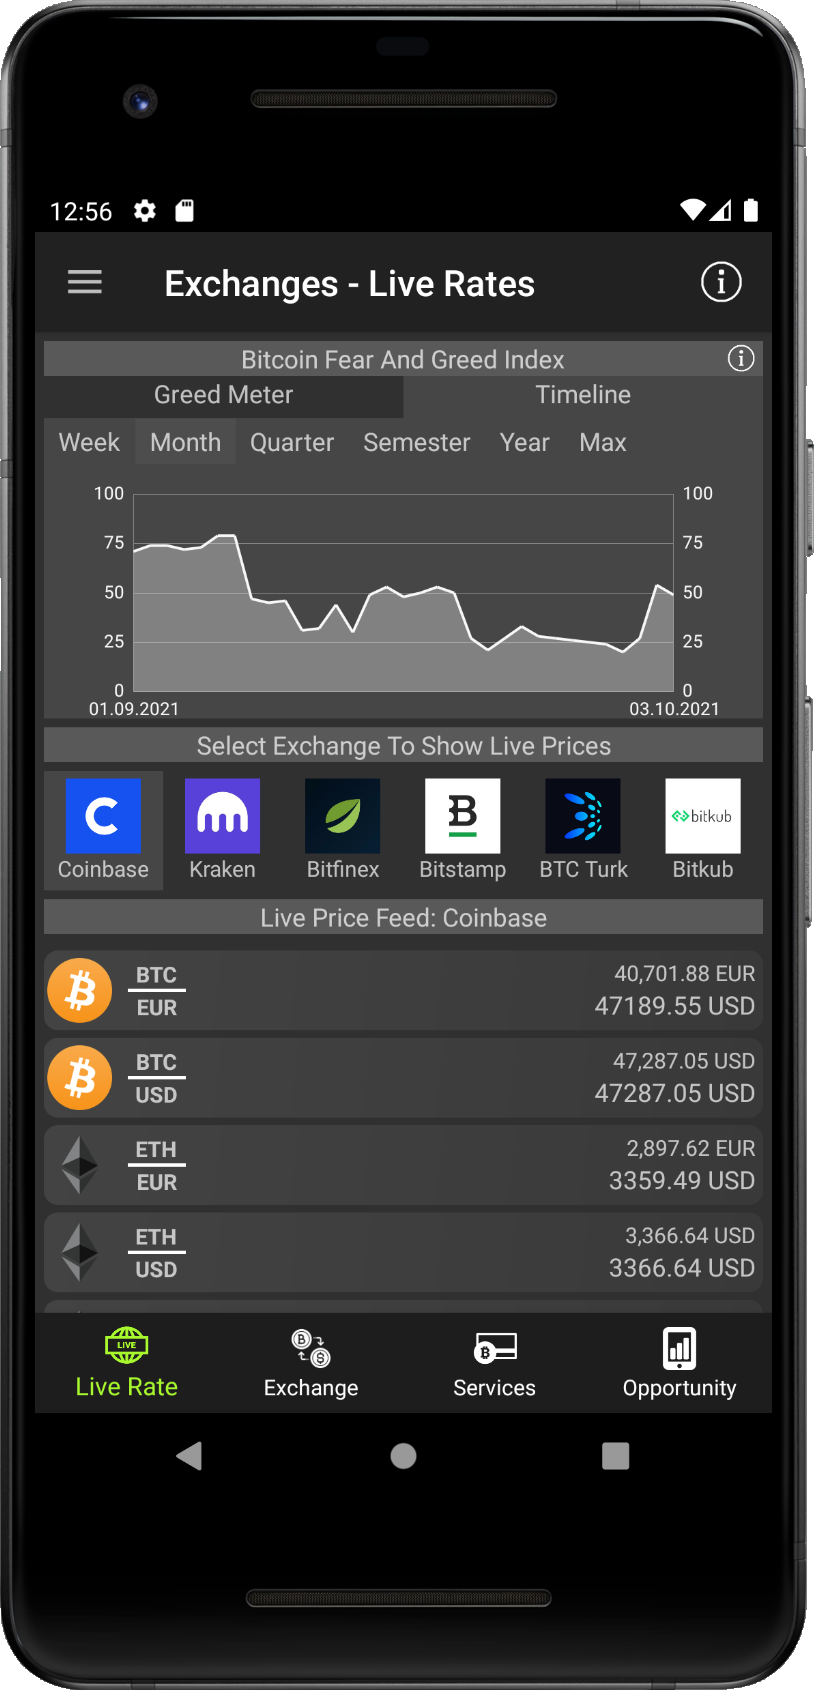
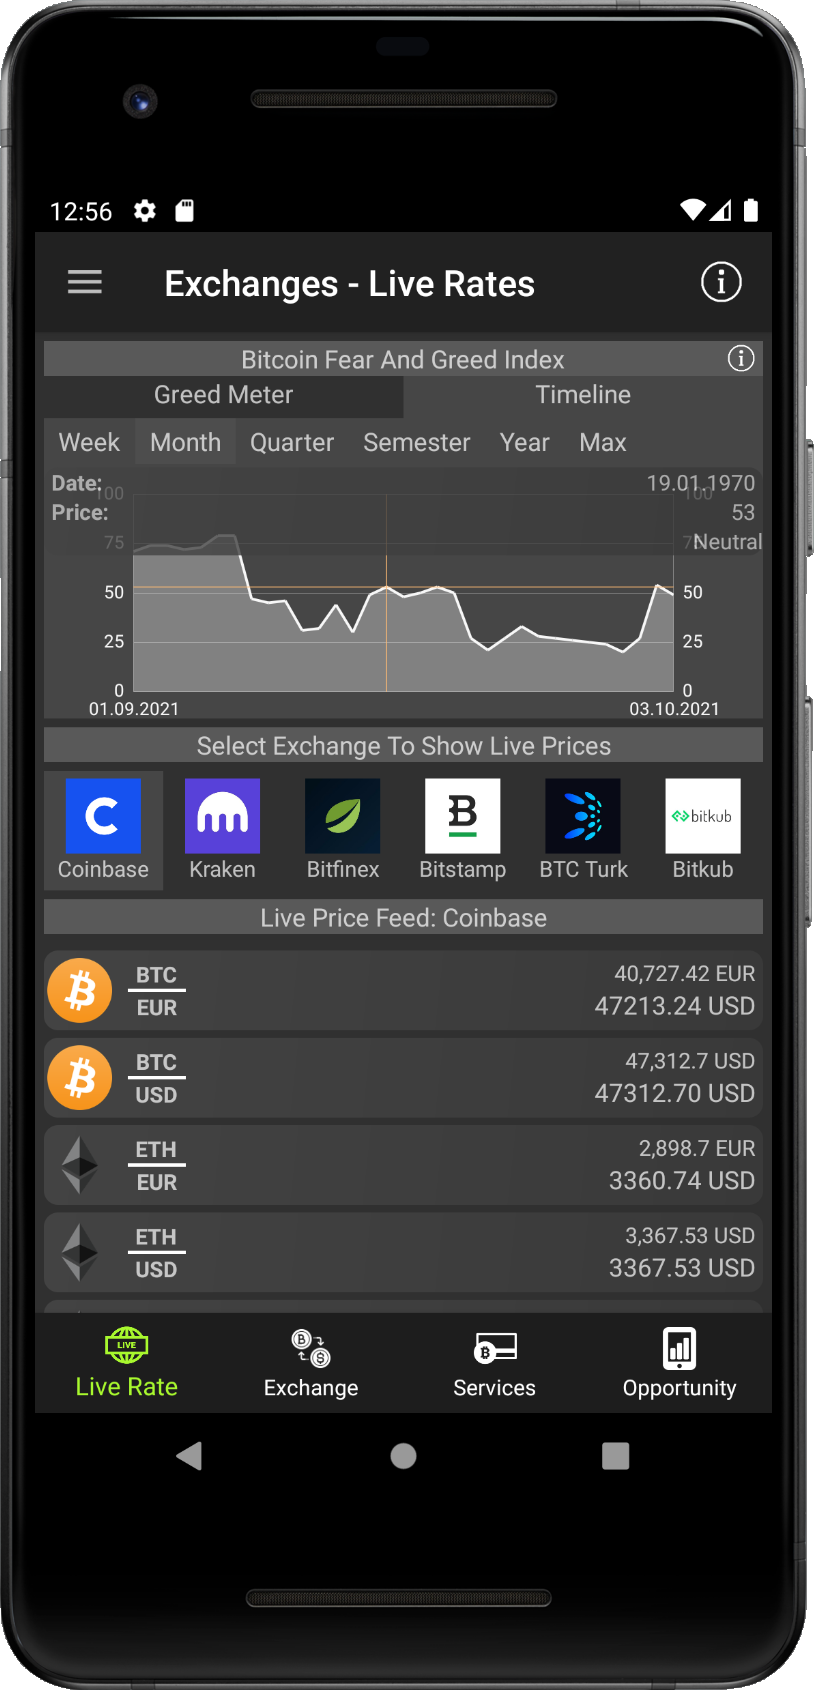
First section is Live Price, which shows current mood of the market and streams live prices from some
exchanges.
Second section shows Exchanges, where you can exchange your assets or currency based on offers
in the orderbook.
Third part is introducing Services. As a service you can imagine middleman providers, who do the trade
for you on the exchange with some fee, or peer to peer marketplaces, where people can exchange directly between them.
Last section is called Opportunities. This section is different from previous, and it should provide you
special features, such as finding the best rate to buy or sell your asset, or opportunities for arbittrage tradings.
Live Price
Live price secton brings current data about market sentiment and live tickers streamed directly from exchanges.
We offer you to get DeFi stats from two different sources. For now, DeFi Llama supports more blockchains and projects but supports tracking of the total value only, on the other hand, DeFi Pulse brings tracking both, of single assets and the total value.
- Initially you can see Total value locked in DeFi projects fetched from DeFi Pulse. To switch data source, tap on the icon of Llame in top left corner.
- Data will be reloaded and shown in the chart and legend with trackded assets will be updated. To see exact value on the timelime, tap on the graph and tooltip with data will be shown. To hidde it tap on the tooltip again.
- To switch back to see data from DeFi Pulse, tap on the icon with letter 'D' in top left corner. Data will be reloaded and shown in the chart and legend with trackded assets will be updated.
We offer you to get DeFi stats from two different sources. For now, DeFi Llama supports more blockchains and projects but supports tracking of the total value only, on the other hand, DeFi Pulse brings tracking both, of single assets and the total value.
- Initially you can see Total value locked in DeFi projects fetched from DeFi Pulse. To switch data source, tap on the icon of Llame in top left corner.

- Data will be reloaded and shown in the chart and legend with trackded assets will be updated. To see exact value on the timelime, tap on the graph and tooltip with data will be shown. To hidde it tap on the tooltip again.

- To switch back to see data from DeFi Pulse, tap on the icon with letter 'D' in top left corner. Data will be reloaded and shown in the chart and legend with trackded assets will be updated.
Exchanges
Exchange screen provides list of pre-selected exchanges. This list might be changed into customizable
watchlist, as it is done with coins, in the future (not supported now).
Each exchange item contains Name and logo of the exchange, markets,
Twitter link and Hompage link.
You can search for other exchanges through the search panel on the top of the screen.
To see detail of the exchange, tap on the item from the list, or use the search field.
Tap on the search button
or on any option from drop down to go to the Detail screen of the exchange (as in Add coin).
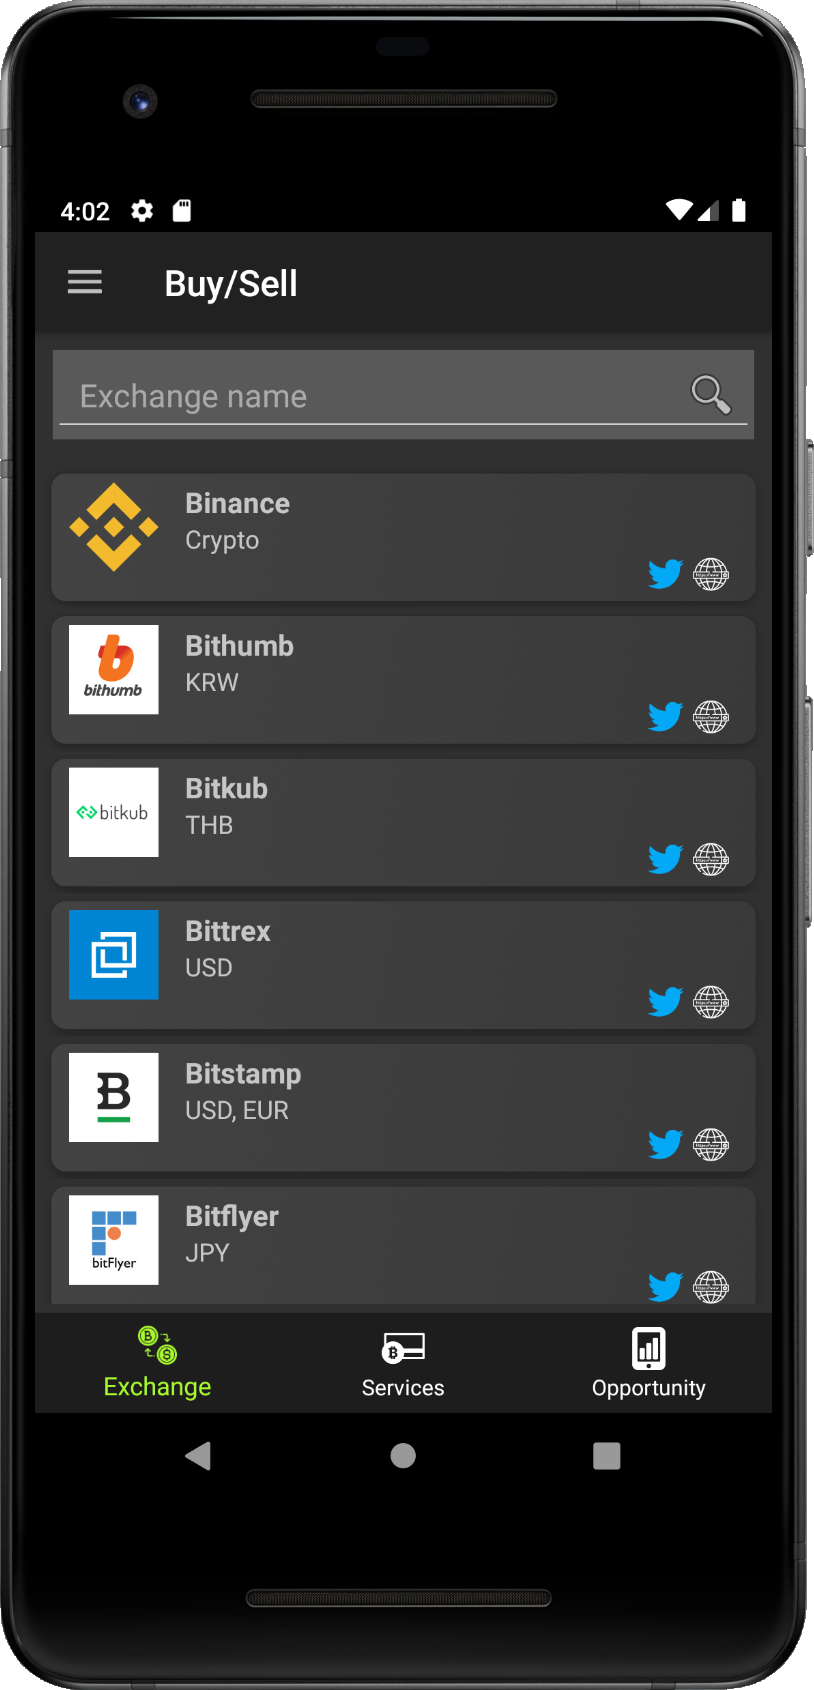
- Exchange screen with list of exchanges.
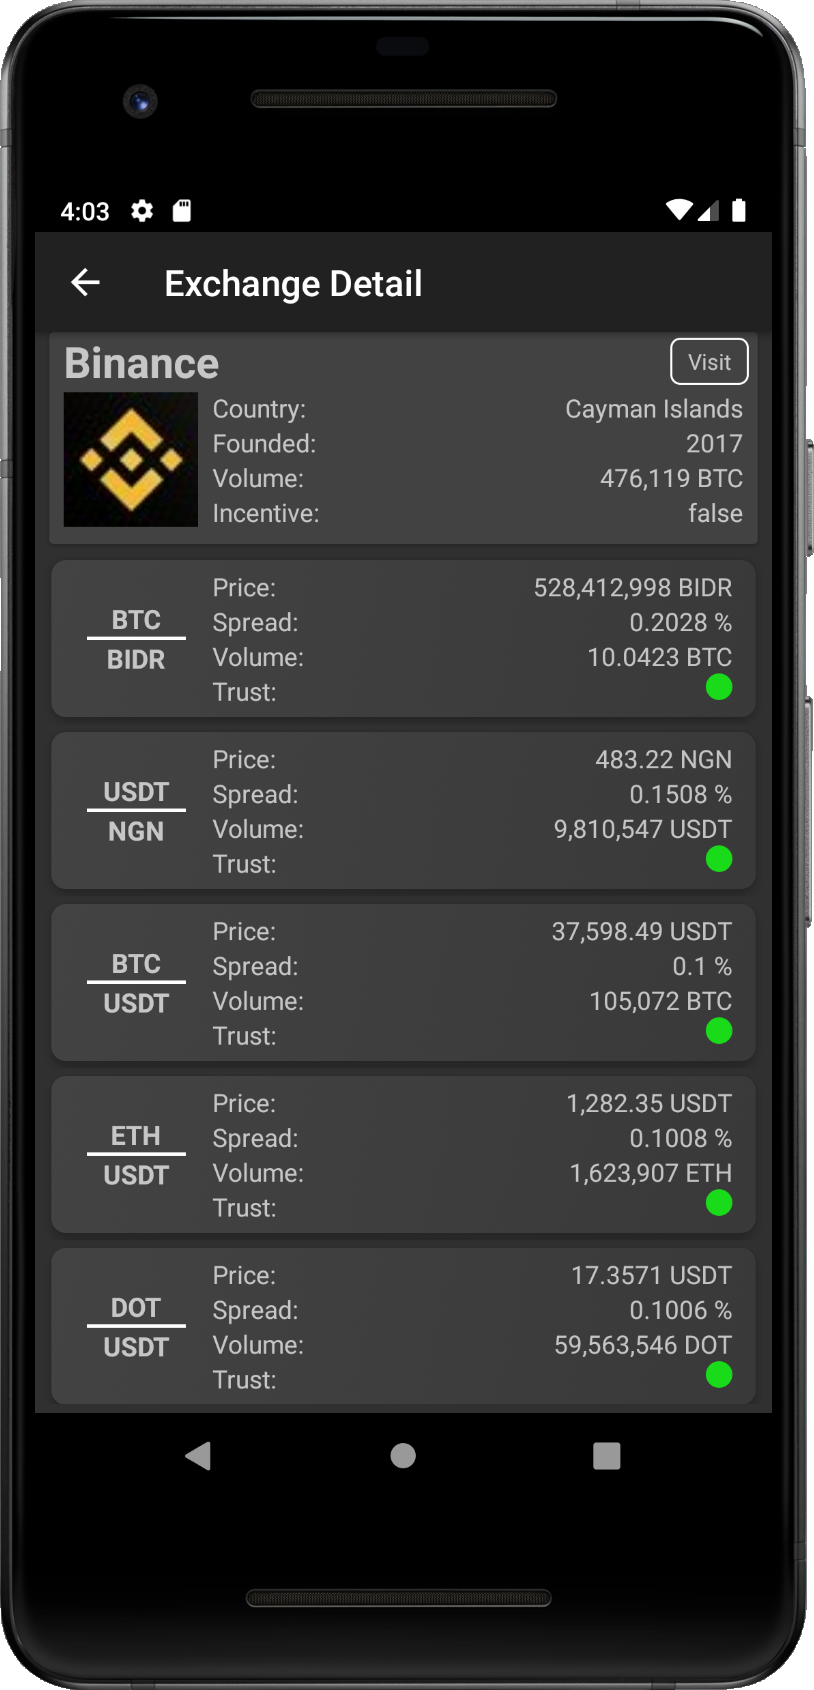
- Detail screen of selected exchange.
Detail screen shows basic data about the exchange, such as country, where it is based, year, when it was founded, or
total reported volume through all markets it provides. There is also 'Visit' button, which redirects you to the hompage of the exchange.
Data is provided by Coingecko.
Below the info widget you can find list with available markets. Markets are sorted by reported volume from highest to the lowest.
Each market show asset-market pair, last traded price, percentage value of spread in the orderbook, reported volume in
volume in last 24h and indicator of trust for reported volume:
Trustful,
Suspicious,
Fake.
Services
As stated in the intro, services provides option to buy or sell crypto currencies, excluding direct trades on exchanges.
It could be ATM service or gateway providers, which executes trades on exchange seamlessly for you with, but you will be charged extra
fee by the service.
Other type of services are peer to peer marketplaces, where you can deal directly with other people.
You can find here list of most known crypto services. If you would like to see more details, tap on the desired
service to open popup with more details.
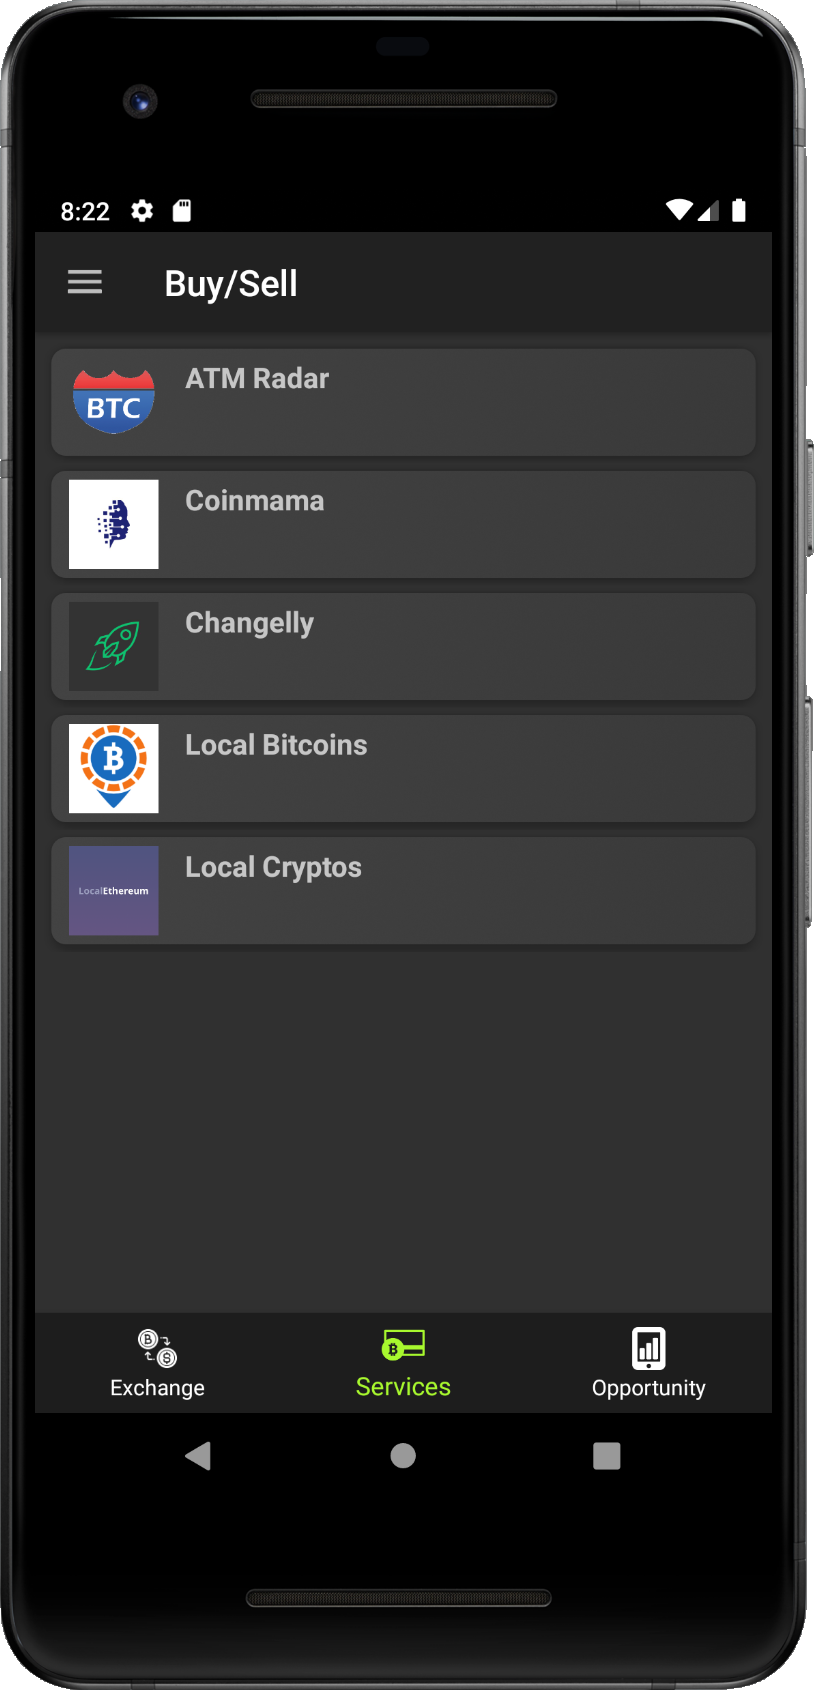
- Service screen with crypto services.
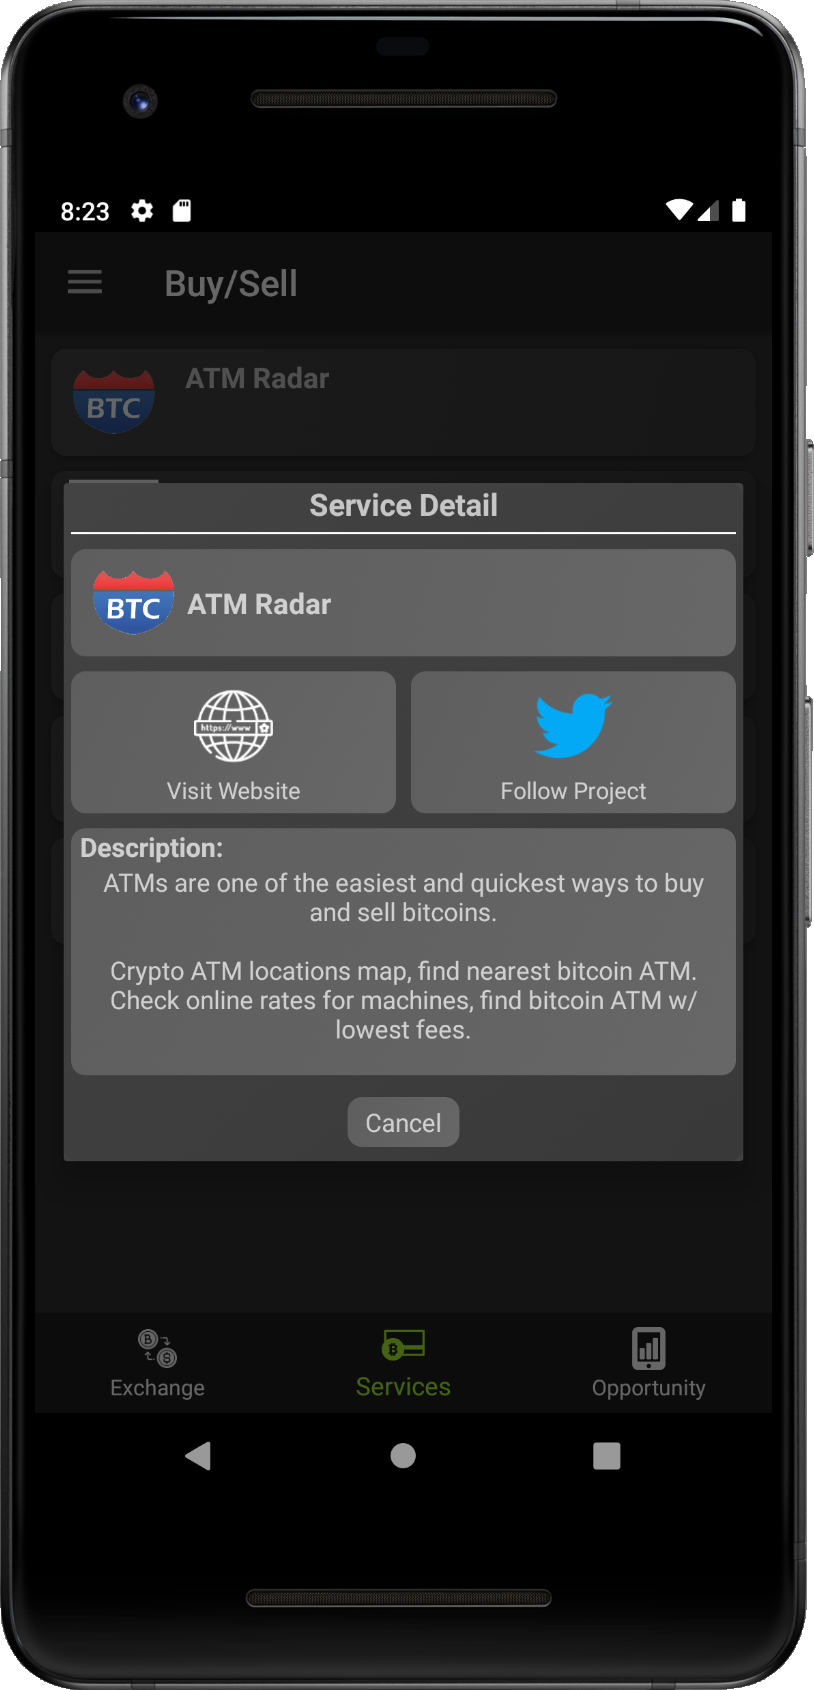
- Popup with detail of selected service.
Popup window with details contains short description of the service, link to the homepage of the service and link to the Twitter page.
Opportunities
Opportunities is special feature, which should help users to find the best rates for trading. Data is cached,
thus real time data on the exchange might be slightly different.
Opportunities are different from Exchange overview, in the way it accesses exchages
directly to read their orderbooks rather than the last traded price.
This might have impact on less liquid markets with higher spread in orderbooks (bigger difference between asks
and bids) and provide bad results, if we compare last traded price.
Please, double check all suggested opportunities before you will execute trades. Data is cached and exchange data might be slightly different. Be careful with your funds.
Opportunity has many parameters. On the following pictures below you can see step by step guide, how to set them to get data you look for.
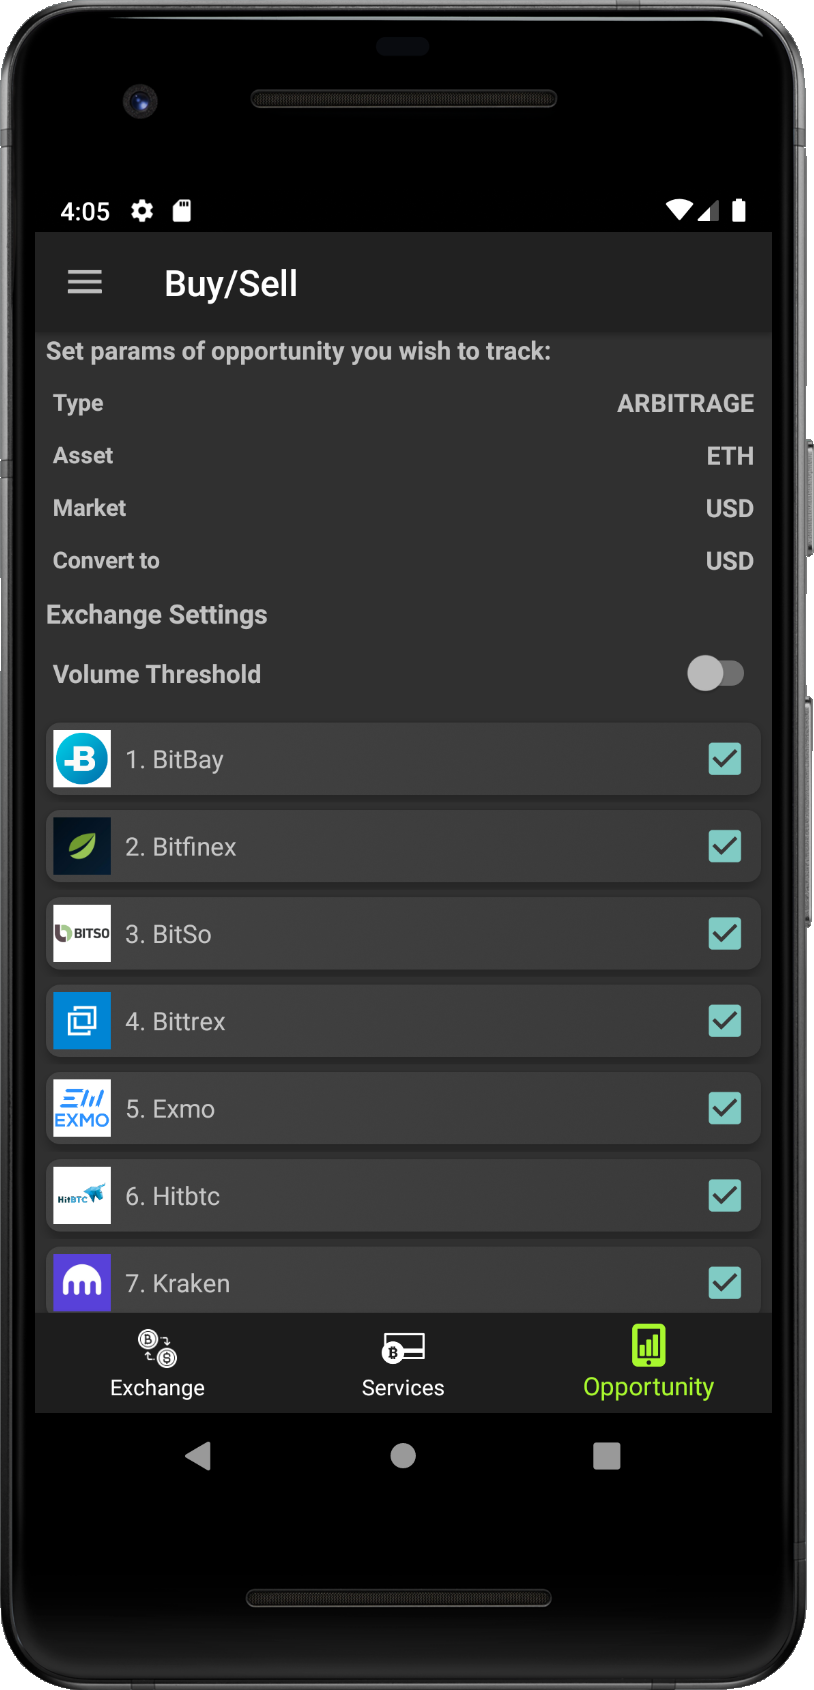
- Step 1 - Opportunity screen with default params.
- Step 2 - To set any parameter tap on the line of param you wish to set.
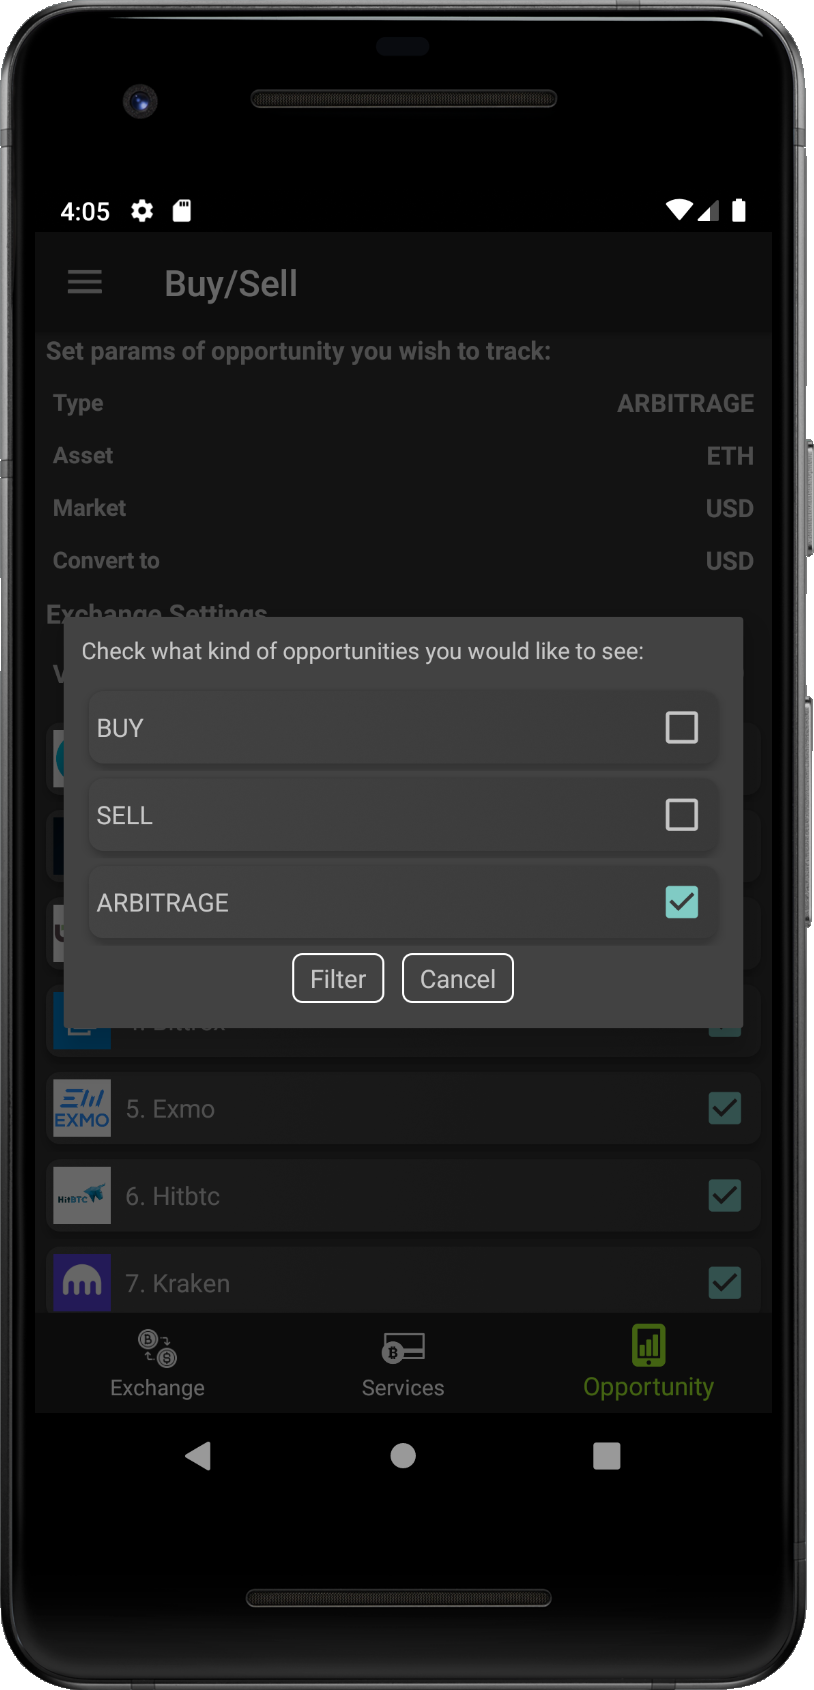
- Step 3 - Tap on the line with Type of the opportunity.
- Step 4 - Popup with types will be displayed.
- Step 5 - Check the type of opportunity you want to find.
- Step 6 - Tap on the 'Filter' button to confirm type.
- Step 7 - Tap on the line with Asset of opportunity.
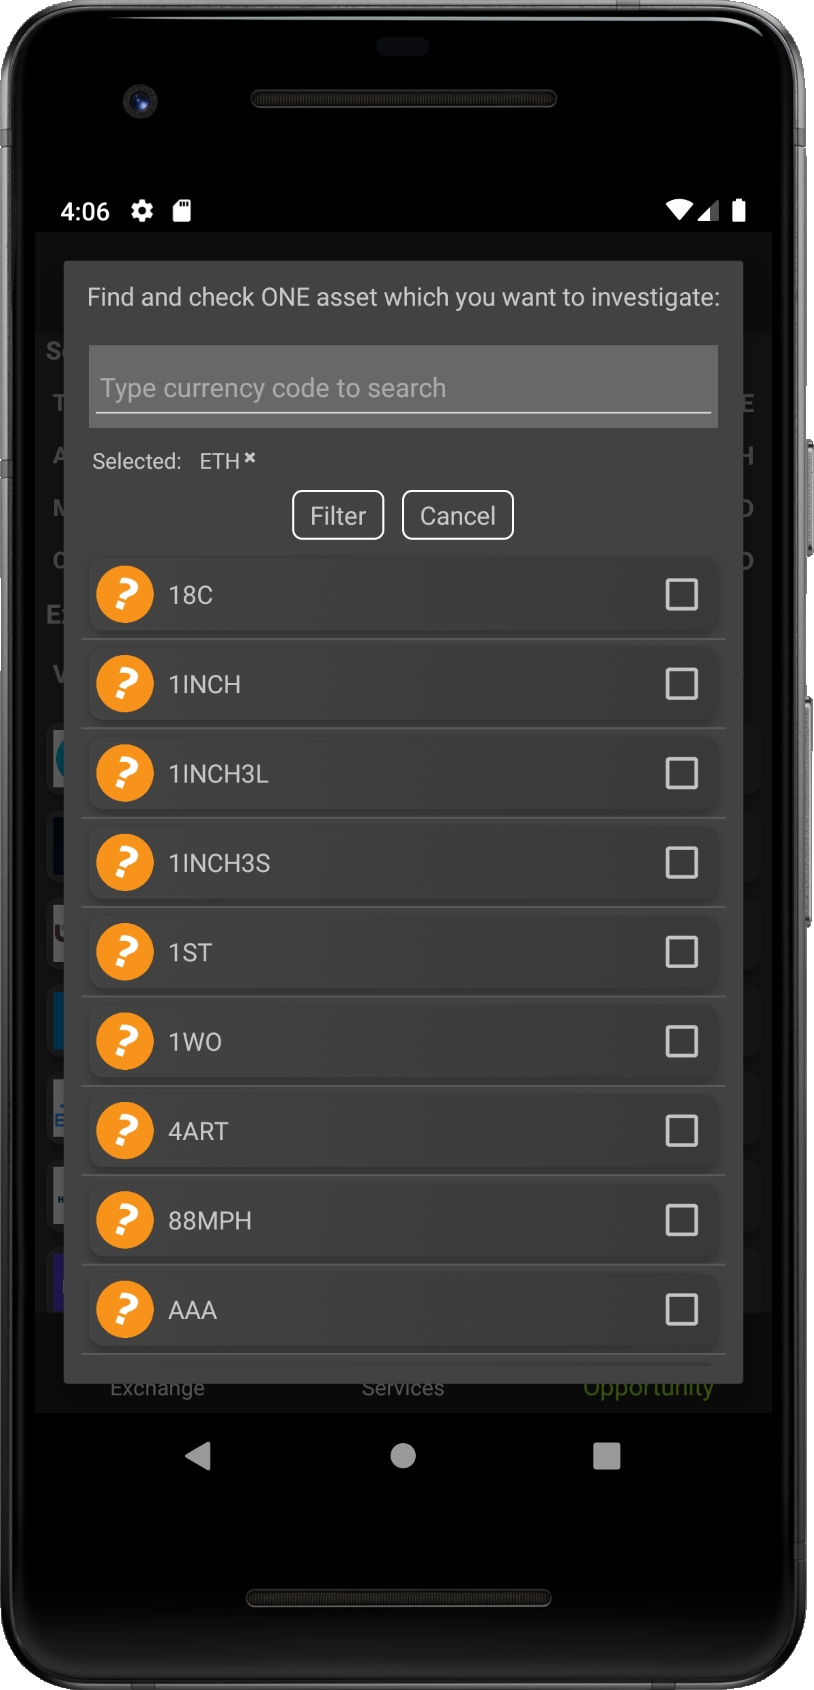
- Step 8 - Popup with types available assets be displayed (you can use search panel).
- Step 9 - Check the asset you want to investigate (only one per oportunity).
- Step 10 - Tap on the 'Filter' button to confirm asset.
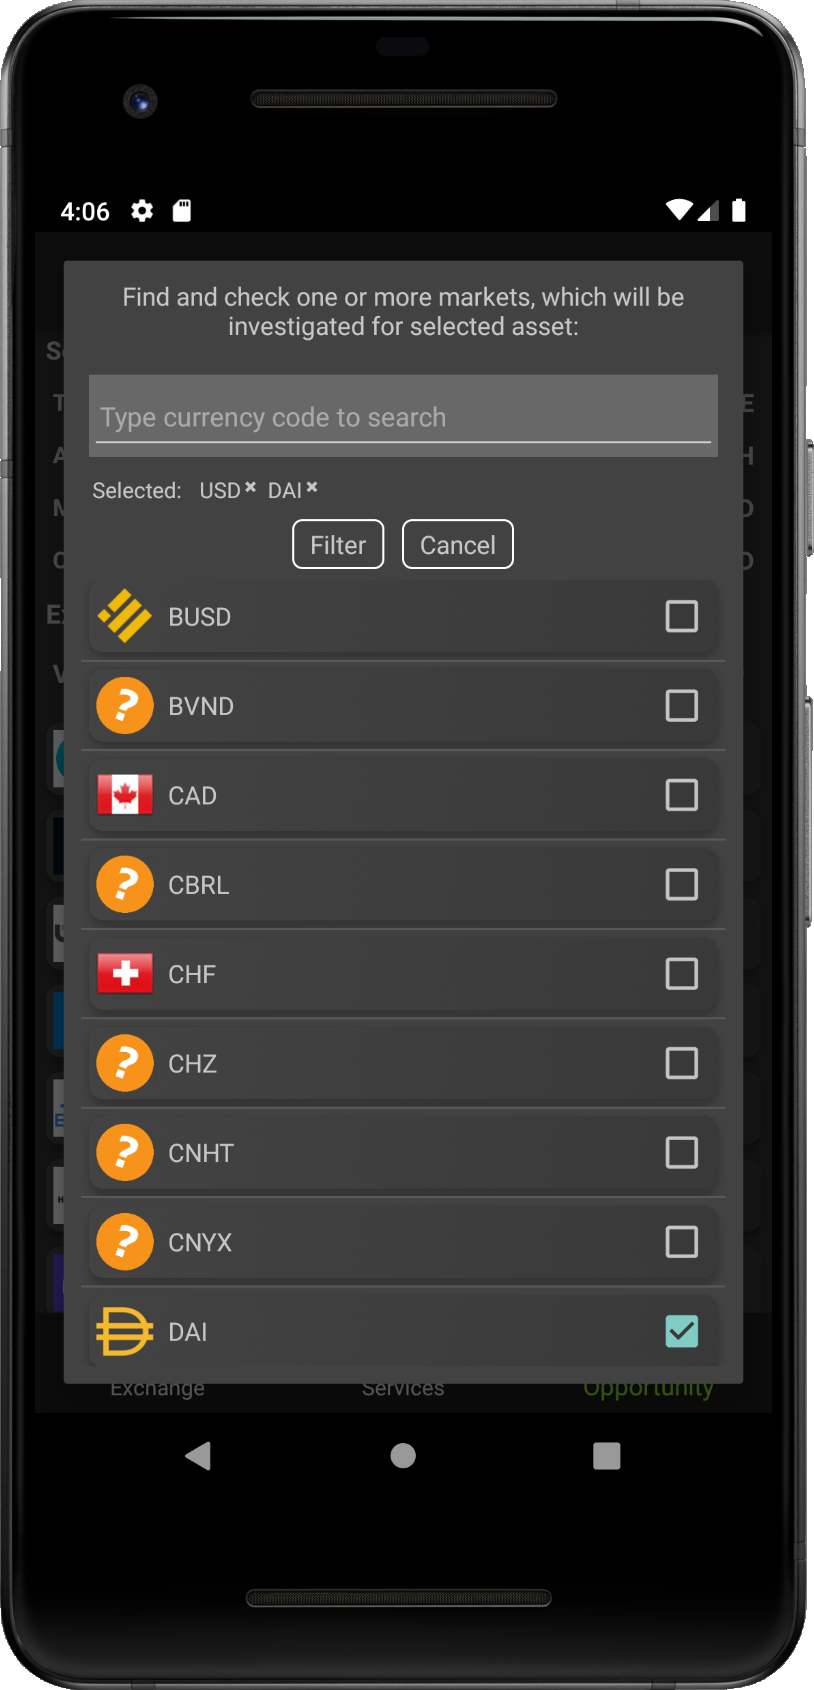
- Step 11 - Tap on the line with Market of opportunity.
- Step 12 - Popup with available markets for the asset will be displayed (you can use search panel).
- Step 13 - Check markets you want to investigate for selected asset. (Delete by tap on selected)
- Step 14 - Tap on the 'Filter' button to confirm markets.
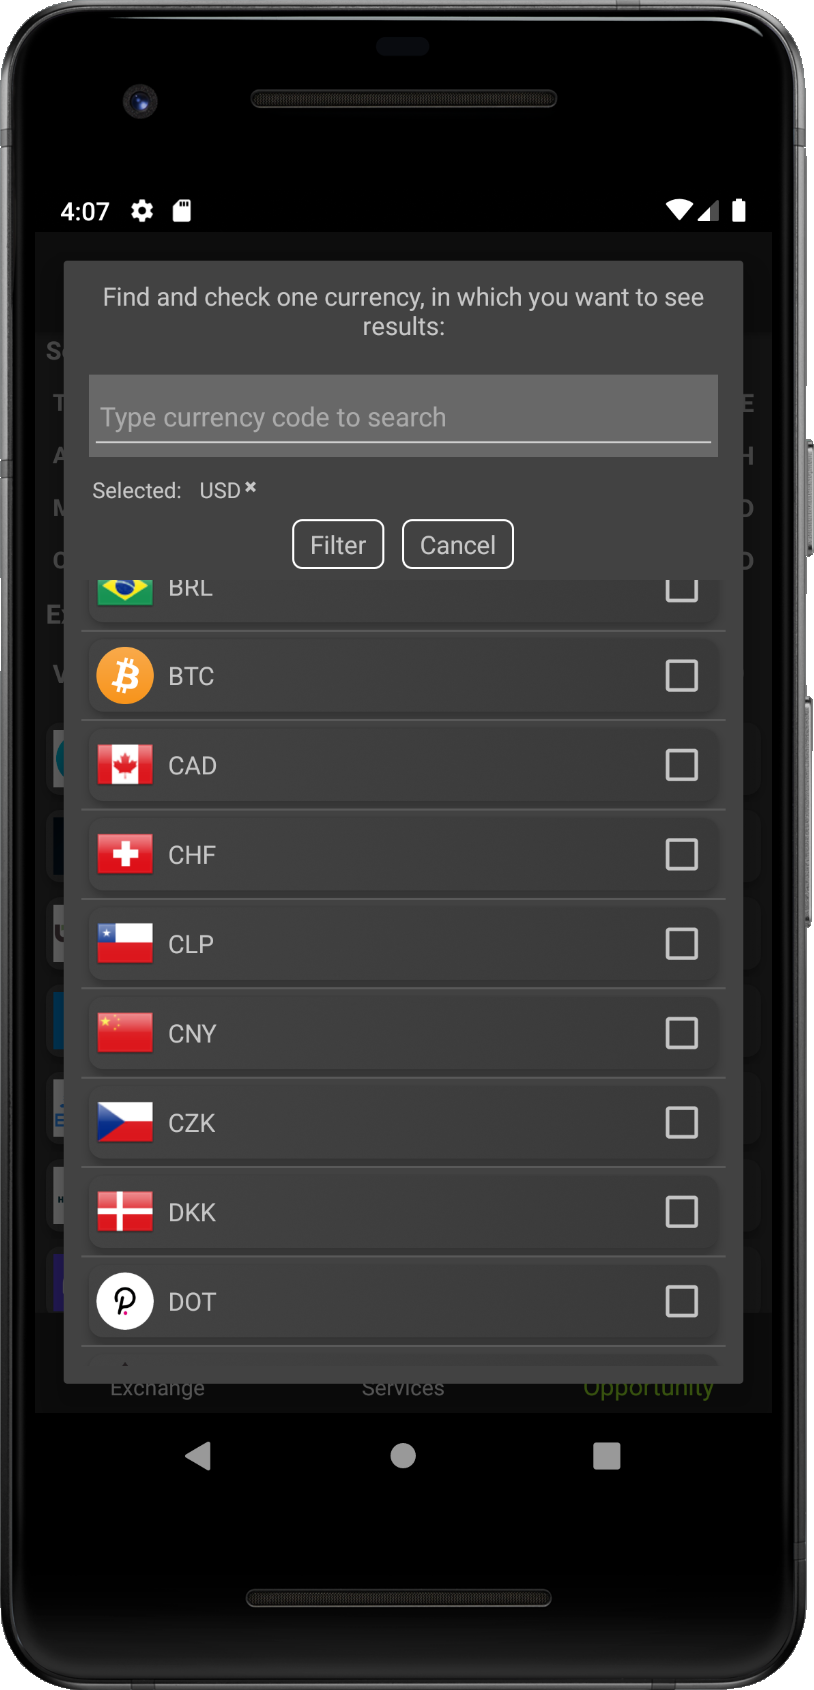
- Step 15 - Tap on the line with Convert to of opportunity.
- Step 16 - Popup with available currencies to convert the asset value into will be displayed (you can use search panel).
- Step 17 - Check the currency which should be used to compare results (only one).
- Step 18 - Tap on the 'Filter' button to confirm conversion currency.
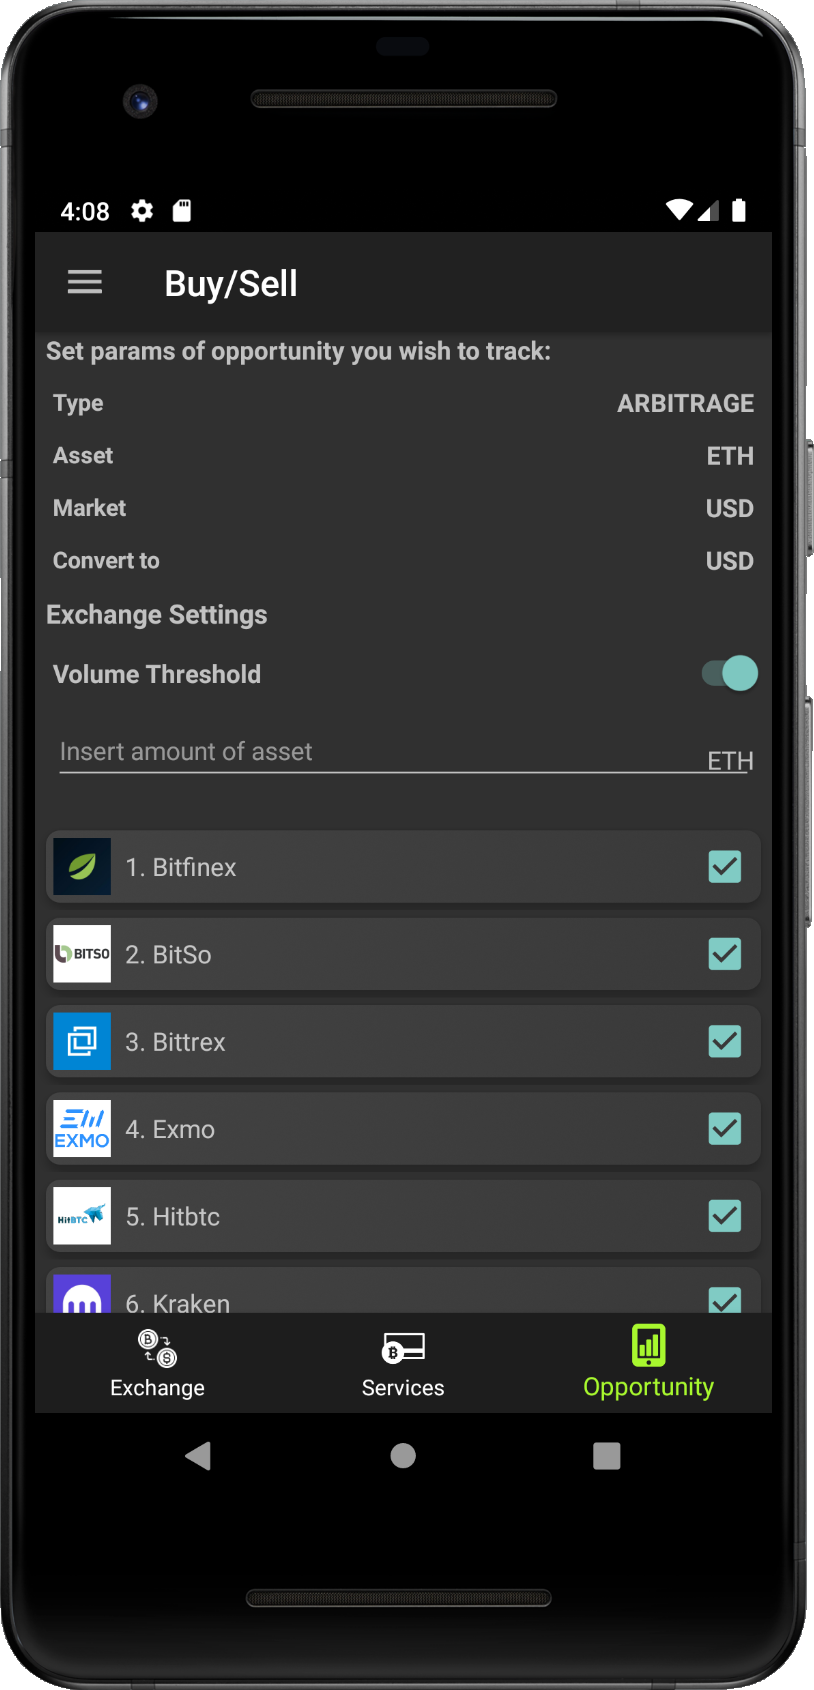
- Step 19 - [Optional] Allow only exchanges with volume above selected threshold.
- Step 20 - [Optional] Set the threshold of volume in the investigated asset units.
- Step 21 - [Optional] Setting of threshold will exclude exchanges with lower volume from search.
- Step 22 - [Optional] Uncheck exchanges from the list, which you do not want to include into search.
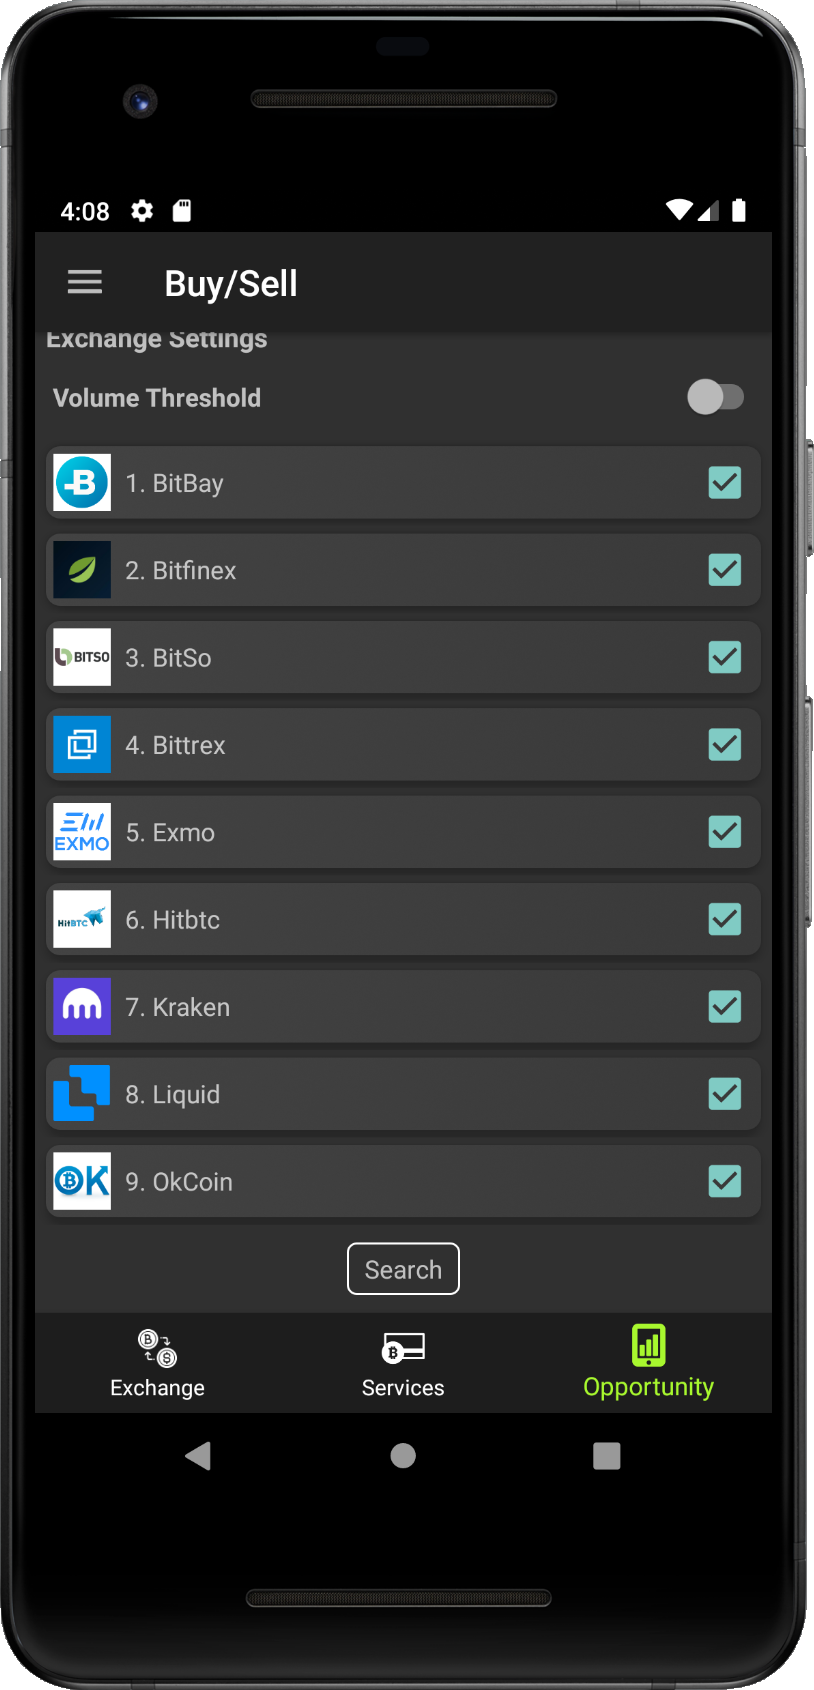
- Step 23 - When everything is set, scroll down to the bottom to find button 'Search'.
- Step 24 - Tap on the button 'Search' to display resutls.
- Congrats - You set the opportunity parameters and let the app generate results.
Application does not make any trades itself. It provides only overview of opportunities.
Arbitrage opportunity
If you select ARITRAGE type in Set params section, you will get result list of all possible
arbitrage tradings with expected profits (arbitrage opportnities with expected loses are not displayed).
And what is the arbitrage trading? It means trading assets on the same market but in different exchanges, where you
exploit differences in price. Basicaly it means you can buy the asset on one exchange and sell on other with profit.
More info can be found on Investopedia.
Opportunities shown in the result list are sorted by expected profit from the highest to the lowest.
Each item shows exchange where to sell the asset on the left and where to buy the asset on the right.
The exchange info contains name and logo, market, the best price from the orderbook converted to selected currency and
the price in the market currency/asset.
To see detail of individual arbitrage opportunity, tap on any record in the oportunity list. It will show popup with information
about markets involved into the arbitrage opportunity.
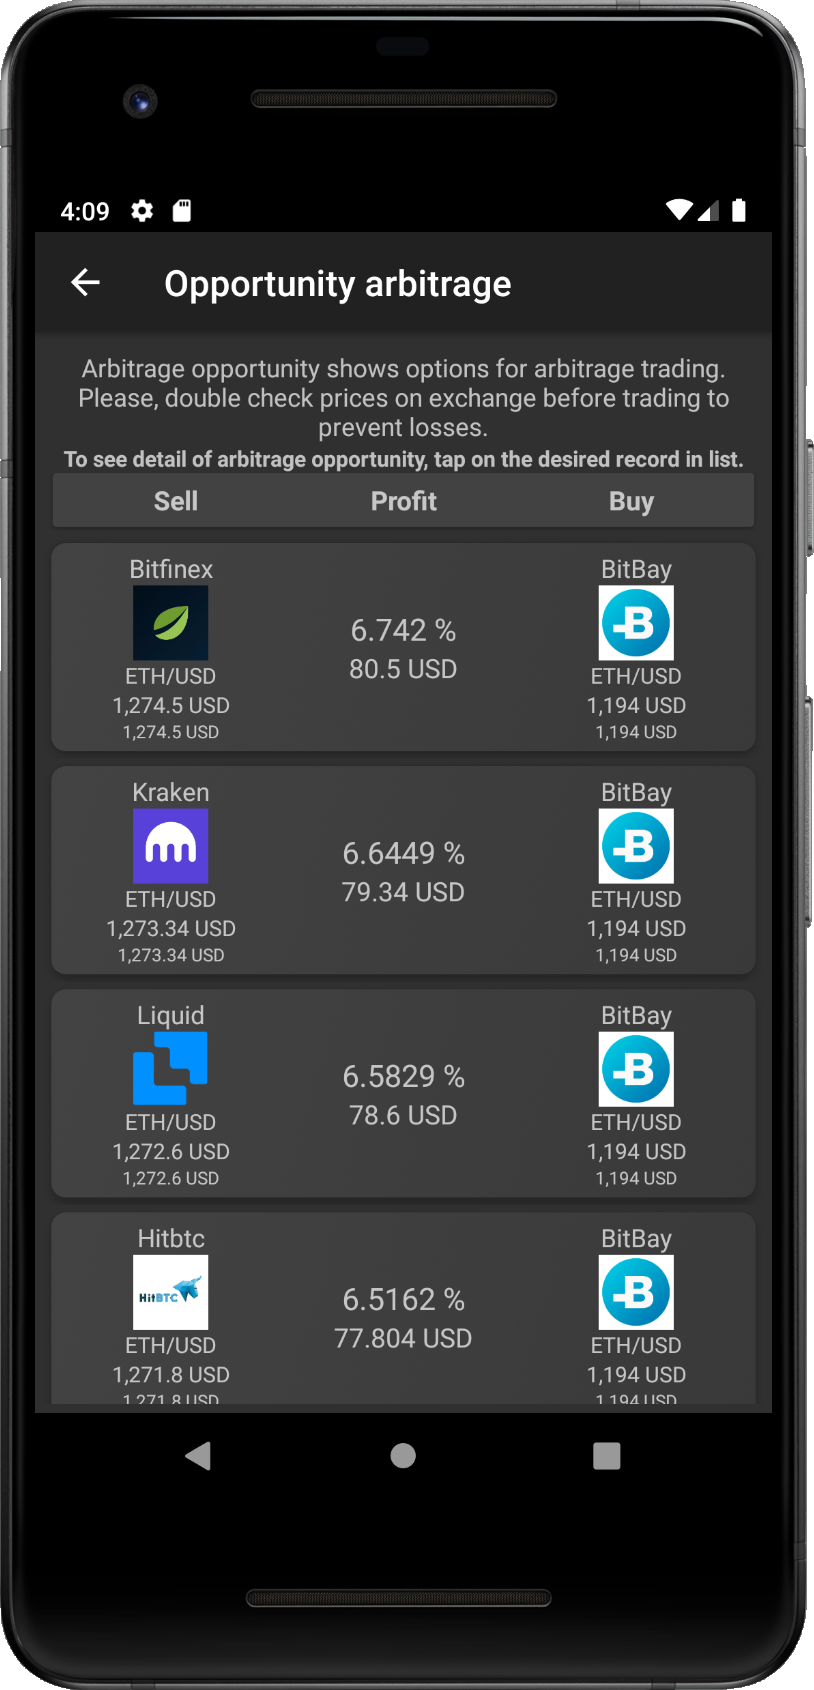
- Arbitrage opportunities result list.
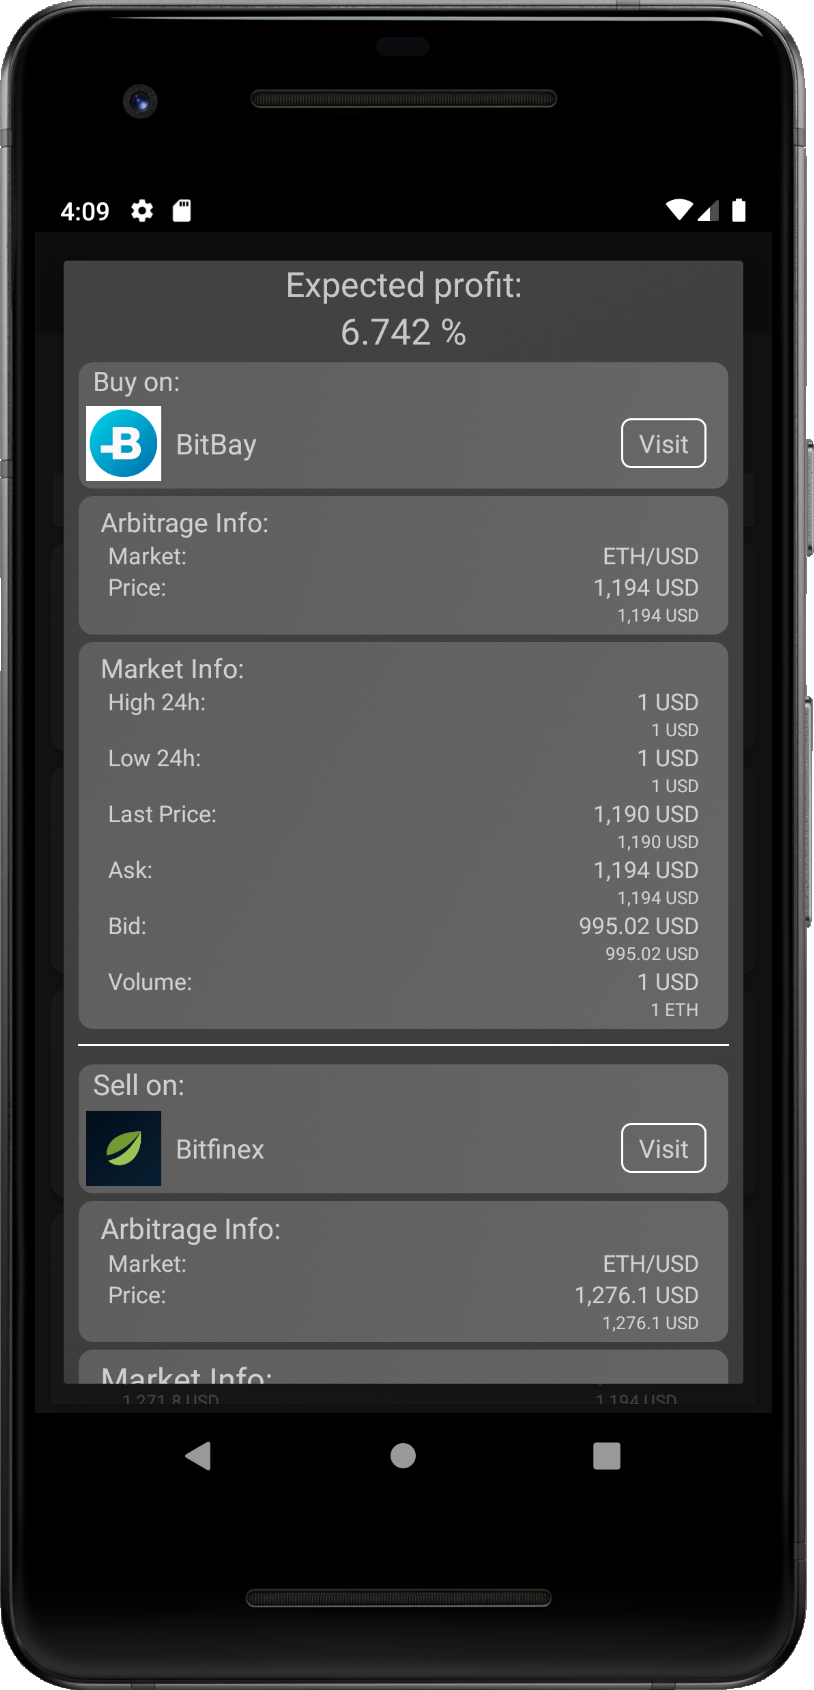
- Selected arbitrage detail popup.
The detail shows expected profit and both markets, buy market info and sell market info. It sums arbitrage info and shows market details as ticker - basic data about the market, such as: highest and lowest price in last 24 hours, last executed price, current ask and bid from orderbook and reported volume.
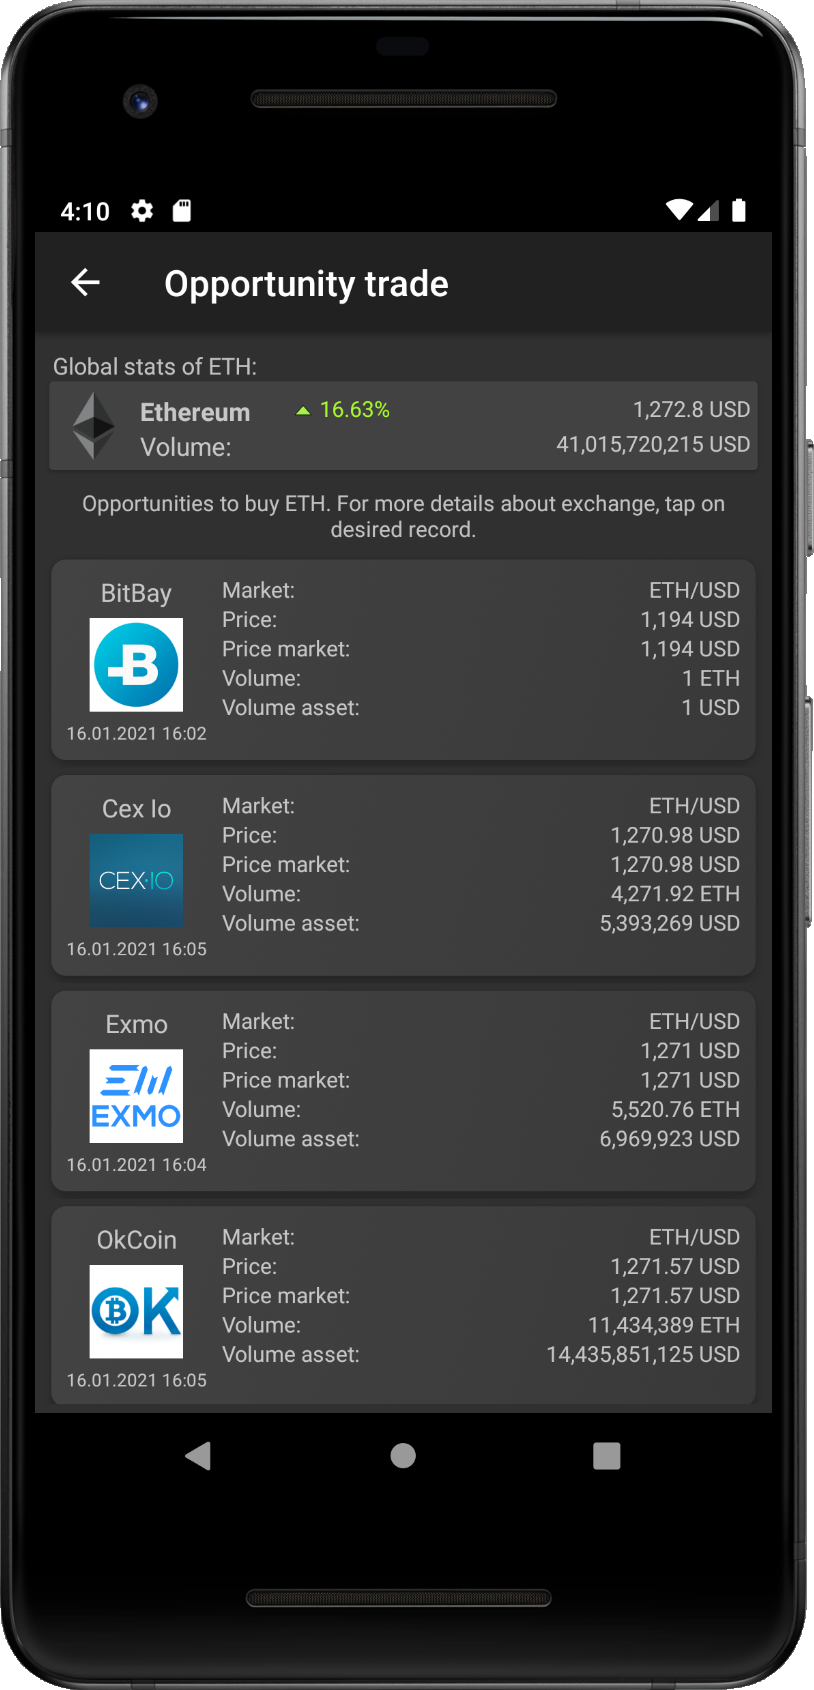
Buy opportunities shows the best rates to buy asset on exchanges selected during the Set params process. On the top of the screen is widget with global stats, reported by CoinGecko, thus you can easily compare shown results with global value.
Opportunities are sorted from best price to the worst. Each item contains basic data about the recommended
market.
Data is sorted into 3 columns. The first contains exchange name, logo and time when the data was fetched.
Second column contains labels for values in third column. These values are market/asset descripton,
converted best buy price, best buy price in market currency, asset volume, volume in converted currency.
To see detail of individual buy opportunity, tap on any record in the list. It will show popup
with data about the market.
- Arbitrage opportunities result list.
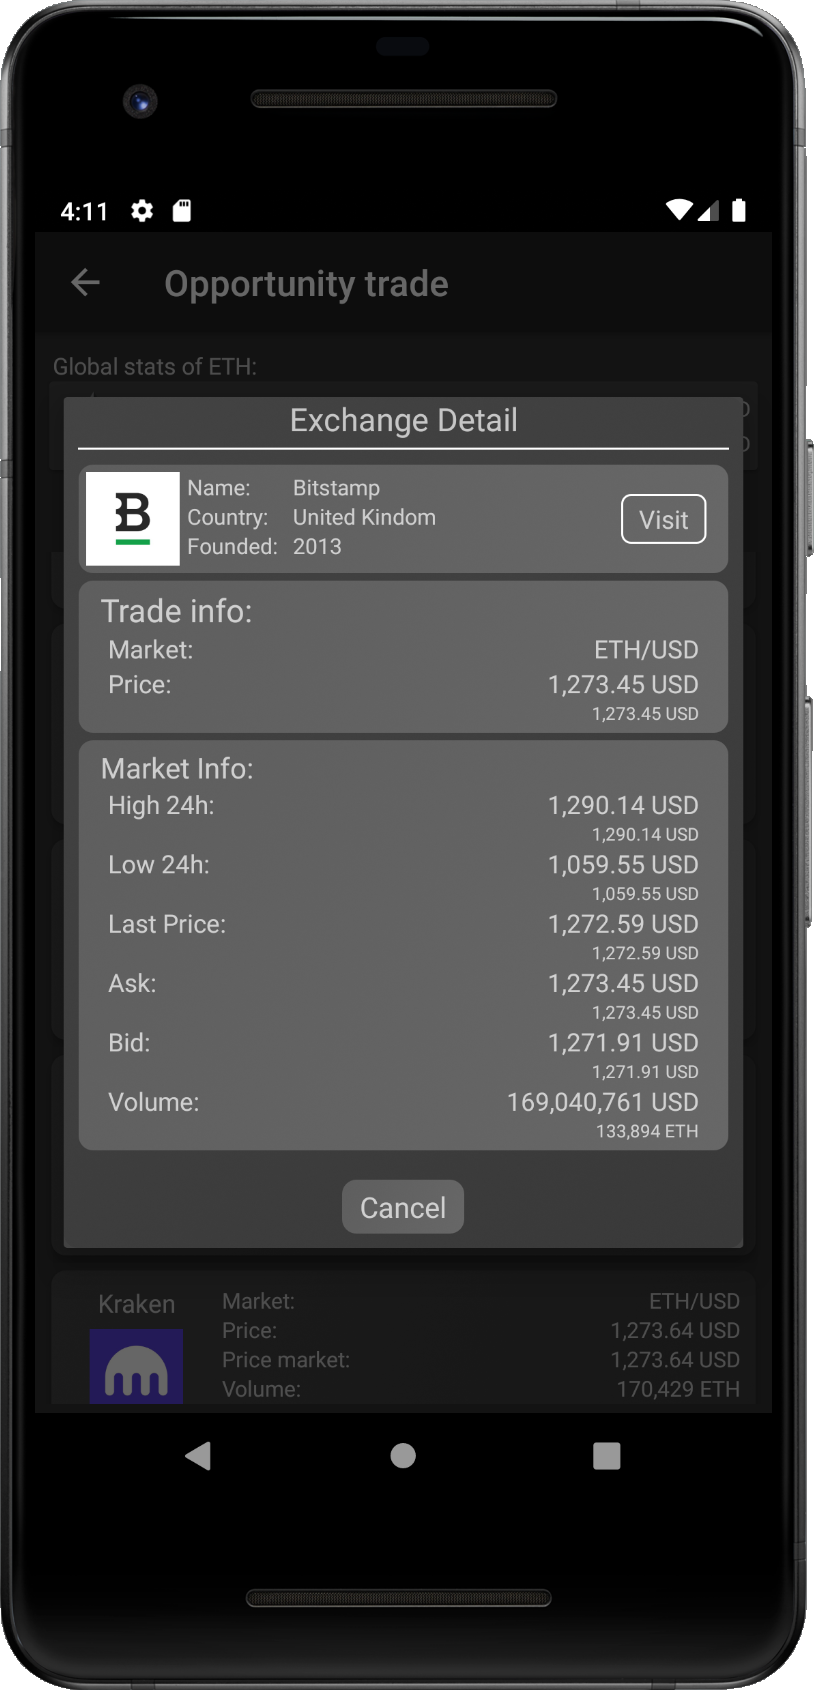
- Selected arbitrage detail popup.
The detail shows detai about the exchange and info about the suggested buy opprotunity with converted price into selected currency. Furthermore, you can find there market data as the ticker - basic data about the market, such as: highest and lowest price in last 24 hours, last executed price, current ask and bid from orderbook and reported volume.
Sell opportunity works exactly in the same way as Buy opportunity. Please, check the Buy opportunity and Set params, where all necesary steps are described and explained.
Portfolio
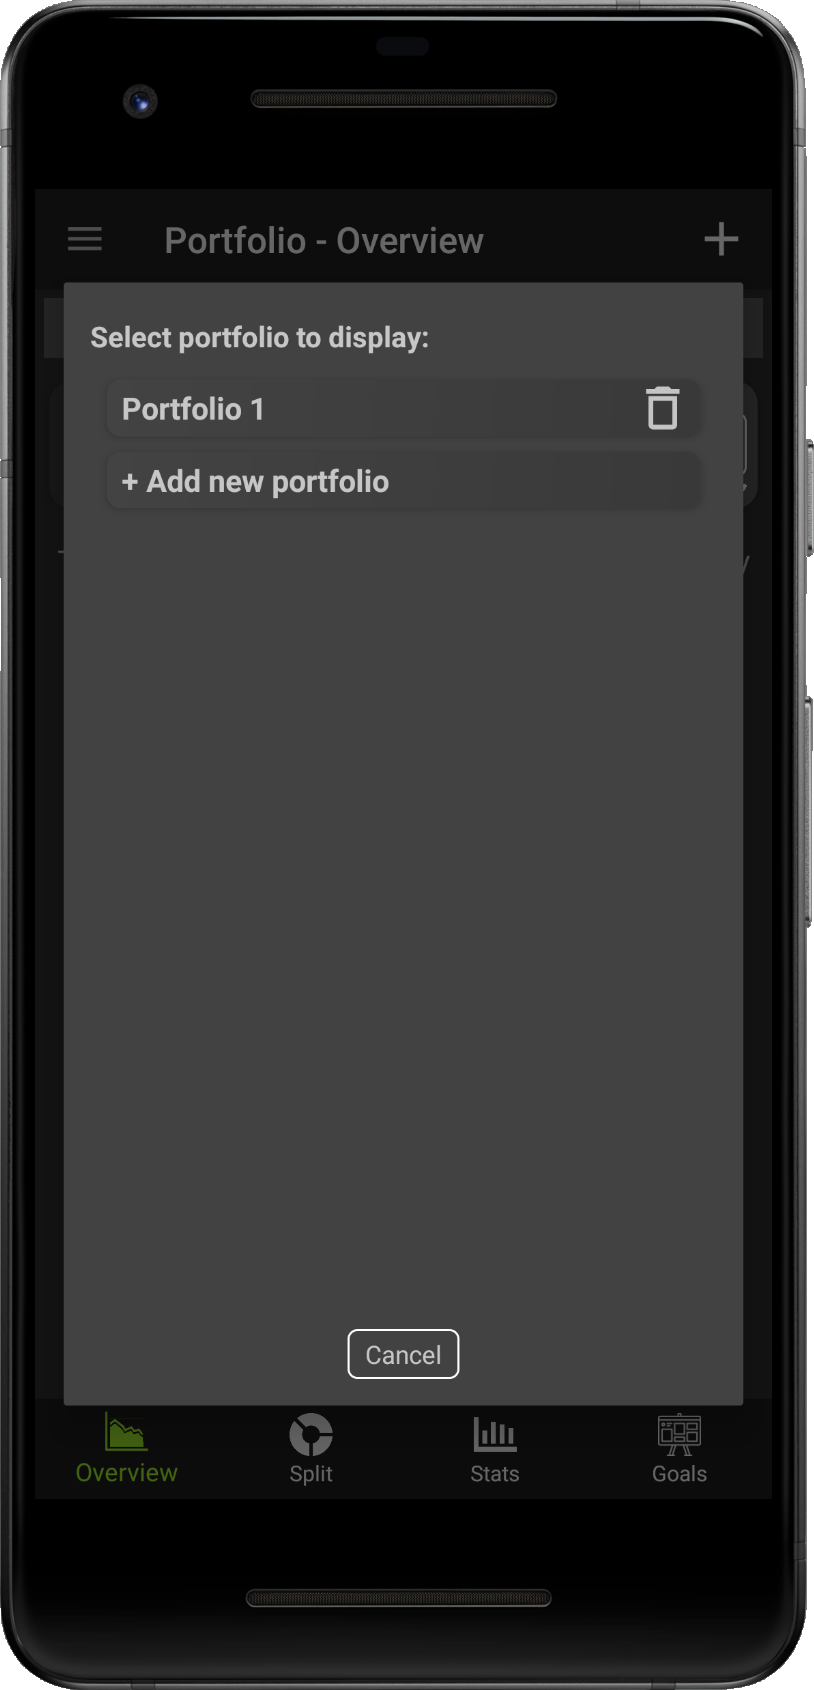
Portfolio section tracks the performance and values of assets in your holdings. You can
create multiple portfolios with multiple assets.
Portfolio is divided into 4 sections. You can switch between existing portfolios from each
of these sections. Sections are following:
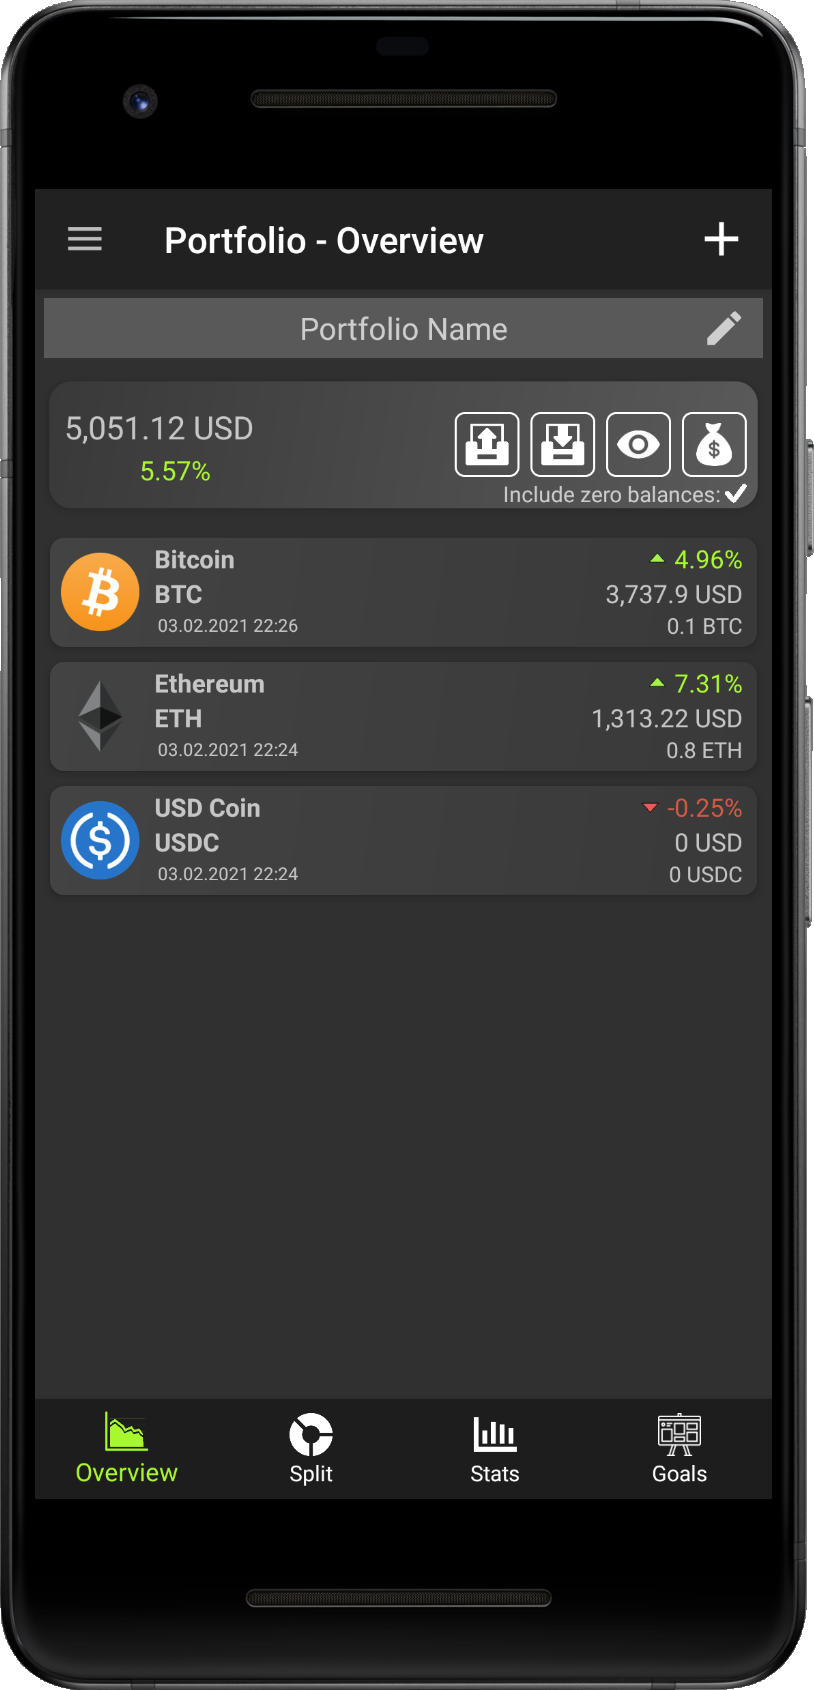
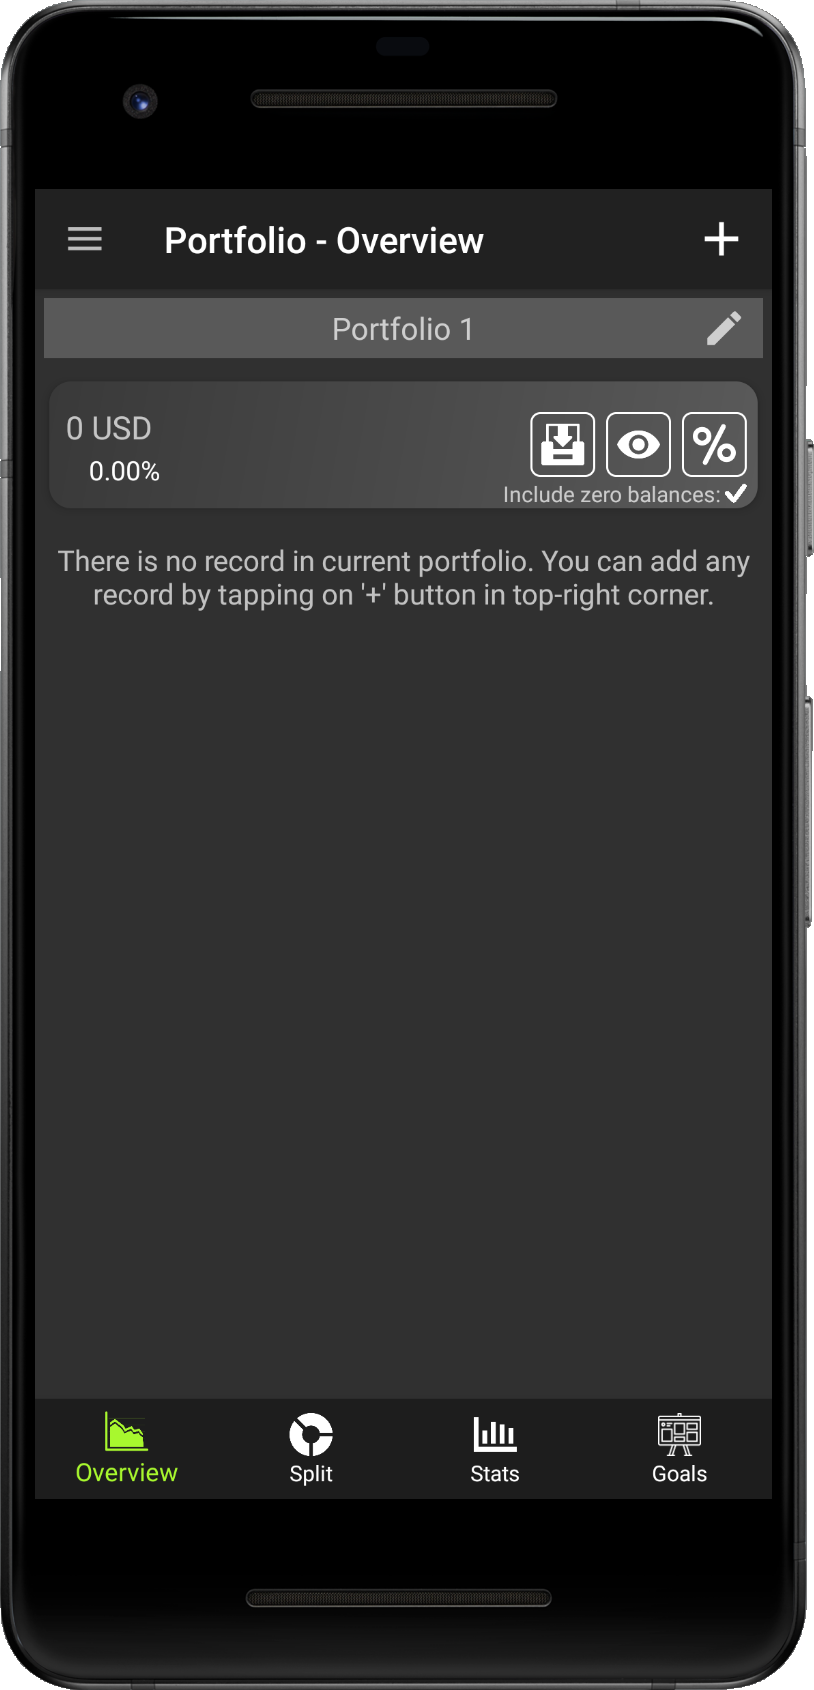
Overview
Overview shows overall value of the portfolio and list of each asset with its value. You can switch
to the asset detail screen or use some action buttons to adapt and manage your portfolio.
Split
Coin split shows diversification of your portfolio. You can see total value of the selected portfolio
and contribution to it per each asset via Pie chart.
Stats
Stats are very similar to the stats in Portfolio Detal, but in here calculaton is applied on whole
portfolio. You can track the performance of the portfolio and best and worst assets based on different
metrics.
Goals
Shows list of your investing goals for the seleceted portfolio and overview of your progress to
achieve these goals.
In the followings lines we are going to explain how to create you first portfolio, how to edit it, manage it, back it up or even delete it.
Create
- Step 1 - Tap on the line with Market of opportunity.
- Step 2 - Popup with available markets for the asset will be displayed (you can use search panel).
- Step 3 - Check markets you want to investigate for selected asset. (Delete by tap on selected)
- Step 4 - Tap on the 'Filter' button to confirm markets.

- Step 5 - Tap on the line with Convert to of opportunity.
- Step 6 - Popup with available currencies to convert the asset value into will be displayed (you can use search panel).
- Step 7 - Check the currency which should be used to compare results (only one).
- Step 8 - Tap on the 'Filter' button to confirm conversion currency.
- Step 9 - [Optional] Allow only exchanges with volume above selected threshold.
- Step 10 - [Optional] Set the threshold of volume in the investigated asset units.
- Step 11 - [Optional] Setting of threshold will exclude exchanges with lower volume from search.
- Step 12 - [Optional] Uncheck exchanges from the list, which you do not want to include into search.
- Step 13 - Tap on the line with Market of opportunity.
- Step 14 - Popup with available markets for the asset will be displayed (you can use search panel).
- Step 15 - Check markets you want to investigate for selected asset. (Delete by tap on selected)
- Step 16 - Tap on the 'Filter' button to confirm markets.
- Step 17 - Tap on the line with Convert to of opportunity.
- Step 18 - Popup with available currencies to convert the asset value into will be displayed (you can use search panel).
- Step 19 - Check the currency which should be used to compare results (only one).
- Step 20 - Tap on the 'Filter' button to confirm conversion currency.
Edit
Delete
Overview
Add Asset
Actions
Split
Stats
Goals
Farming
Farming screen brings you overview of opportunities to farm yields on your crypto holdings. Some of them are simple ledning markets,
some are investiment opportunities with fixed yields and some brings complex strategies to connect multiple opportunities into one,
i.e. with tranches or lending with liquidity positions etc.
This overview contains some projects, which are listed in Loans section also, however Loans
section offer more options such as listing Lending markets by token and more.
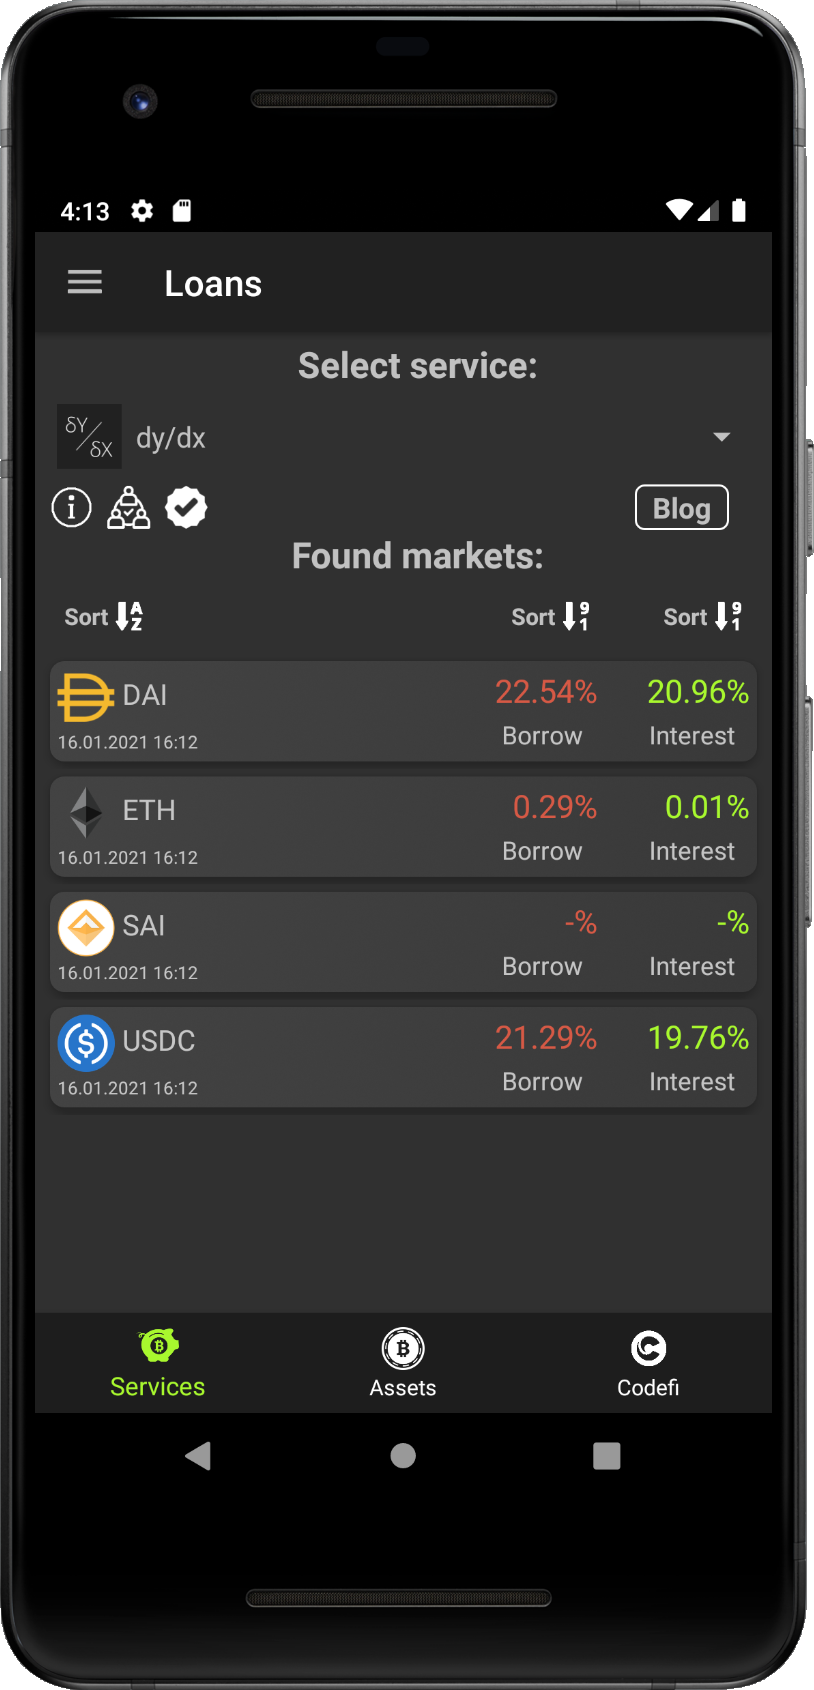
Selected service display icons under its name. It shows network logo, on which the service runs, info icon (tap on it to open popup
with more info), centralized / decentralized icon and if the service was tried and verified by us.
There is also 'Blog' button, which will redirects you to the project's blog, if it is available
Furthermore you can sort supported assets in alphabetical order or by yields, which are provided by the selected service.
Sorting is performed simply by tap on the sorting icons on the top of the asset list.

Changing the Yield Farming Service is very straightforward. tb on the dropdown with the service name and select the service you want to explore, as shown on following pictures:
- Tap on the dropdown with service logo and service name (here dy/dx).
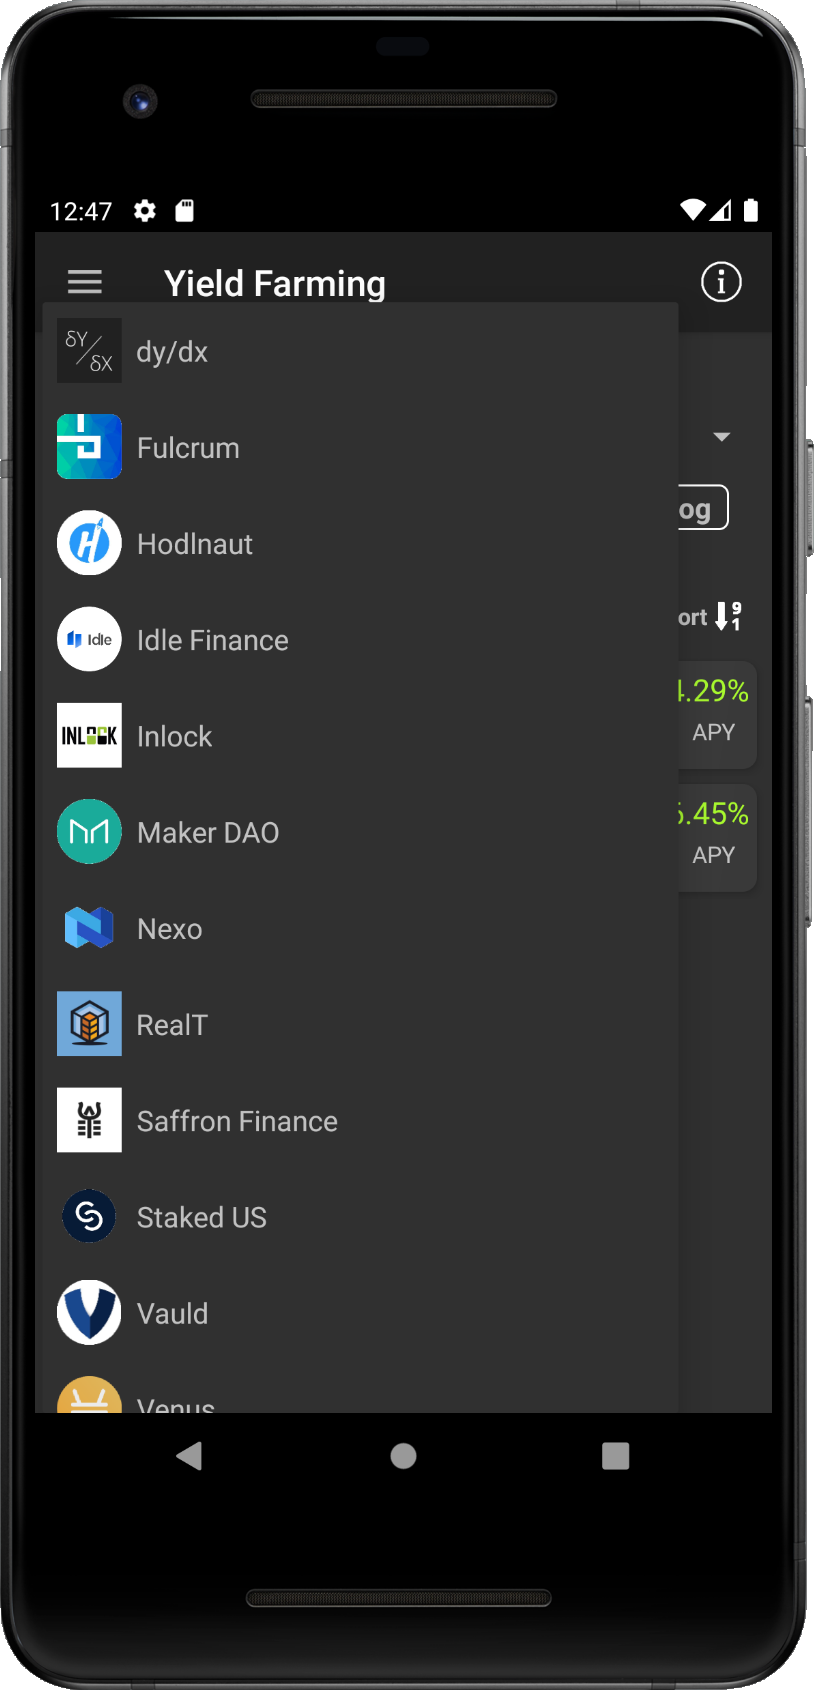
- Dropdown will be expanded and you can select service you want to explore (here Saffron Finance).
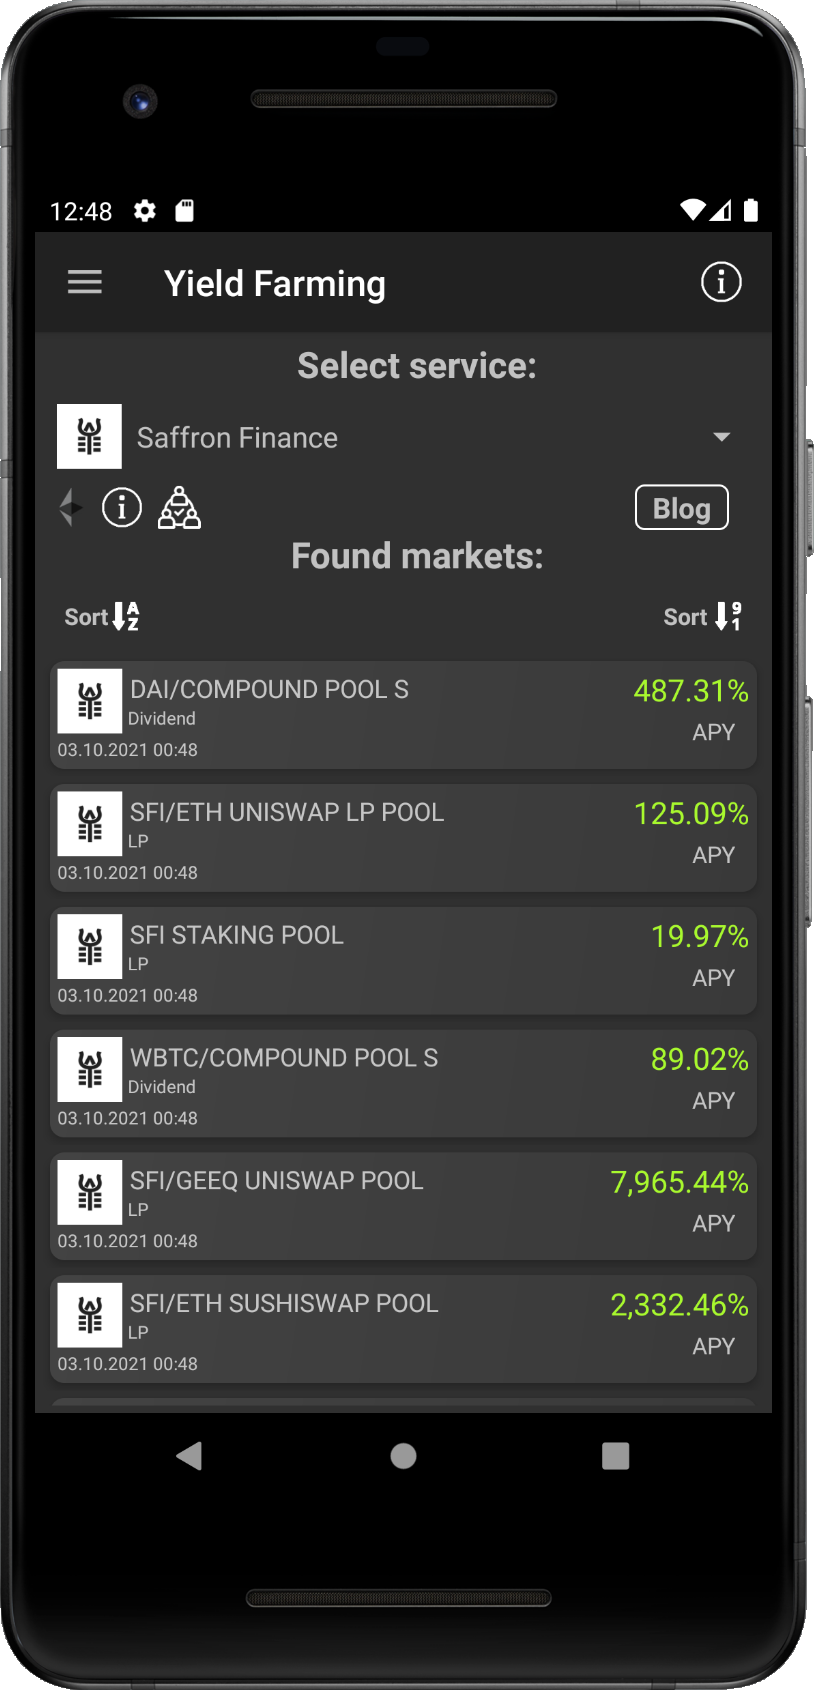
- Selected service is loaded with its assets available for farming.
If you want to see detail info, tap on the info icon to display info popup with more details about the selected service, as shown on following pictures:
- If you want to see more details about selected service, tap on the info icon .
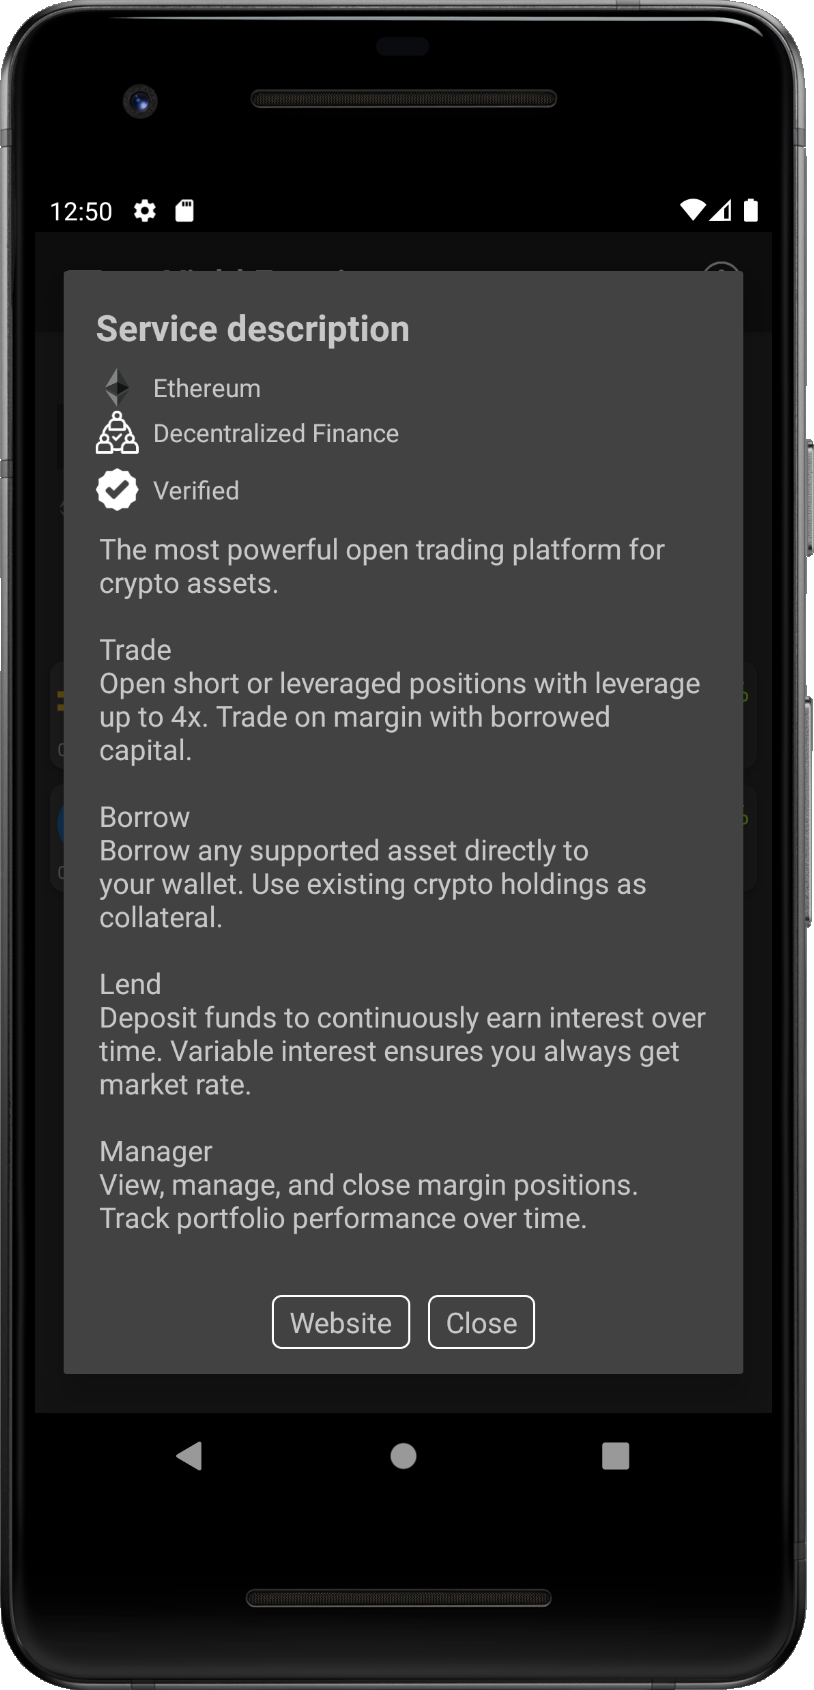
- Popup with brief info will be shown. To visit website of the project, tap on the 'Website' button, if you want to get back to the asset list, tap on the 'Cancel' button.

- You got back to the list of assets available for farming on the selected DeFi services.
Loans
One of the most used financial tool nowadays are loans. DeFi opened doors for lending money without
any middleman, relying on the smart contract only. It brings smart contract risks into the game. Thus
you should be really careful with these projects. On the other hand it brings opportunity to anyone to get to
the loan, without need to provide KYC/AML data.
The rise of DeFi brought another type of projects, known as Open Finance. They are not necessarily decentralized,
but they offer similar services of loans with your crypto used as collateral. Or you can provide liquidity into
the project and earn interest on your funds, similar to saving account.
This section introduces DeFi and Open Finance Services, which provide loans. You can find here
their products, their brief description and useful links.
Then you cand find here Assets section, which compares lending services per asset. You can find the best
service for the asset you want to lend, or you want to earn on.
Last part is CodeFi. For now, this works as link to the
CodeFi website. This project is developed under
Consensys and provides bunch of tools, such as CodeFi data
with ranking system of DeFi porjects.
Double check the rate on the service official webpage before you will use it. It could happen that rates might differ due to cached values or because of processing in data provider (such as different rates for user tiers etc.)
Services
Service screen shows overview of products on the lending market per service. You can select the service you are interested in from
the drop down on the top of the screen.
There is info line below the drop down. There is group of icons on the lef side and in the case the project has its own blog, there
is link button 'Blog', which redirects you to the blog.
If you tap on the info icon - , popup with details will be shown. Other icons shows it the project is
considered as decentralized or centralized. Last icon is shown if the project is trustworthy, by community and tested by us.
Then you can see markets which were found for selected service.
- Lending service screen with markets.
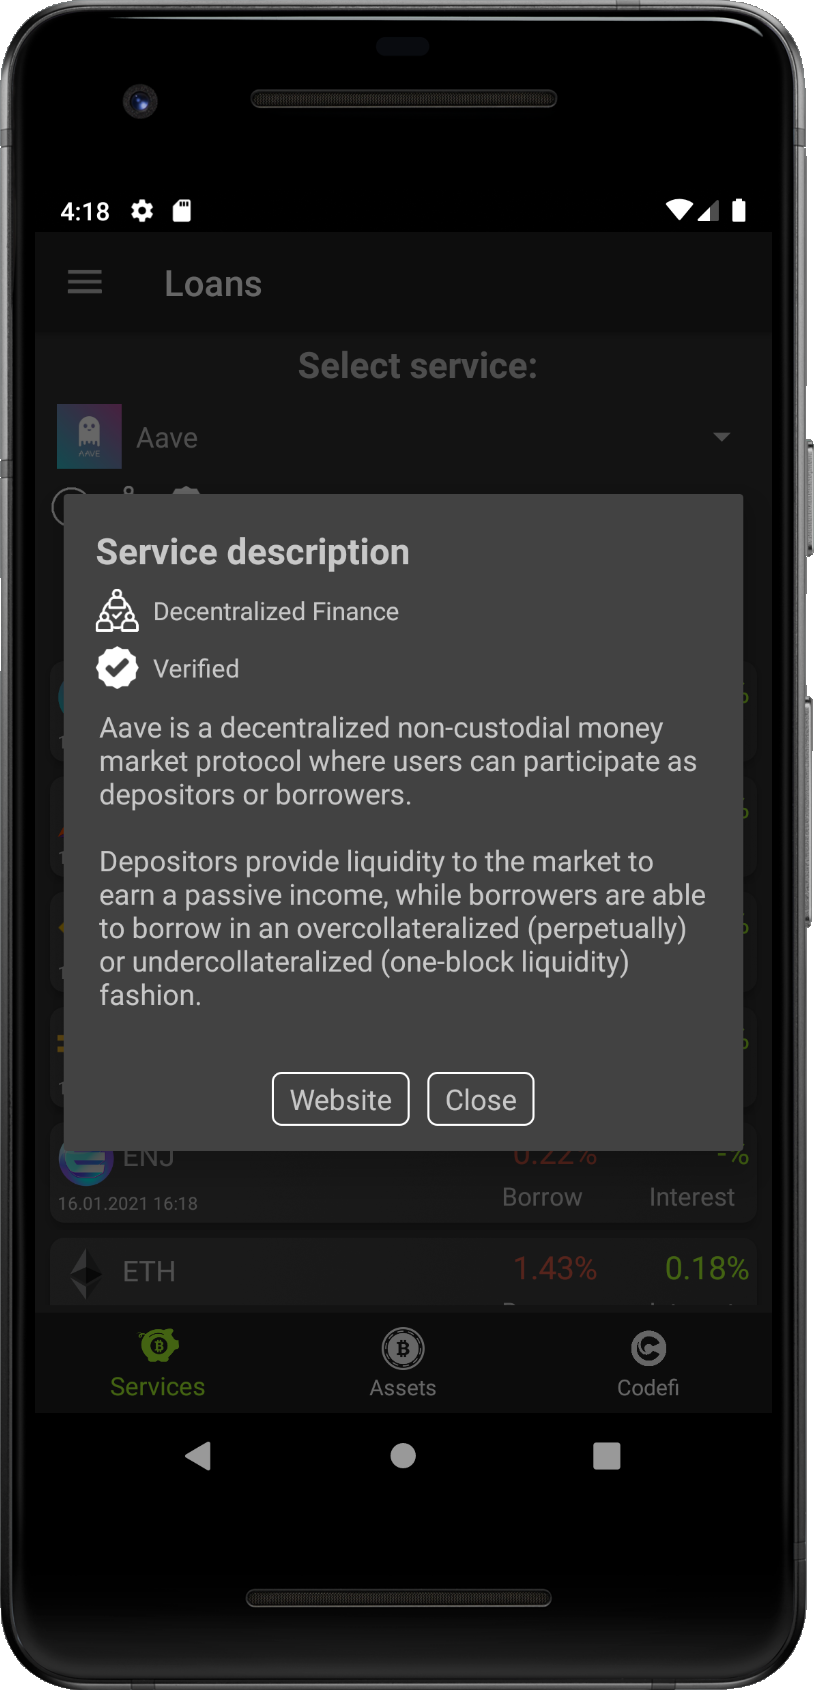
- Lending service popup with details.
Market data is collected from project directly or from the Coingecko. You can
sort the list markets by name, borrow rate or supply (erning) interest rate. Each item then shows, when the data was updated.
If you tap on the market, it will redirect you to the homepage of the project.
Detail popup itself contains brief info and description about the project and link to the project homepage.
Assets
This section provides overview of lending markets through tracked lending services. It is different from Services,
where you can track markets only in selected service.
Select the asset, which you would like to compare through lendning markets, from the drop down. Application will reload
and update the list of services automatically.
If you would like to see detailed info about the asset, tap on the button 'Detail', which redirects you to the Coin detail.
Markets are sorted by their name by default. But you can re-sort them by name, or by borrow rate or supply (earning) interest rate.
Each market item contains its name and logo, date when it was updated, info icons and borrow rate and supply (earning)
interest rate. If you tap on the market, it will redirect you to the homepage of the project.

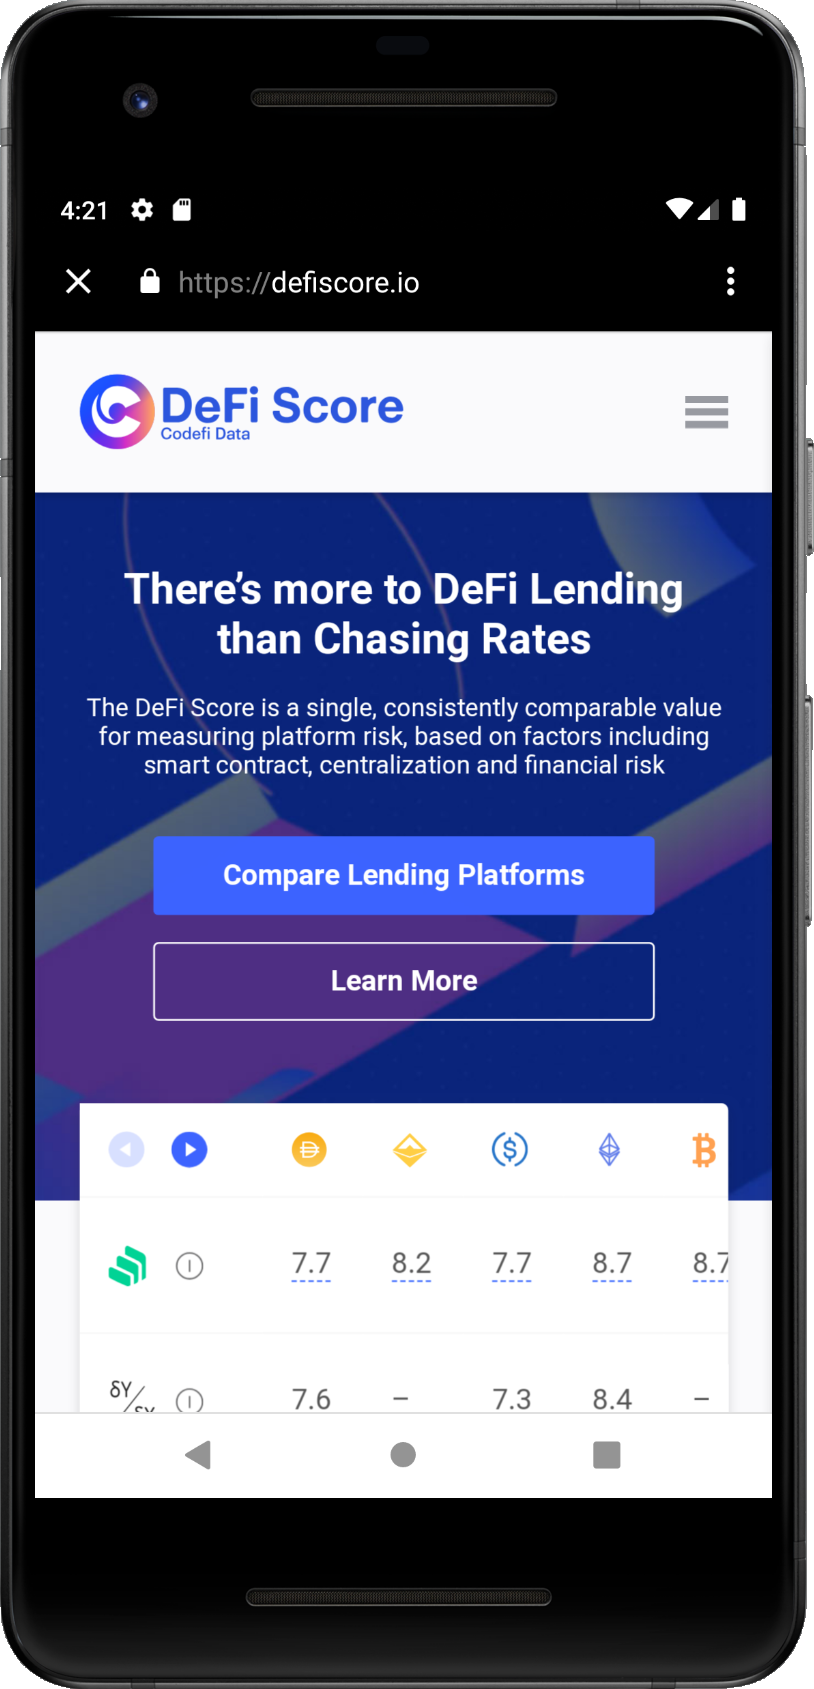
Codefi
Codefi is a suite of data and analytics solutions for the investment ecosystem by Consensys. It provides multiple analytic
tools focused on crypto currencies. In our case we will focus on DeFi tool. Because it works as simple link for now, let us
briefly introduce the service itself.
DeFi Score is a single, consistently comparable value for measuring platform risk, based on
factors including smart contract, centralization and financial risk. It ranks each market (pools) listed in different projects
on scale 0-10 (worst-best) based on diffetent metrics. For more info check the official
web.
Compare compares statistics of chosen asset across DeFi
projects. There are multiple metrics you can compare, such as historical yield, liquidity, etc. For more info check the official
web.
Inspect is an open source project dedicated to protocol transparency in DeFi, tracking
all public audits, admin key details, oracle dependency and on-chain activity. For more info check the official
web.
Info
This section should serve as knowledge base for new comers. It aggregtes useful sources if you want to start with crypto currencies.
Books section is focused, surprisingly, on books. you can find here books focused more on
economic part, while others are more technical. You can compare these books and check them in online shops.
Events provides an overview on conferences and meetups focused on blockchain technology and crypto
currencies. You can compare upcoming events and check their details.
Academy provides list of courses and articles focused on crypto currencies, underlying technology or event
trading. Currently we use two data sources, Binance Academy and BlockGeek.
Books
This section brings list of most famous books for understanding crypto currencies. We tried to handpick most relevant books,
even some might be a little bit older.
Each item in the list contains: Book cover, Name of the book and Authors. You can find there also icons of amazon (link),
and e-book reader, which signs author made the book accessable for free.
Tap on the book to open popup with details. Detail popoup shows the info widget, with date as shown in the list on the top.
Under the info widget is link panel. It contains buttons, which redirects you to the amazon shop, gihub (if he book is
accessable for free by author) and twitter profile of the author.
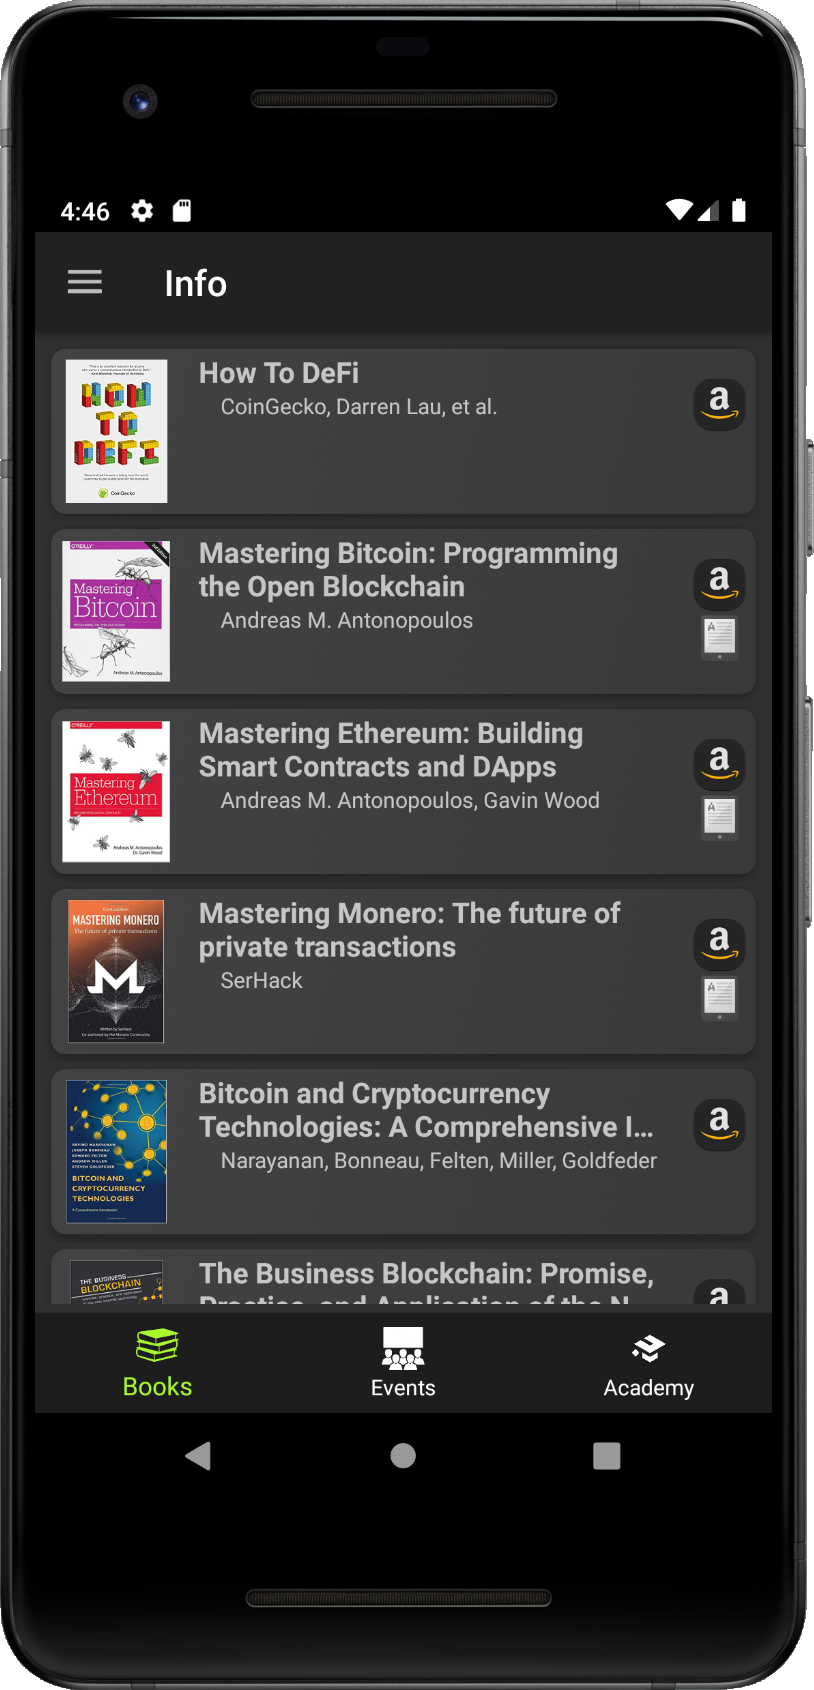
- Book section with book list.
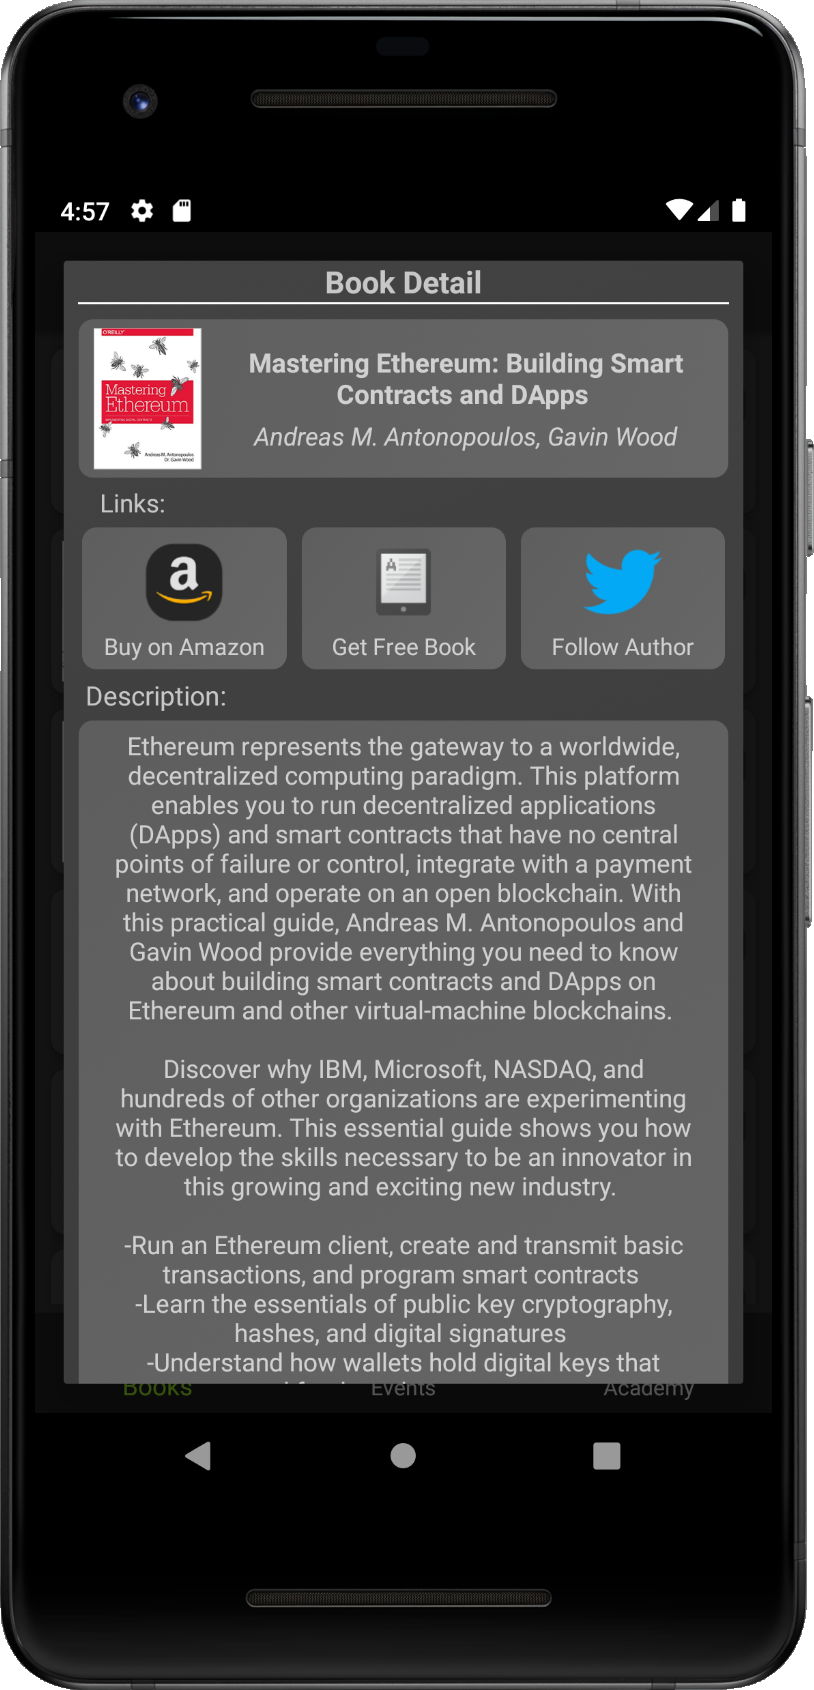
- Popup with details about the book.
At the end there is desciption of the book. You can check if the book might be interesting for you and what should be its content.
Events
You can find here upcoming events, like conferences, comunity meetings, etc. Data is provided by
CoinGecko.
Items cointains banner with logo and basic info such as event's Name, Date, Type, Organiser and Location of the event. On the right
side is icon of website, which redirects you directly to the event homepage.
To see more details about event, tap on the event from the list and popup with details will be displayed.
Detail popup shows the same basic info, but furthermore it provides description of the seleted event.
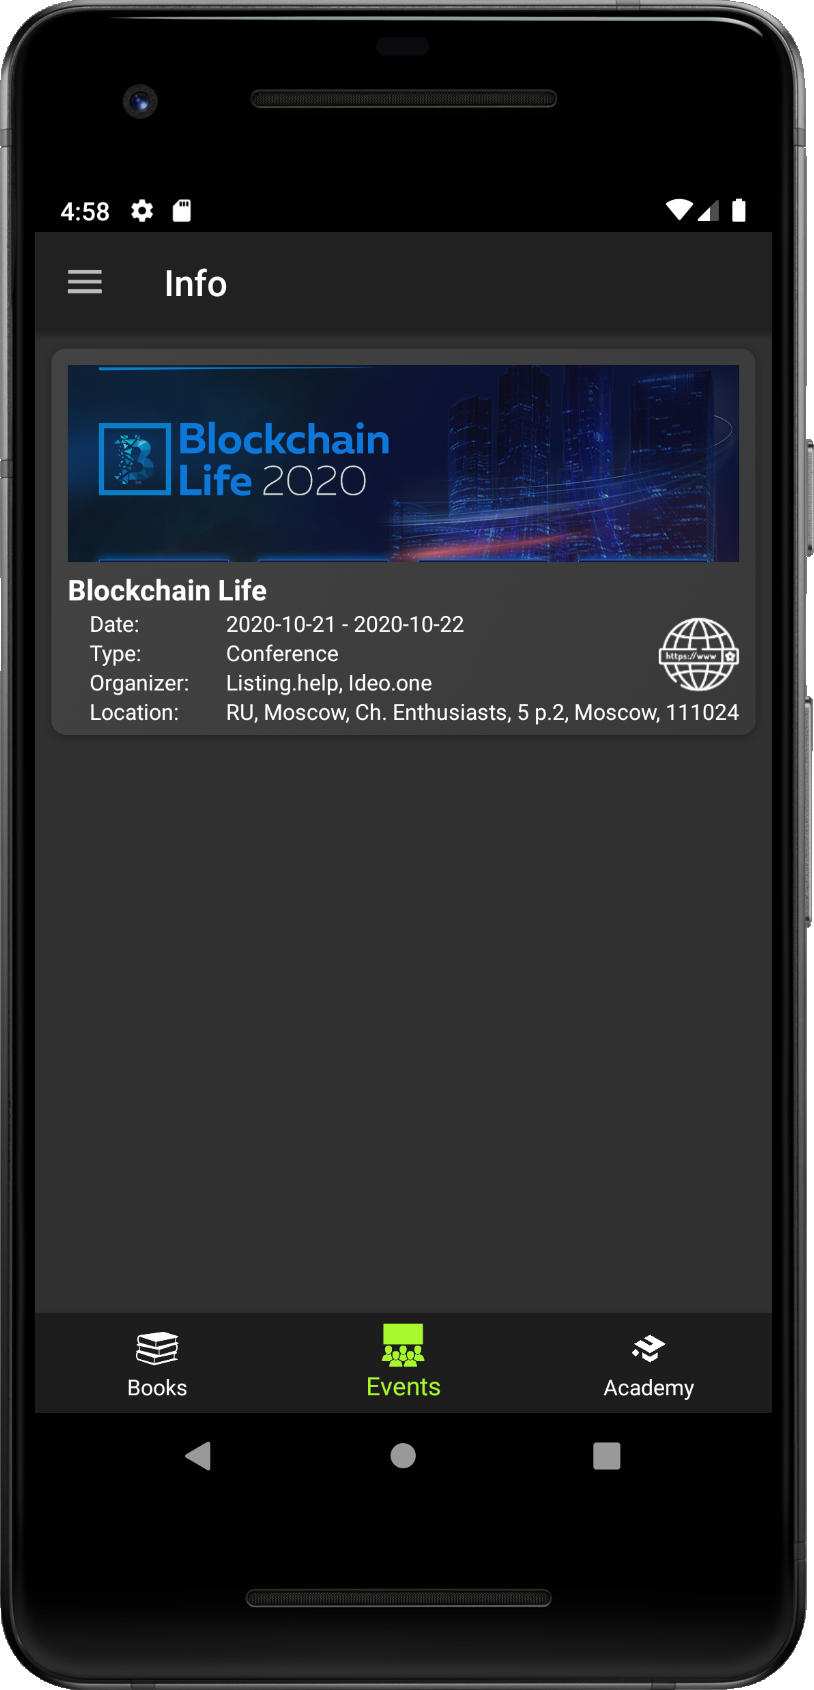
- List of upcoming crypto events.
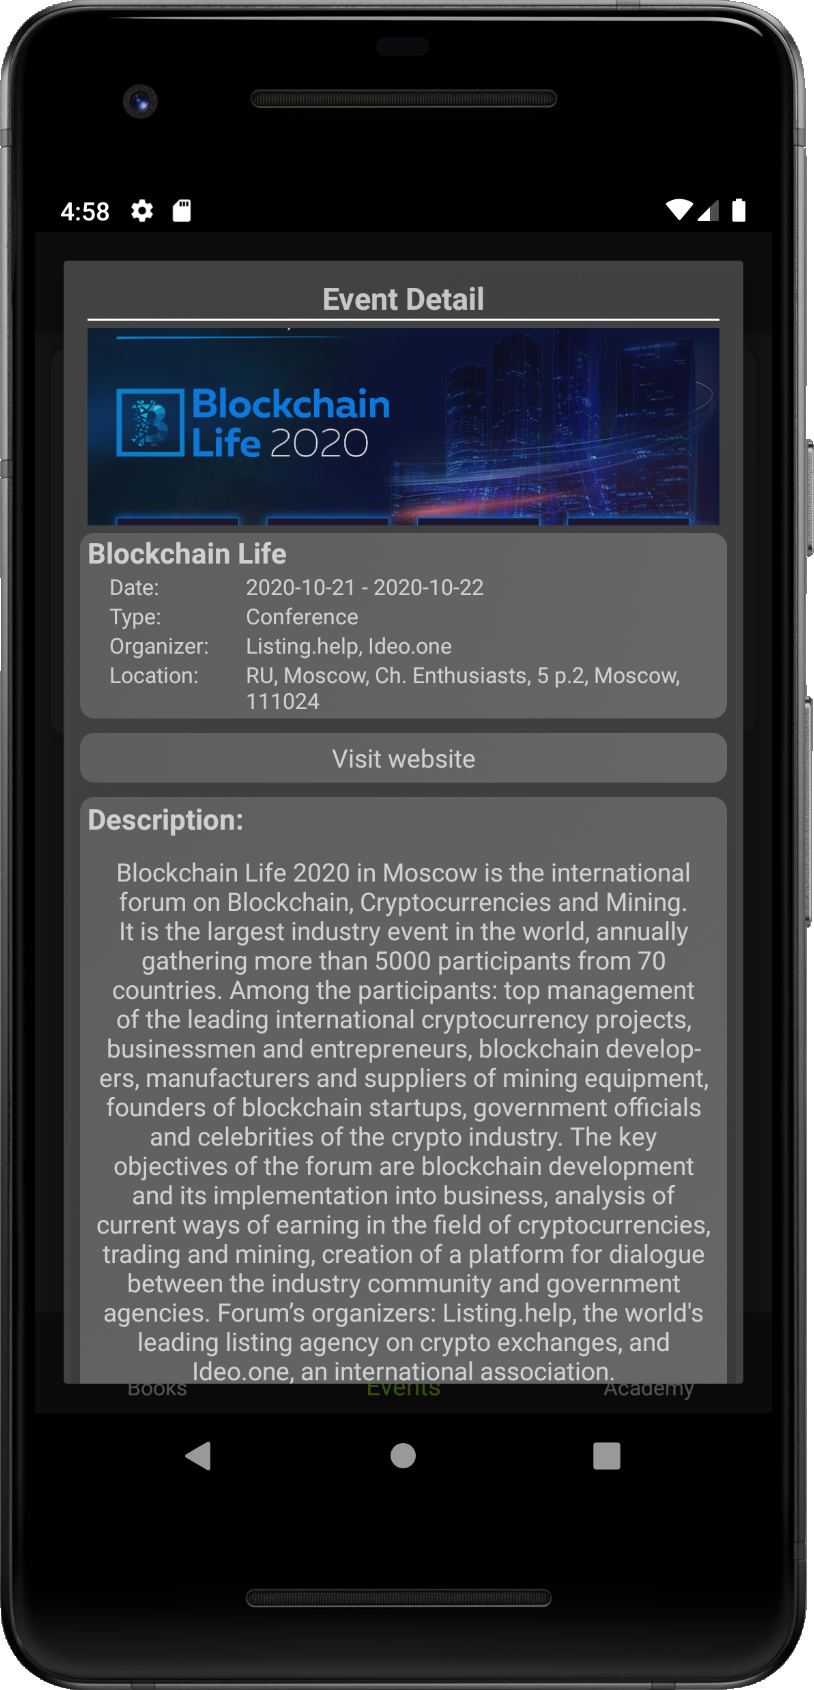
- Popup with details about the event.
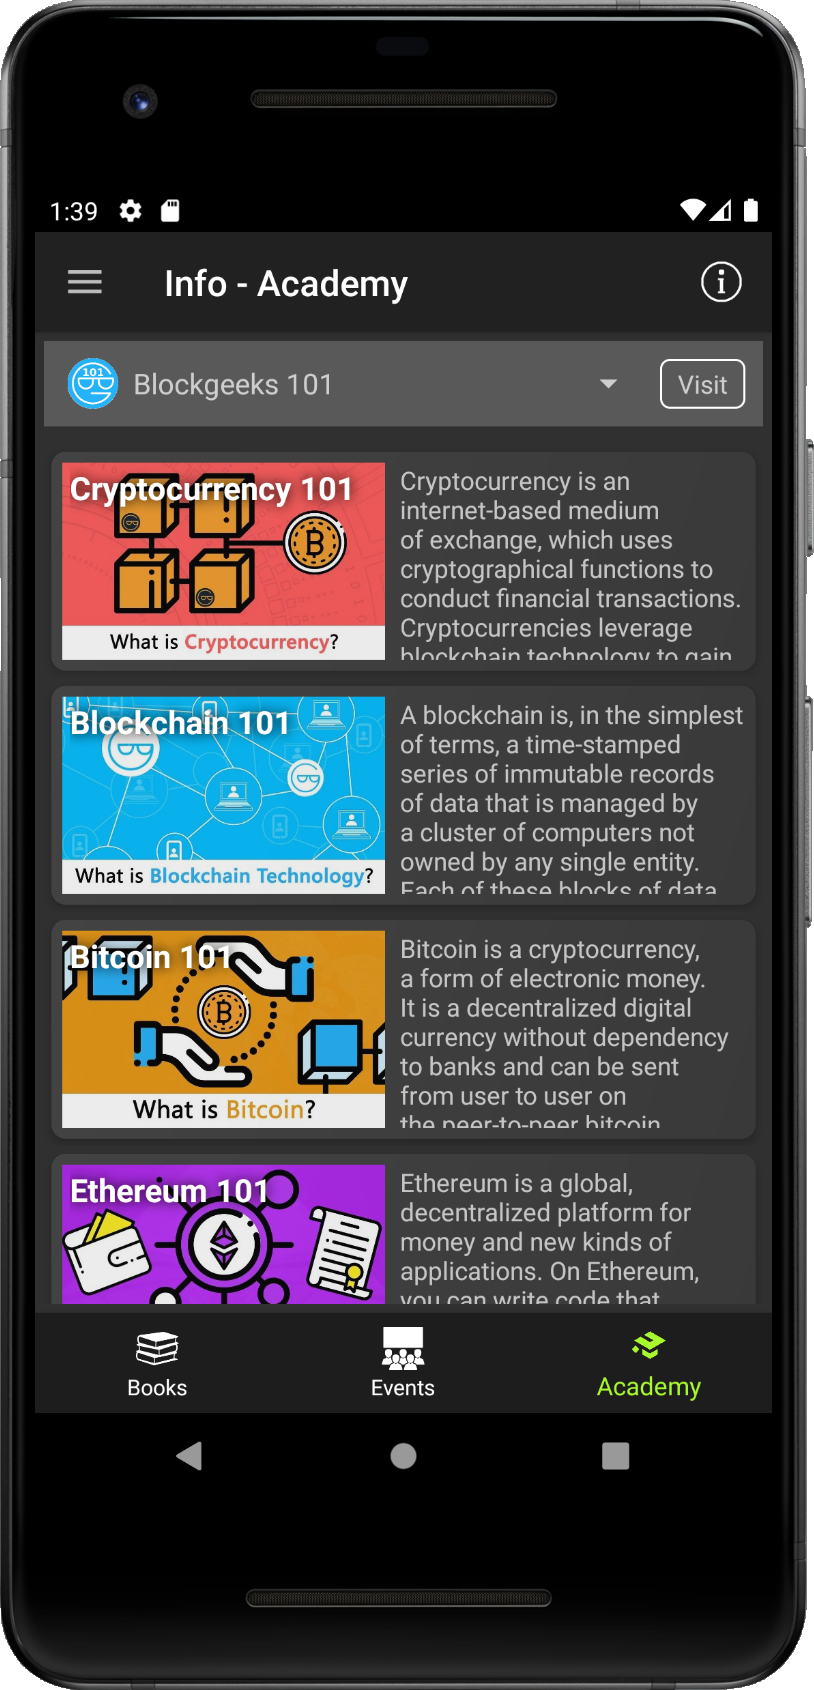
Academy
This sections tries to bring together useful knowledge sources such as
Blockgeeks and
Binance Academy. Both provide amazaing
articles about world of crypto currency and both are legit source of information.
You can select, which source you would like to explore from the drop down on the top of the screen. You can visit the homepage
of the seleced source, if you tap on the button 'Visit'.
Blockgeeks 101 articles bring the series about most used crypto currencies and basic terms. It is list of links to the original
articles with a small preview.
Binance Academy loads recent articles, which covers everything from trading, technical analysis, project descriptions to technical
explanations of tools and possible risks.
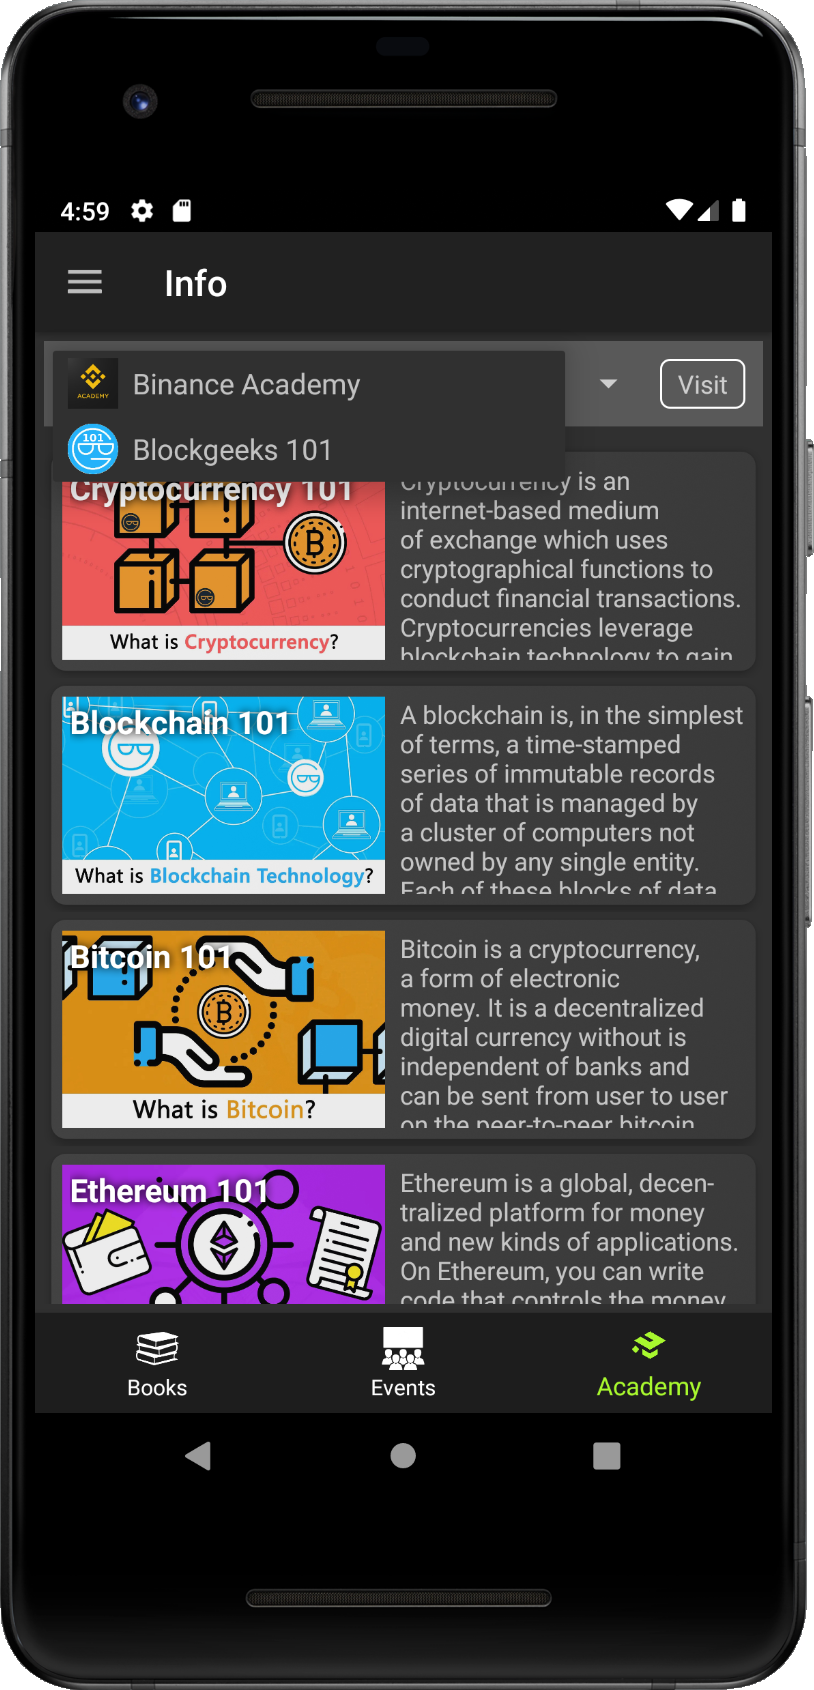
Currently we support two data sources to fetch articles, Blockgeeks Binance Academy. To see article in detail, tap on the article from loaded list. How to switch is shown on following pictures:
- Tap on the dropdown with service logo and service name (here CoinGeeks).
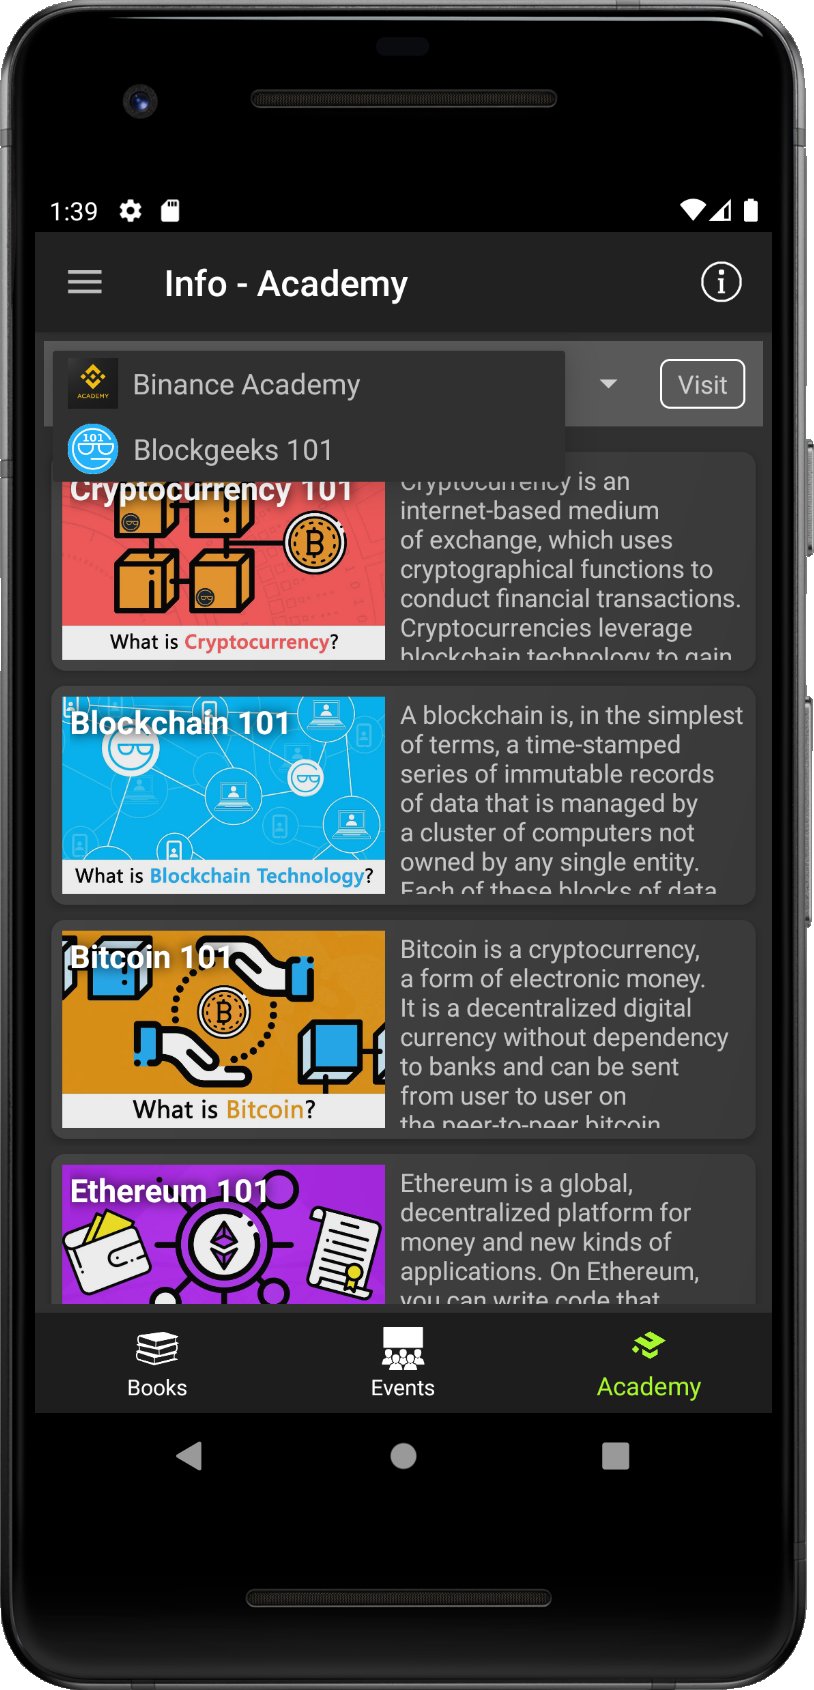
- Dropdown will be expanded and you can select service you want to fetch articles from (here Binance Academy).
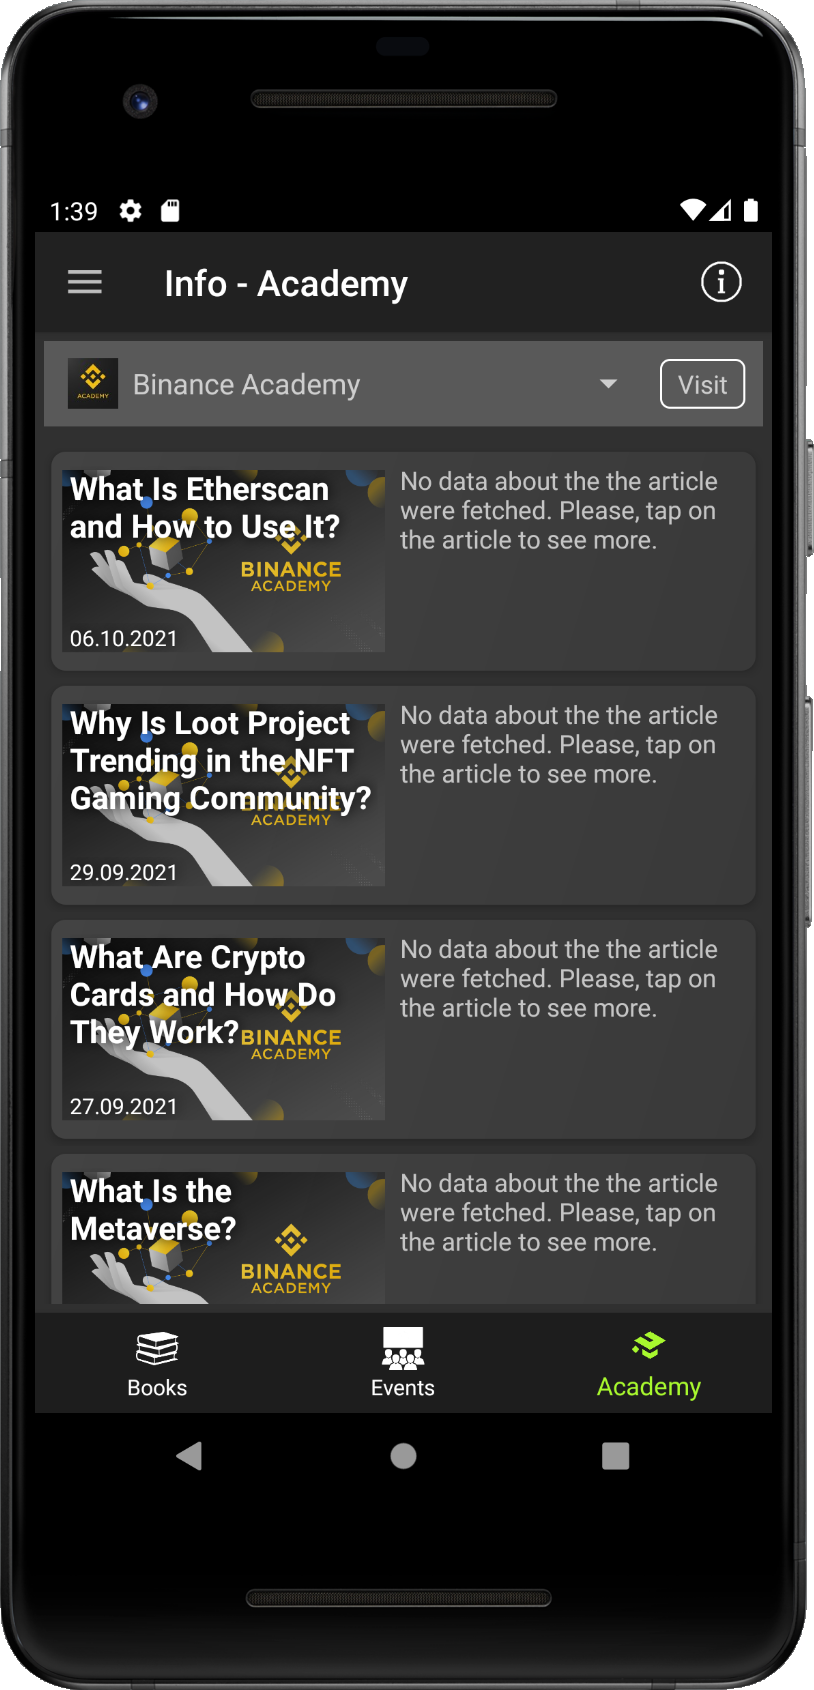
- Selected service is loaded with list of articles.
Wallet
Originally we wanted to introduce overview of existing walleta apps here. But during the time we extended
this section with more features. It is divided into 3 parts:
My Wallets section let you create and maintain your own offline wallets.
Tracking section let you track current balances of tracked addresses.
Wallets section introduces exiting wallet applications and divide them into categories.
My Wallets
You are using the app at your own risk. Always backup addresses generated in the app, if you will not have backup (file or private key), you might lose all your funds.
The main goal of this setion was to give an easy way how to create wallet for new users,
which came into the crypto currency world. The idea was inspired by walletgenerator.net*.
It let users generate offline paper wallet, which might be later imported into any compatible wallet.
First version was focused on Ethereum only. But we extended supported blockchains, since they are forked (~cloned)
from Ethereum. Curently we support in alphabetical order:
Binance Smart Chain,
Ethereum,
Ethereum Classic,
Icon,
Klaytn and
Tron.
Created wallets in our app should be compatible with all available wallets, which allow you to import
private key or account/wallet file. It means you are able
to use addresses, created in here, in other wallets if you will want to.
You can import address from other wallets to have them in the app, too. You can import the
private key or account/wallet file. You can use it as back up
and set it for tracking in Tracking section.
* - the project was not maintained for some time and recently is even reported as phising site - be careful if you will visit it.
All available functions and featrues are described in dedicated sections. To give you a brief overview, we are going to
describe how to create brand new wallet. Then we will introduce options how to
import already existing wallets.
We will show how to delete wallets from your list of your wallets and what you are
allowed to do on wallet detail screen.
Then we will show how to backup wallets you generated. We will show how to
sign messages with private key and how to add your wallet to the
watchlist to see current balance on the chain.
In this section we present the step by step guide how to create new wallet. Follow pictures bellow with descriptions to new create wallet.
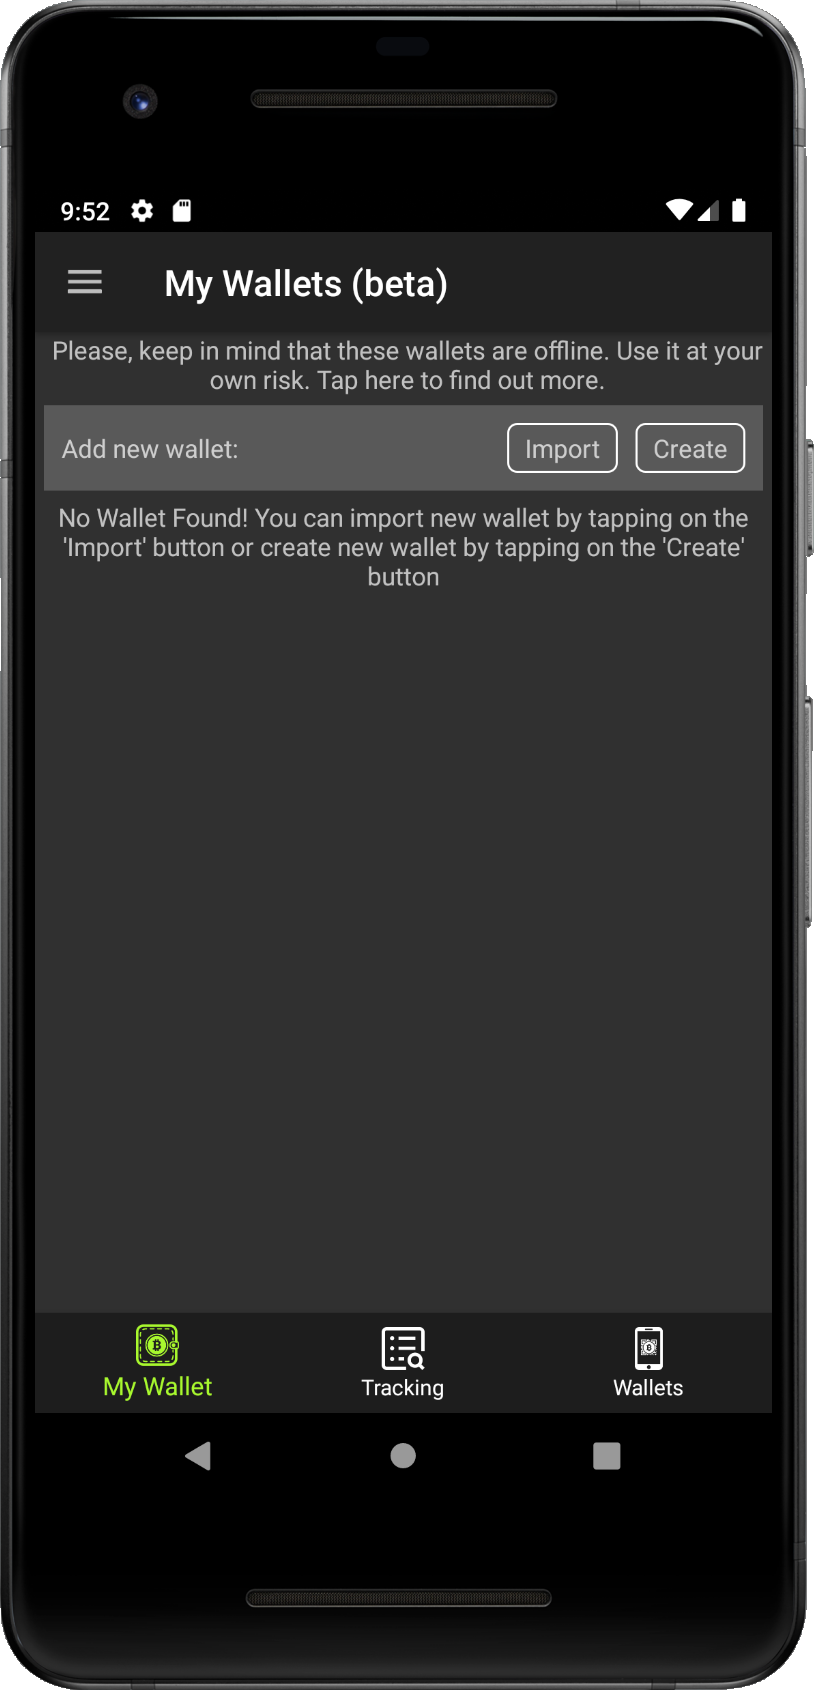
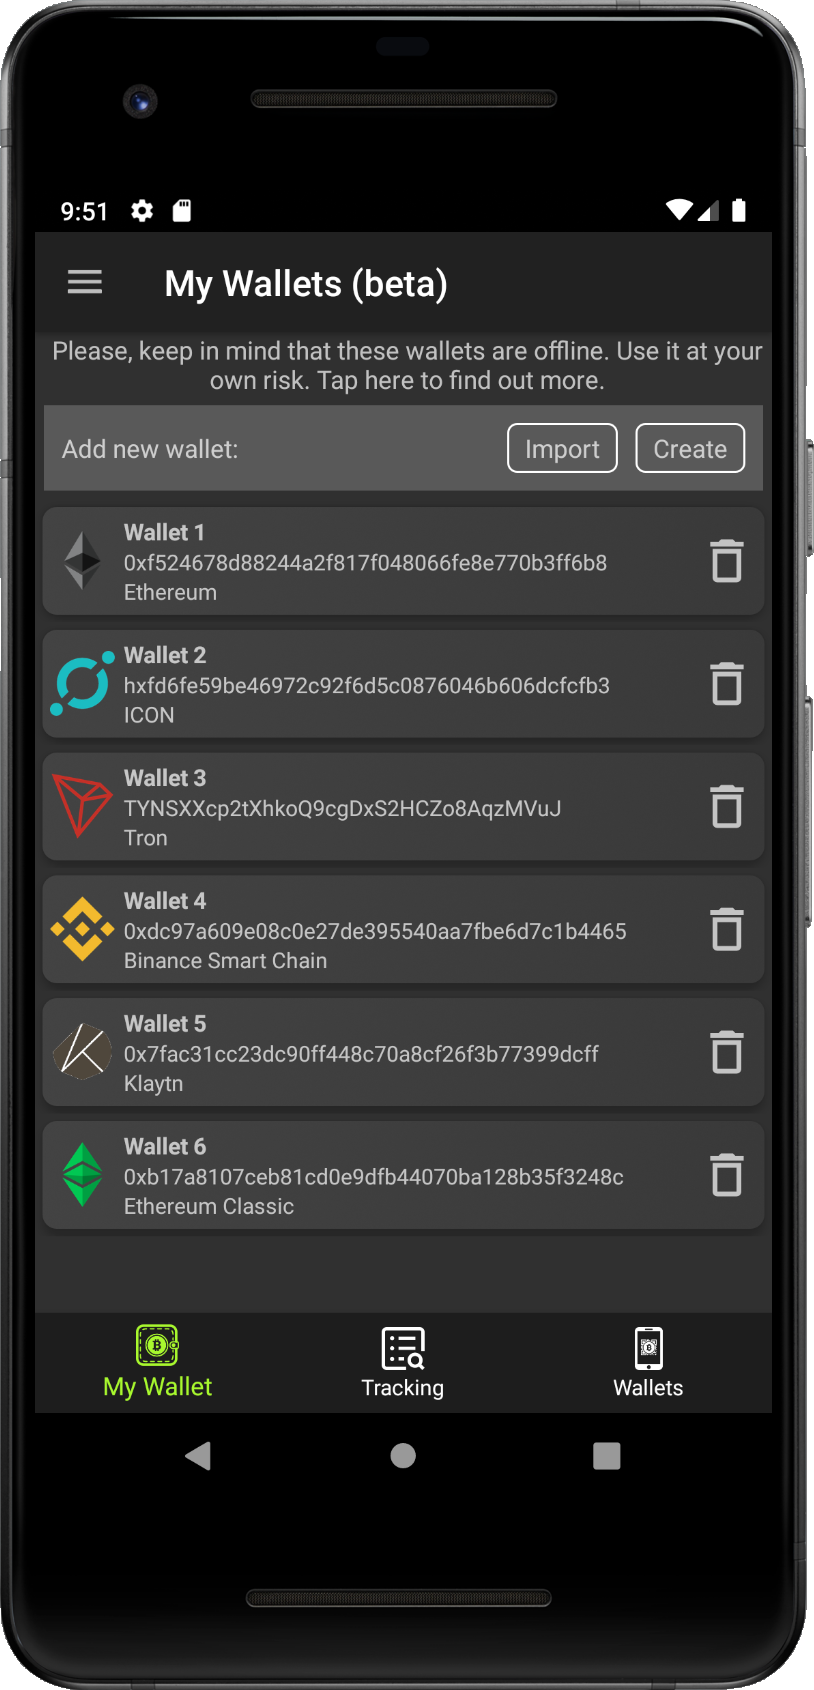
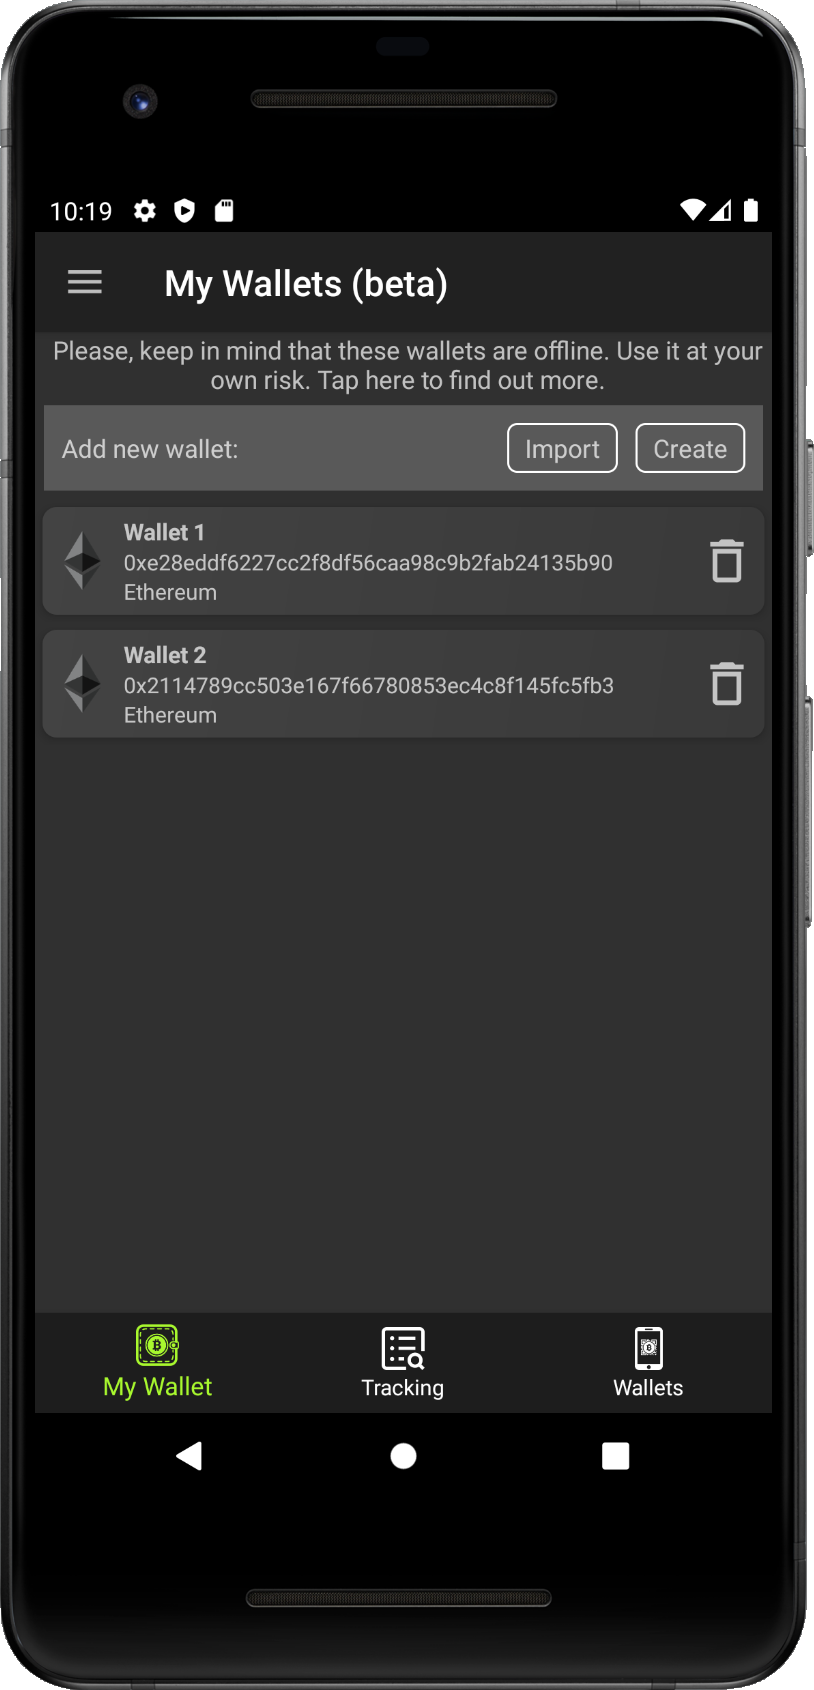
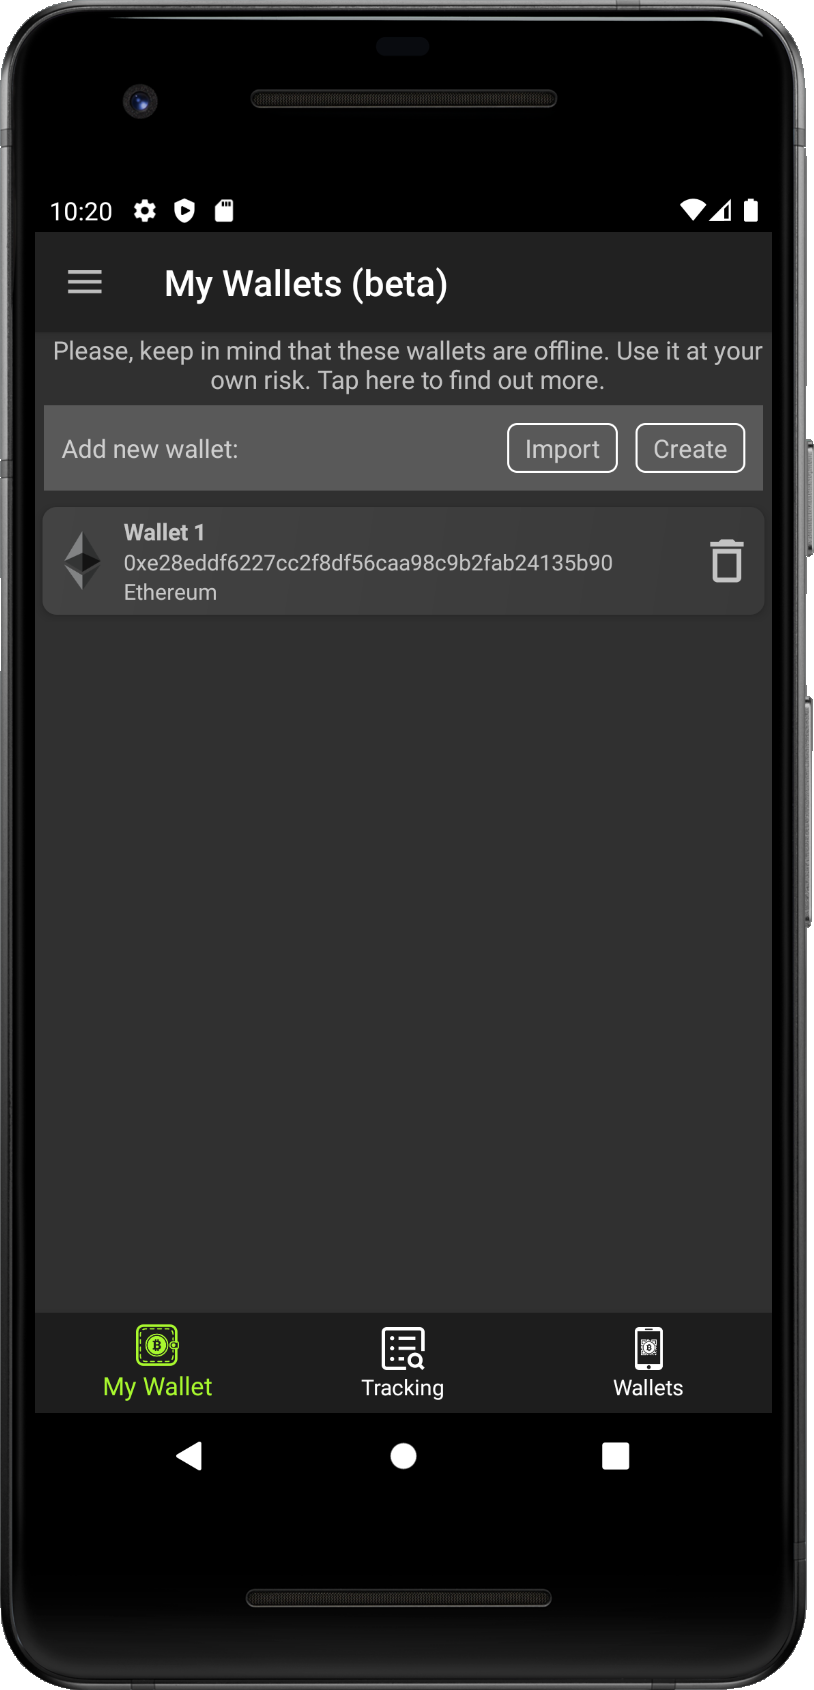
- Step 1 - On the first run the wallet list is empty.
- Step 2 - Tap on the 'Create' button, you will be redirected to the screen with supported blockchains.
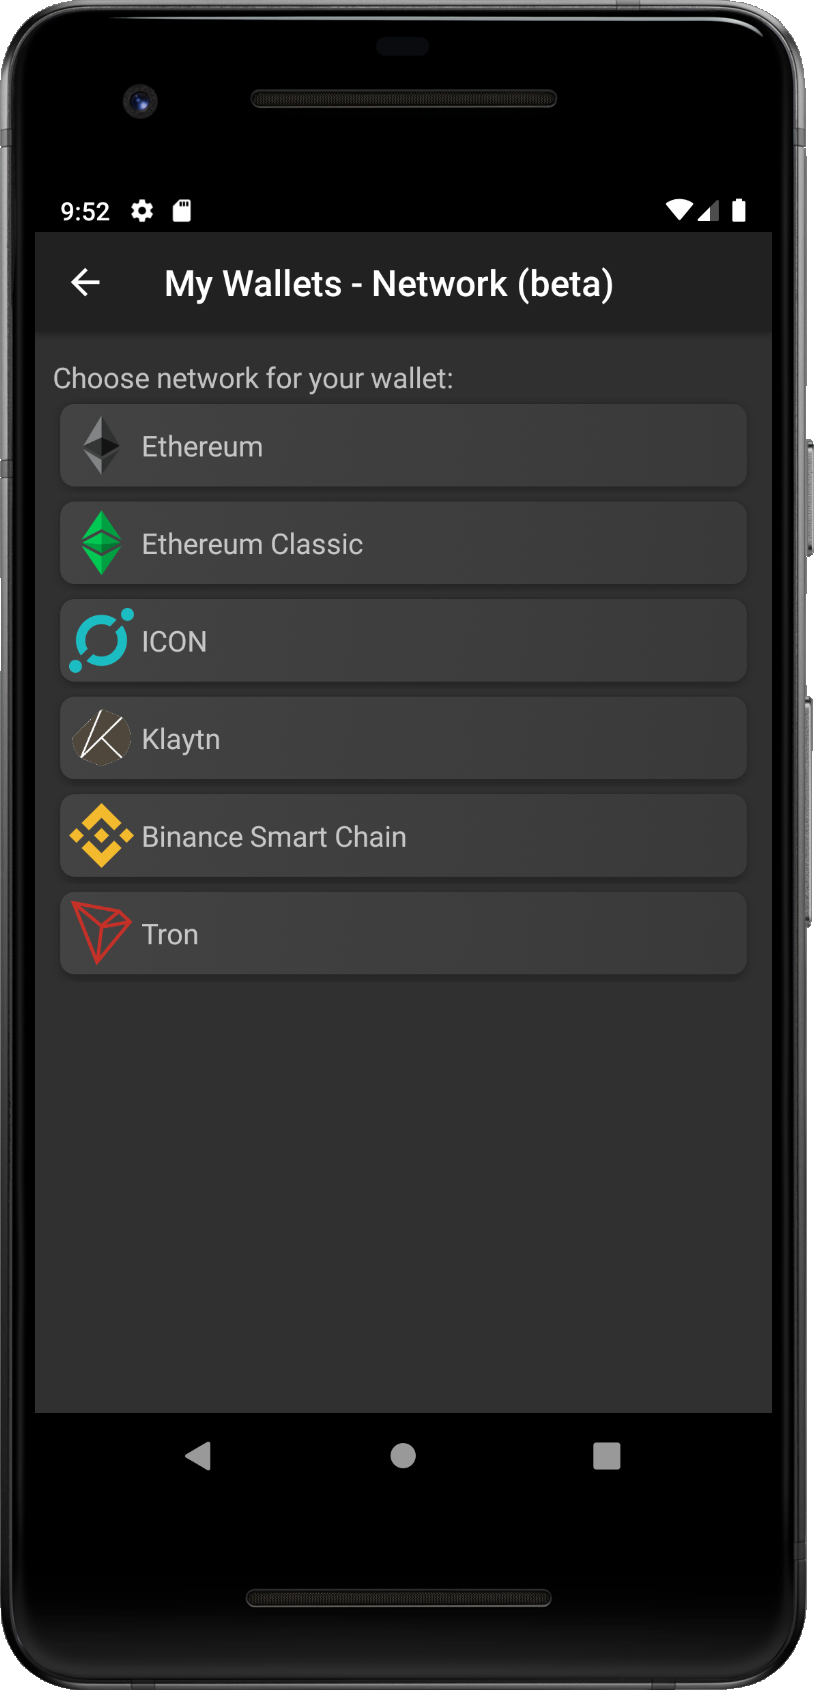
- Step 3 - List of supported blockchains/networks is shown.
- Step 4 - Tap on the network you want to create wallet for (i.e. Eteherum).
- Step 5 - You will be redirected to the password screen.
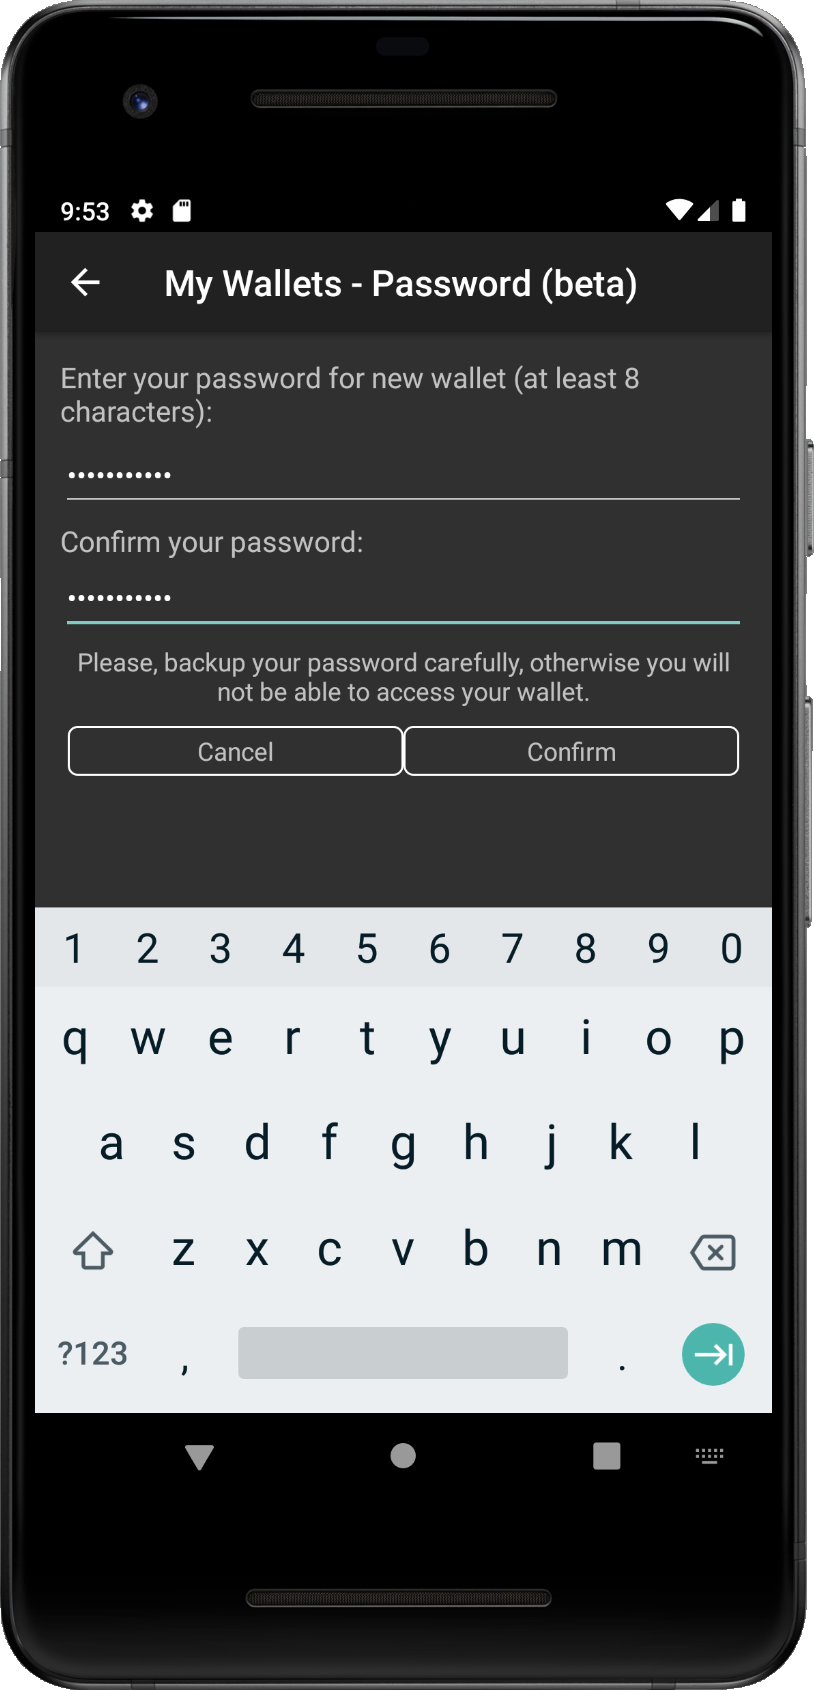
- Step 6 - Type password for the wallet you are creating and type it into the confirmation field to verify it
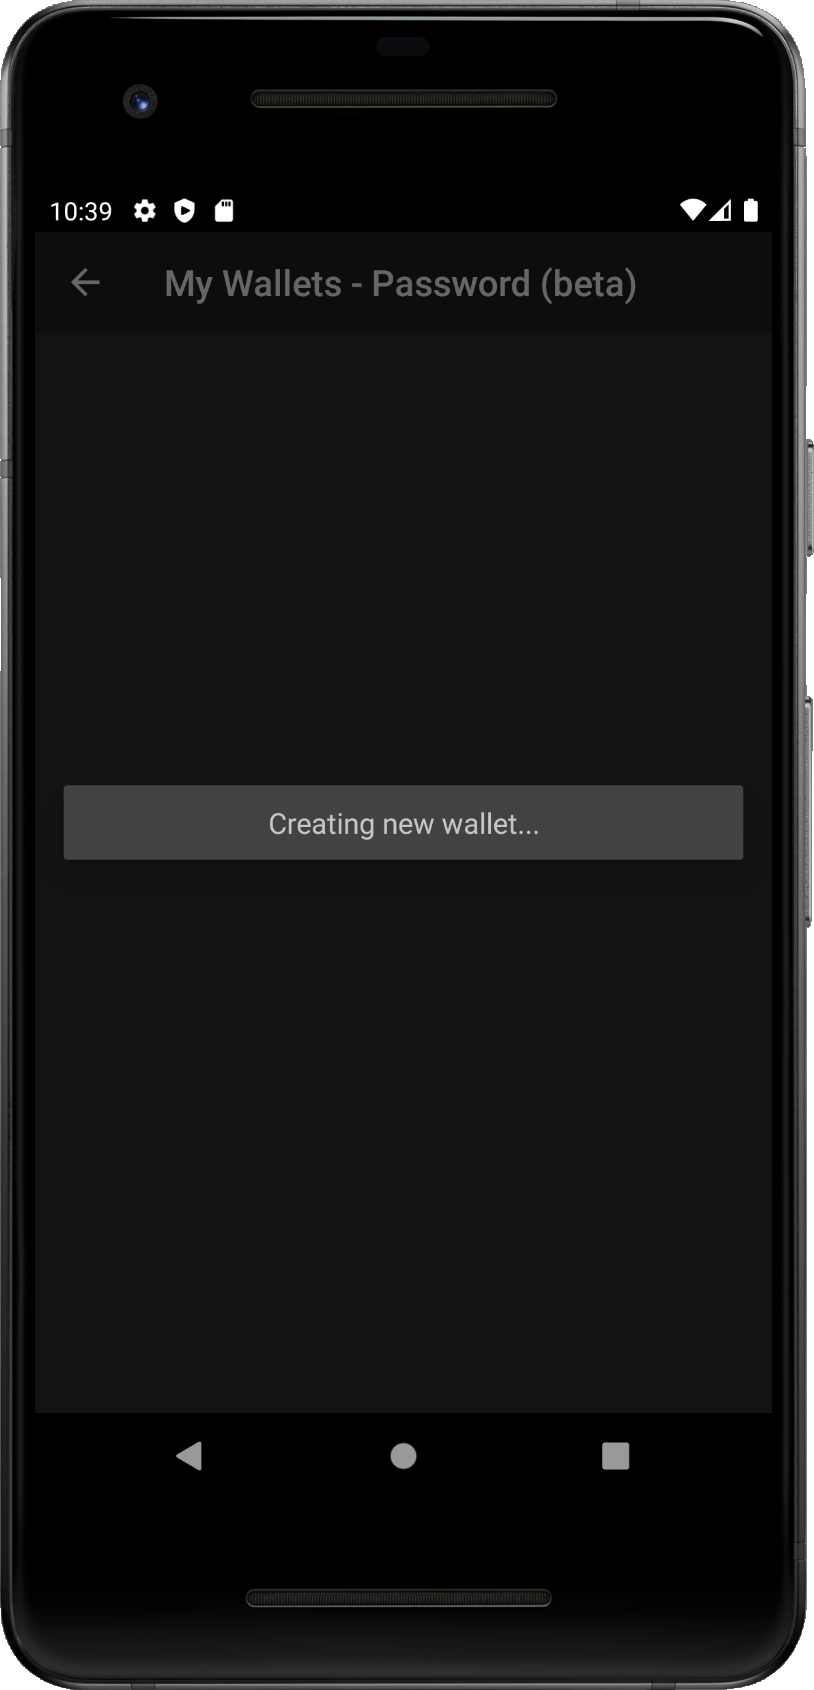
- Step 7 - Tap on the 'Confirm' button and generating of the wallet will start.
- Step 8 - [Optional] Tap on the 'Cancel' to return to the previous screen.
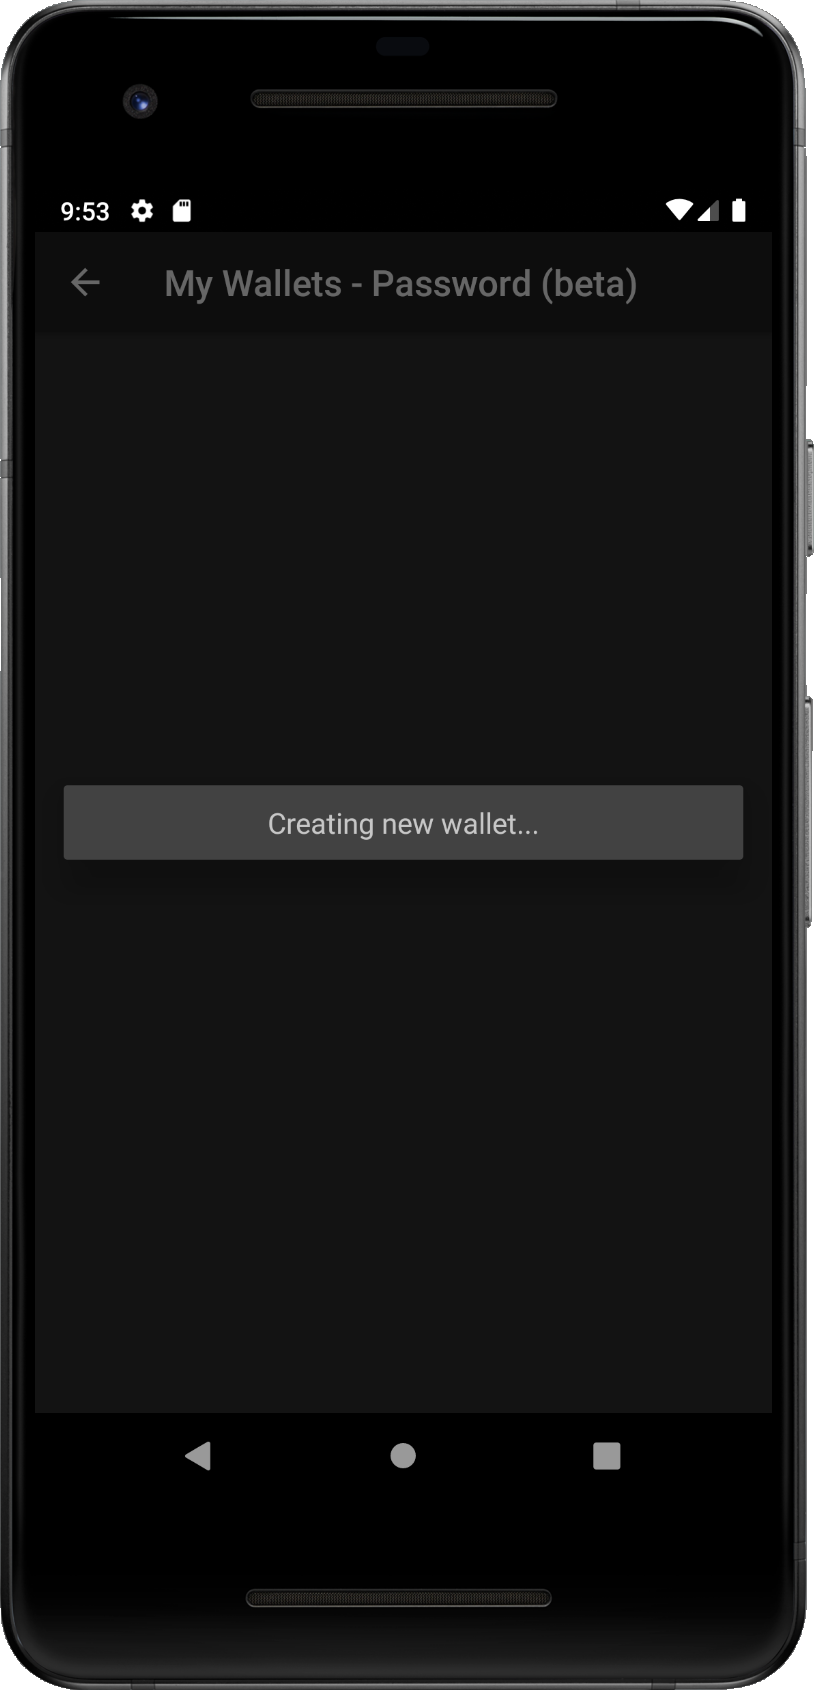
- Step 9 - Info popup about wallet is being generated is shown, wait until it is finshed.
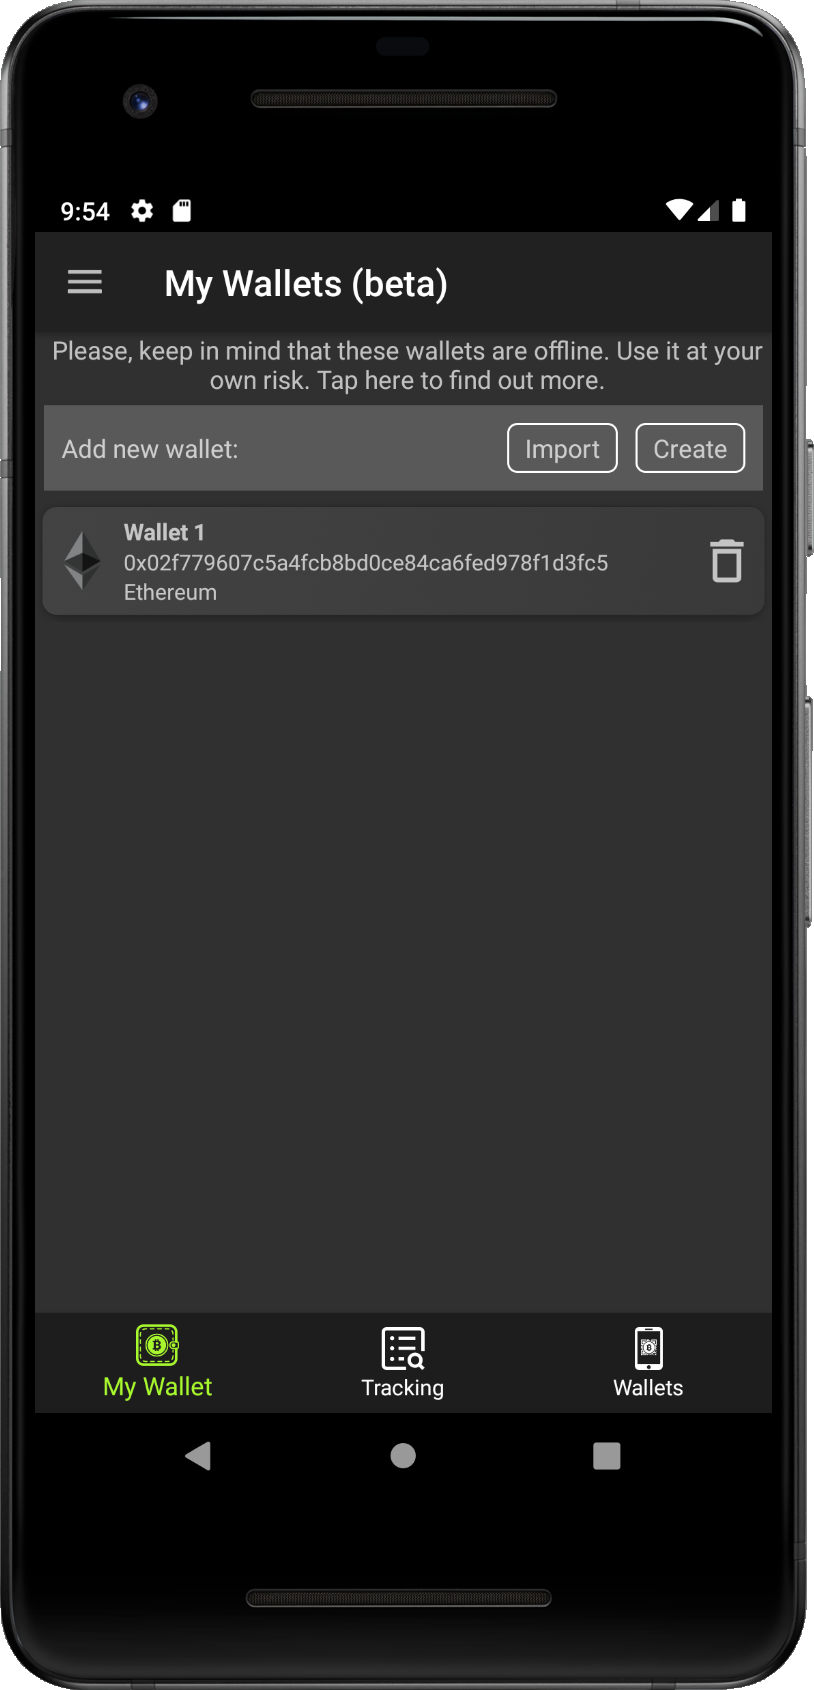
- Step 10 - When wallet is generated, you are redirected to the wallet list, new wallet is shown in the list.
- Step 11 - [Optional] Tap on the wallet to see its detail.
In the case you have already generated wallet and you would like to import it into the DeFi Overview app,
you have two options how to achieve it. First is importing wallet file. Most of wallet
wallet applications allow you to export wallet file for backup (so does DeFi Overview). It is usually mor secure
then releaving private key.
The second option is the private key mentioned above. It is the easiest way, but you
be very careful with it. If anyone will get access to your private key, i.e. reading clipboard memory, that person
will get access to your funds stored in the wallet. Try to avoid sharing of your private keys. If you need to do it,
it is better then to transfer your funds into another address.
In this section we present the step by step guide how to import existing wallet from file. Follow pictures bellow with descriptions to add your wallet into the app.

- Step 1 - Tap on the 'Import' button, you will be redirected to the screen with supported blockchains.
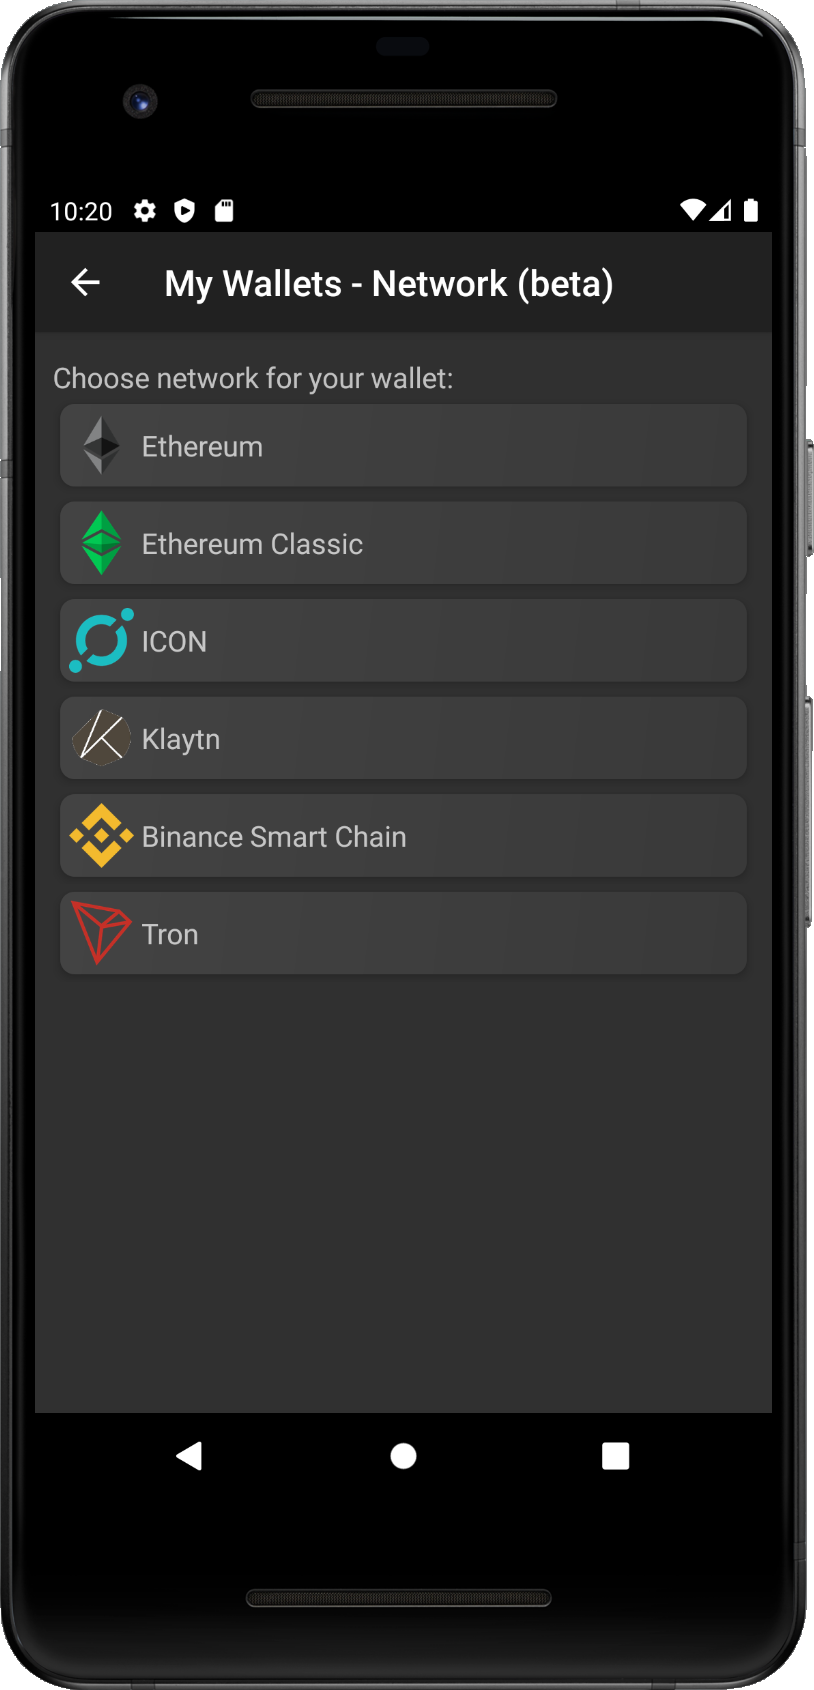
- Step 2 - List of supported blockchains/networks is shown.
- Step 3 - Tap on the network you want to create wallet for (i.e. Eteherum).
- Step 4 - You will be redirected to the import options screen.
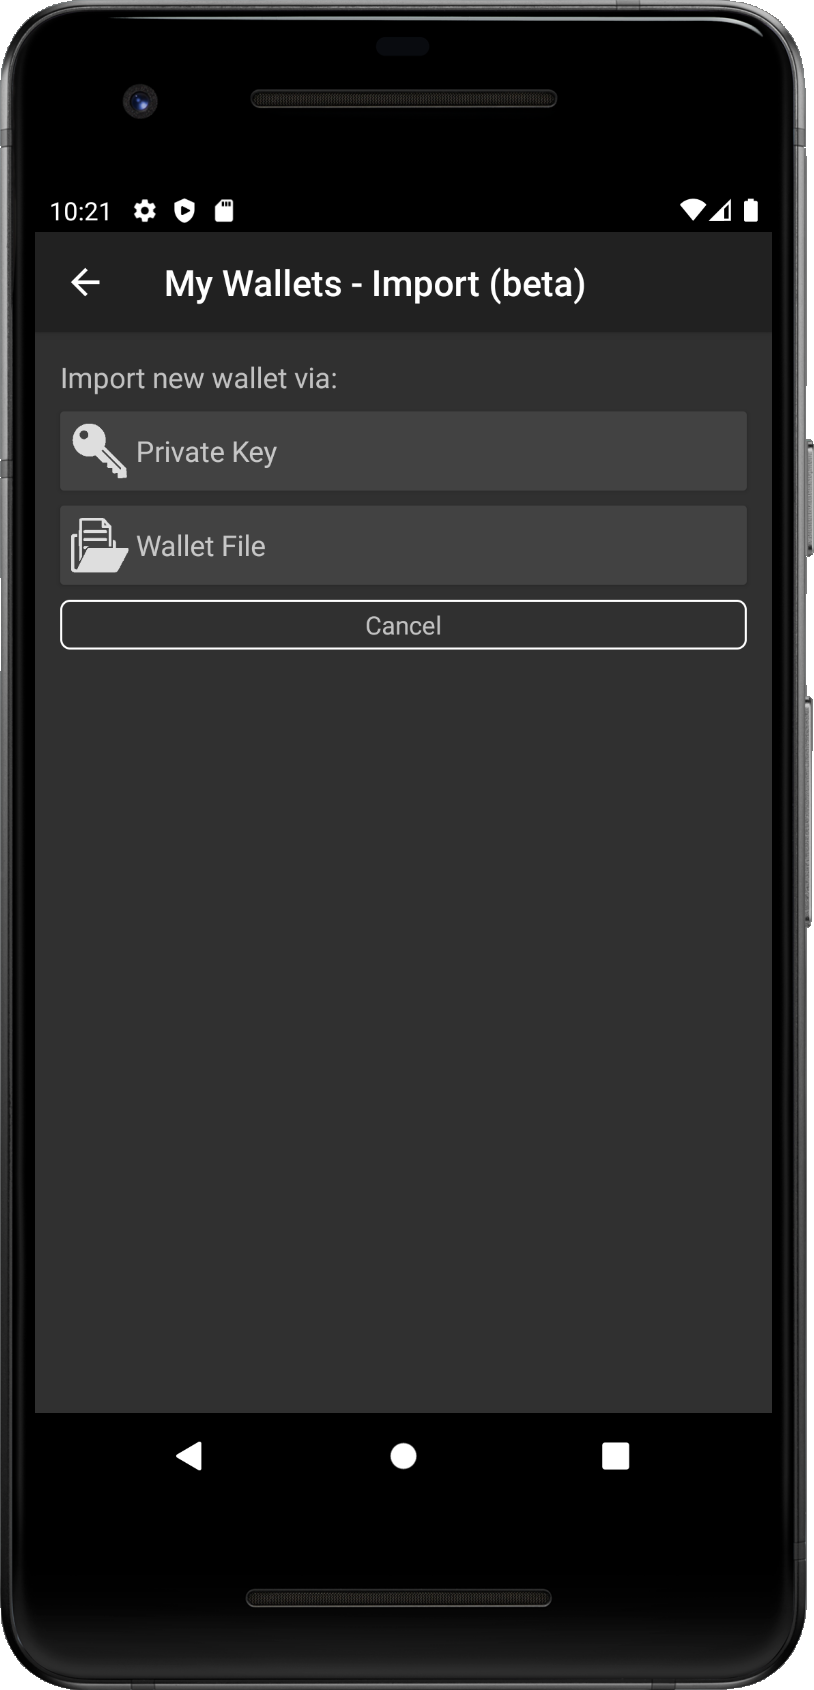
- Step 2 - List of available options for import is shown.
- Step 3 - Tap on 'Wallet File' option.
- Step 4 - You will be redirected to the File screen.
- Step 5 - [Optional] Tap on cancel to return to the previous screen.
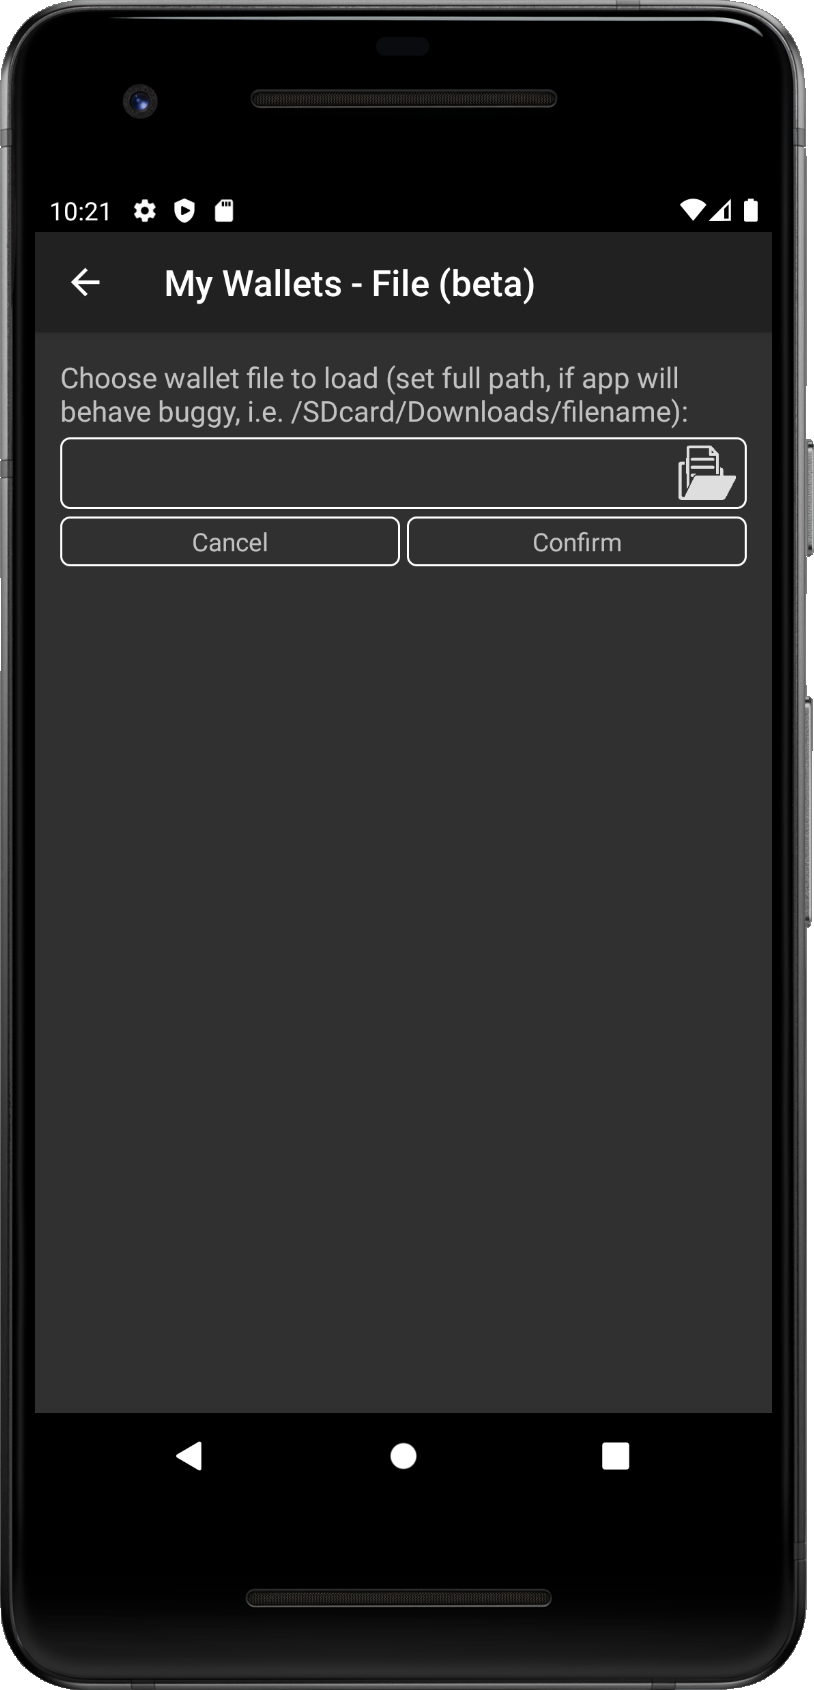
- Step 6 - Tap into the field to select file.
- Step 7 - [Optional] You might be asked to grant access to your storage, to be able to load the file. You need to approve it.
- Step 8 - Screen to select the wallet file will be opened.
- Step 9 - [Optional] Tap on cancel to return to the previous screen.
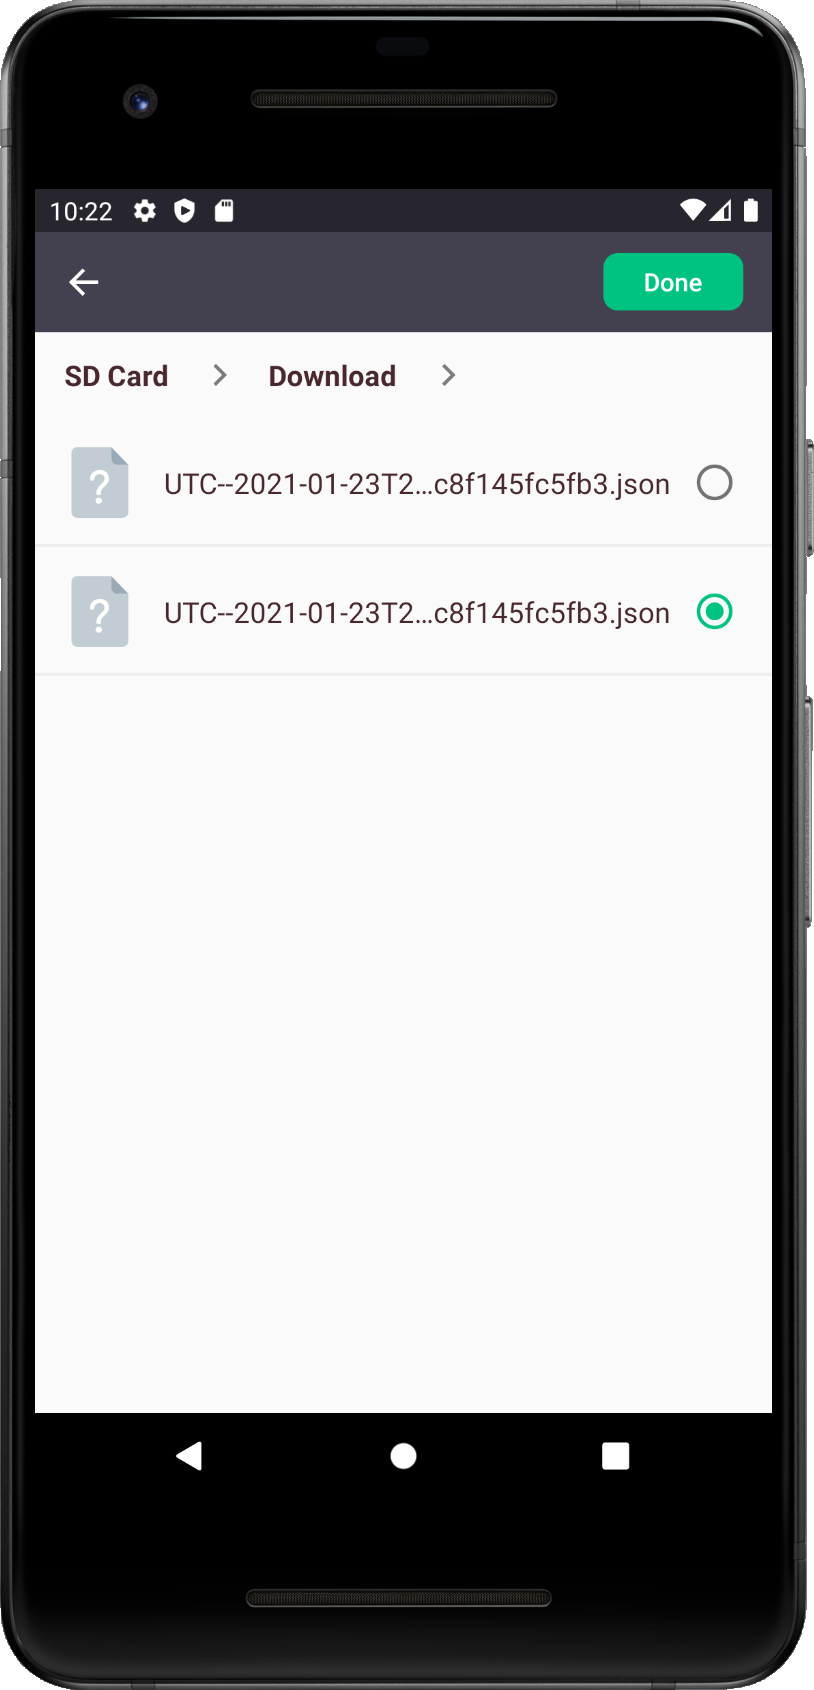
- Step 10 - Move to the folder with file.
- Step 11 - Tap on the wallet file you want to import (it will be makrked by green dot on the right).
- Step 12 - Tap on the 'Done' button in top right corner and you will get to the File screen again.
- Step 13 - [Optional] Tap on the arrow in the top left corner to return to the previous screen.
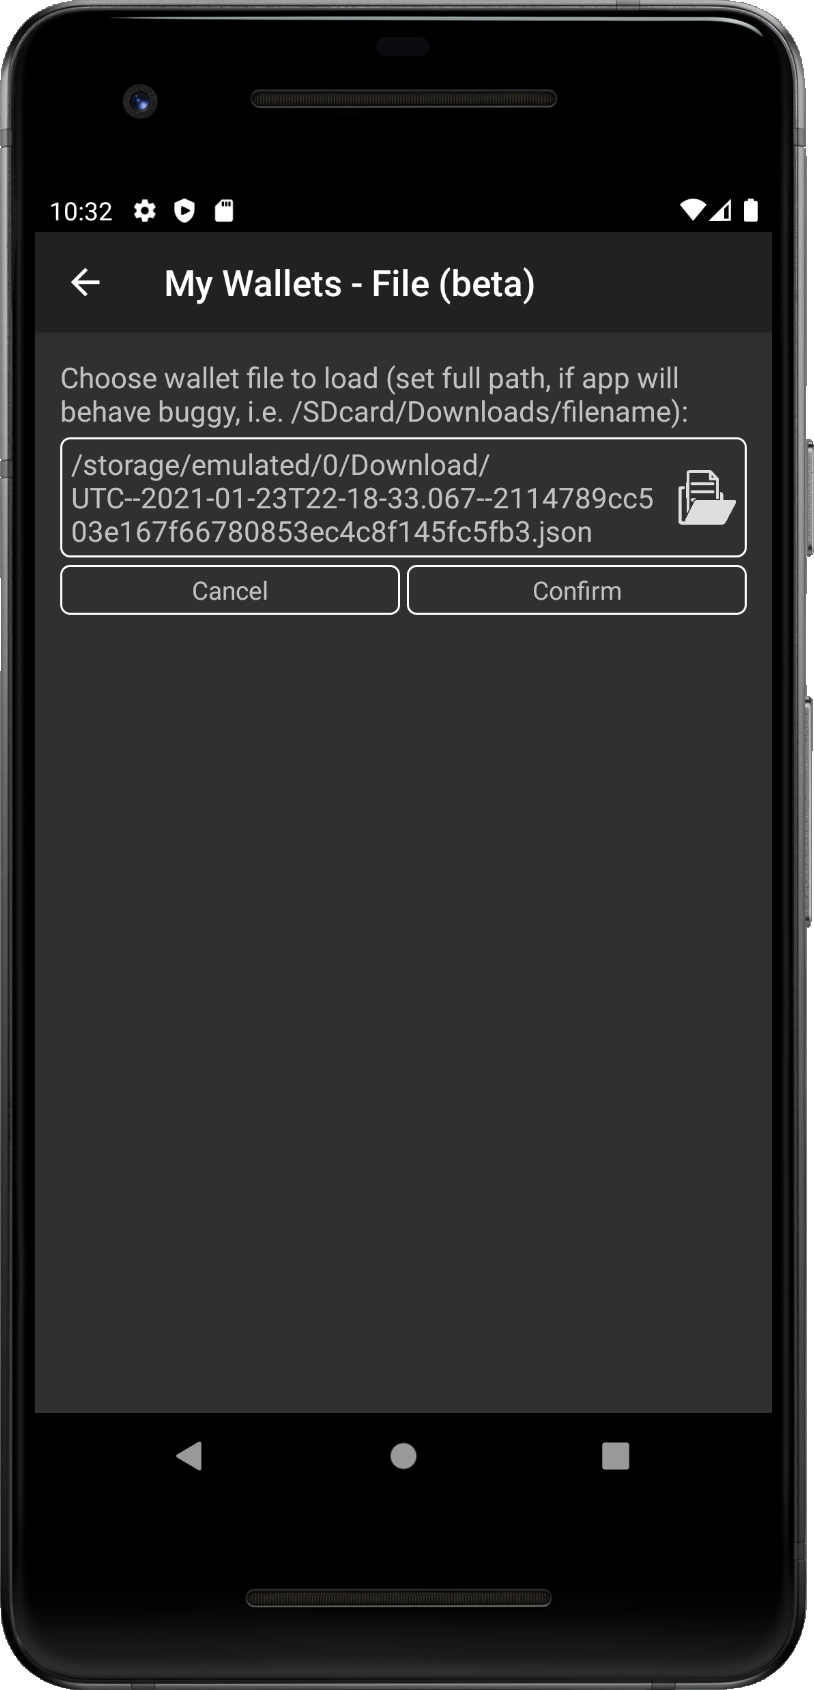
- Step 14 - Check the set path for the file in the path field.
- Step 15 - Tap on the 'Confirm' button and wait for the popup to unlock the wallet file.
- Step 16 - [Optional] Tap on cancel to return to the previous screen.
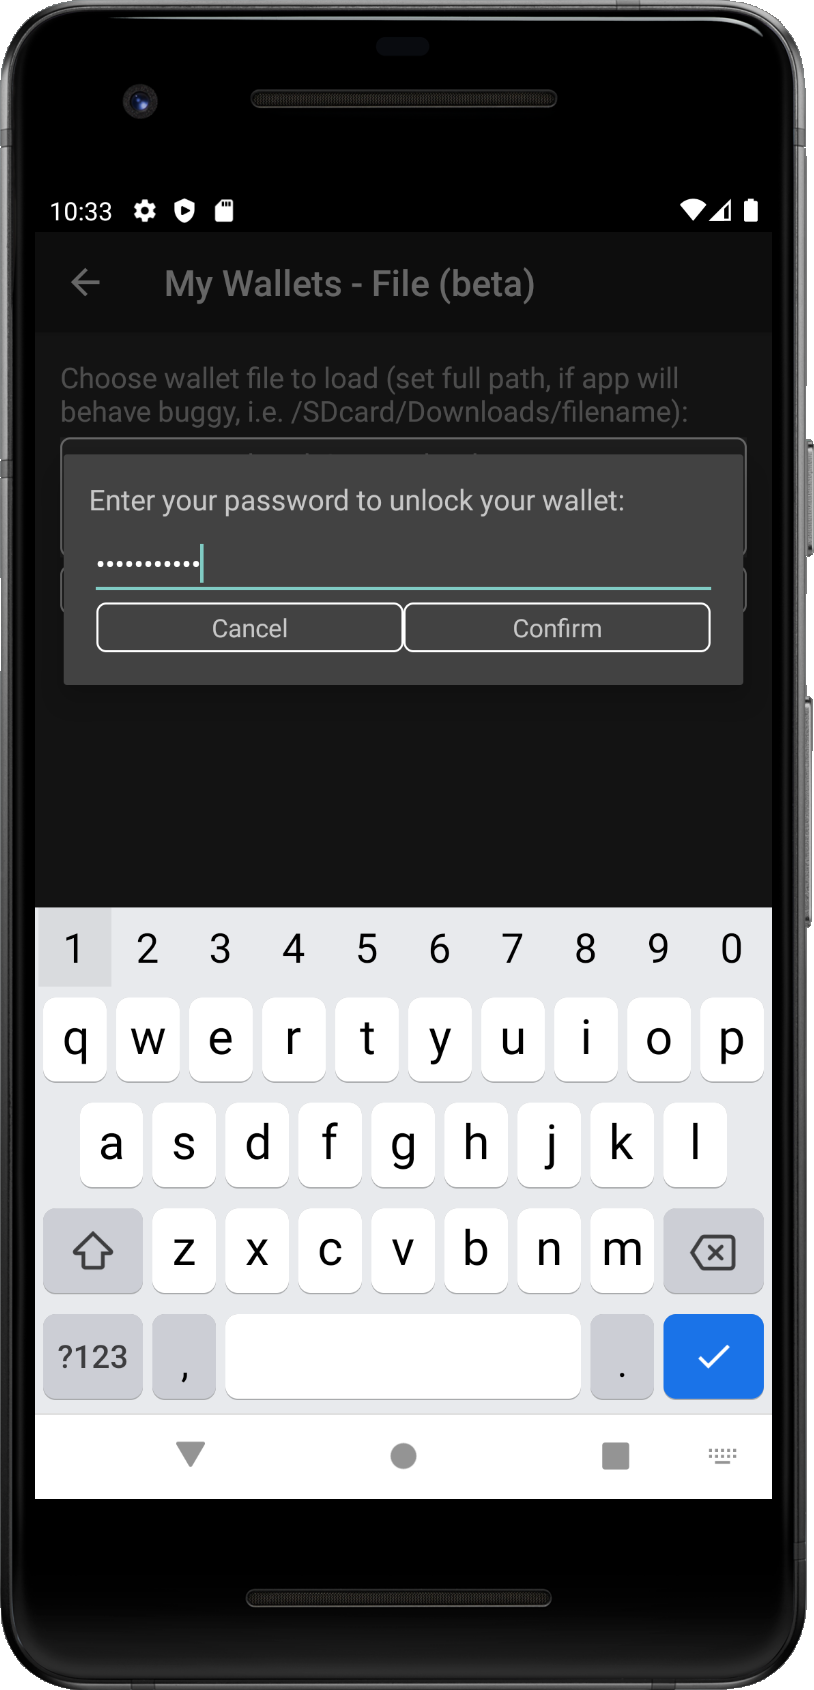
- Step 17 - Enter the wallet password to unlock the wallet file.
- Step 18 - Tap on the 'Confirm' button and wait for the popup indicating unlocking the wallet.
- Step 19 - [Optional] Tap on cancel to return to the previous screen.

- Step 20 - Popup indication the faile is being unlocked is shown.
- Step 21 - If the file was successfully unlocked, wallet will be imported and you will be redirected to the wallet list.
- Step 22 - [Optional] If the file was not successfully unlocked, recheck the pasword and try again.
- Congrats - You successfully imported your wallet file into the app.
In this section we present the step by step guide how to import existing wallet with your Private Key. Follow pictures bellow with descriptions to add your wallet into the app.
- Step 1 - Tap on the 'Import' button, you will be redirected to the screen with supported blockchains.
- Step 2 - List of supported blockchains/networks is shown.
- Step 3 - Tap on the network you want to create wallet for (i.e. Eteherum).
- Step 4 - You will be redirected to the import options screen.
- Step 2 - List of available options for import is shown.
- Step 3 - Tap on 'Private Key' option.
- Step 4 - You will be redirected to the Private Key screen.
- Step 5 - [Optional] Tap on cancel to return to the previous screen.
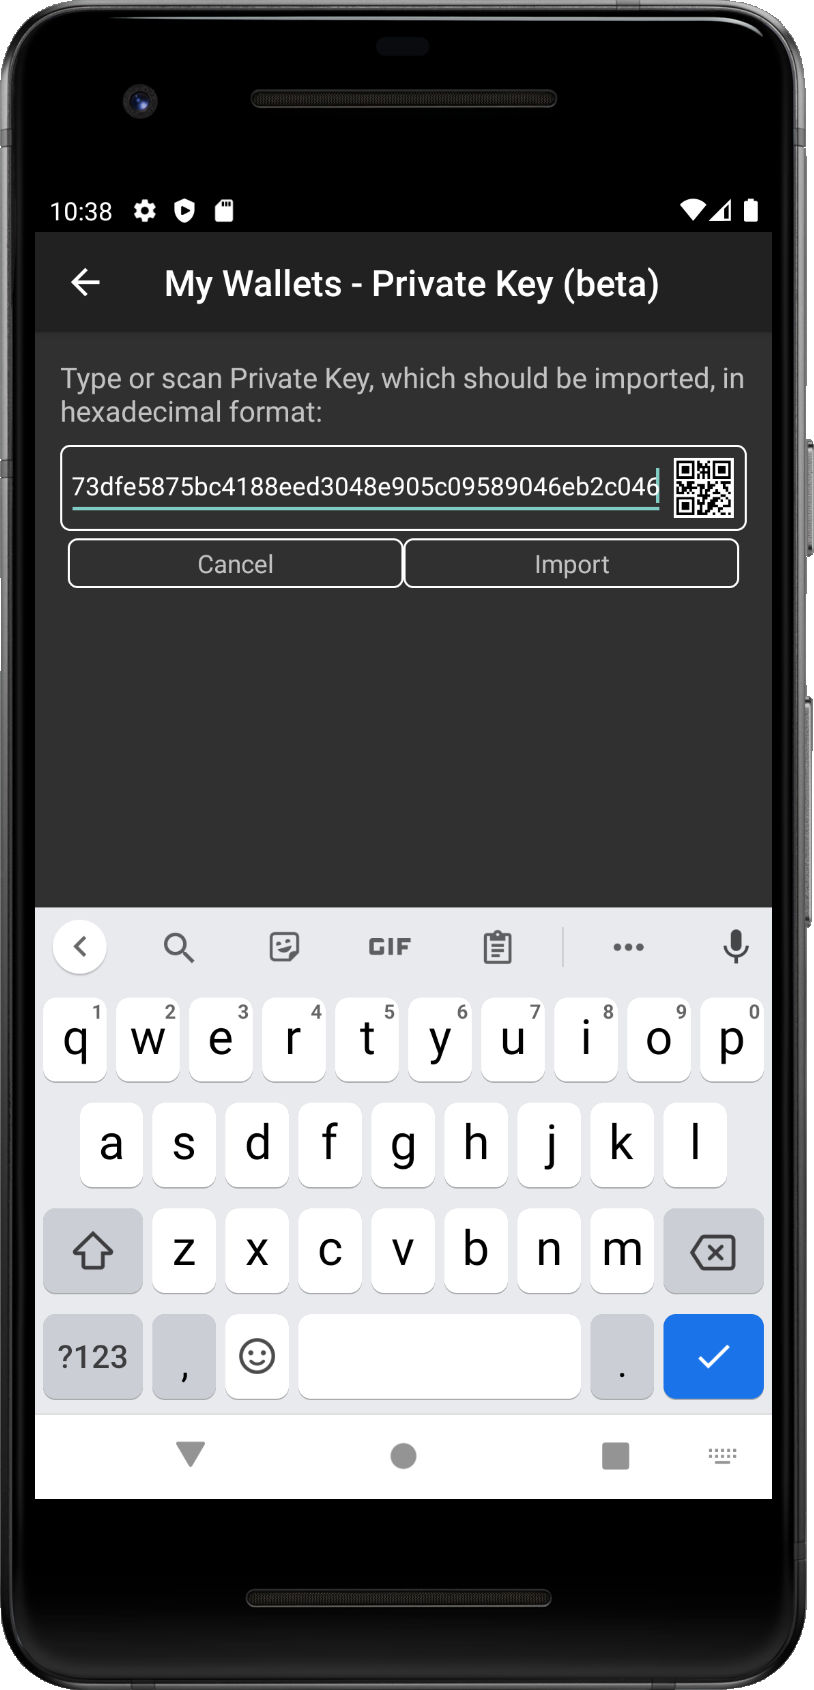
- Step 6 - Type Private key or you can scan the QR code with Private Key, if you tap on WR code icon.
- Step 7 - [Optional] You might need to allow the app to access to your camera, if you want to scan QR code.
- Step 8 - [Optional] Tap on cancel to return to the previous screen.
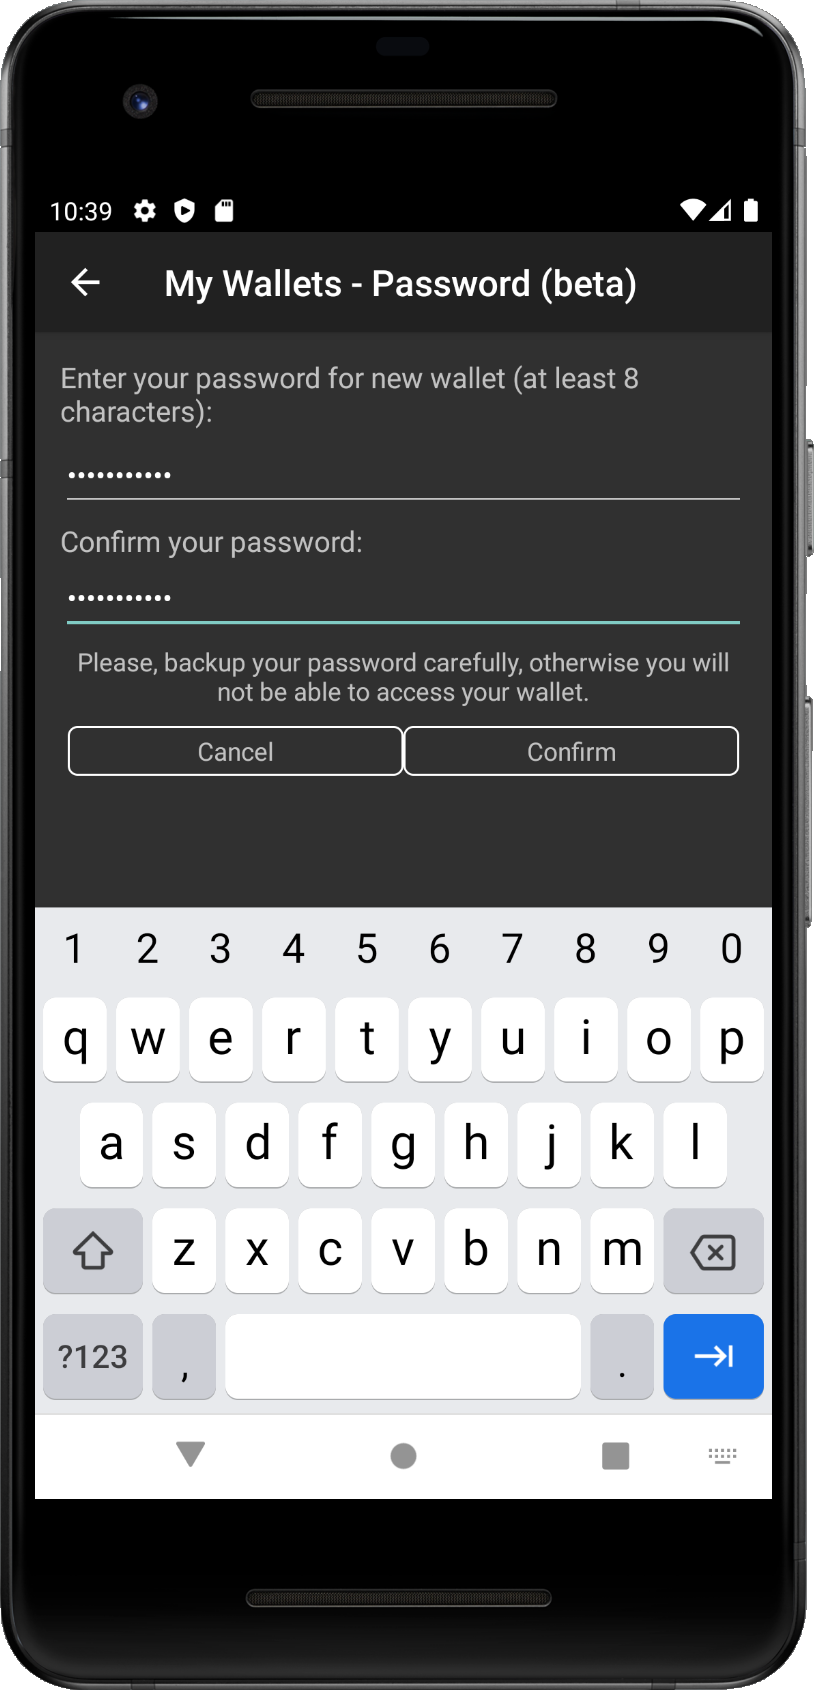
- Step 9 - Type password for the wallet you are creating and type it into the confirmation field to verify it.
- Step 10 - Tap on the 'Confirm' button to import the wallet secured with typed password.
- Step 11 - [Optional] Tap on cancel to return to the previous screen.
- Step 12 - Info popup about wallet is being generated is shown, wait until it is finshed.
- Step 13 - When the wallet is imported, you are redirected to the wallet list, new wallet is shown in the list.
- Congrats - You successfully imported wallet with the Private Key.
In this section we present the step by step guide how to delete a wallet from your wallet list.
Follow pictures bellow with descriptions to add your wallet into the app.
Be aware that deleting without wallet backup will lead to loss your your funds! Be sure you backed up
wallet file or the private key of the wallet.
- Step 1 - Tap on the trash icon on the right side of the wallet record.
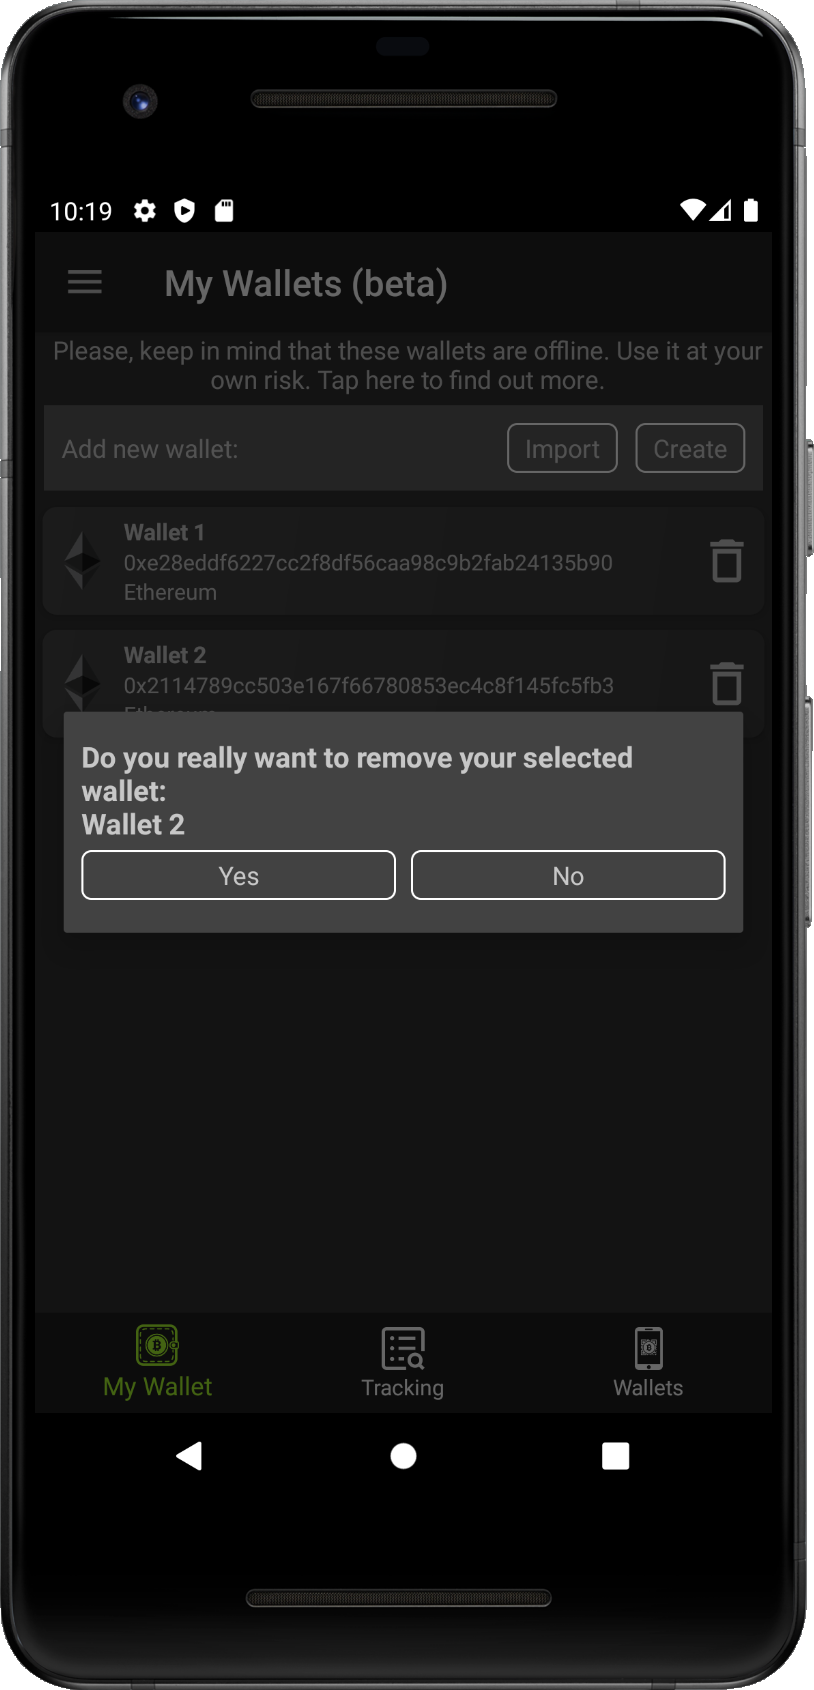
- Step 2 - Tap on the 'Confirm' button to confirm you want to delete the wallet.
- Step 3 - [Optional] Tap on cancel to return to dismiss the delete.
- Congrats - You successfully deleted selected wallet from the app.
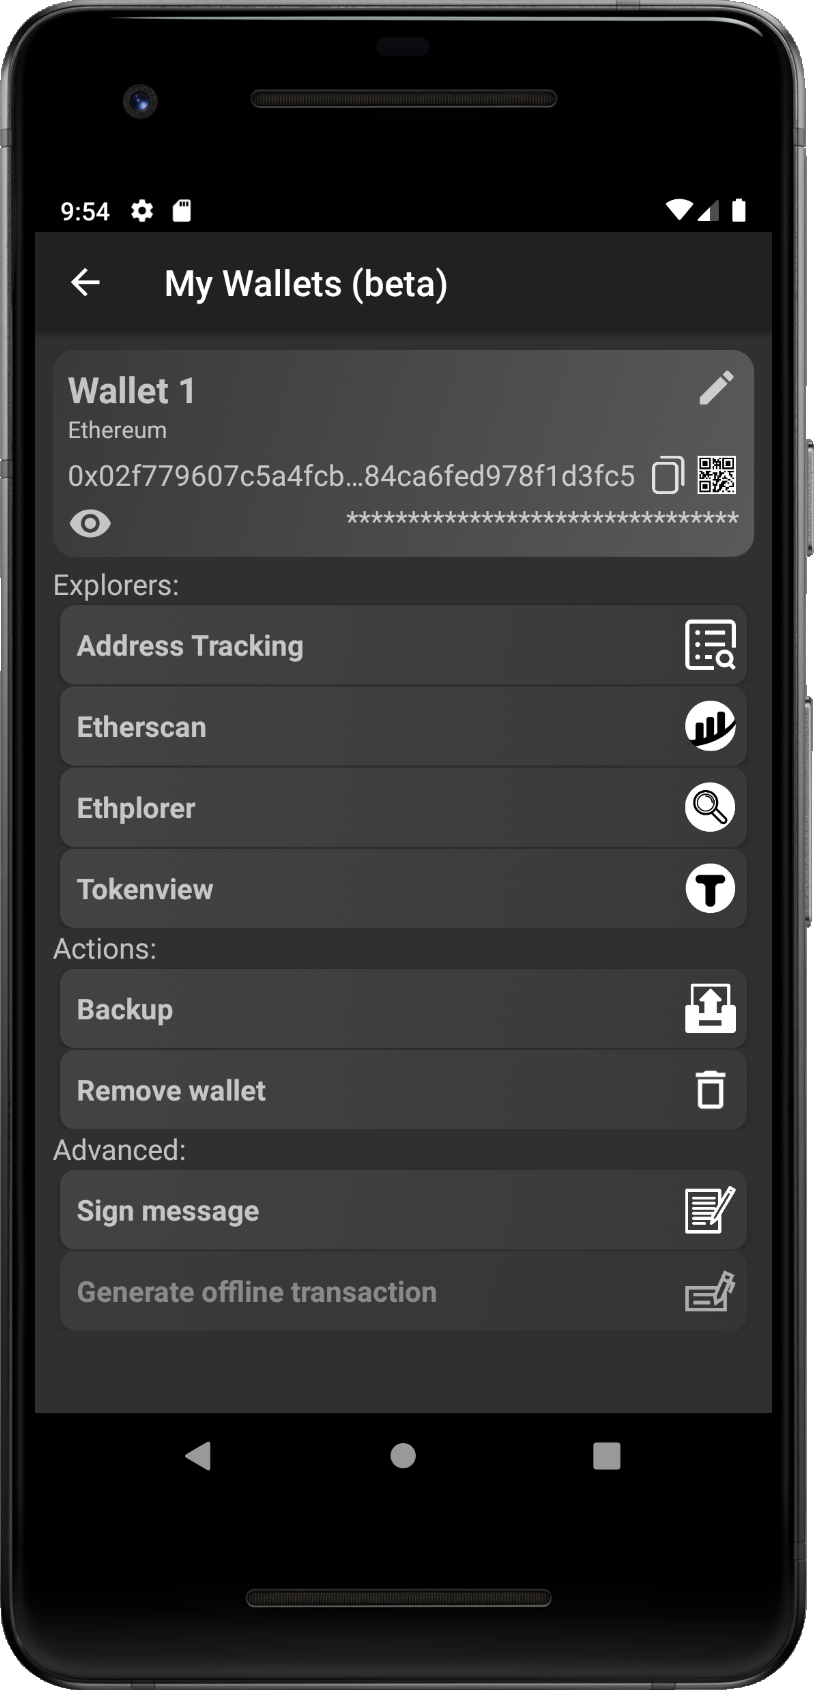
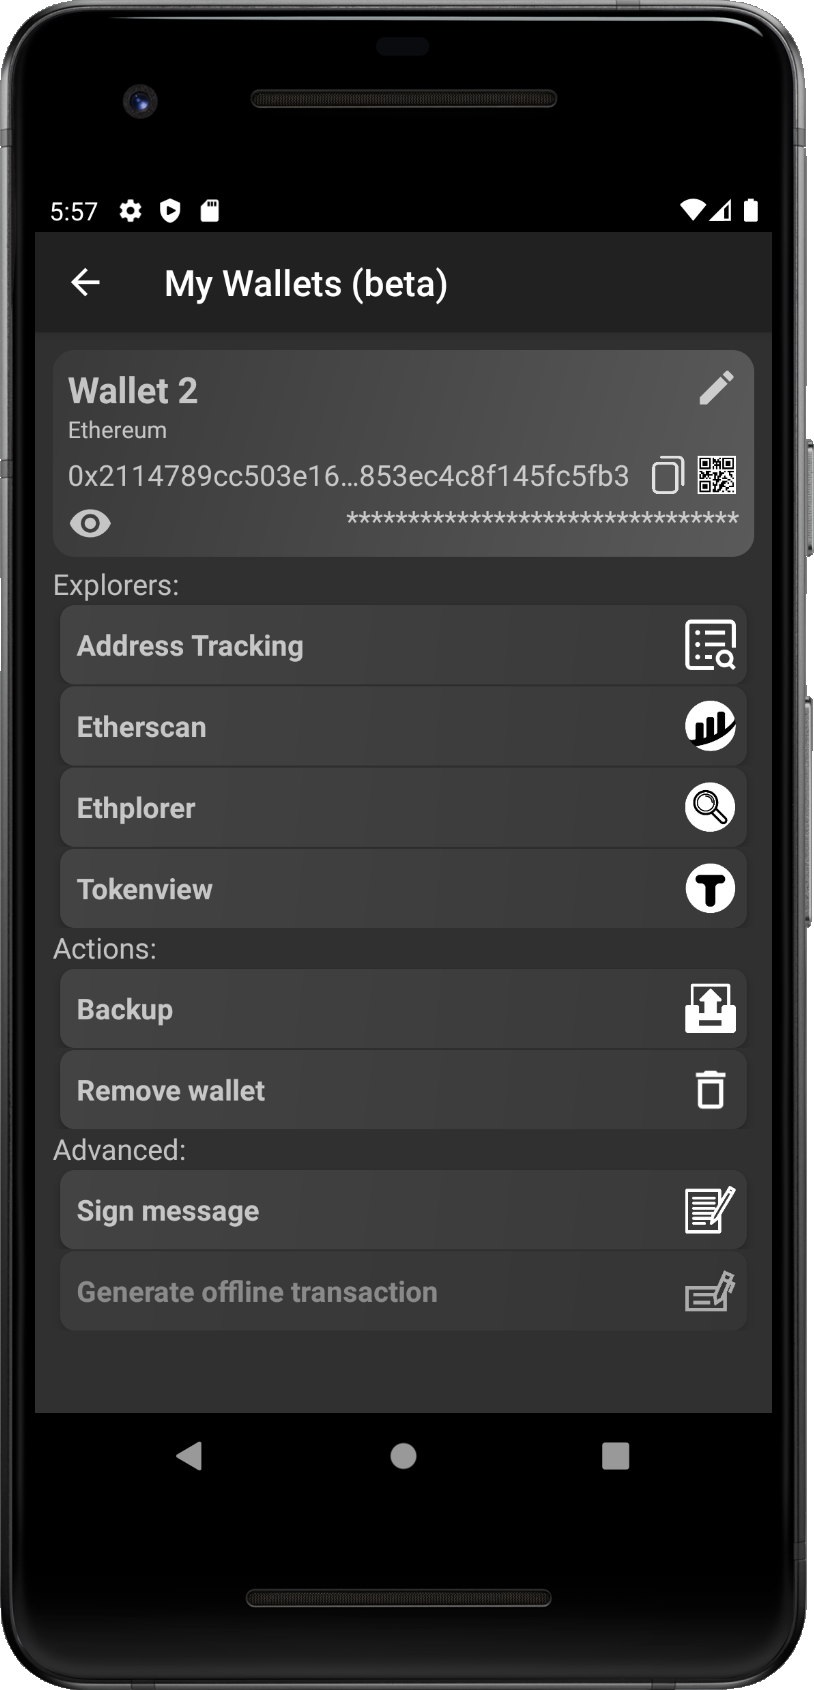
Detail screens shows basic info about the wallet and let you perform some basic actions with your wallet.
Widget on the top o the screen shows basic data as name of your wallet, which you can change,
address of the wallet and private key. You can copy the address to the memory if you tap on the
copy button next to it. You can also generate QR code of your address,
if you tap on the QR code icon next to copy buton.
Private key is encrypted by default, if you wnat to reveal it, you have to unlock the wallet with
your password. You can do it, if you tap on the eye icon under the address. Then you
can use similar buttons to copy the private key or to generate its QR code, as will be described in
Export Private Keys.
Explorer section is right undert the wallet widget. If you want to track the address throught different explorers
you can select any from the menu. There is even option to use Address Tracking feature which, combine
some explorers together.
Action section allows you to perform two actions. Export the wallet into the file,
or delete the wallet (if you do not have backaup, access to your fund will be lost forever).
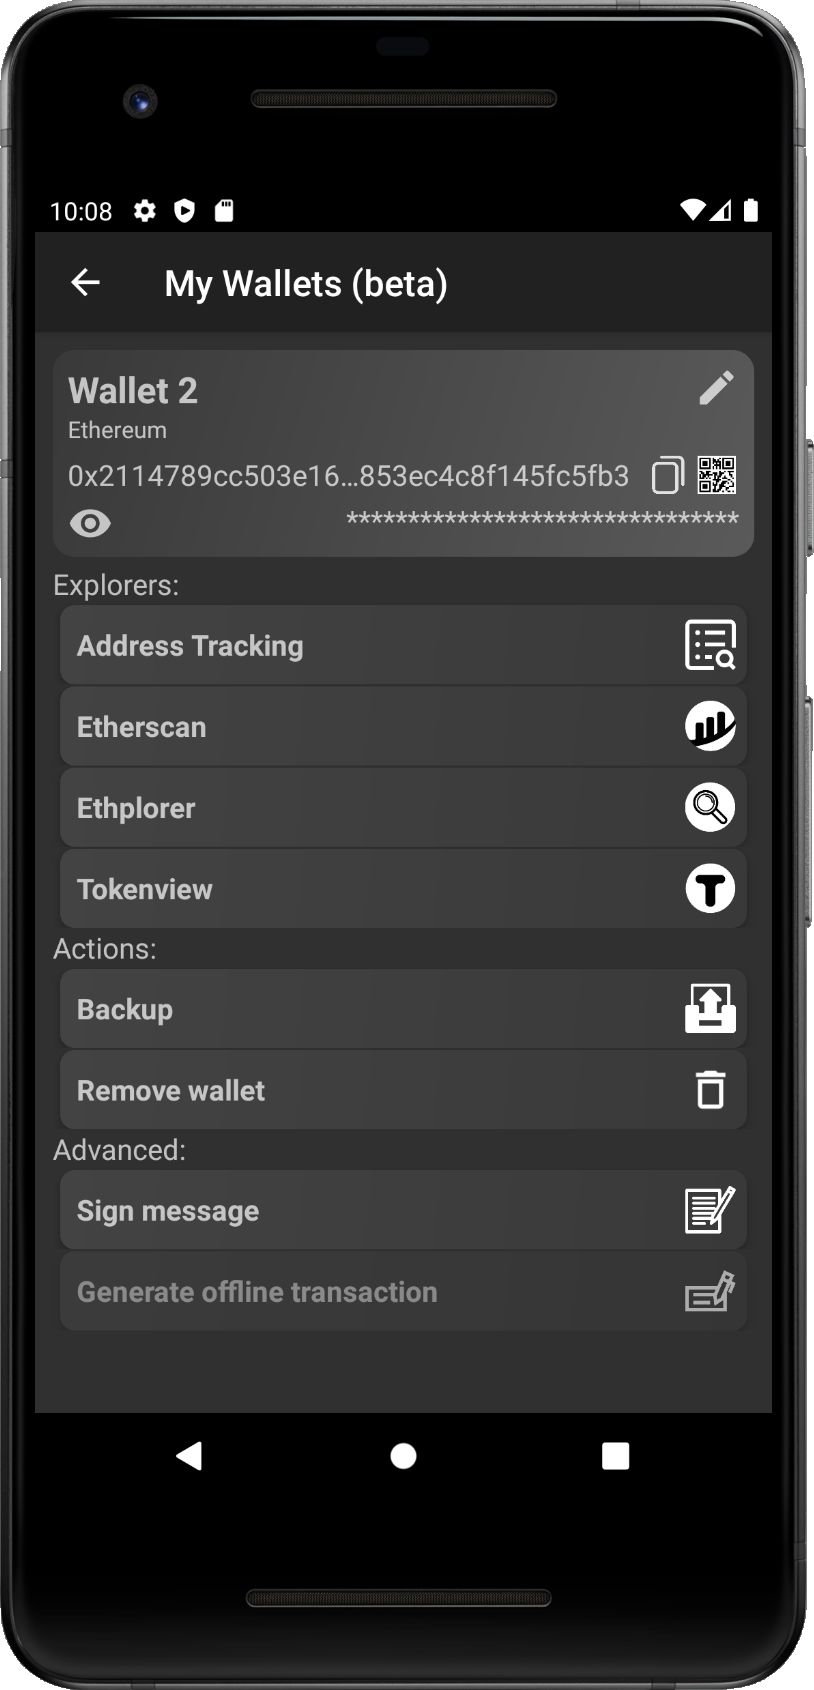
Advanced sections is focudes on signatures. First feature is signing any message with your private key. It can be used to verify ownership of the addresss by you and proving you signed the message. Second fetaure for signing offline transactions was not implemented yet. It is postponed for futher versions after the first stable release.

- Step 1 - Tap on the pencil icon in the top right corner.
- Step 2 - Edit popup will be shown.
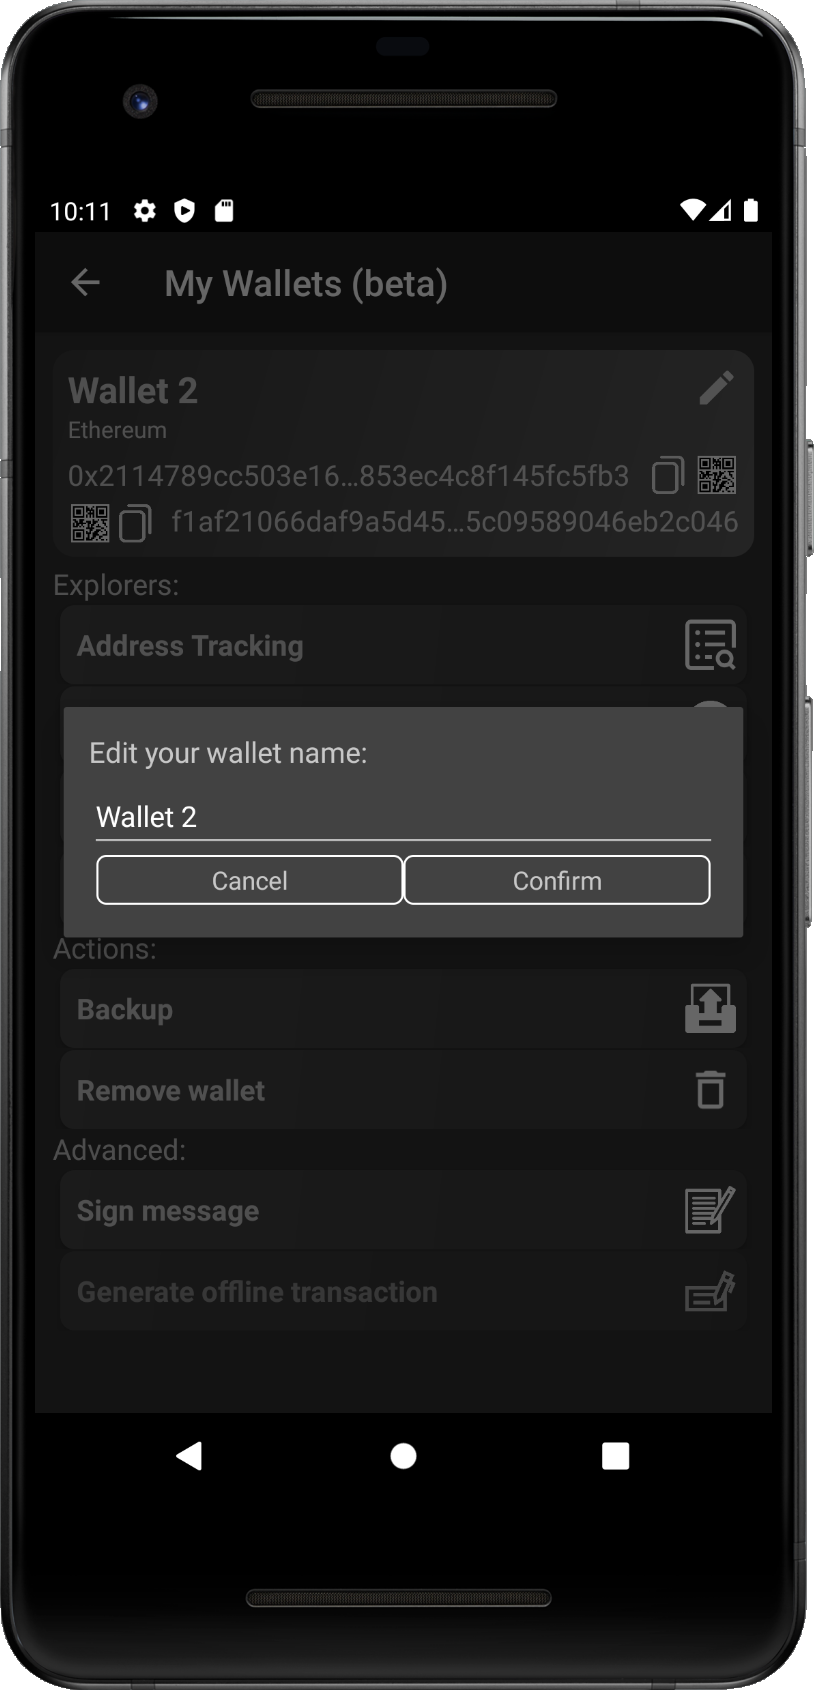
- Step 3 - Edit the name of your wallet.
- Step 4 - Confirm the edited name by tap on the 'Confirm' button, or dismiss change by 'Cancel' button.
- Congrats - You successfully changed the name of your wallet.
You can traack your address to follow current balance on the chain through the Tracking feature. The Tracking feature has its own dedicated section, in here we are going to show only how to add your generated wallet into the tracking list.
- Step 1 - Tap on the Address Tracking option from Explorers menu.
- Step 2 - You will be redirected to the tracking screen.
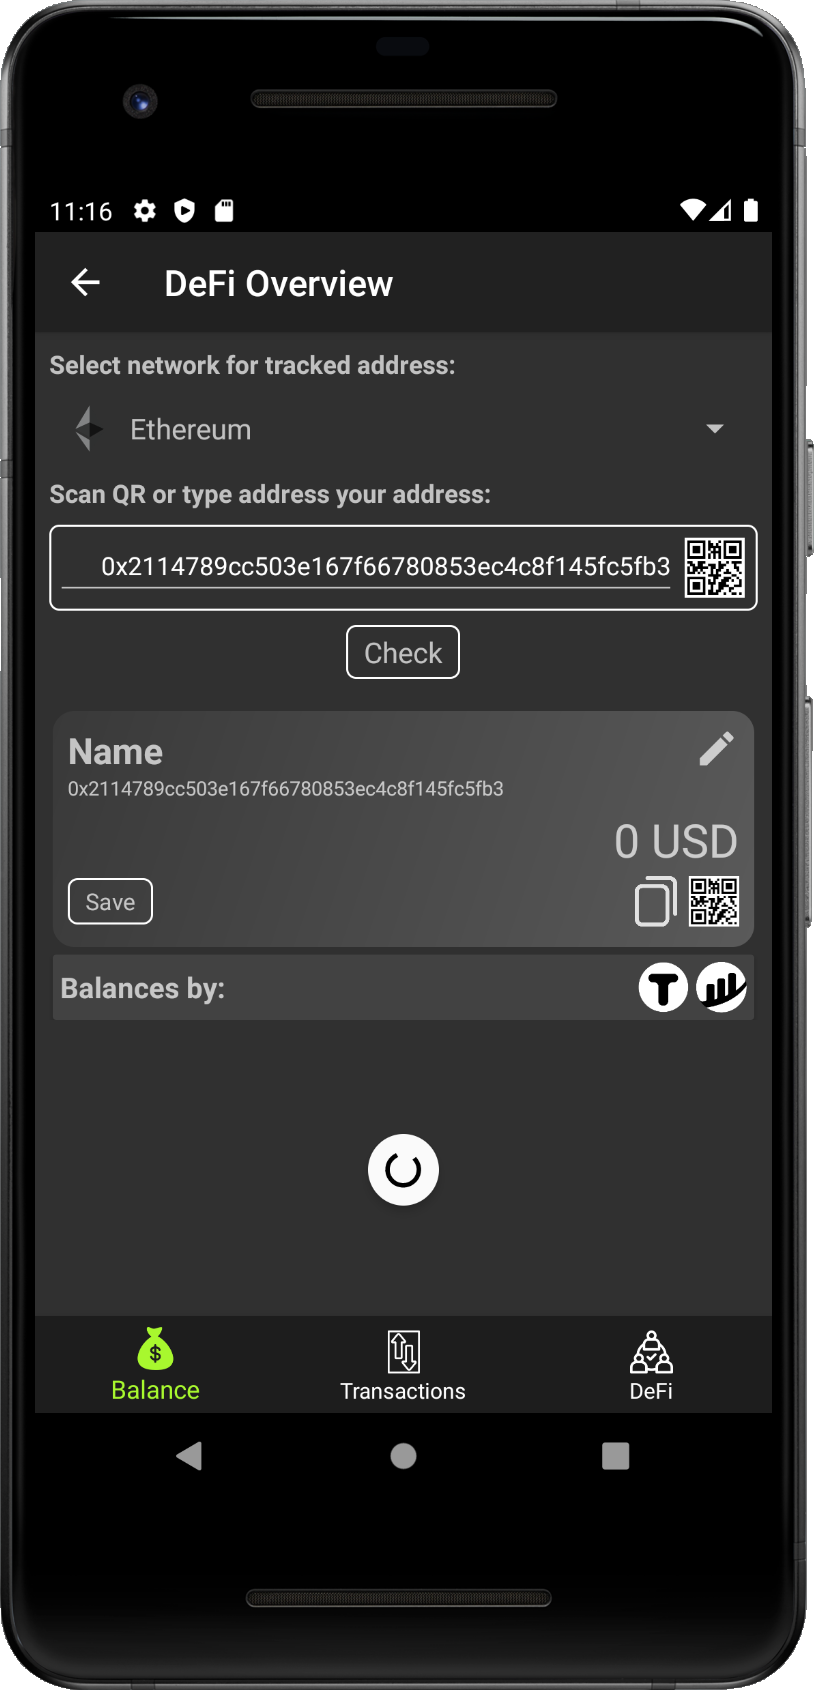
- Step 3 - Tracking screen with pre-filled address is shown.
- Step 4 - Wait untill progressbar of loading disappear and data is shown.
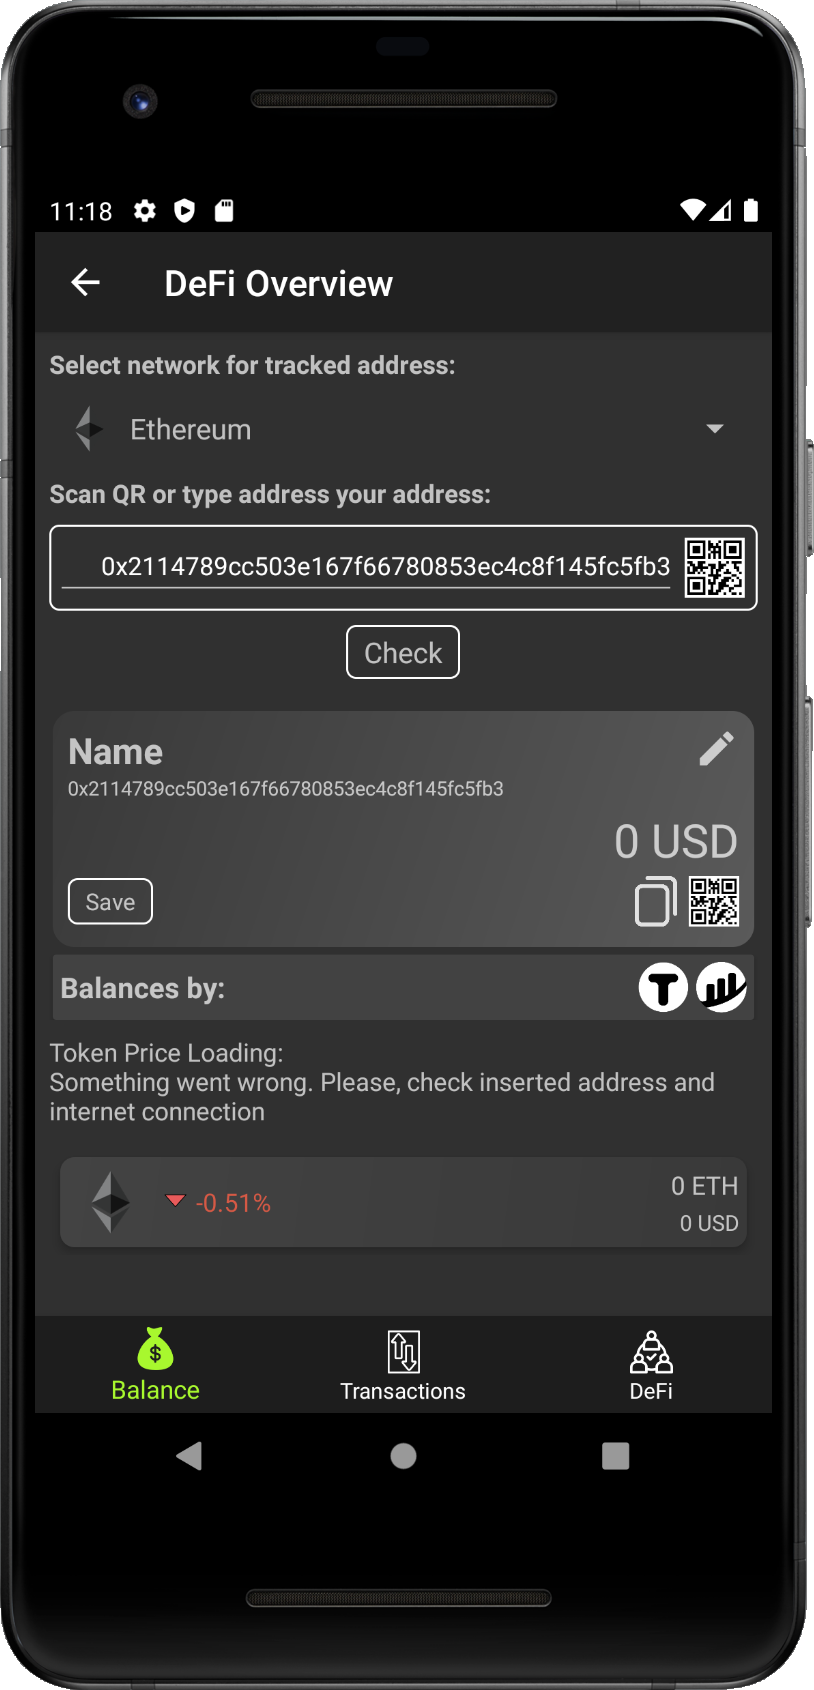
- Step 5 - Loaded funds are shown. (If the address is empty, false possitive error message might be shown as data provider is not able to recognize the address)
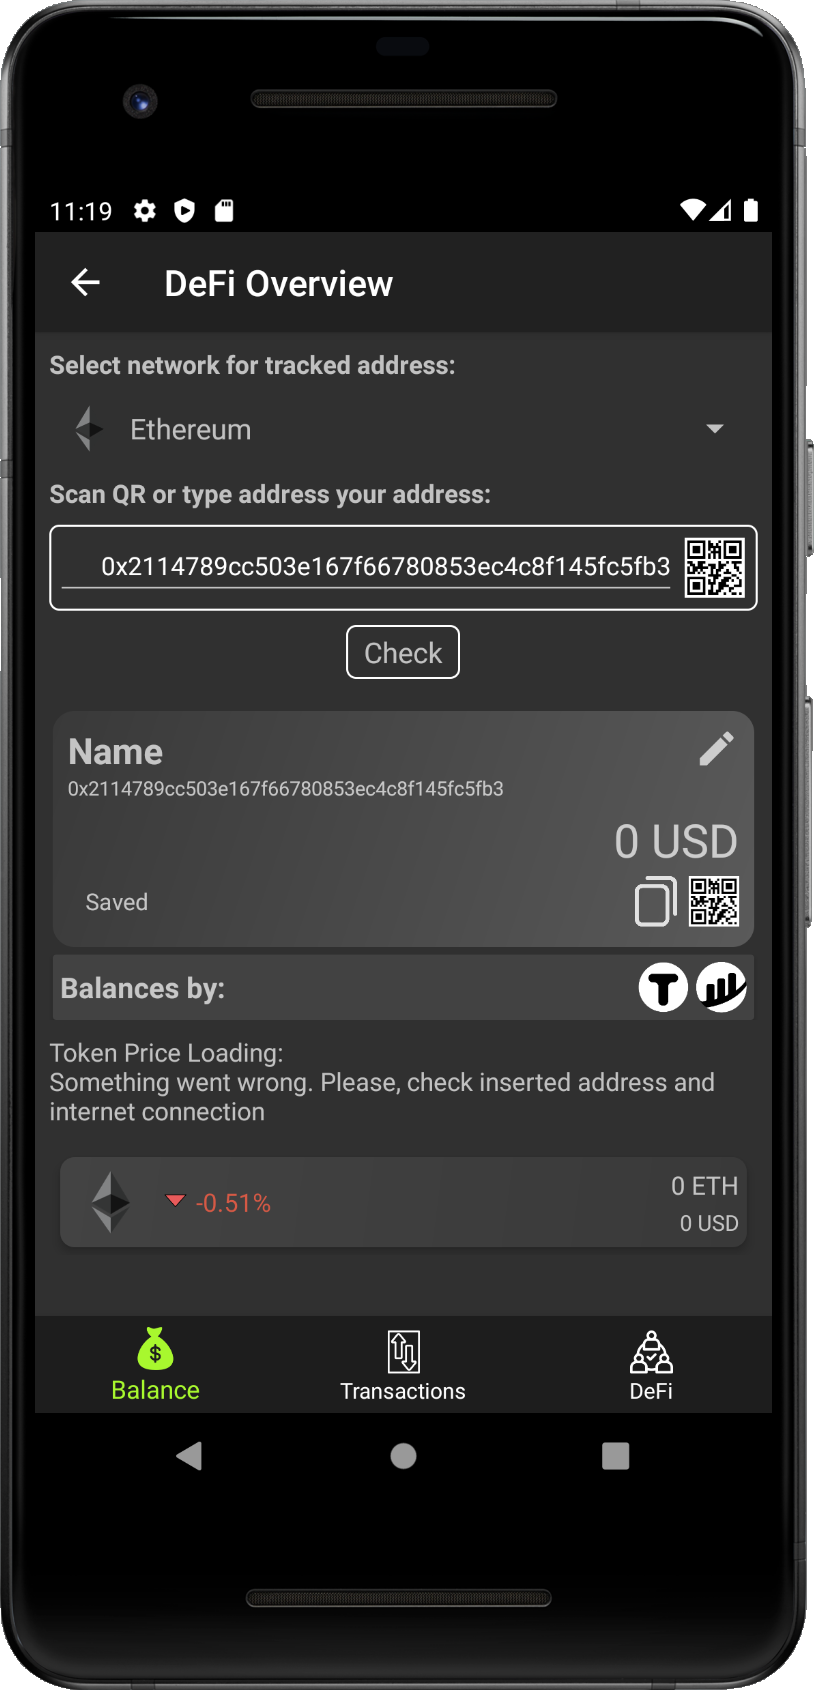
- Step 6 - Tap on 'Save' button, if you want to save address into the Tracking List.
- Step 7 - 'Save' button disapears, if the address was saved successfully, and Saved message is shown.
- Step 8 - Get back to the My Wallet screen with list of generated wallets.
- Step 9 - Tap on the 'Tracking' icon from the bottom menu to open Tracking section.
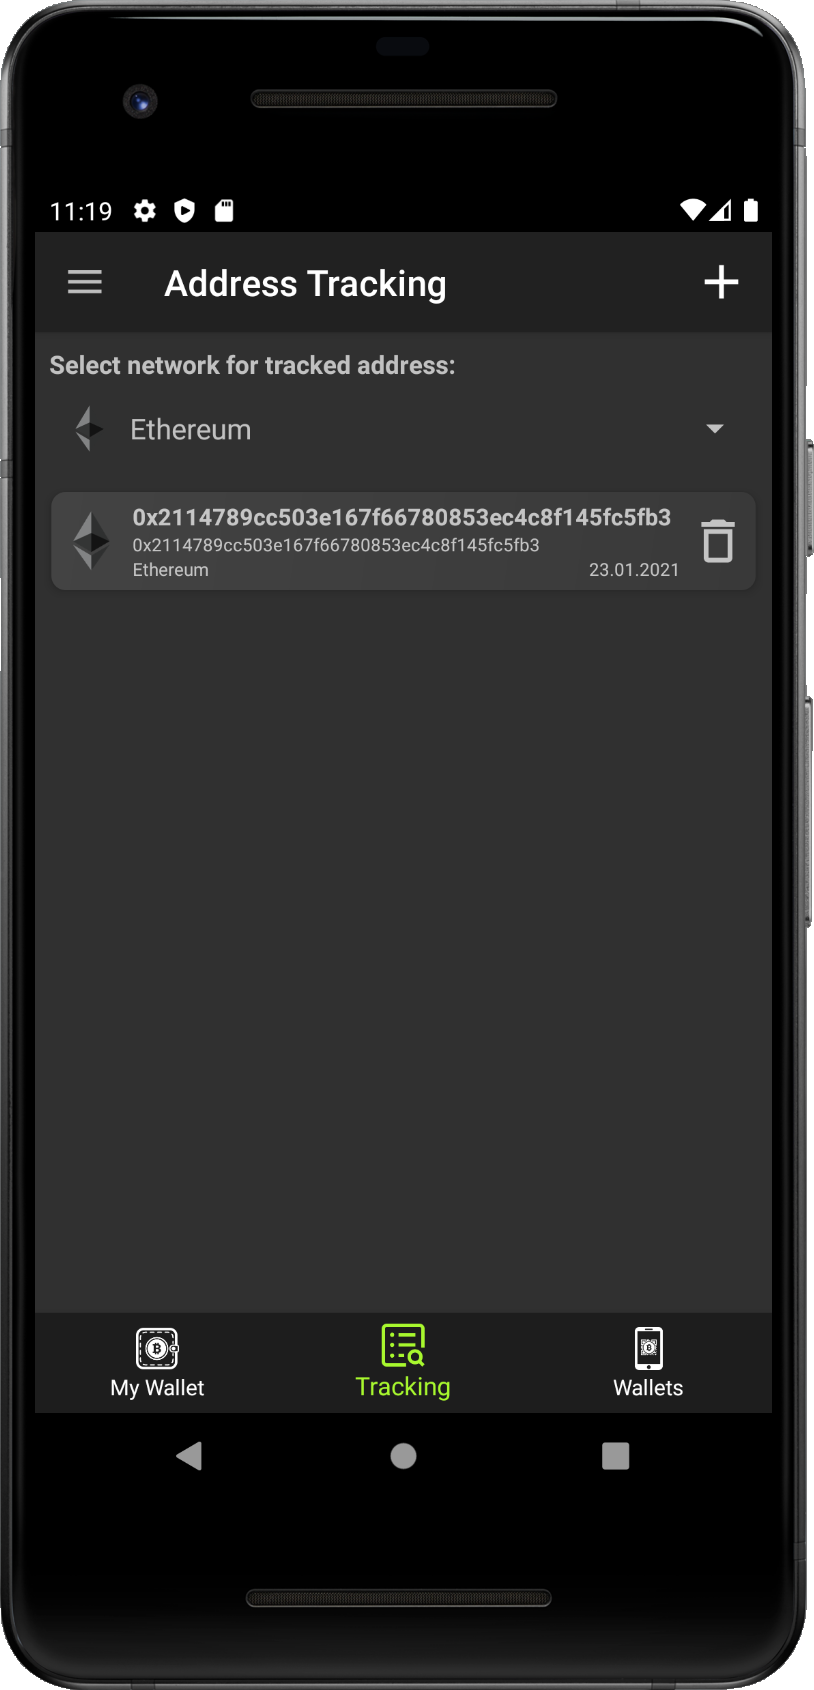
- Congrats - You can see successfully added generated wallet into your track list.
This sections shows how to export you public address to receive payments and how to export your private key or wallet file, to be able to back up your wallet and to be able to import the wallet into other wallet applications.
There are systems which asks you to insert your address directly if you want to receive any funds. On the other hand some can ask for QR code of your address to scan it. You can use both from our app. See the step by step guide bellow.
- Step 1 - Tap on the copy button next to the address.

- Step 2a - Message about copied addres to the clipboard memory is shown.
- Step 3a - You can paste the address into anywhere.
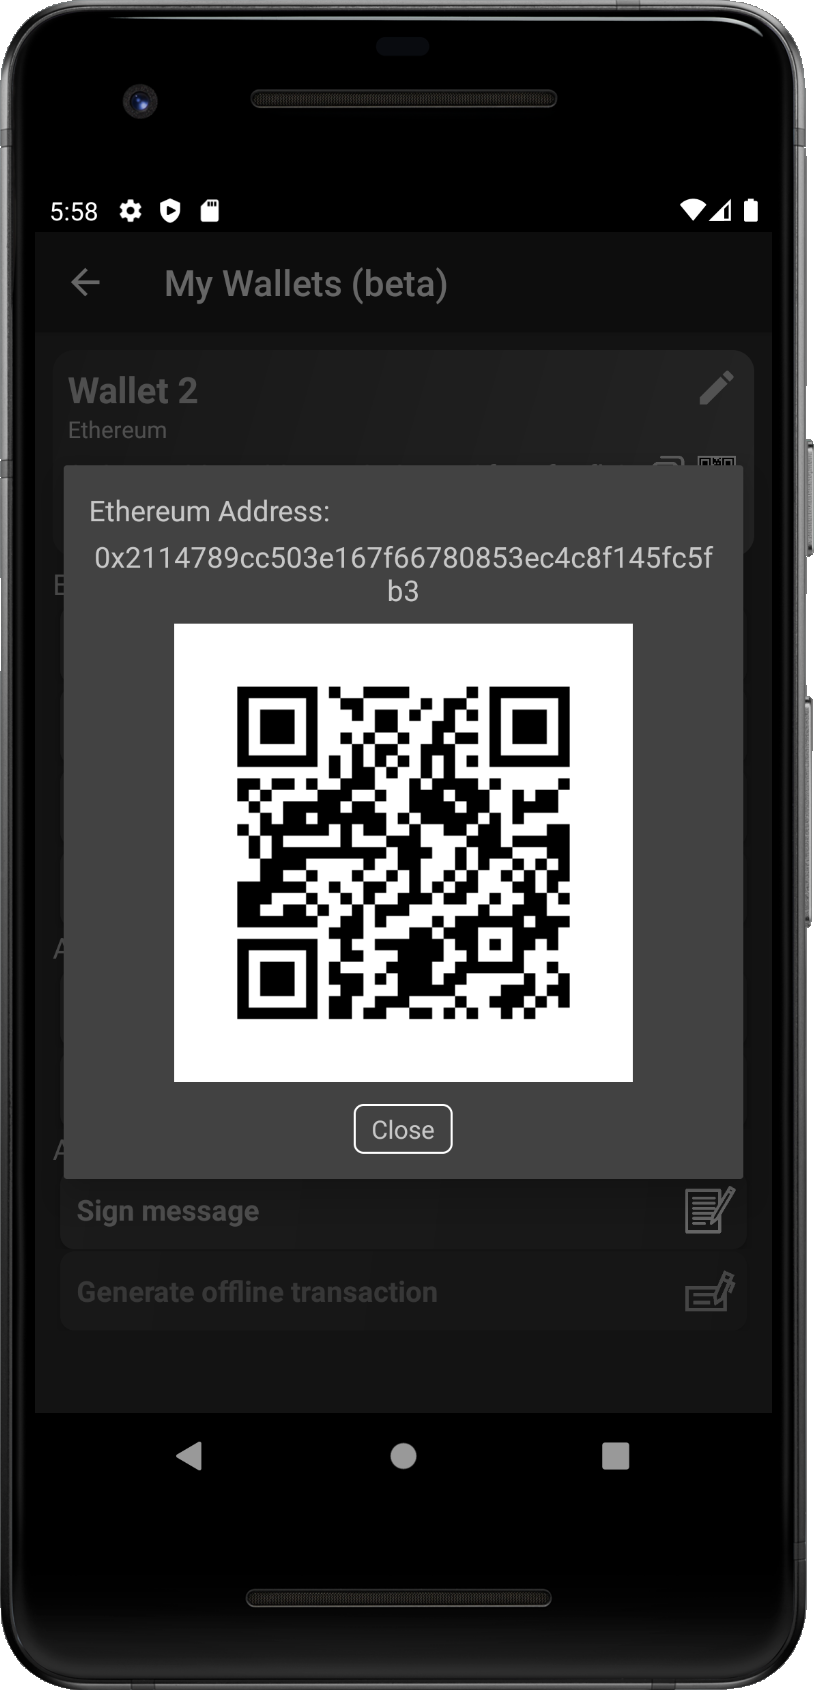
- Step 2b - To get QR code of the address, tap on the QR code icon .
- Step 3b - Popup with QR code is shown and can be scanned.
You should be very careful, when you manipulate with primary key. Once some is able to highjack it, he person has access to your funds. Be very careful when you use your private key.
- Step 1 - Tap on the eye icon .
- Step 2 - Popup to unlock the wallet will be shown.
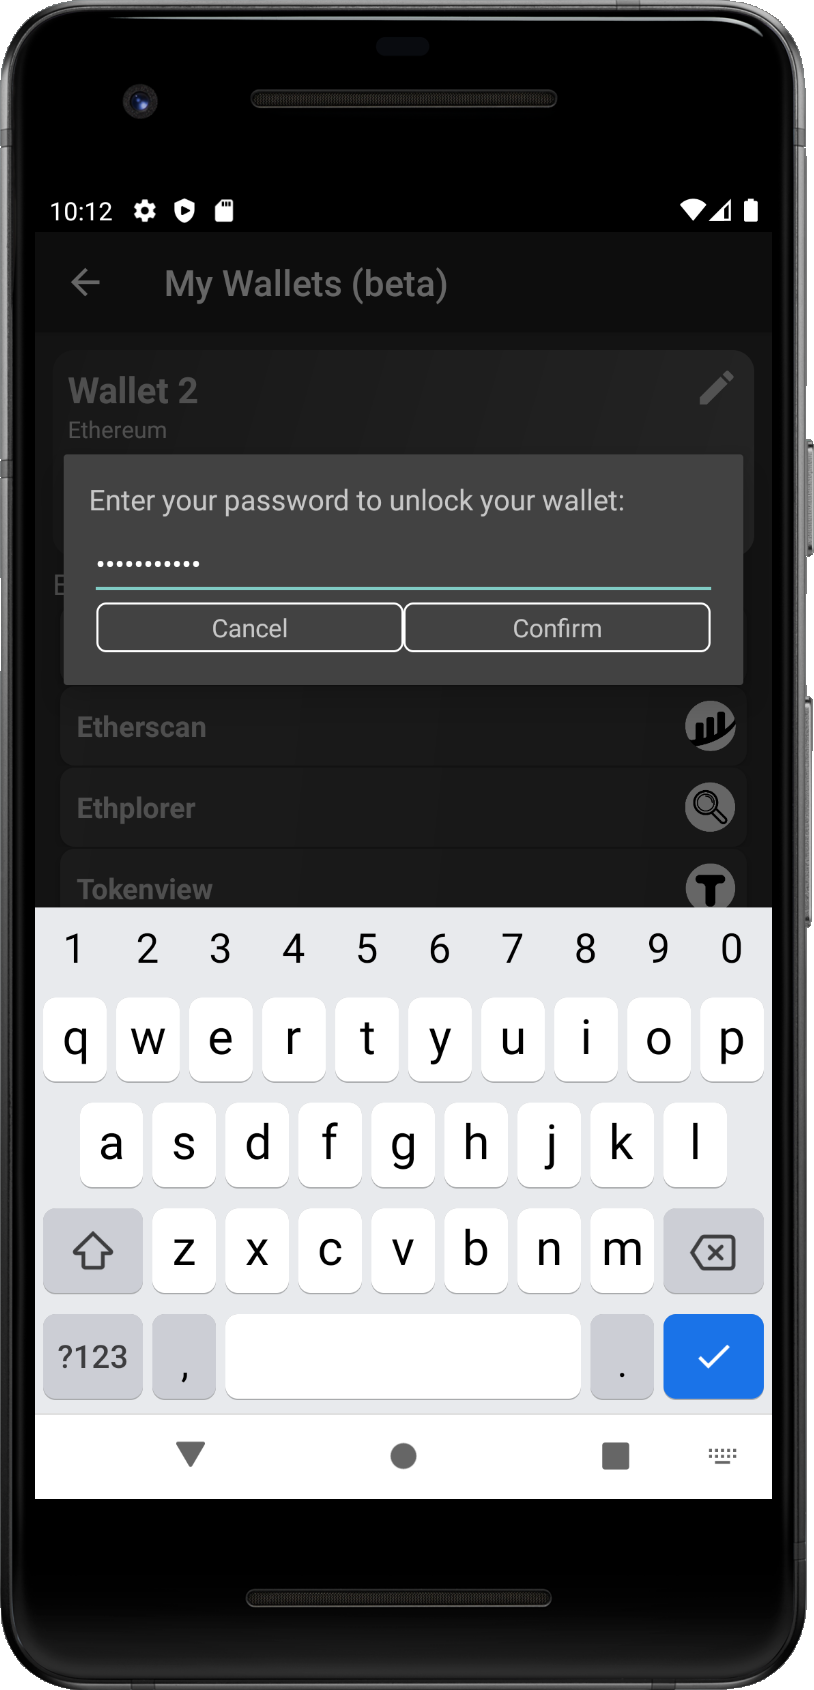
- Step 3 - Enter the password to unlock the wallet to show Private Key.
- Step 4 - Confirm the password by tap on the 'Confirm' button, or return back by 'Cancel' button.

- Step 5 - If the password is correct, info popup about unlocking is show.
- Step 6 - Wait until the wallet is unlocked to show Private key.
- Step 7 - The eye icon disappeard, you can see copy icon and QR code icon instead. Private Key itself is shown also, instead of string of ************
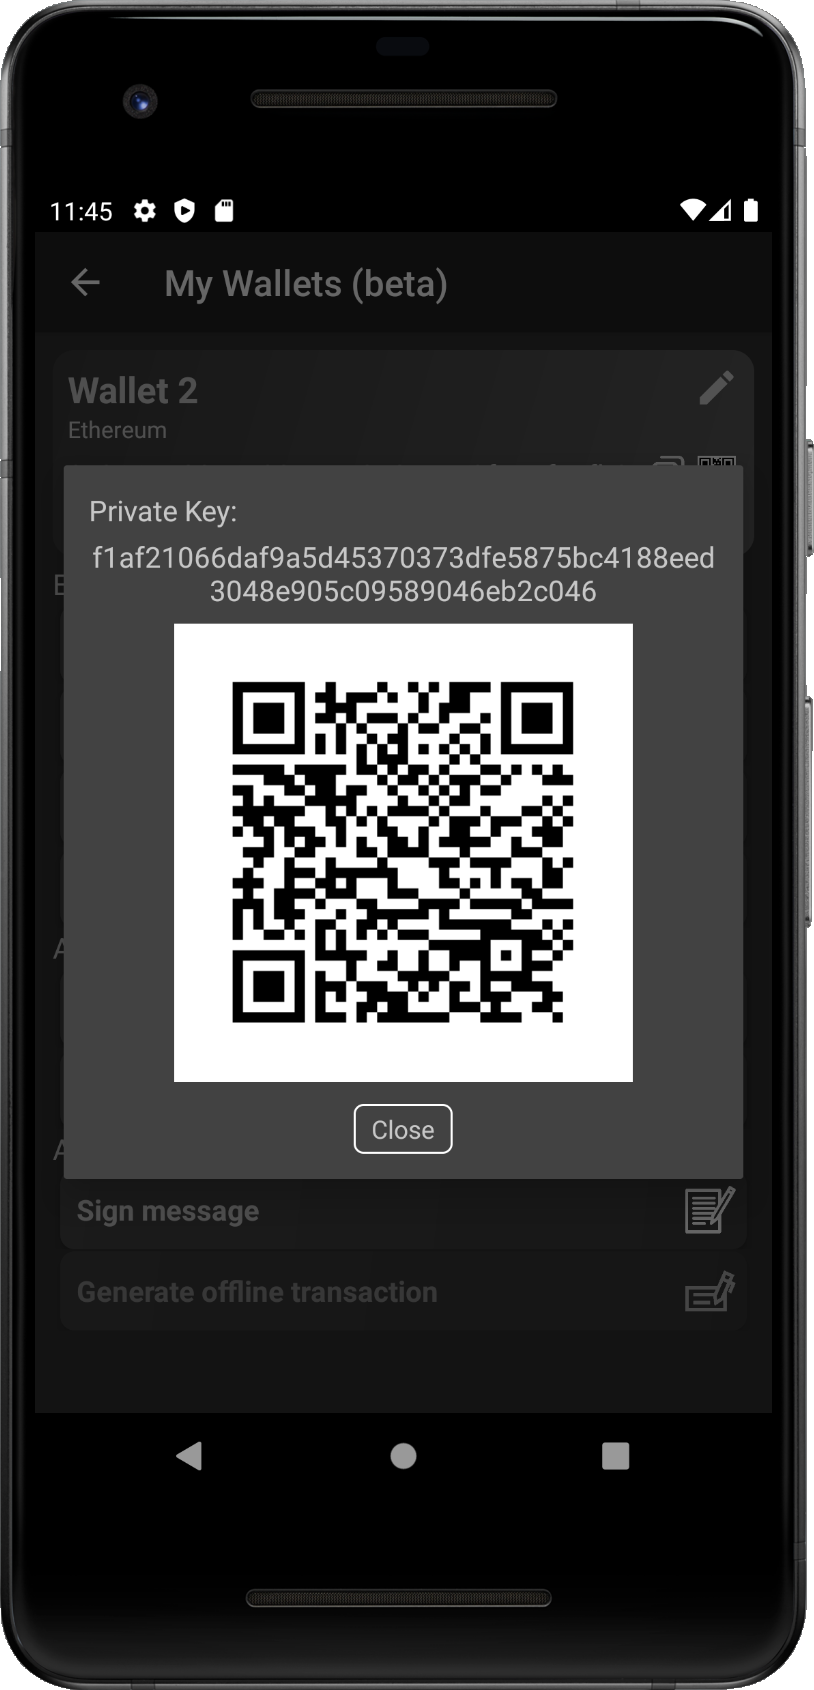
- Step 8a - To get QR code of the Private key, tap on the QR code icon .
- Step 9a - Popup with the QR code of Private Key is shown and can be scanned.
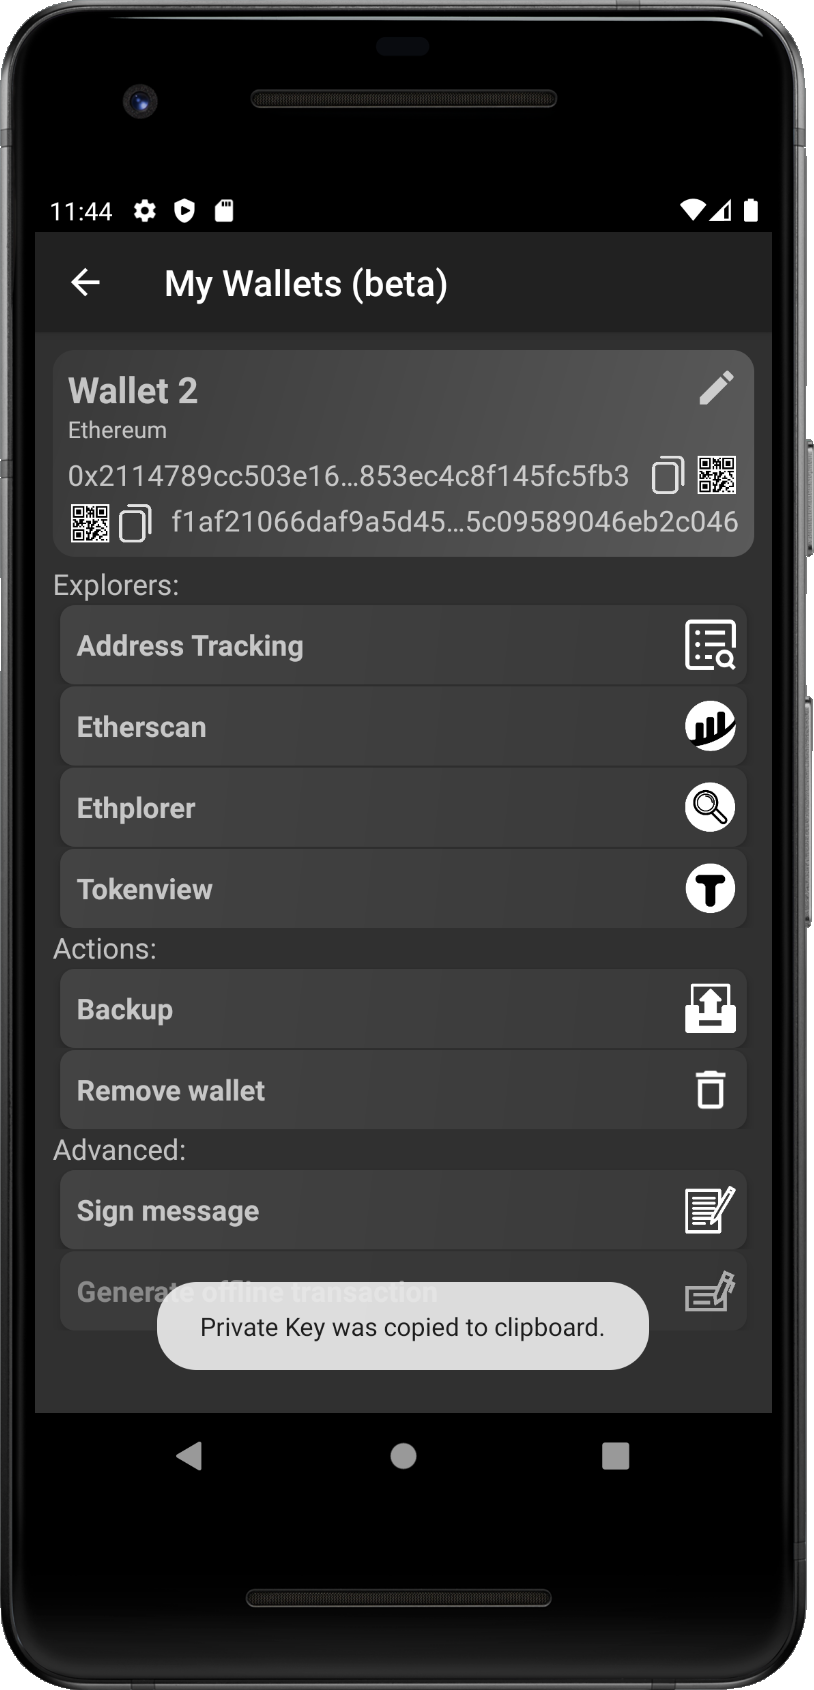
- Step 8b - To copy the Private key into the clipboard memory, tap on the copy icon .
- Step 9b - Message that Private Key was copied is shown. Now you can import the Private Key into another wallet app.
Exporting the wallet file is safer option how to export your wallet. DeFi overview enforces you to use password to encrypt the wallet, thus the password is needed if you want to access the wallet from the file. Following pictures shows step by step guide to export your wallet into the wallet file.
- Step 1 - Tap on the Backup option from Actions menu.
- Step 2 - Popup to unlock the wallet will be shown.
- Step 3 - Enter the password to unlock the wallet for export to the file.
- Step 4 - Confirm the password by tap on the 'Confirm' button, or return back by 'Cancel' button.
- Step 5 - If the password is correct, info popup about unlocking is show.
- Step 6 - Wait until the wallet is unlocked to show Private key.
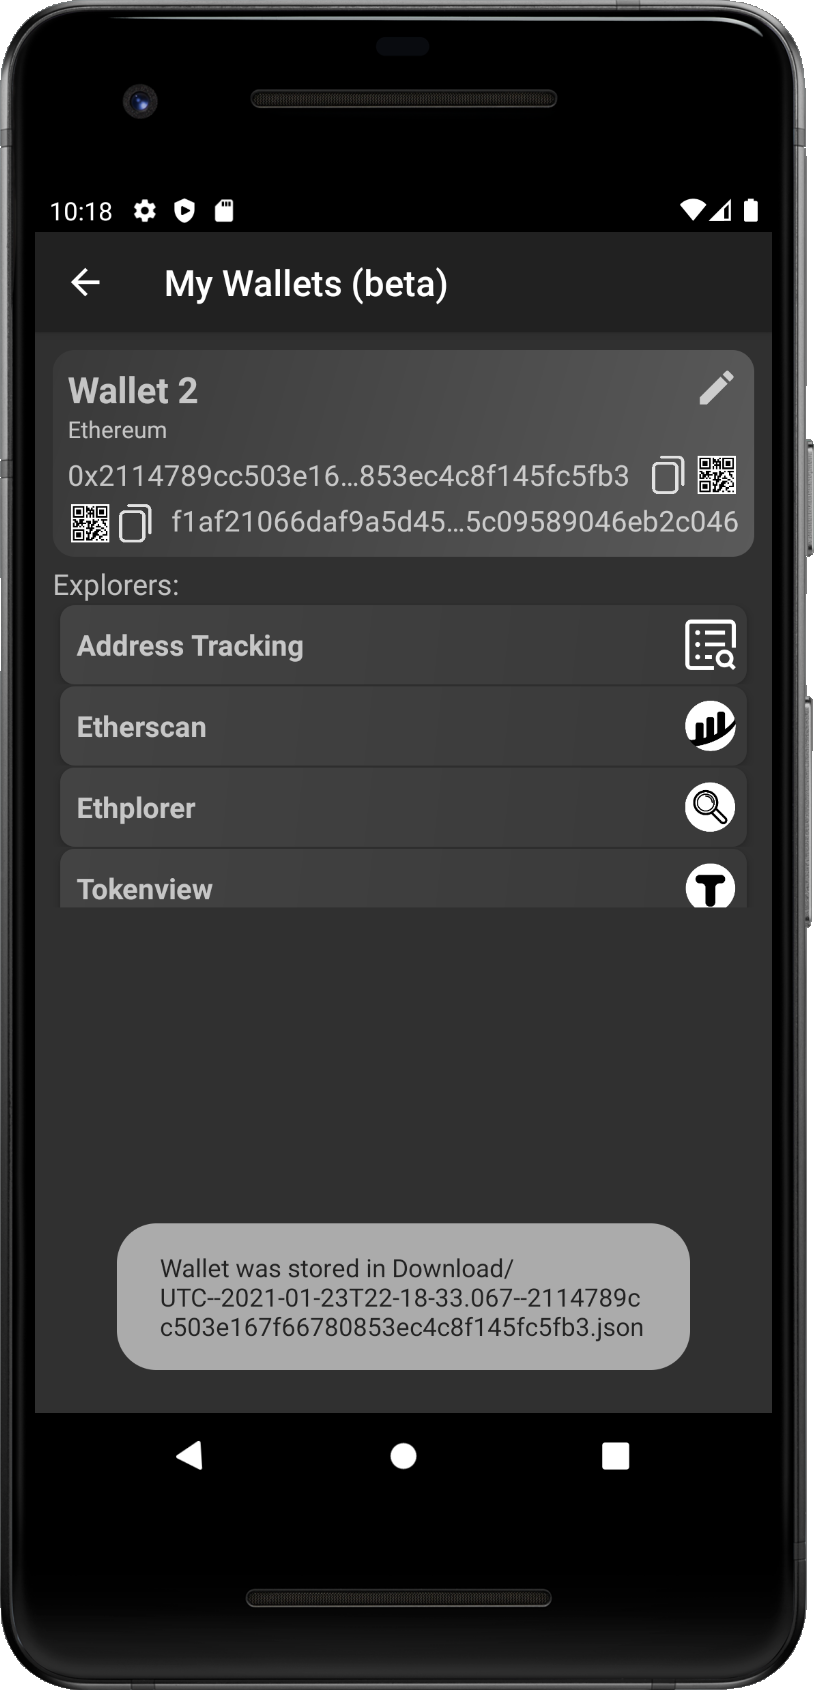
- Step 7 - If export was successful, you will se the message with the destionation where the file was exported.
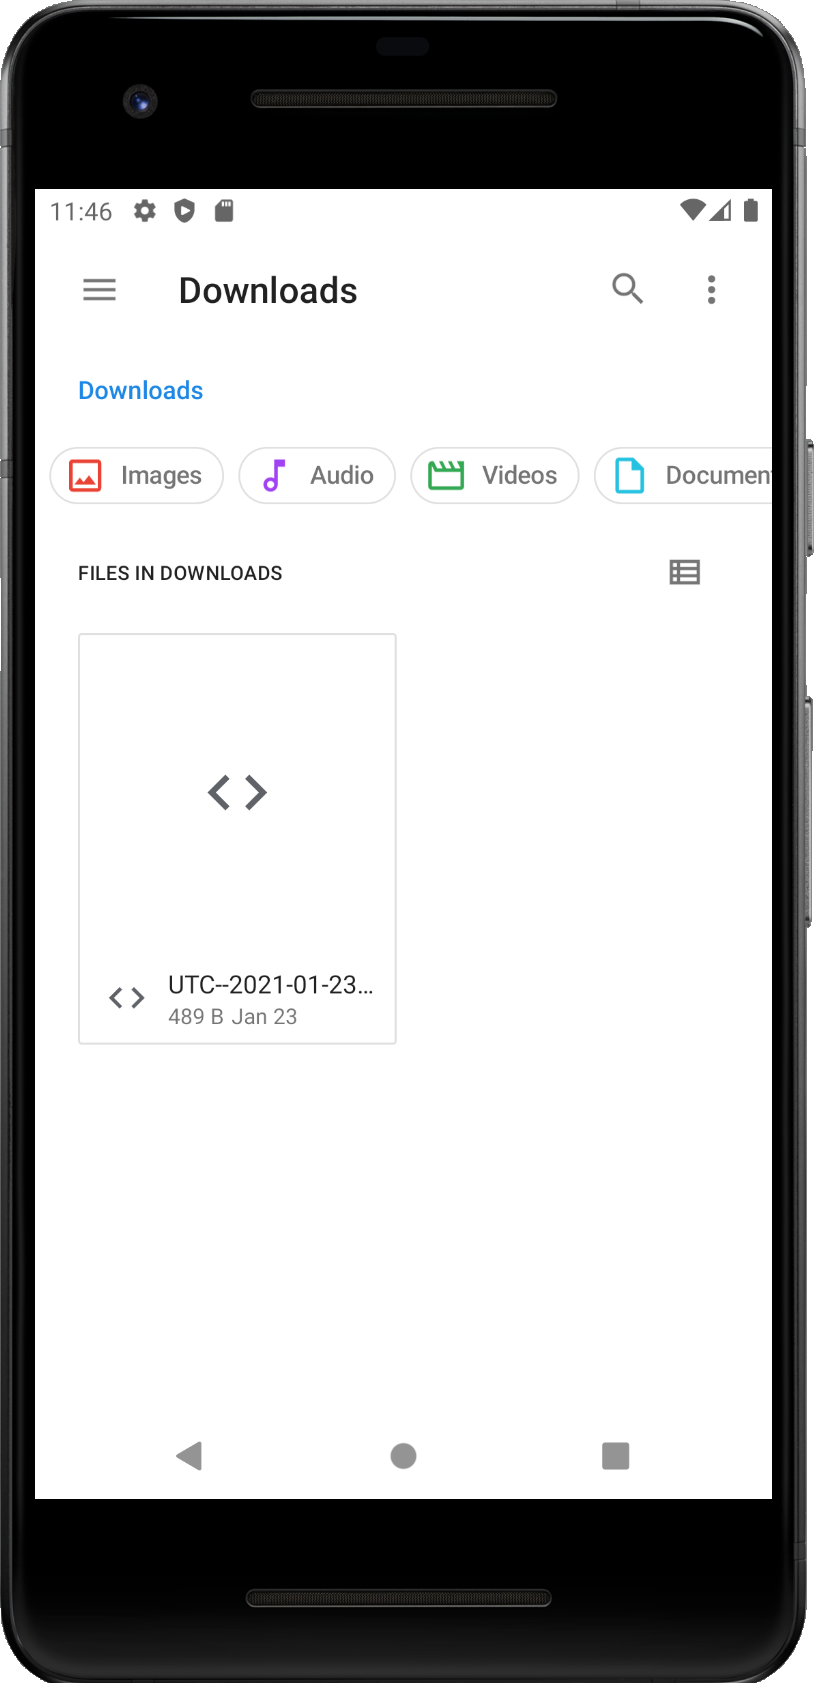
- Step 8 - [Optional] Check the destination where the file was exported.
- Step 9 - [Optional] You can try to import the file to verify it.
Signing is part of Advanced menu in the Detail screen. Currently there is implemented only support to sign message with your Private Key, however it is considered to add option to sign offline transactions. It will be decided later if this feature will be implemented (we would like to, but currenctly it seems there is need for more educational text to be written from our side to prevent some failures).
One of the basic functions of Private-Public Key cryptography is signing messages to verify ownership or to identity (authentication). We offer option to sign any text message with your Private Key to verify it was really signed by you. Follow the step by step guide below how to make it.
- Step 1 - Tap on the 'Sign message' from Advanced menu.
- Step 2 - You will be redirected o the Signing screen.
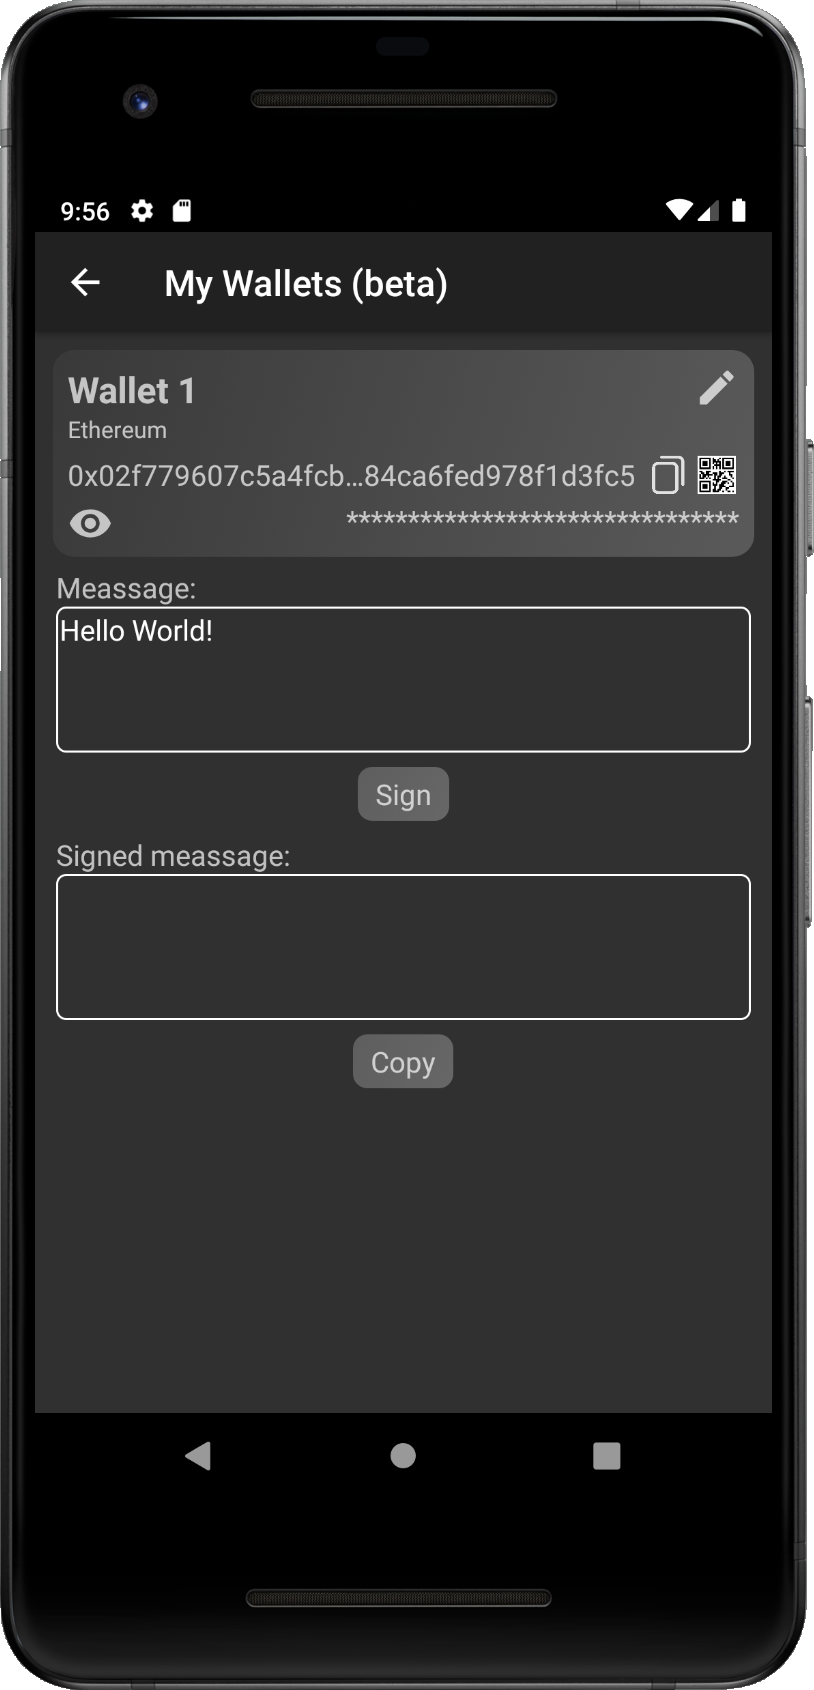
- Step 3 - Type/Paste the text you would like to sign.
- Step 4 - Tap on the 'Sign' button to sign the text.
- Step 5 - Popup to unlock the wallet will be shown.
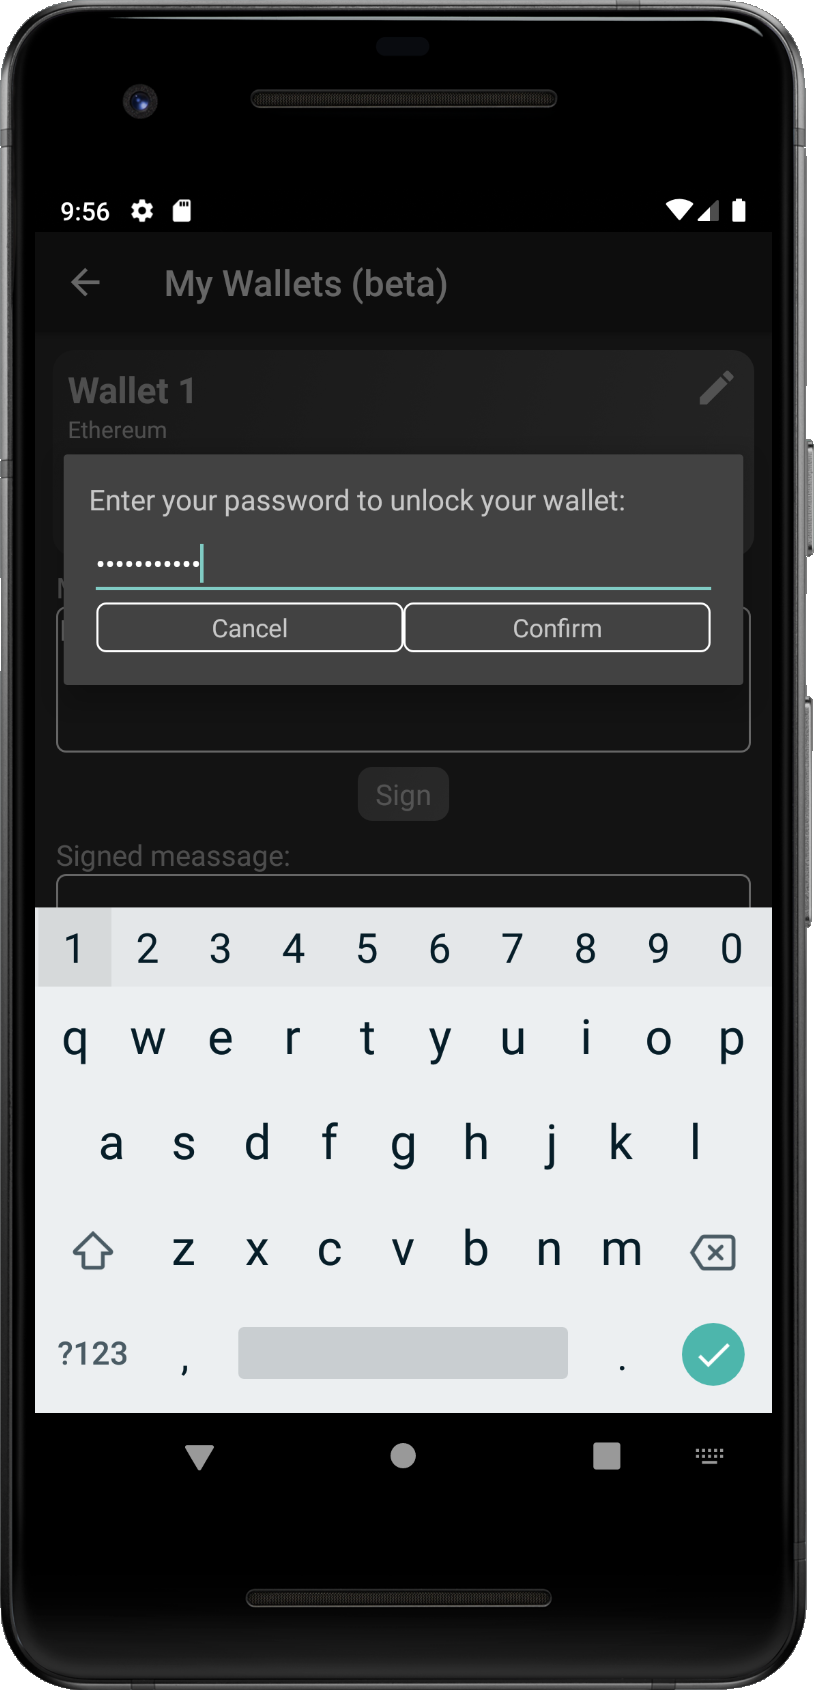
- Step 6 - Enter the password to unlock the wallet for export to the file.
- Step 7 - Confirm the password by tap on the 'Confirm' button, or return back by 'Cancel' button.

- Step 8 - If the password is correct, info popup about unlocking is show.
- Step 9 - Wait until the wallet is unlocked to show Private key.
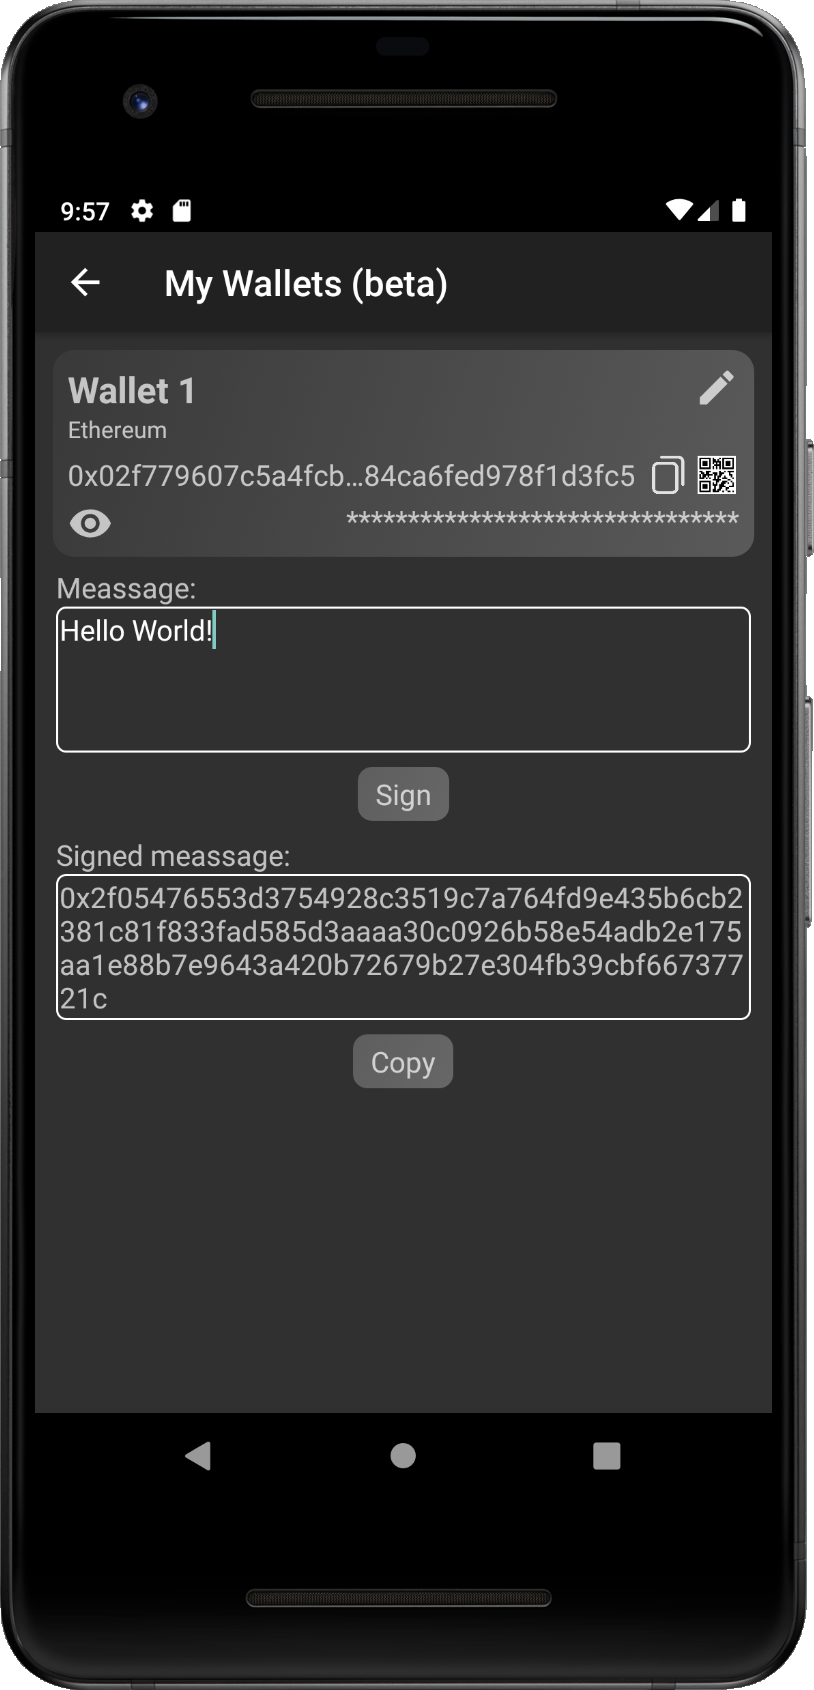
- Step 10 - If the password is correct, signed message will be filled into the Signed mesage field.
- Step 11 - Copy the signed message into the clipboard memory by tapping on the 'Copy' button.
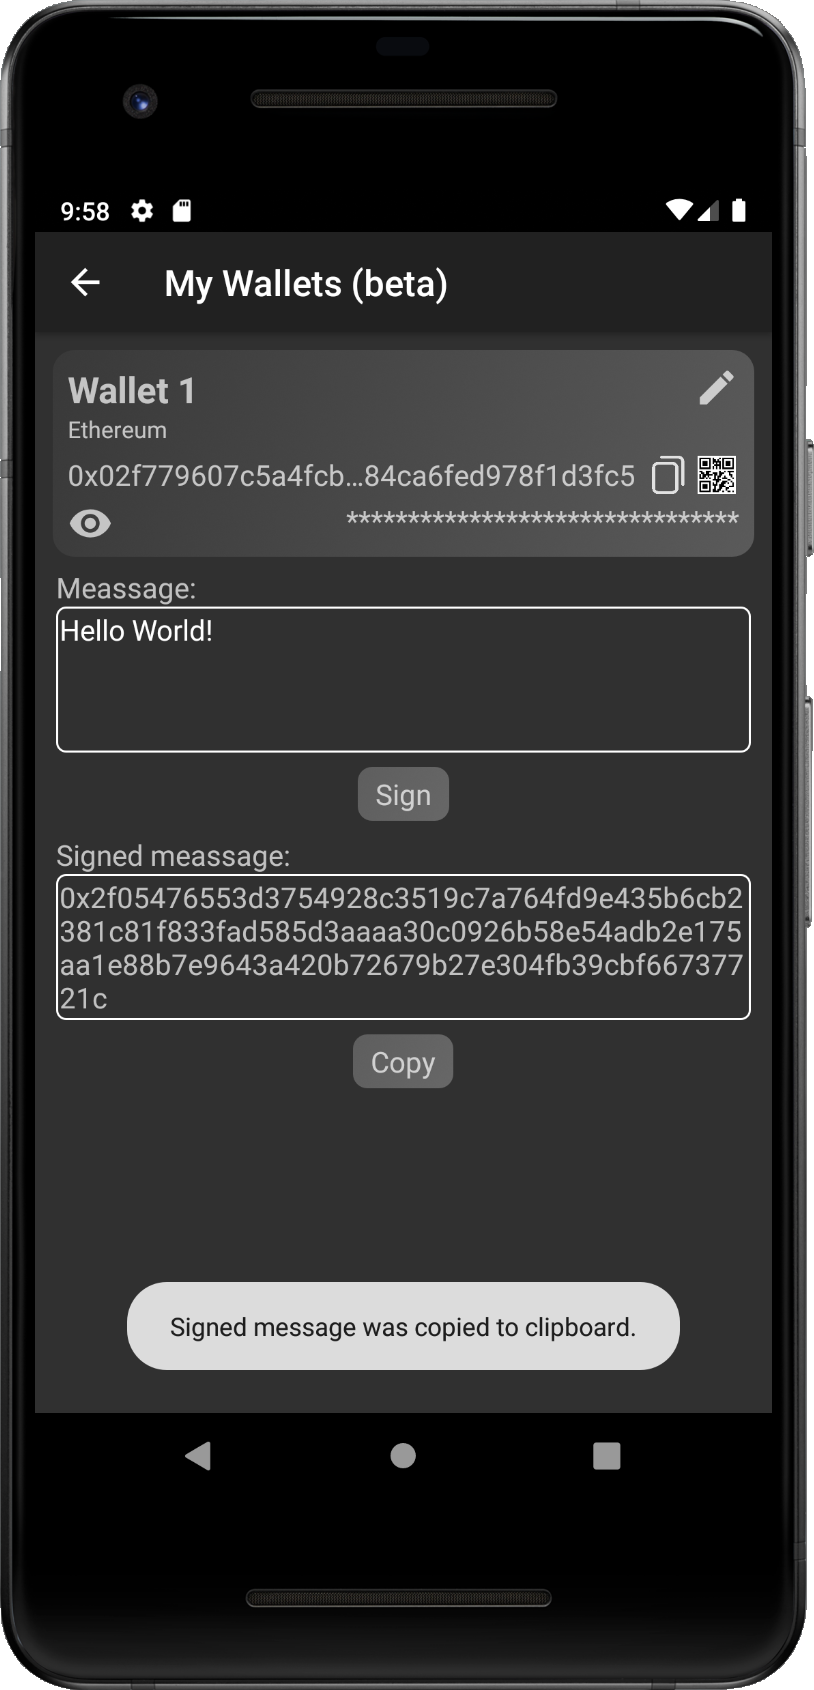
- Step 12 - Info mesage that Signed message was copied into the memory is shown.
- Congrats - You copied signed message and you can paste it anywhere.
This feature is not implemented yet. It will be decided further, if it will be included, it will depend on users feedback.
Tracking
Traking section brings opportunity to track your funds on chain. You can create your own track list of
addresses accross different blockchain to be able to track current balances, recent transactions or
positions in DeFi projects.
Curently we support following chains in alphabetical order:
Binance Smart Chain,
Ethereum,
Ethereum Classic,
Icon,
Klaytn and
Tron.
In following chapters we introduce step by ste guide how to maintain and use this feature. First we show
how to add address into the track list. Then we will explain how to use each part,
as Balance, Transactions or DeFi section.
To be able to track addresses, you need to add some into the track list. How to do it shows following stp by step guide with pictures.
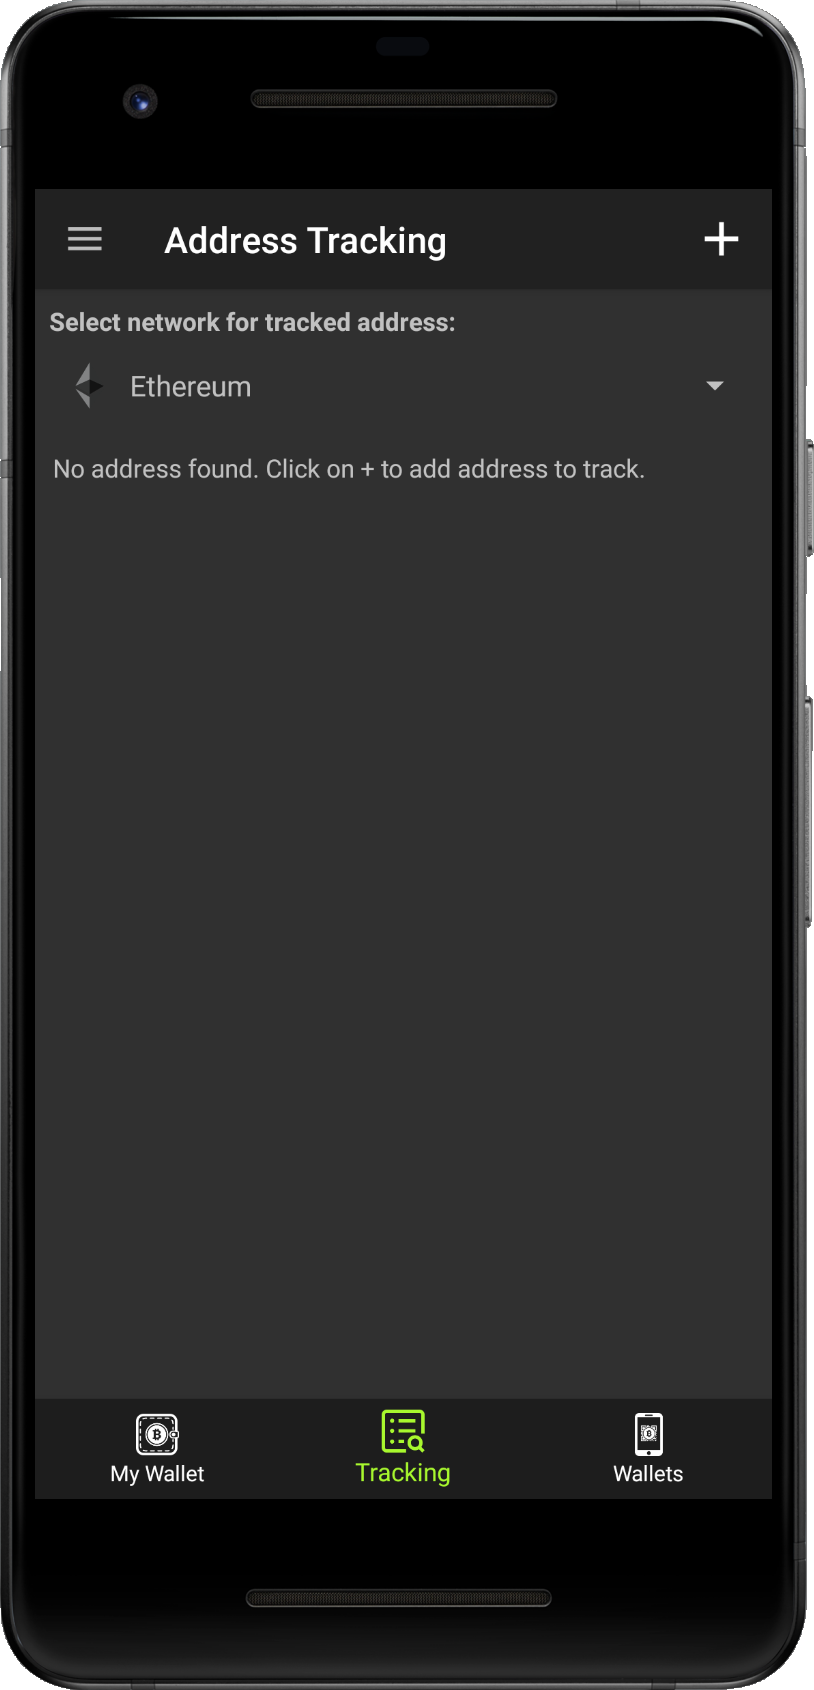
- Step 1 - On the first run, there is no address, but the process is the same when you already have any address added.
- Step 2 - Tap on the drop down, on the top of the screen, to select blockchain (Ethereun is selected by default).
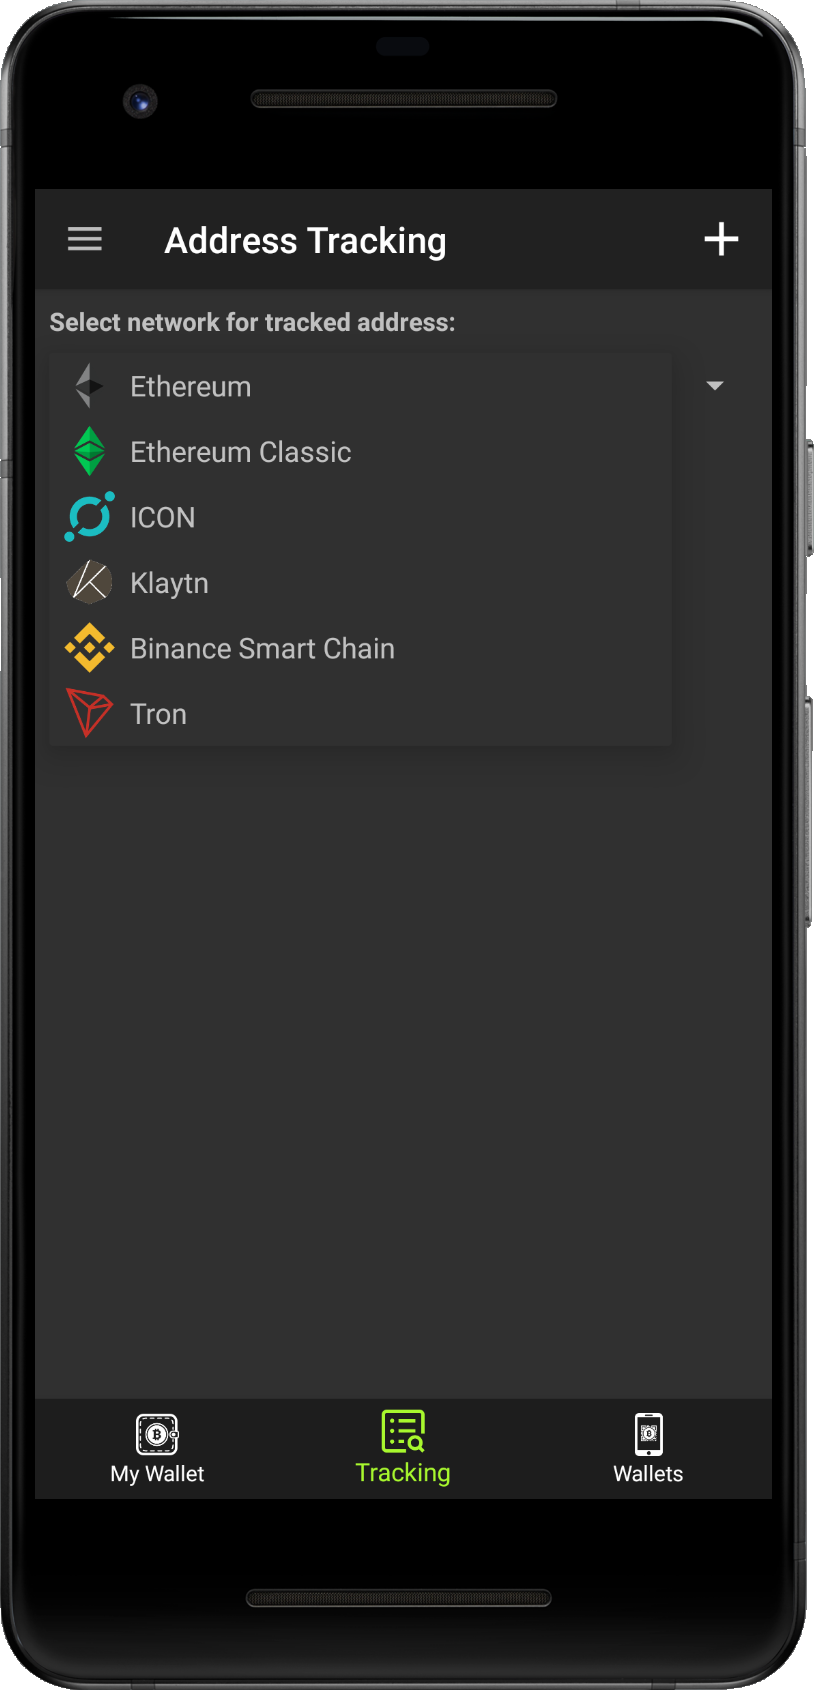
- Step 3 - Drop down shows available network for address tracking, tap on the one where you want to track your address.
- Step 4 - After selecting the network, tap on the button in the top right corner.
- Step 5 - You will be redirected to the new screen to enter the address.
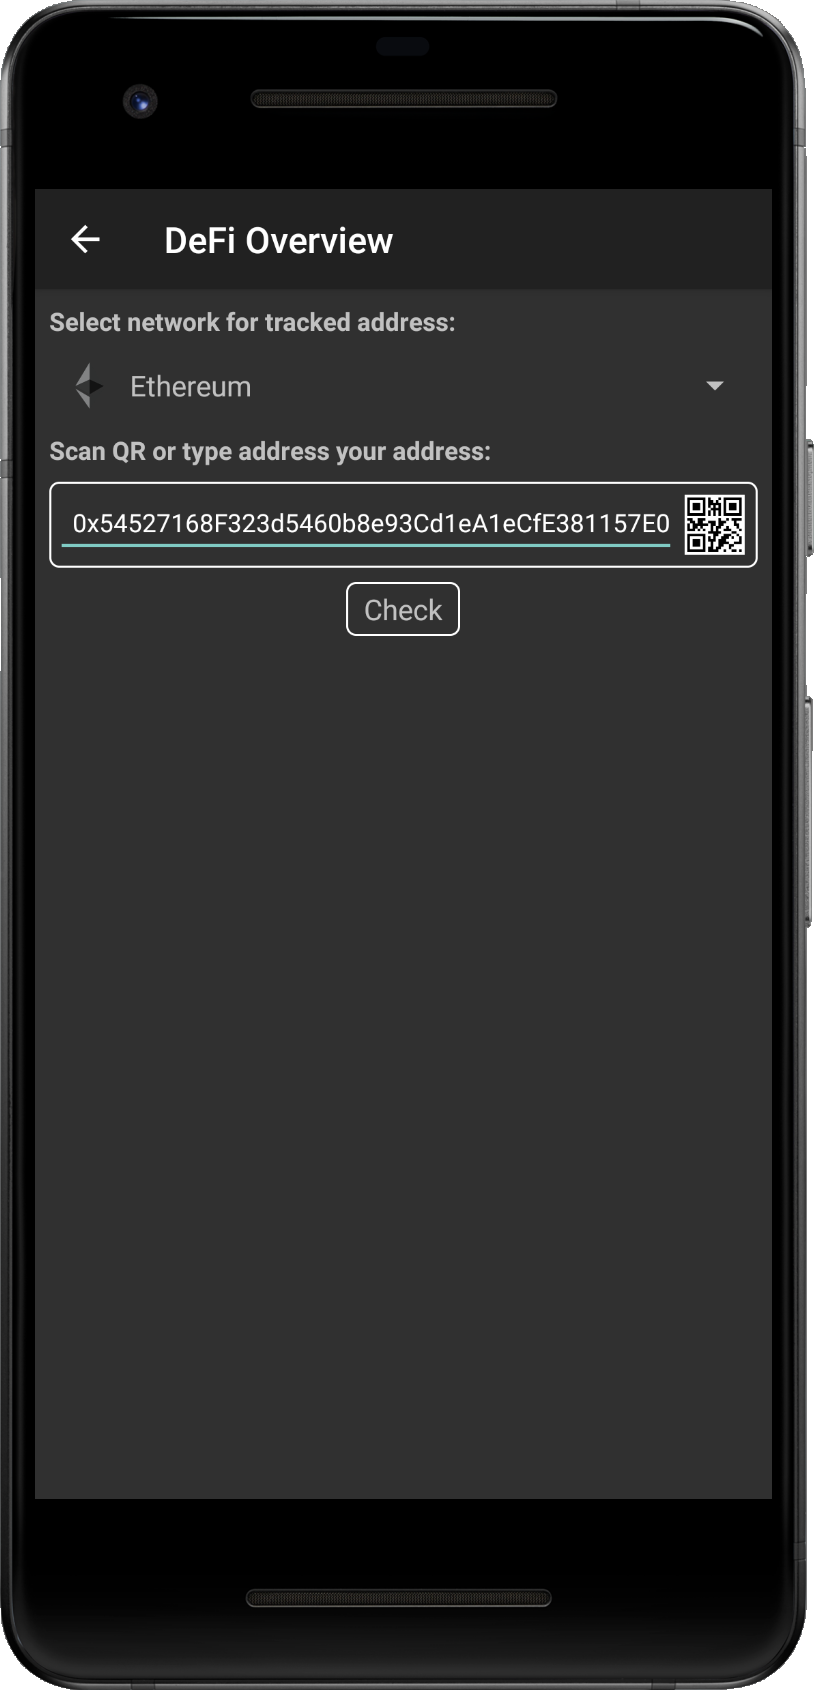
- Step 5 - On the new screen, double check the network you want to use for address tracking (still can be chaged).
- Step 6 - Enter the address you want to track. Use keyboard or tap on the QR code icon to scan the address QR code (you might be asked to allow access to your camera to scan the QR code).
- Step 7 - When the address in entered, tap on the 'Check' button and wait until balances are loaded.
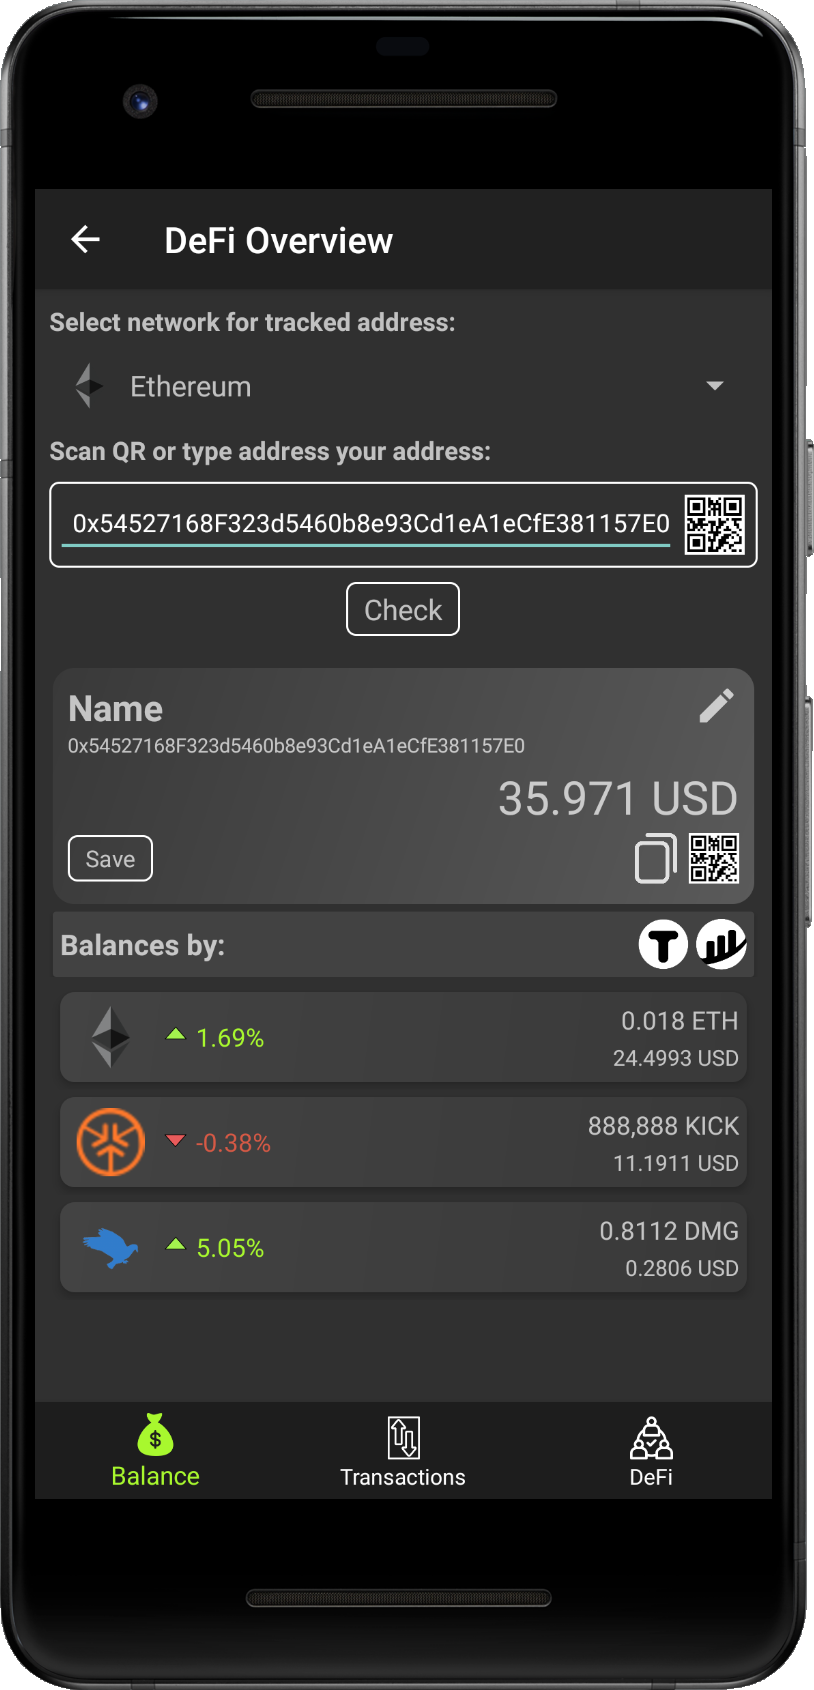
- Step 8 - If there was no error, you should see current balance of funds on the address.
- Step 9 - Tap on the 'Save' button, if you want to store the address into your track list.
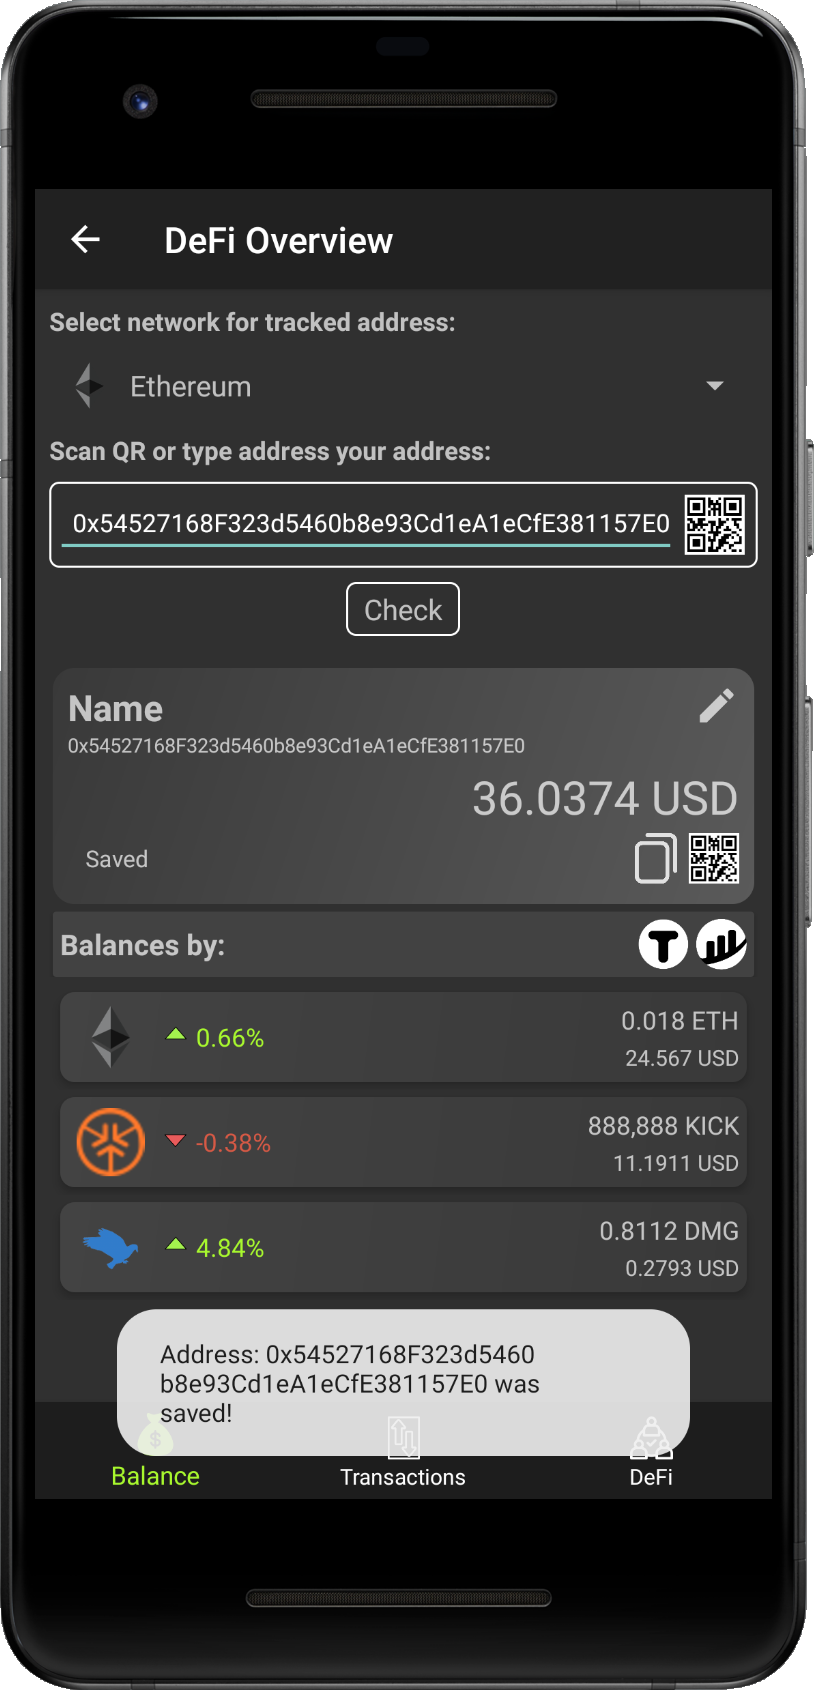
- Step 10 - If address was scuessfully saved, 'Save' button is replaced with 'Saved' text.
- Step 11 - Message about sucessful saving should be displayd in the bottom of the screen.
- Step 12 - Return back to the Address tracking screen via .
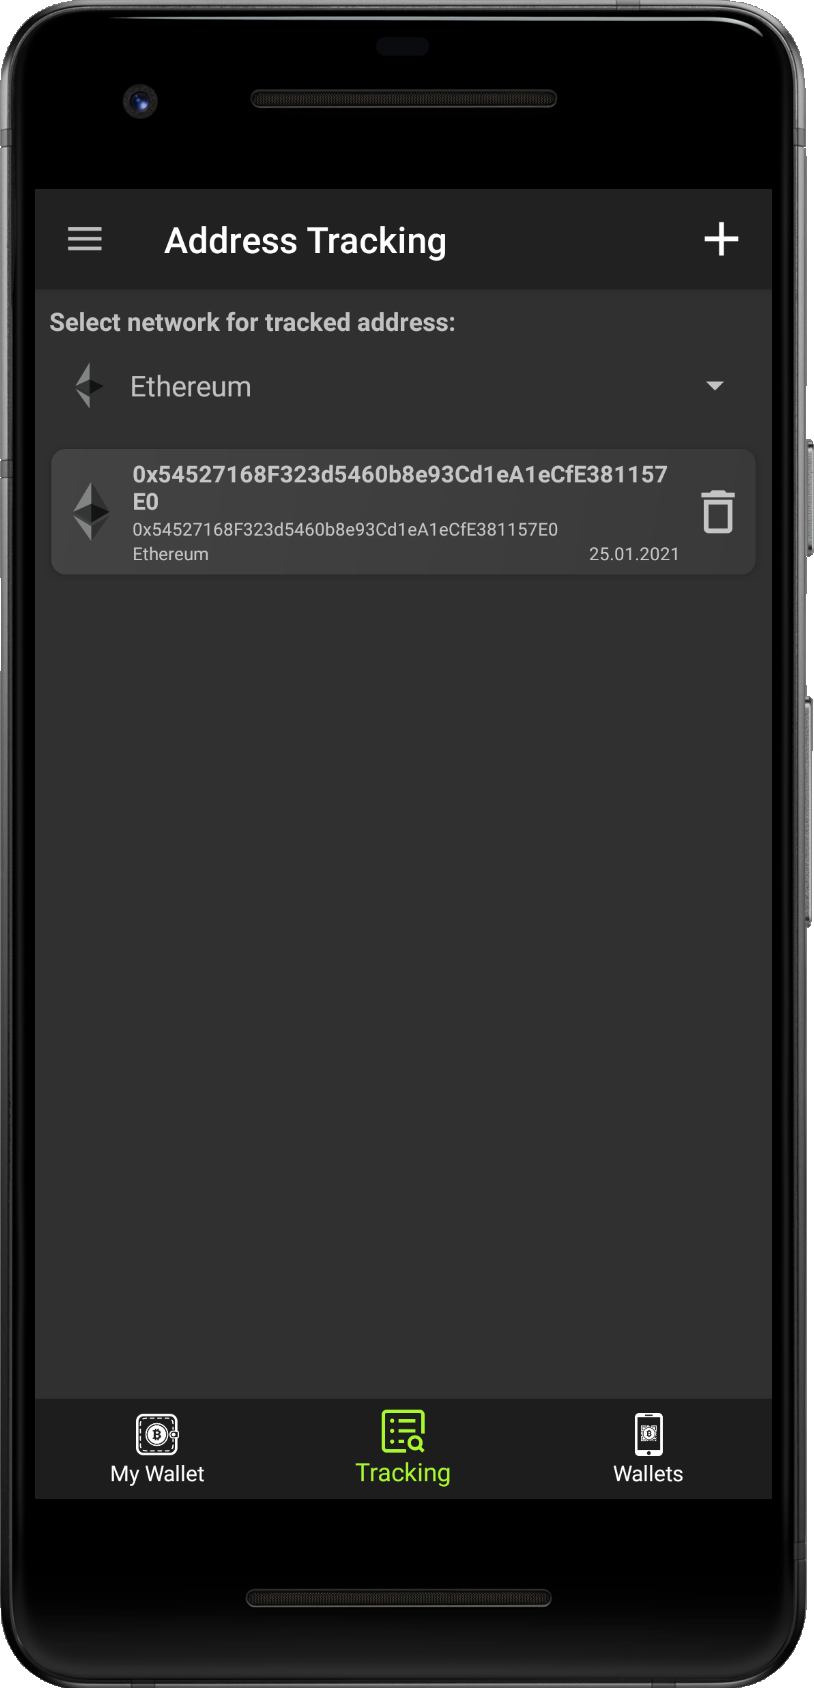
- Step 13 - Select the network from, where the address was added, the drop down.
- Congrats - You should see newly added address into your track list.
When the address is added, you can edit its name, copy the address into memory, display the QR code, or just track balances or recent activity, as described in following sections.
Tracking section is divided into 3 parts: Balances, Transactions and DeFi. However all these sections share
common address widget. You can find here name of the address and edit button ,
to edit the name.
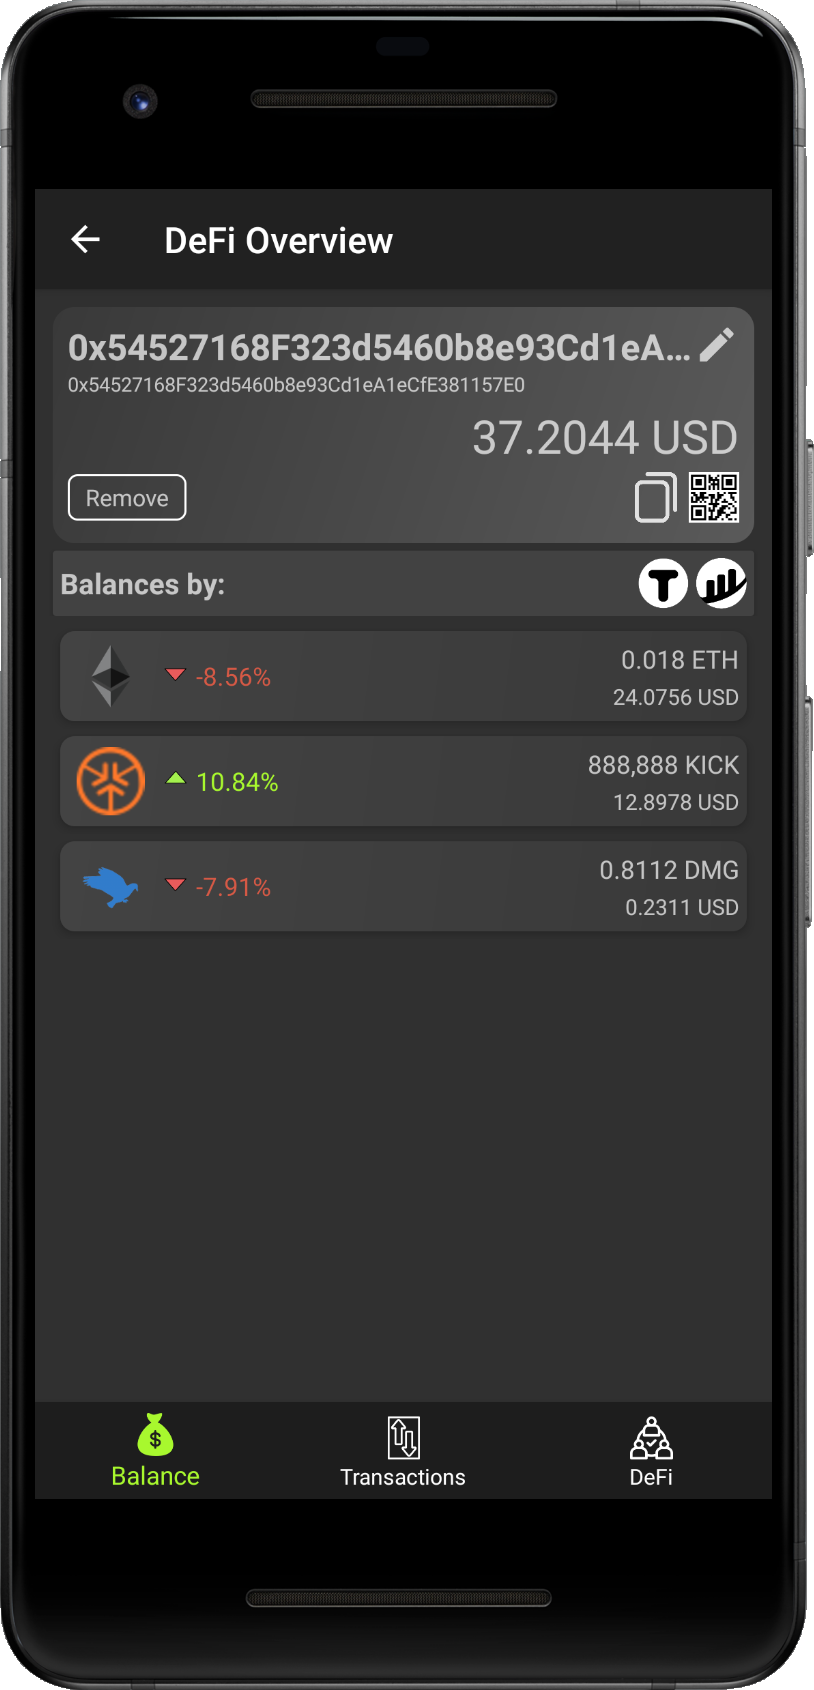
Then there is address itself and current balance in app currency (can be set in Settings). Last
line of the widget contains 3 buttons, whic we call action buttons:
- 'Remove' button on the left removes the address from your track list.
- Copy button to save address into the clipboard memory.
- QR code button to generate QR code of the address.
Follow the step by step guide below how to maintain and use this manage and use the address widget.
- Step 1 - To rename the address, tap on the pencil button .
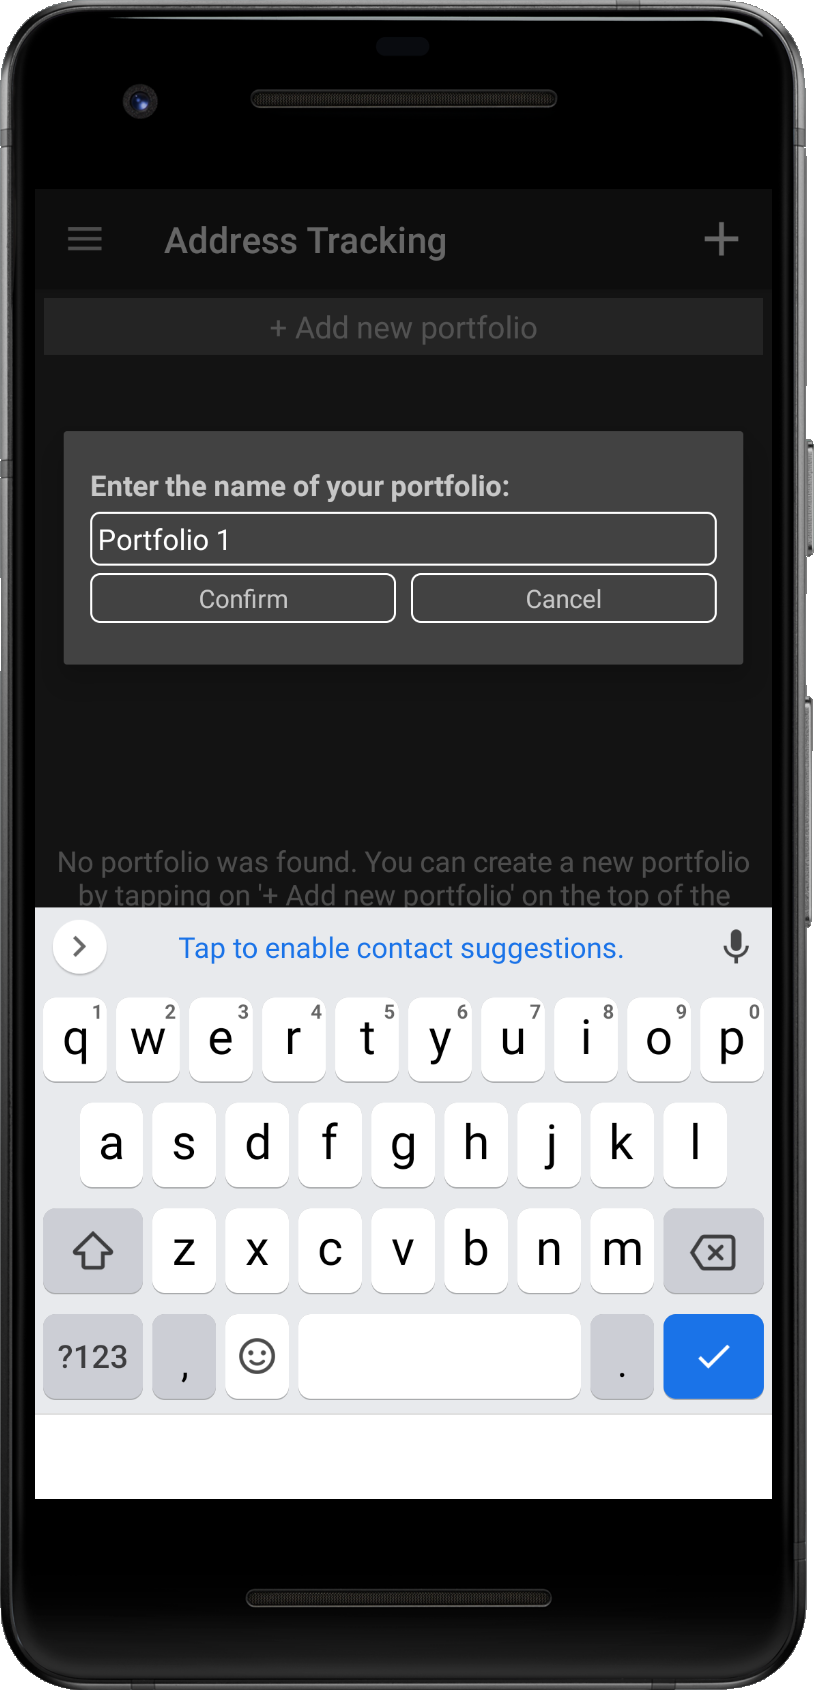
- Step 2 - Popup to edit the name will be shown.
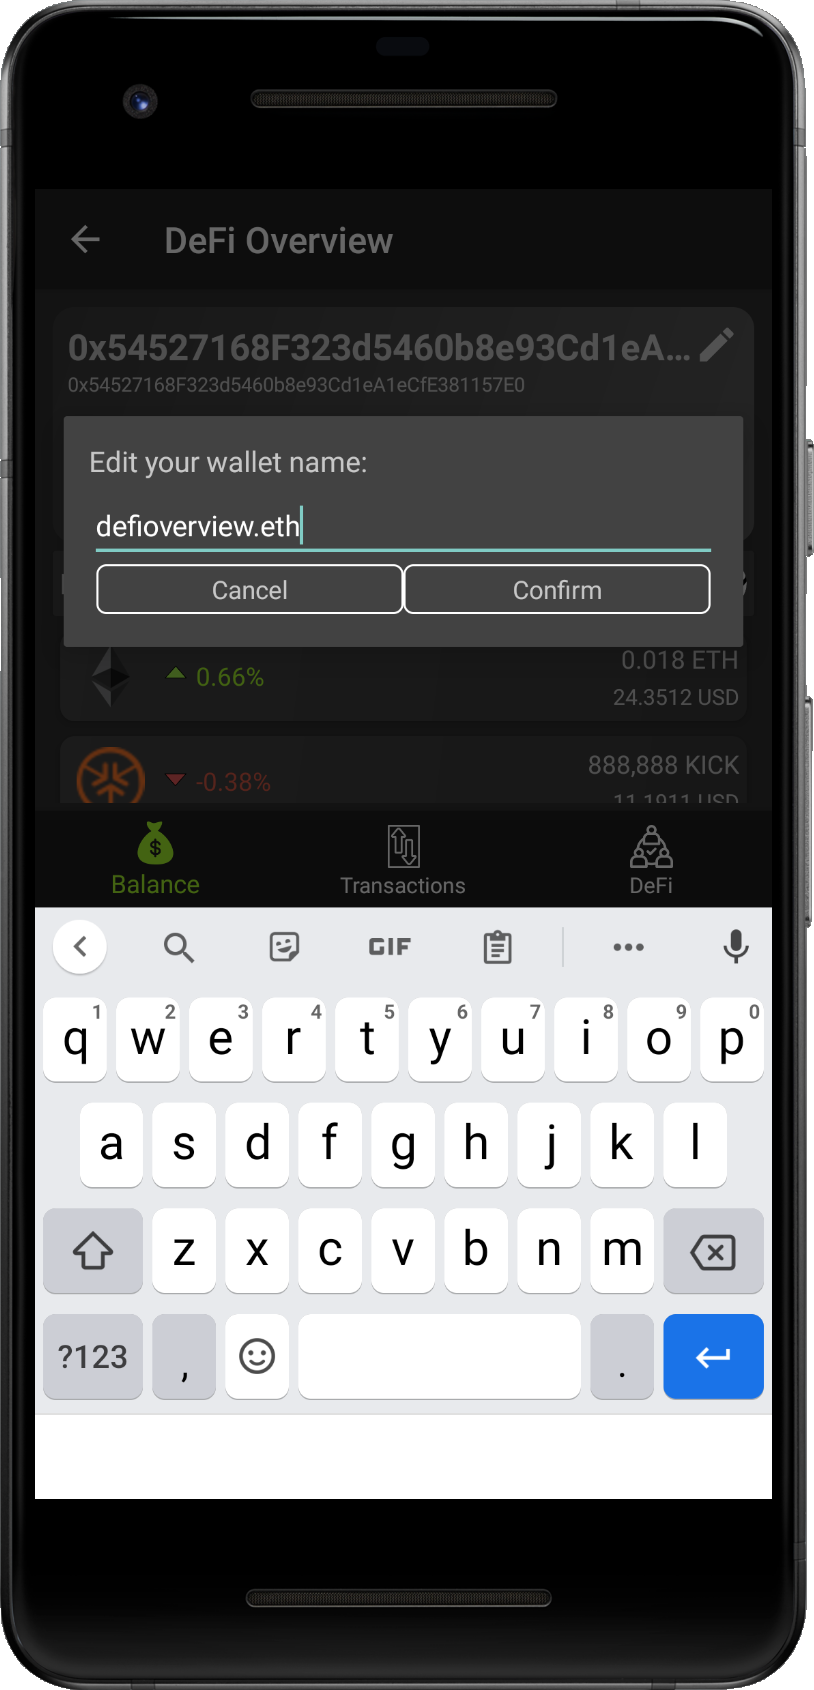
- Step 3 - Enter the name you would like to set for your address.
- Step 4 - Tap on 'Confirm' button to save the change, or 'Cancel' to dismiss it.
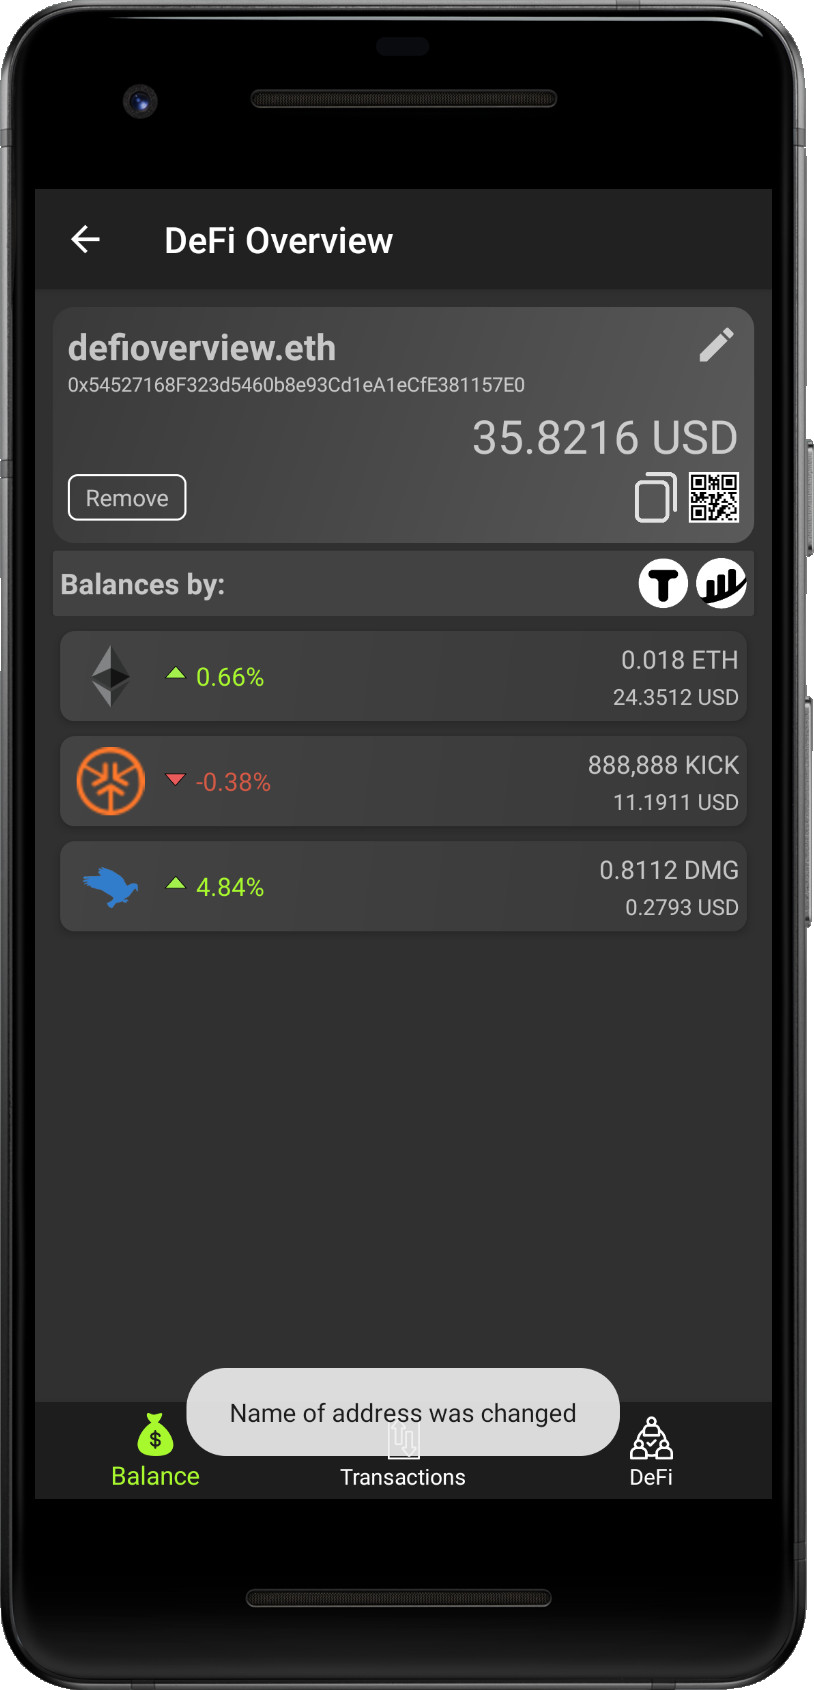
- Step 5 - Name in the widget is changed and info message is shown.
- Congrats - You changed the name of the address int your tracklist.
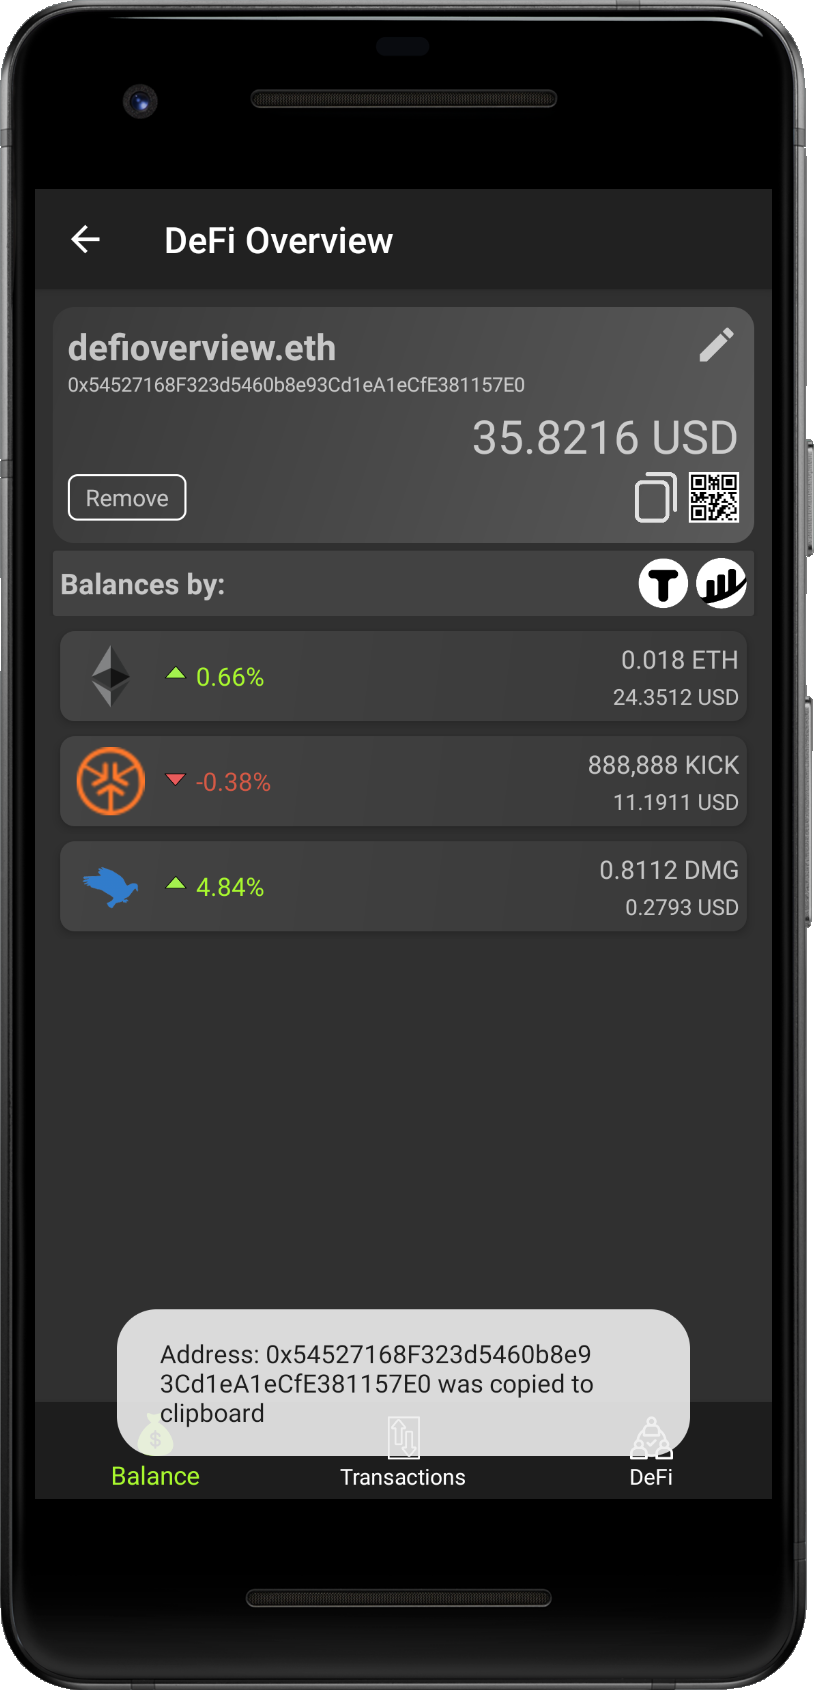
- Step 1a - To copy the address into clipboard memory, tap on the copy button .
- Step 2a - If successful, info message will be shown.
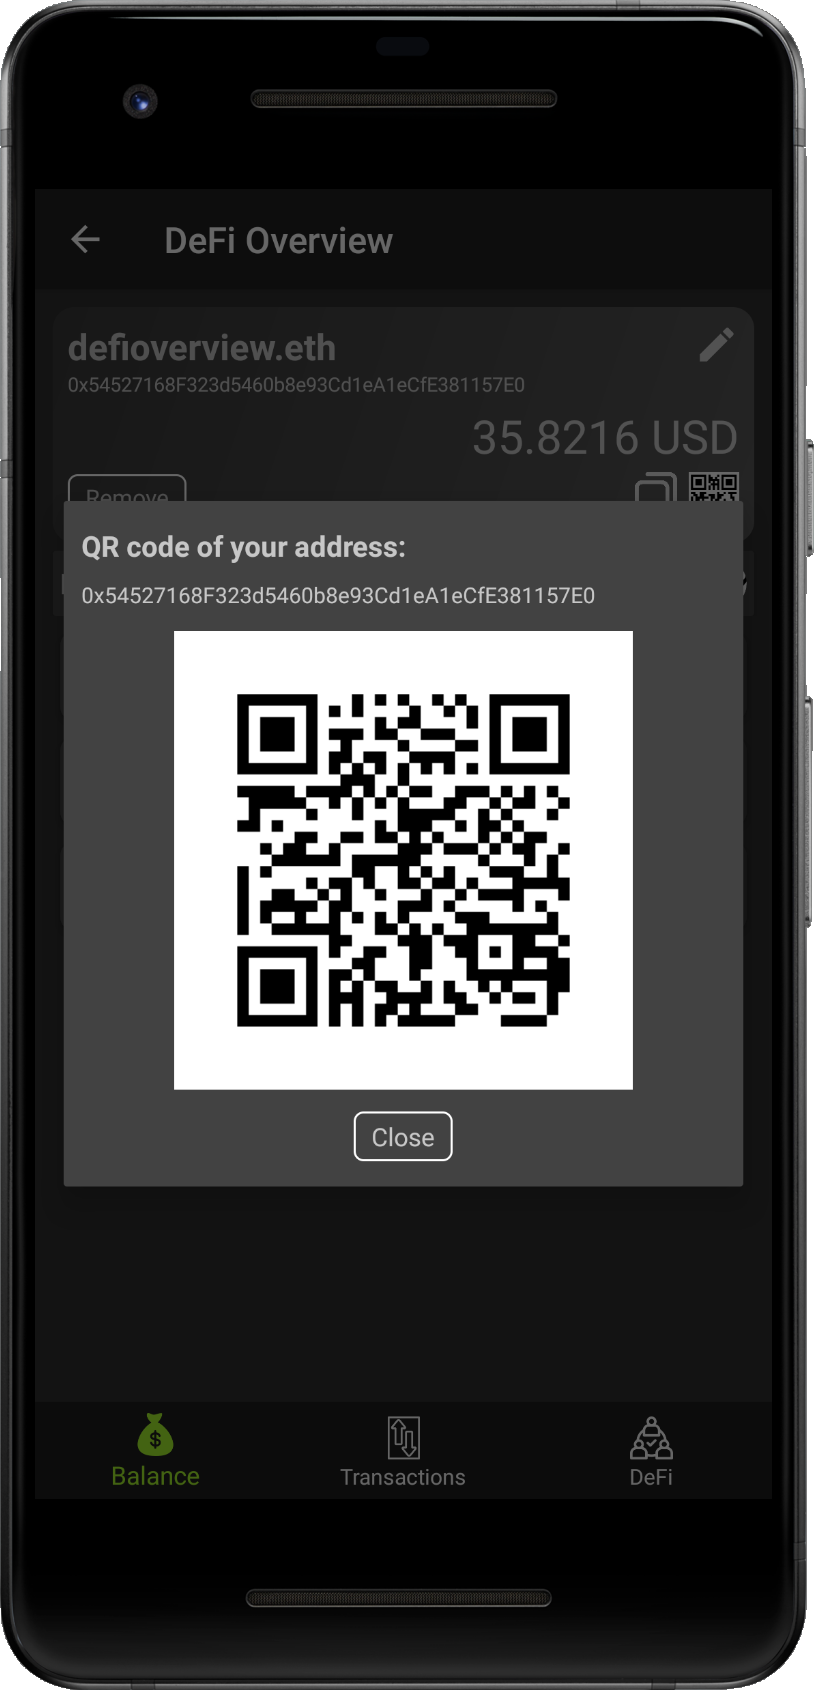
- Step 1b - To display QR code of the address, tap on the QR code button .
- Step 2b - Popup with QR code of the address will be shown, tap on 'Close' to close the popup.
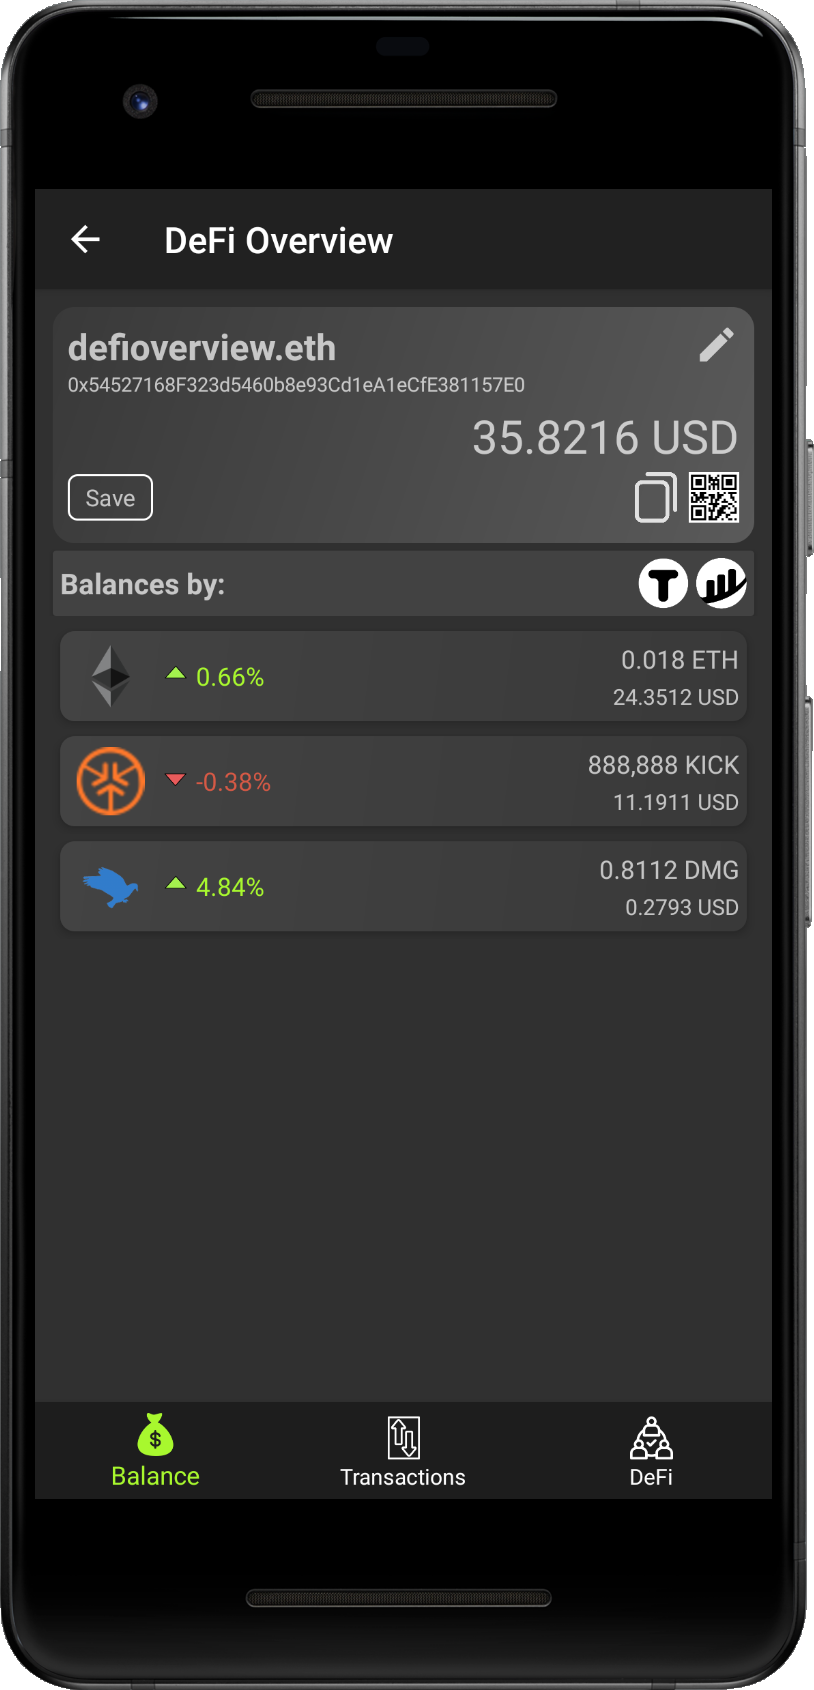
- Step 1c - Tap on the button 'Remove' to remove the address from your track list.
- Step 2c - 'Remove' button is replaced by 'Save' button. If you want to add the address back to track list, tap on the 'Save' button or do it later with Add Address.
Balances screen show current state of funds on the address. We use different data providers for each network. For some blockchains, there are even
combination of data from different blockchain explorers.
You can see the address on these explorers when you tap on the icon of the explorer, located
on the right next to label 'Balances by:'
Each token balance shows the amount of tokens and total value of them (in currency set in Settings).
Supported balances of token area currently for:
Ethereum, Ethereum Classic, Icon, Tron
Currently we do not support token balances, but only native tokens (due to API limitations), for:
Binance Smart Chain, Bitcoin, Klaytn
Transactions screen shows latest transactions connected with the address.
If you want to see whole history, you can tap
on the blockchain explorer on the right next to label 'Balances by:' which redirects you to the explorer website.
To see detail of the transaction, tap on the transaction record. The transaction widget will expand and shows more
details about it.
To hide details, tap on the expanded transaction record. Transaction records have detailed description, so it is understendable
what info is shown.
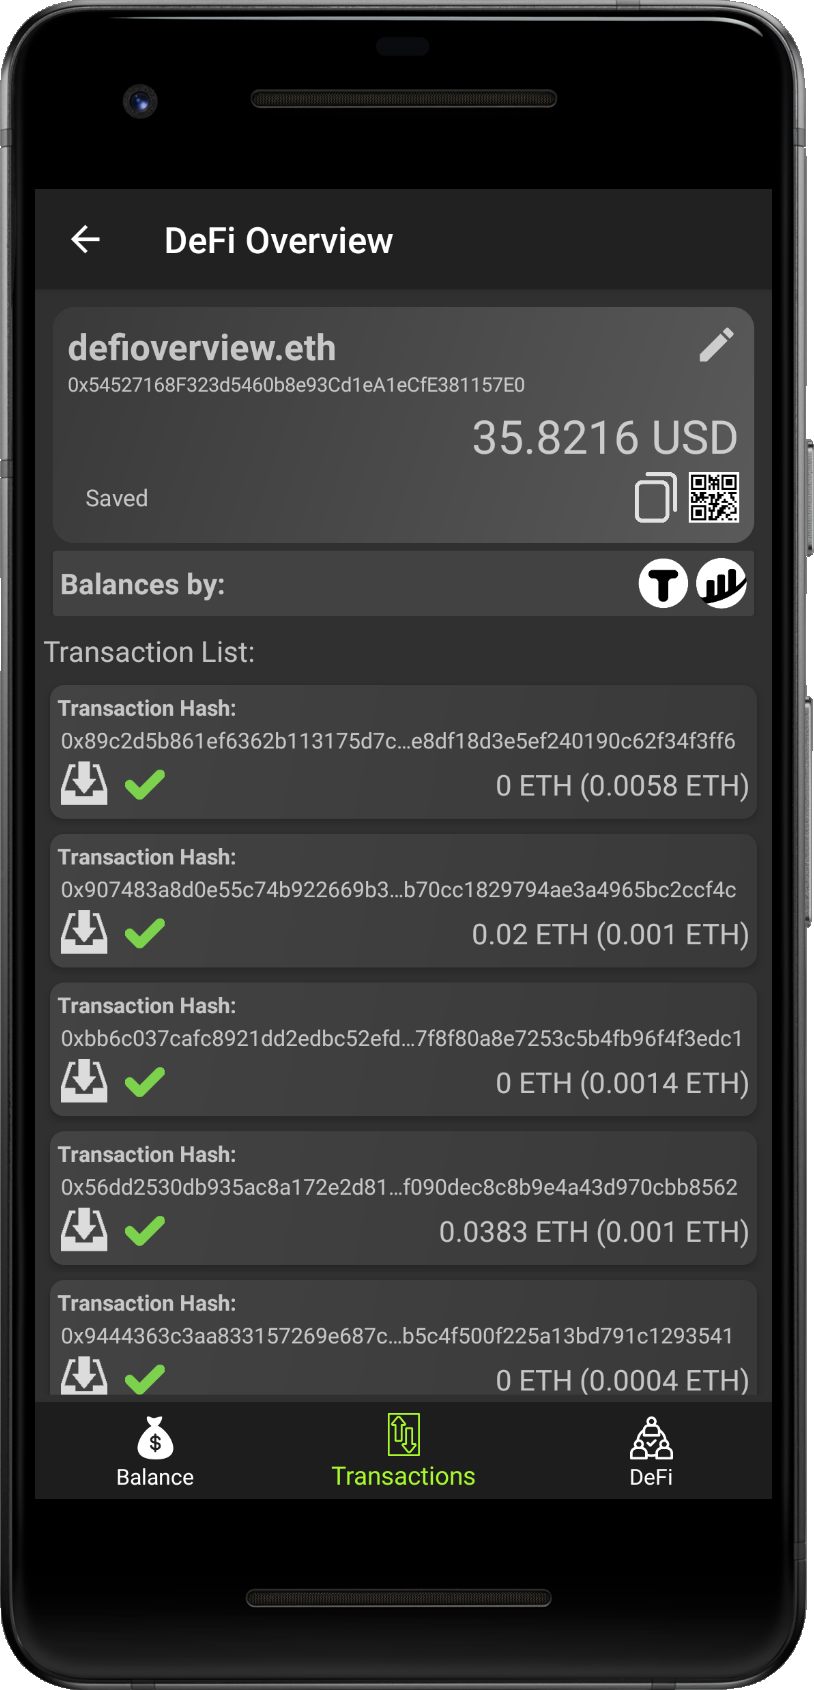
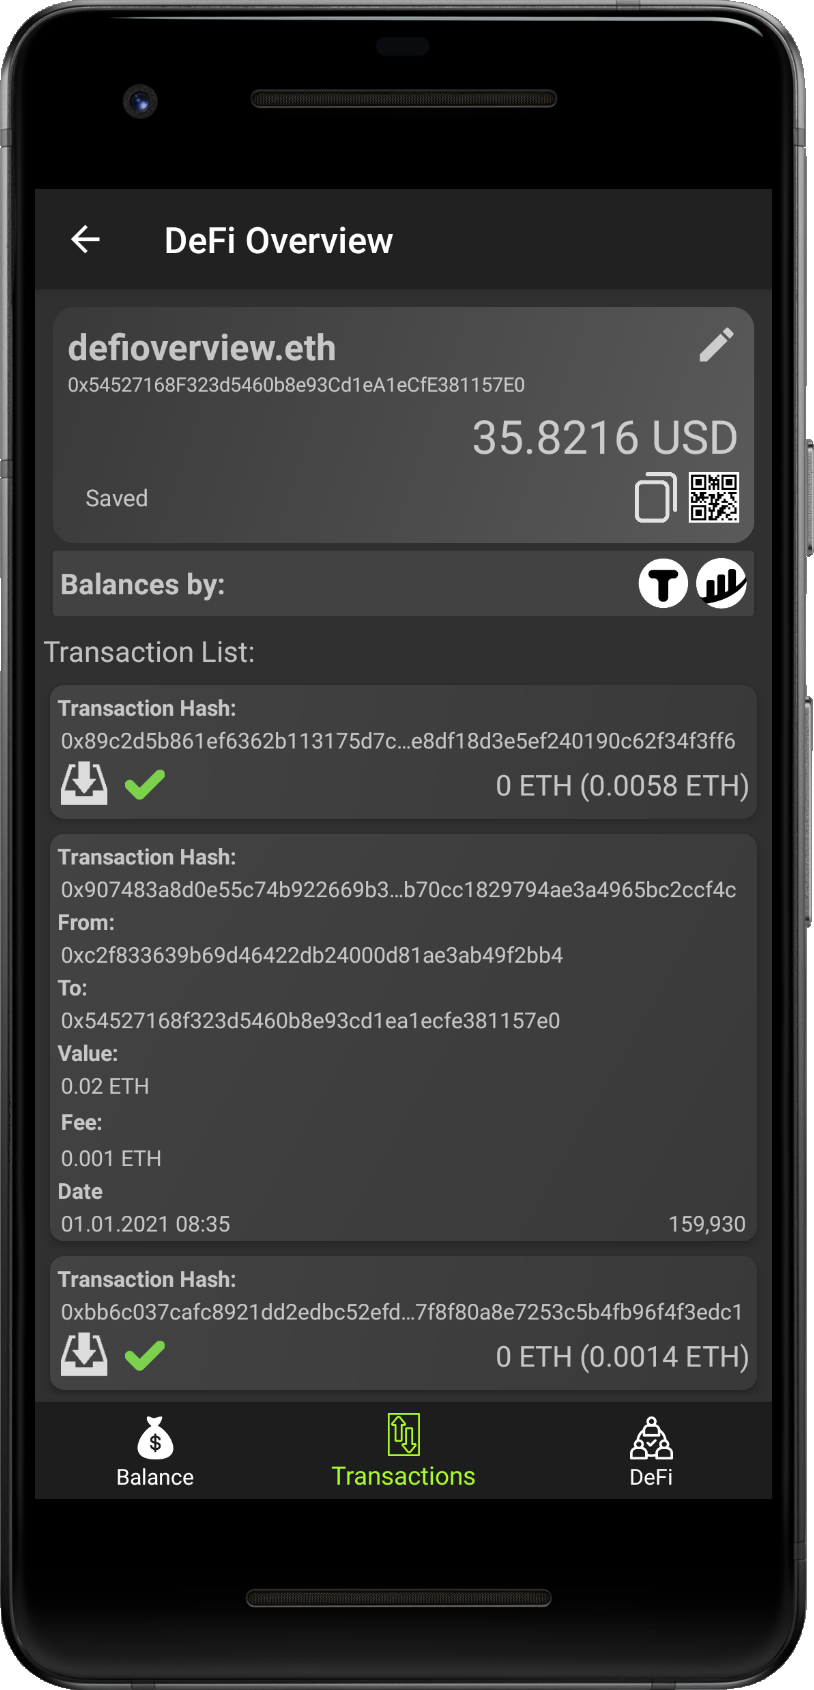
But to make it clear, signs confirmed transaction, signs pending transaction and signs failed transaction. When transaction is not expanded, it shows two values such as: TRANSFERED_AMOUNT (PAID_FEE).
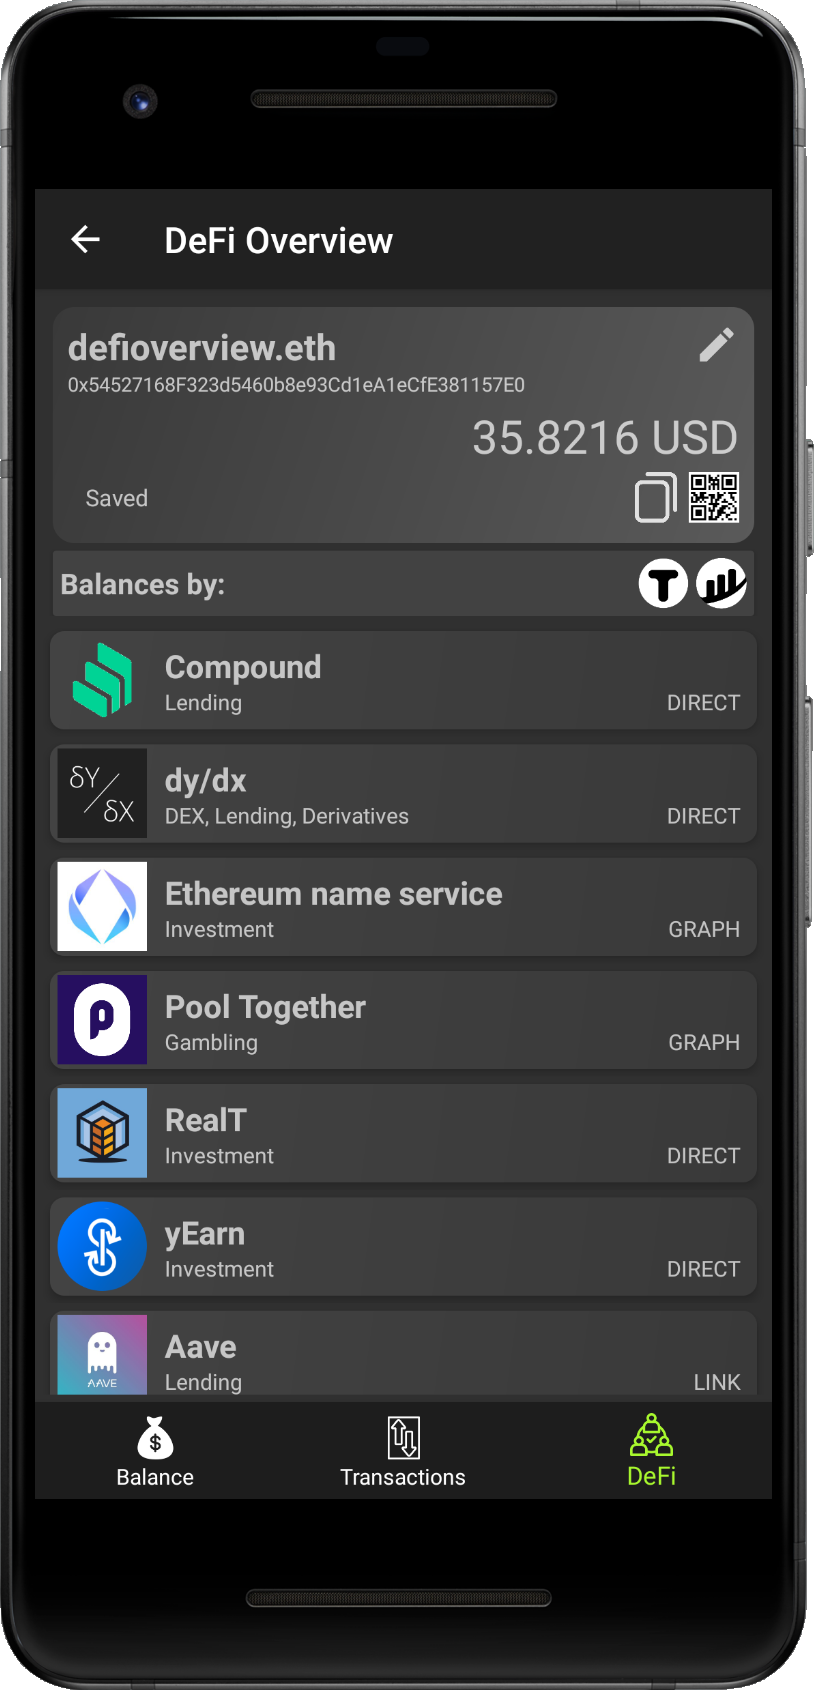
DeFi secion lists all supported DeFi projects on the given network. You can check the address per project, if there are any funds stored.
We did not find any common reliable API, so we divided these project into groups depending how we get data:
DIRECT:
Access data directly API provided by the project or our custom API.
GRAPH:
Access data via graph protocol, unfortunately some lack of documentation, so we do not use it as much as we planed.
LINK:
Unfortunately for some projetcs there were no simple public APIs and some are in queue to be added,
thus we list them only with links to their homepage.
If you want to open the DeFi project, tap on the project and you will be redirected to it. If the project is not from LINK category,
app will display collected data as shown in following section.
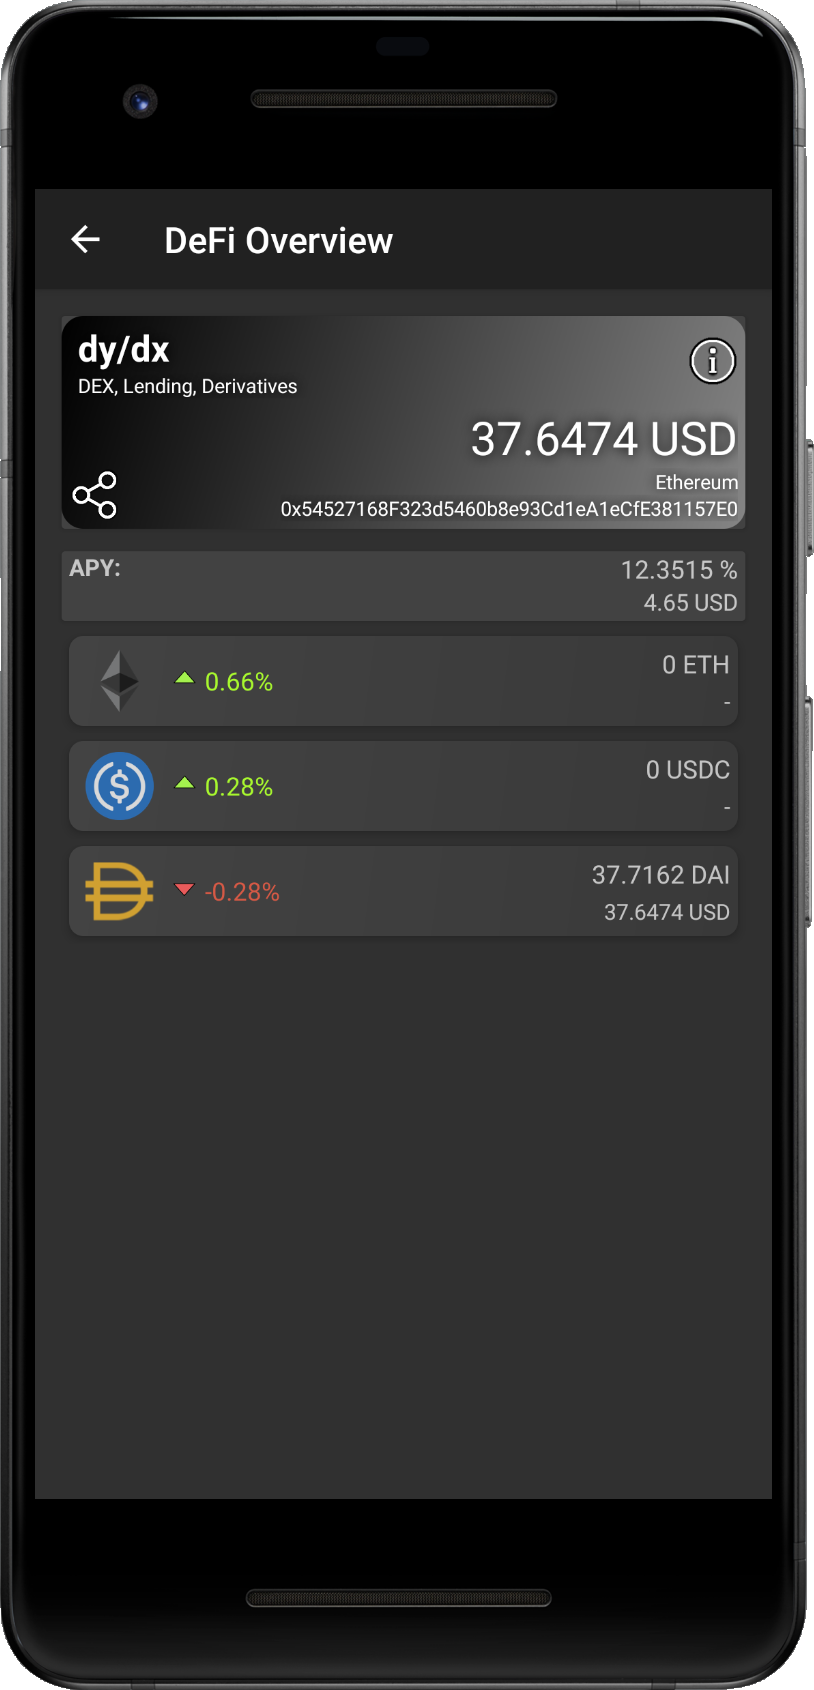
This sreen might look different for each project. ISt is based on the product the selected project offers. In genereal there is template
with summary widget about the service and total value of deposited funds.
This widget contains name and categor of selected DeFi service and info button to show popup with
brief info. Then there should be info about total value, network/blockchian and the address, which is investigated.
As the last element is link button . This will show popup with links with websites related to the project,
such as the homepage, blog or the social networks profile of the DeFi project.
Under the summary widget there might be aggregated APY widget, if the service offers loans, dividends or yield farming. It should show the
accumulated APY across products you decided use as expected percentage value and as expected profit value in fiat currency.
Finally there is list of products with their details. This might be different per project, but in general, it shoud show the amount of
assets in your holding, its value and and its price change in last 24h in percentage.
There are only few activities, you can find on the detail screen, follow the step by step guide bellow to get familiar with them.
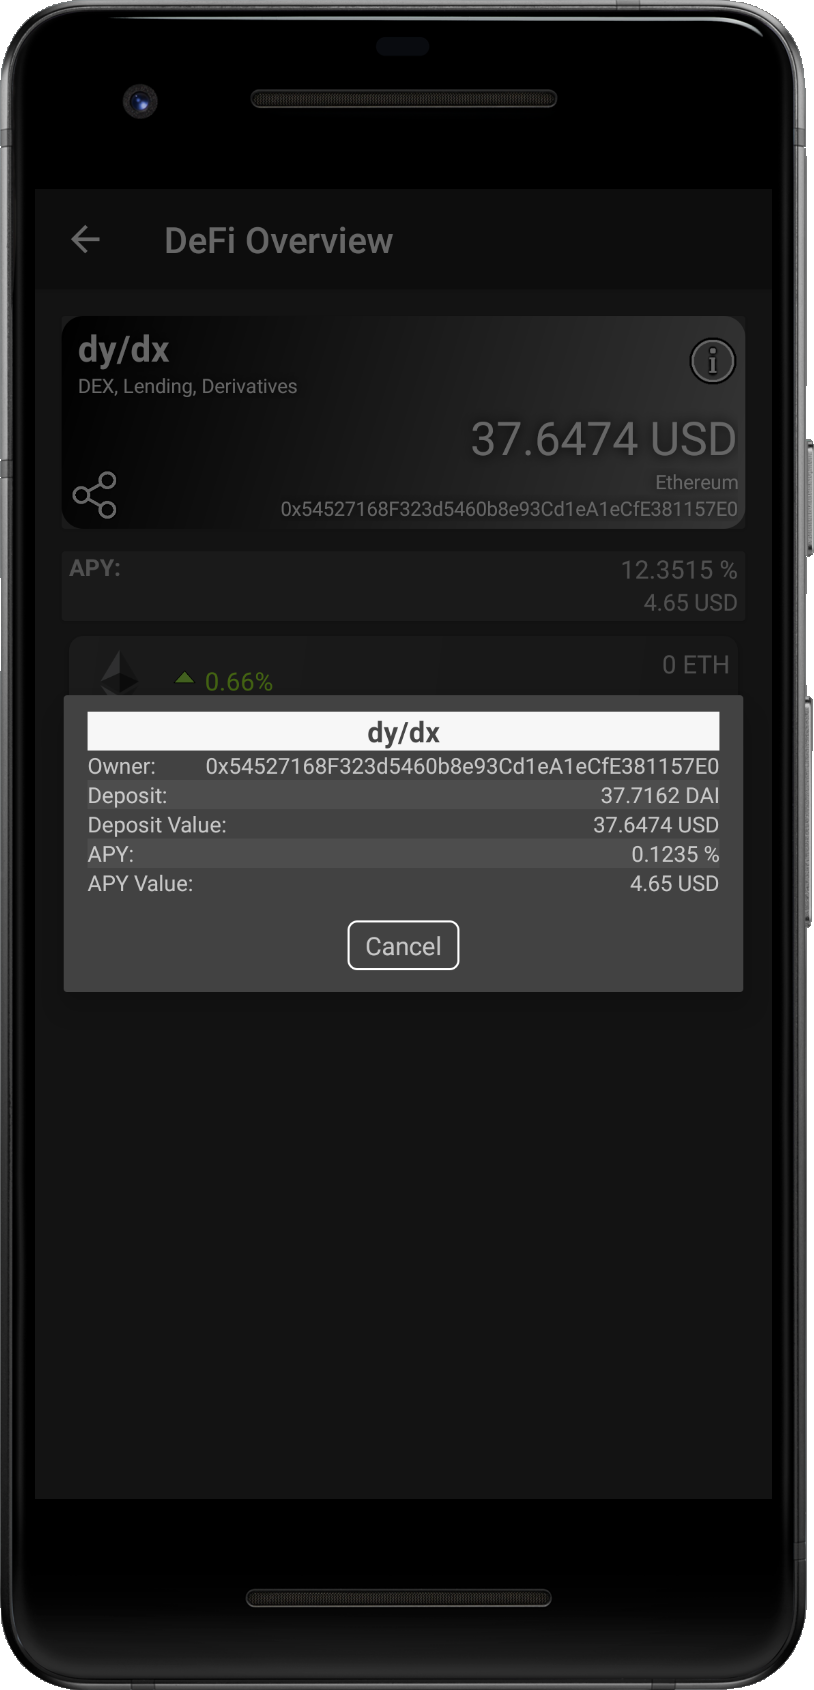
- Step 1a - Tap on any item from the list of products under the summary widget.
- Step 2a - Popup with details about the product is shown, such as value or APY of the product, etc.
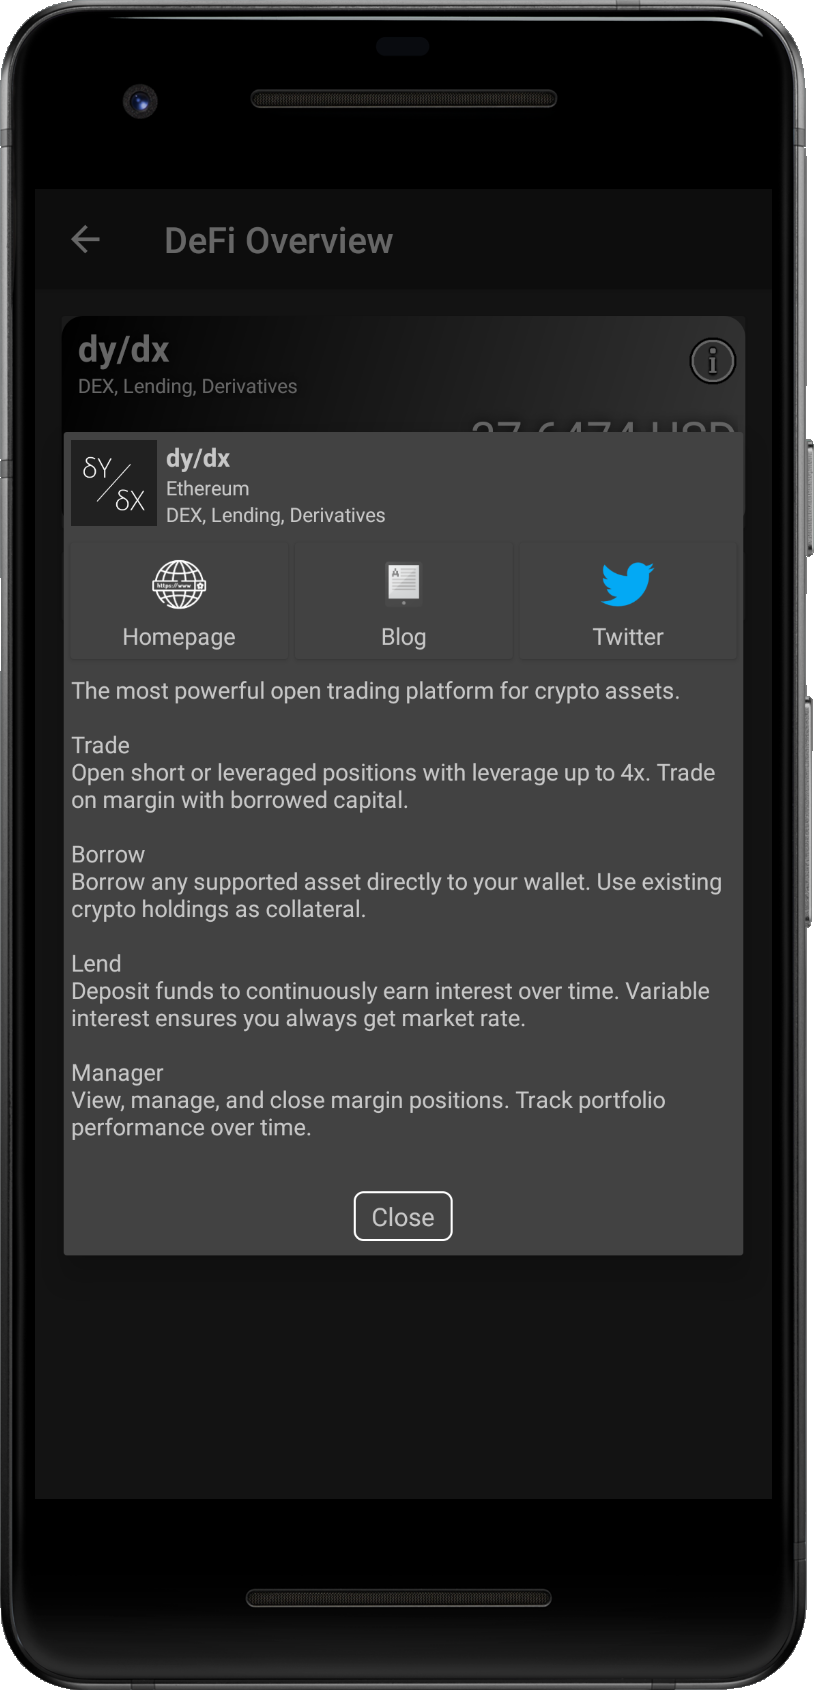
- Step 1a - Tap on the info button in the top right corner of the summary widget .
- Step 2a - Popup with link buttons and details about the project is shown.
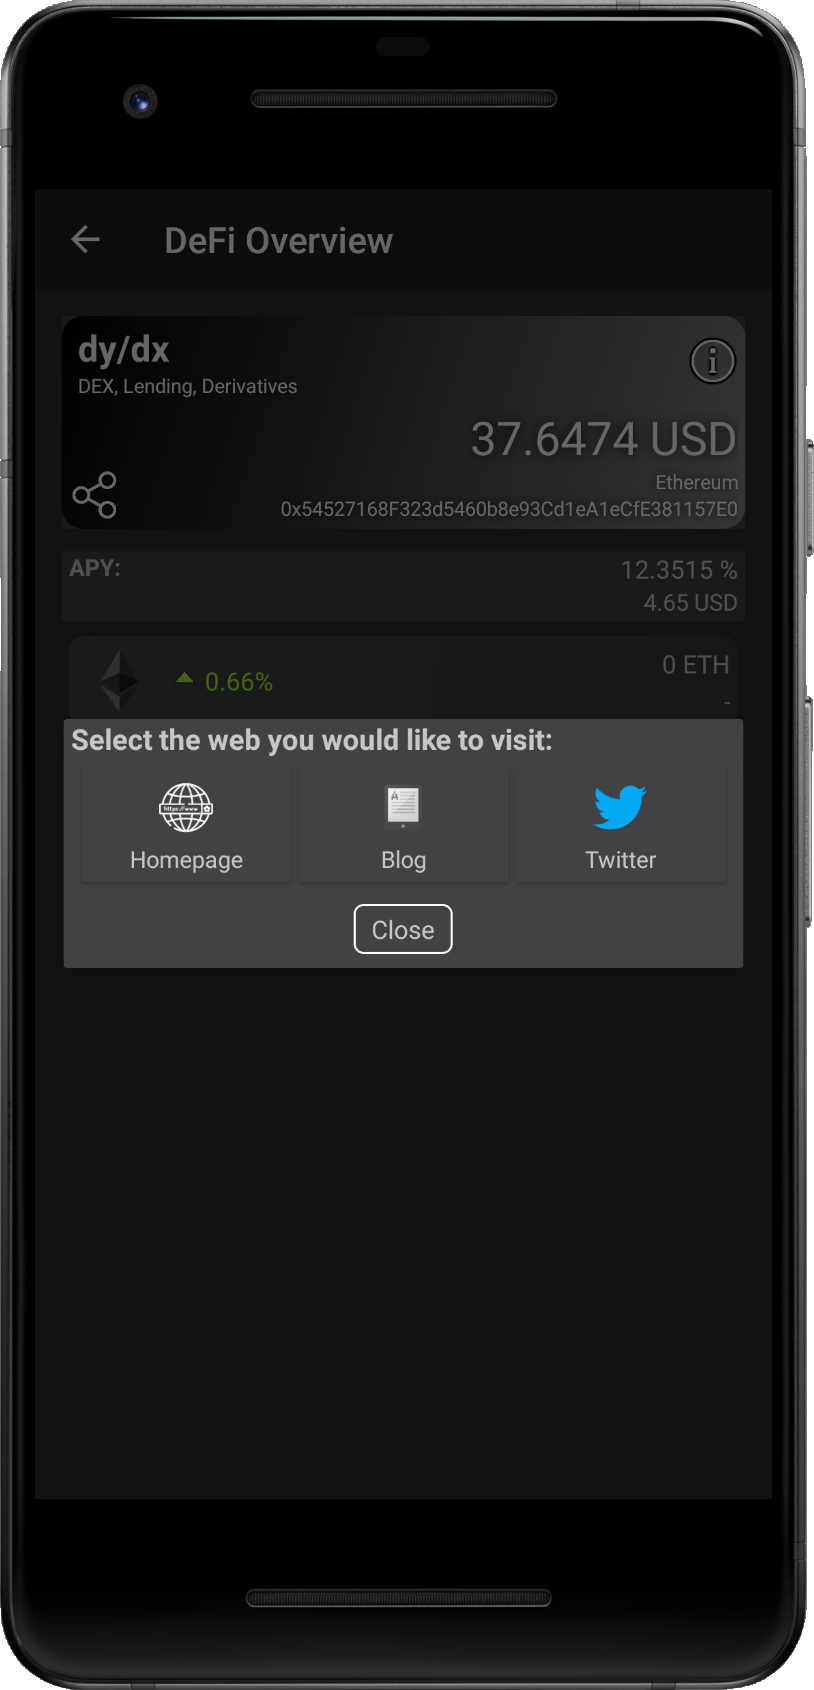
- Step 1a - Tap on the link button in the left bottom corner of the summary widget.
- Step 2a - Popup with link buttons to the project related websites is shown.
Wallets
This sections tries to introduce cryptocurency wallets. We tried to pick the most used ones, however this field is quite dynamic and
we might miss some.
We divided wallets into groups based on wallet properties. You can switch the category if you swipe (left/right) or via
/ buttons on the top of the screen.
When you tap on any wallet from the list, popup with details will be shown. The popup contains link buttons to web pages realted
to the wallet and brief description as shown on the picture on the right.
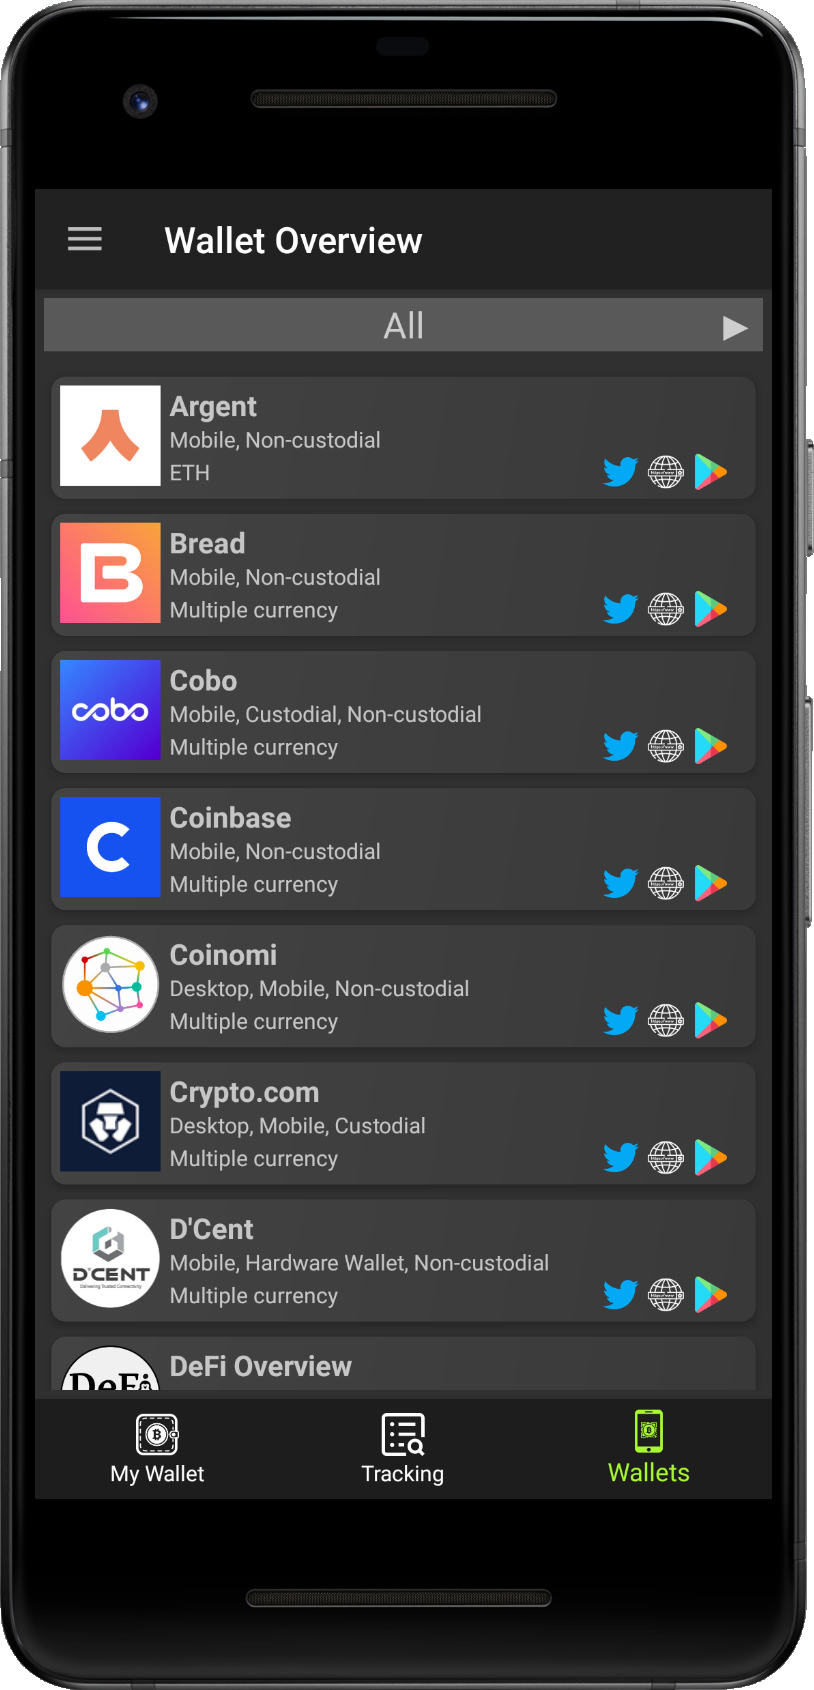
- List of wallets in selected category.
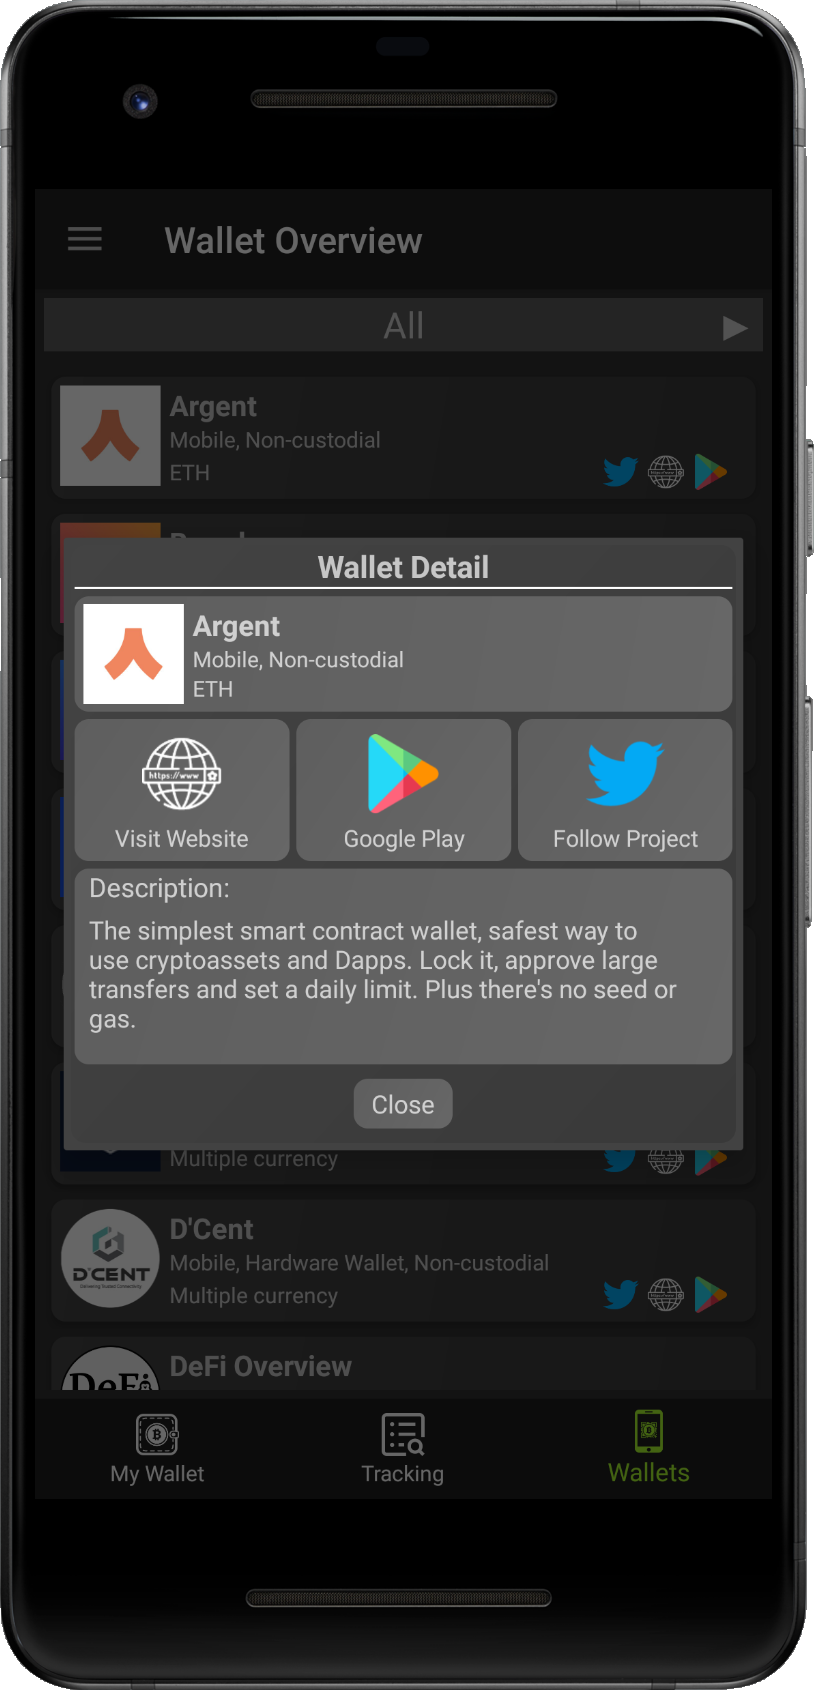
- Popup with details about given wallet.
DApps
DAppp section introduces Decentralized Applications - DApps. These aplications are built on blockchain. Usually it is collection of smart contracts communicating together. Interactions with dApp are made through frontend UI, which might be website on server, or in decentralized way stored on IPFS.
We divided DApps into following categories:
Assets - tokenized assets on chain, it might be fiat currency, commodities, real estates or even other crypto currencies.
Computing Power - rent computing power of your computer on open marketplace to help solve hard computation, i.e. rendering of 3D scenes etc.
DDEX - decentralized exchanges, where you can exchange your coins or tokens.
Data storage - data storage services, which should work in decentralized way.
DeFi - decentralized finance aims to provide financieal tools to anyone, anytime and anywhere (with connection, of course)
ETH Staking - Ethereum 2.0 staking providers, which tries to help ethereans, with less than minimal amount
(32 EHT), to take a part in securing of the network and earning rewards.
Gambling - gambling games on blockchain, easy way how to lose your tokens.
Games - games built on top of the blockchain, from card games to RPGs.
Markets - markets build on blockchain to exchange all kind of assets, from digital art to tokenized energy.
Privacy - procjects focused on increasing privacy on public blockchains.
Social - social networks utilizing blockchain to achieve decentralization and censorship resistance
Other - other DApps, hard to fit in previous categories, such as oracles, DAOs, etc.
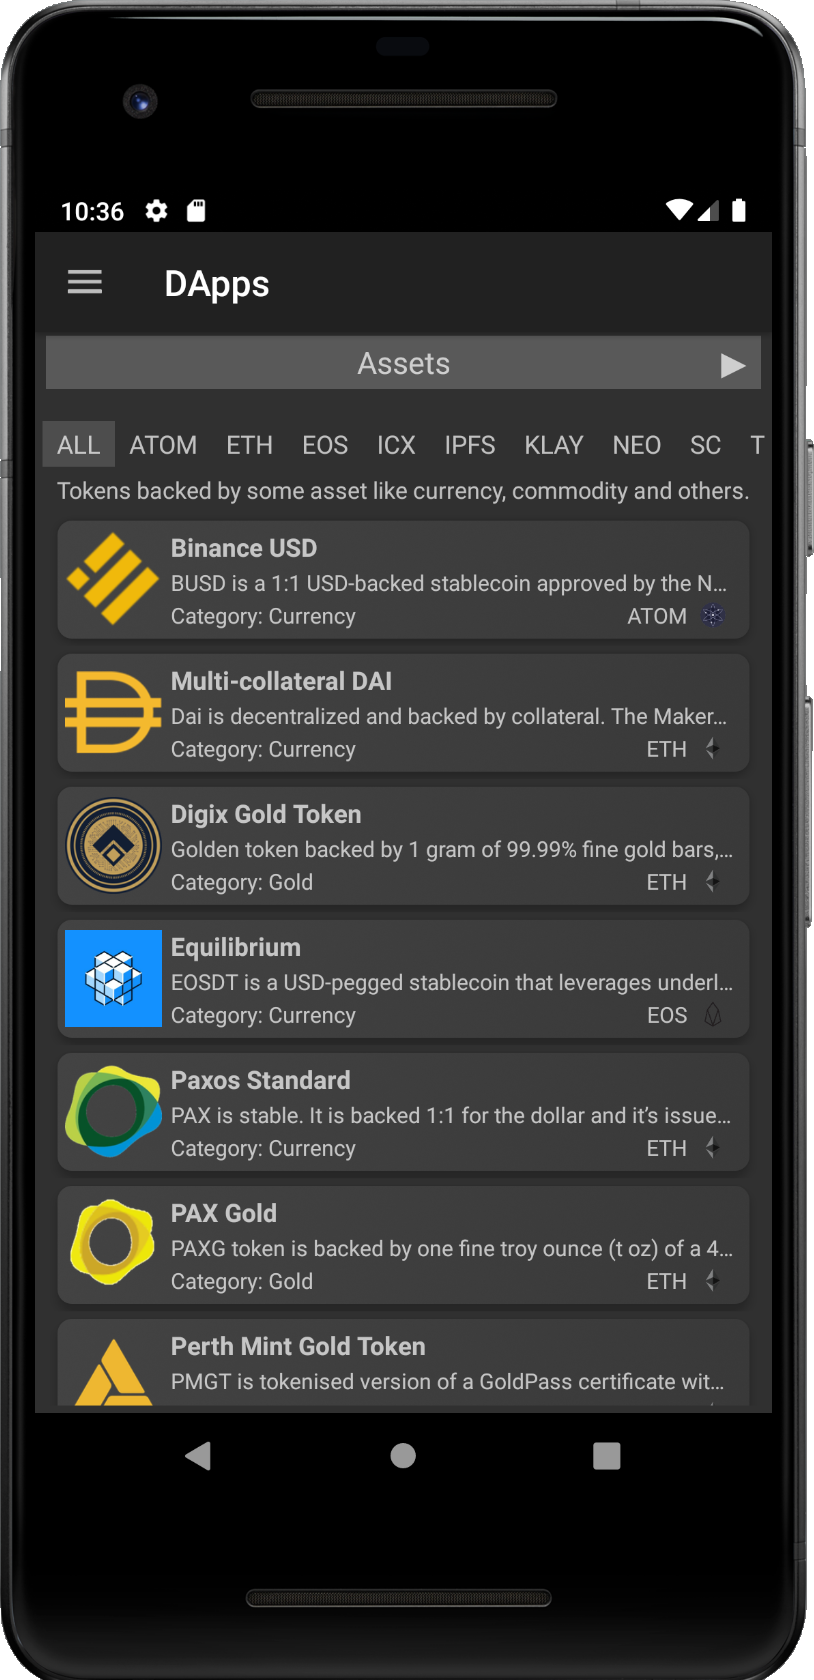
You can move between categories by simple swipe (left or right) or tap on left or right
button, on the top of the screen, to move on next screen. Current category is highlited
in the widget on the top between buttons / for changing category.
Horizontal list with platforms is located below the category widget (ALL, ATOM, ETH, ...). You can filter available dApps by platform
on which the dApp is implemented. Selected platform is highlighted. All platforms are selected by default.
Then there is list of dApps itself. Each item contains brief info, such as logo and name of the project, short description, subcategory and
platform info (i.e. ETH).
You can display detailed popup about dApp, if you tap on the record from the list. The popup contains extended description with
useful links, such as homepage, twitter and multiple dApps ranking services to track metrics of given dApp (users per day, transactions per
day, etc.) - see below.
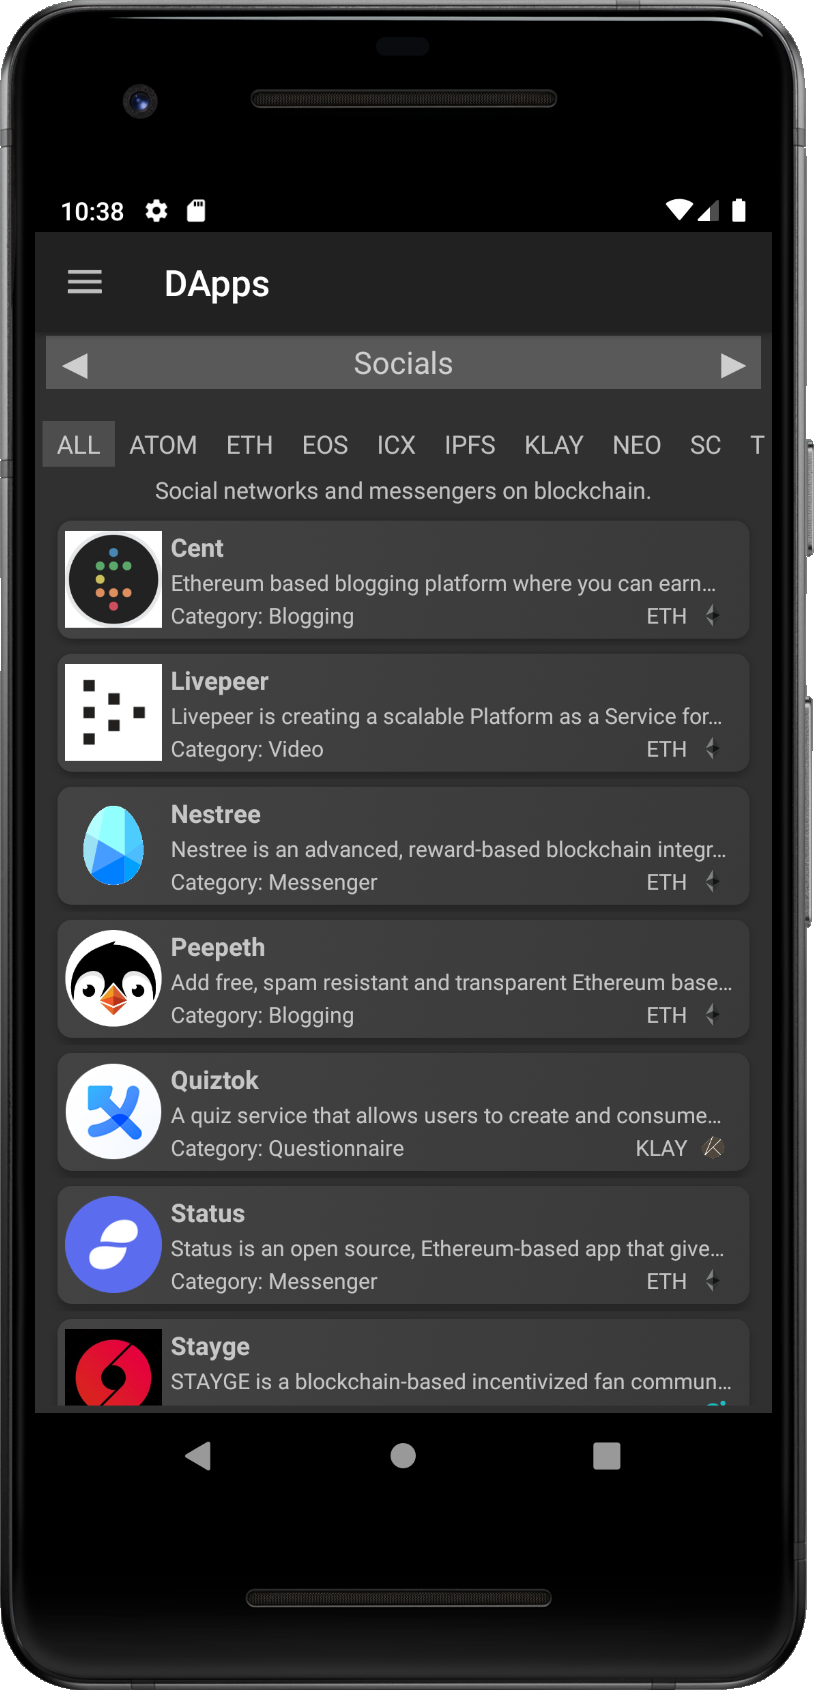
- Step 1 - Swipe (or use / buttons) to get to the Socails category.
- Step 2 - Filtered dApps, which belongs to the Socials category, are shown.
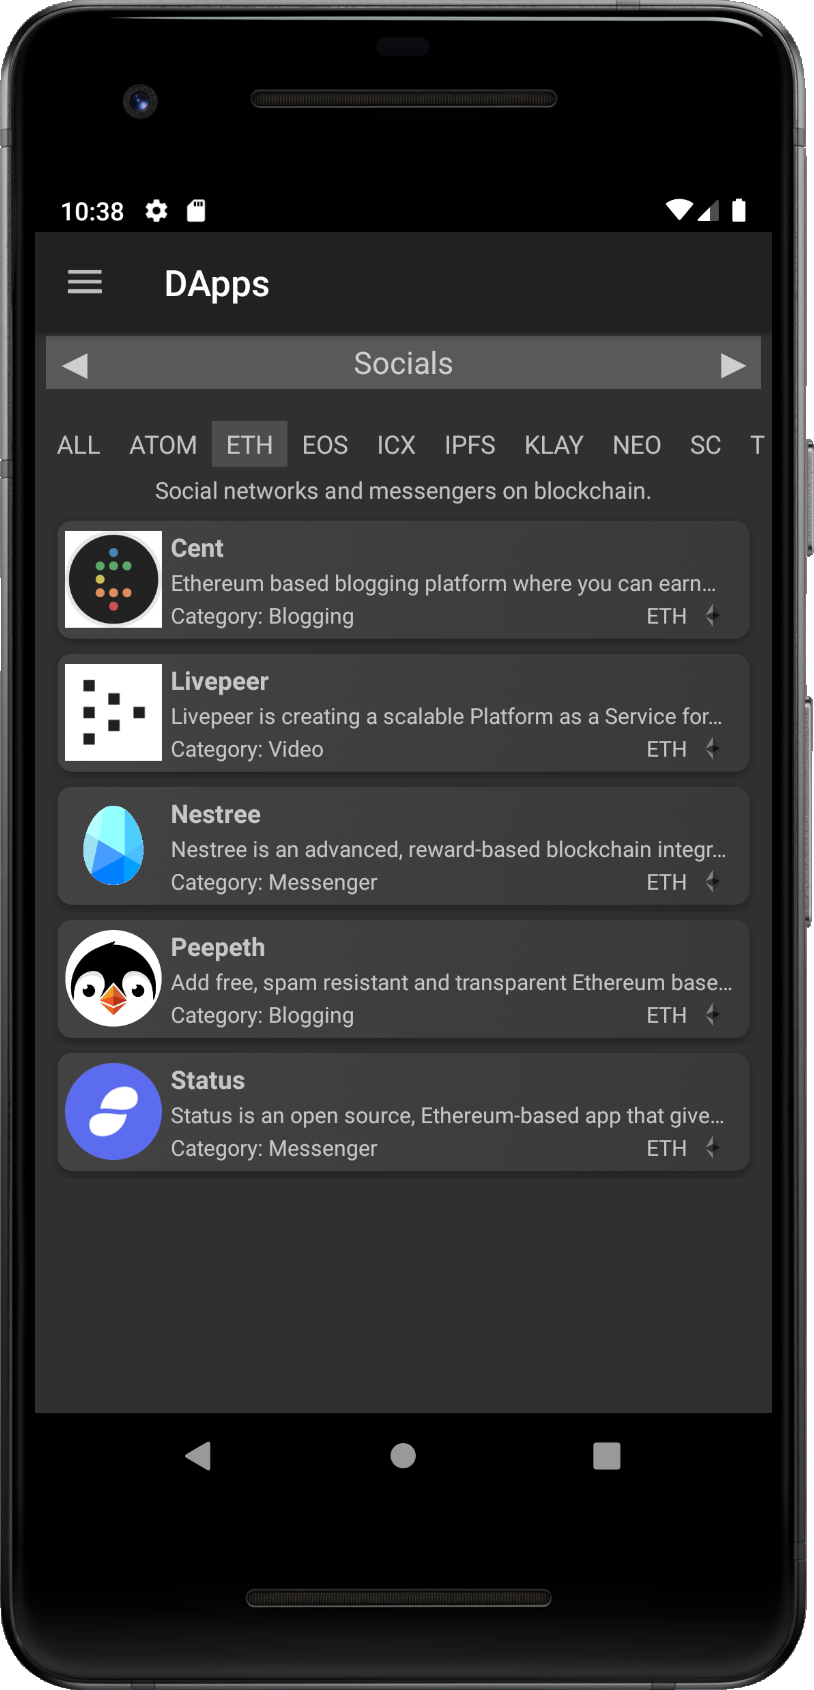
- Step 3 - Tap on the platform of dApps you want to filter by (i.e. ETH - Ethereum).
- Step 4 - Filtered dApps, which belongs to the Socials category and are built on Ethereum, are shown.
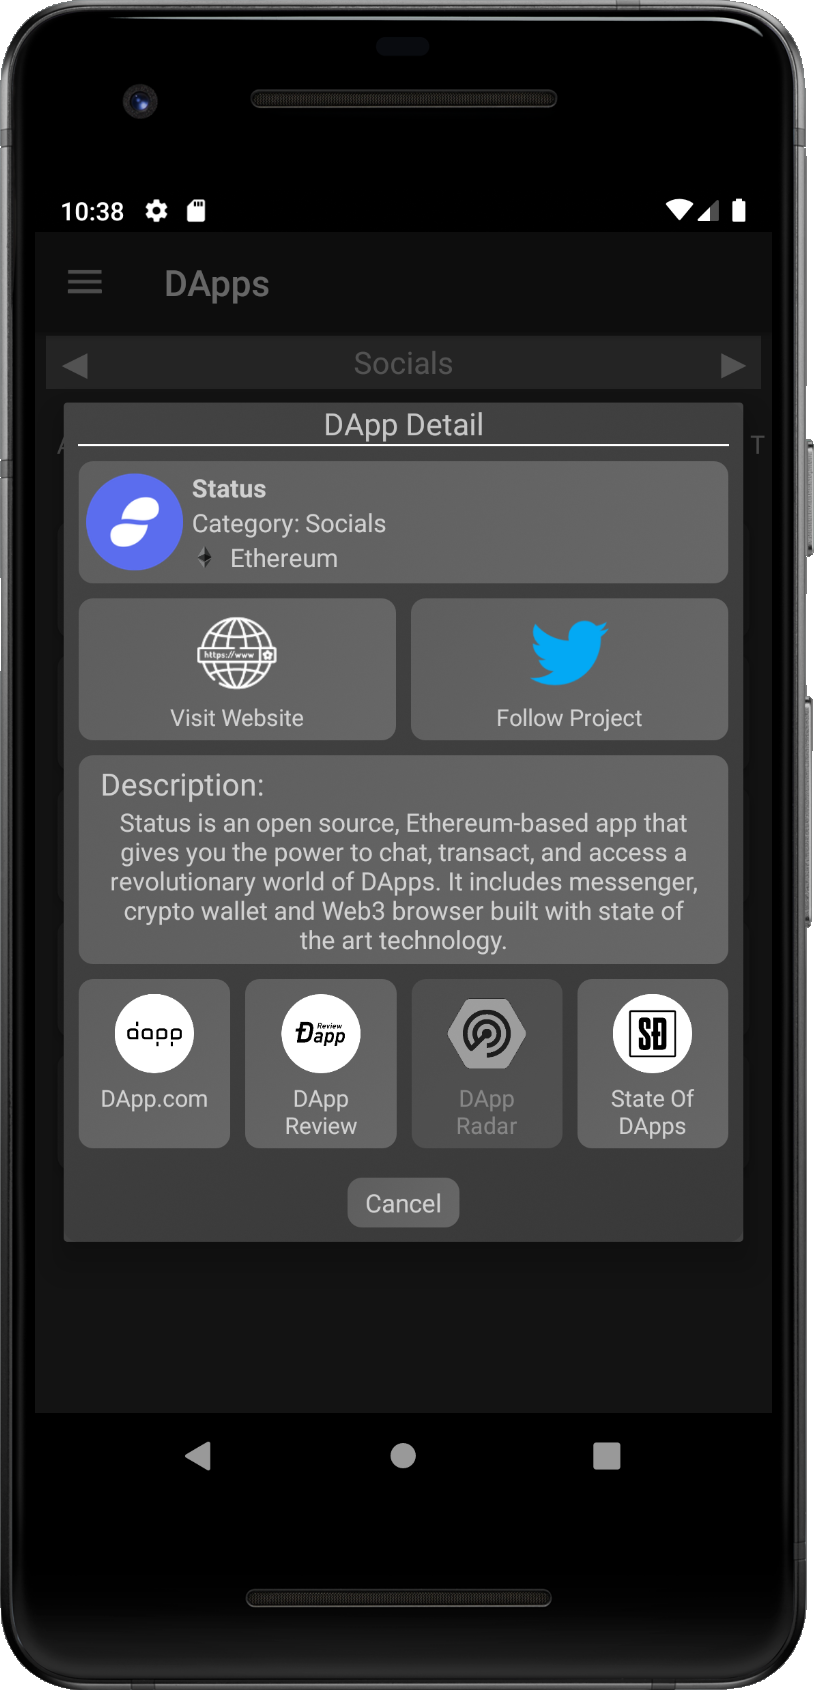
- Step 5 - Tap on the dApp you want to investigate and popup with details will be shown.
- Step 6 - See brief dApp's description, and find more data via buttons redirects you to webpages dedicated to the dApp.
Adoption
Adoption section tries to show adpotion of crypto currencies. It is hard to measure adoption, but we tried to make
overview of multiple point of view on it:
Pay secions shows shops and services, which already accecpt crypto payments.
Maps section lists of map providers with palces where you can spent your crypto currency.
Jobs section aggregates services, which provides opportunity to find a job in crypto currency
focused projects.
Get and Earn section tries to show how you can earn coins without buying them directly.
Pay
We tried to collect services and shops, which support crypto currency payments. It is quite unstable field,
but we try to maintain the list up to date.
If you are aware of any service or shop, which supports crypto payments,
or which stopped supporting them and we have it on the list, please, let us know on our
email.
Services are divided into multiple categories. Current category is visible on the top of the screen in the
category widget.
You can switch them if you swipe (left/right) or via /
buttons on the top of the screen.
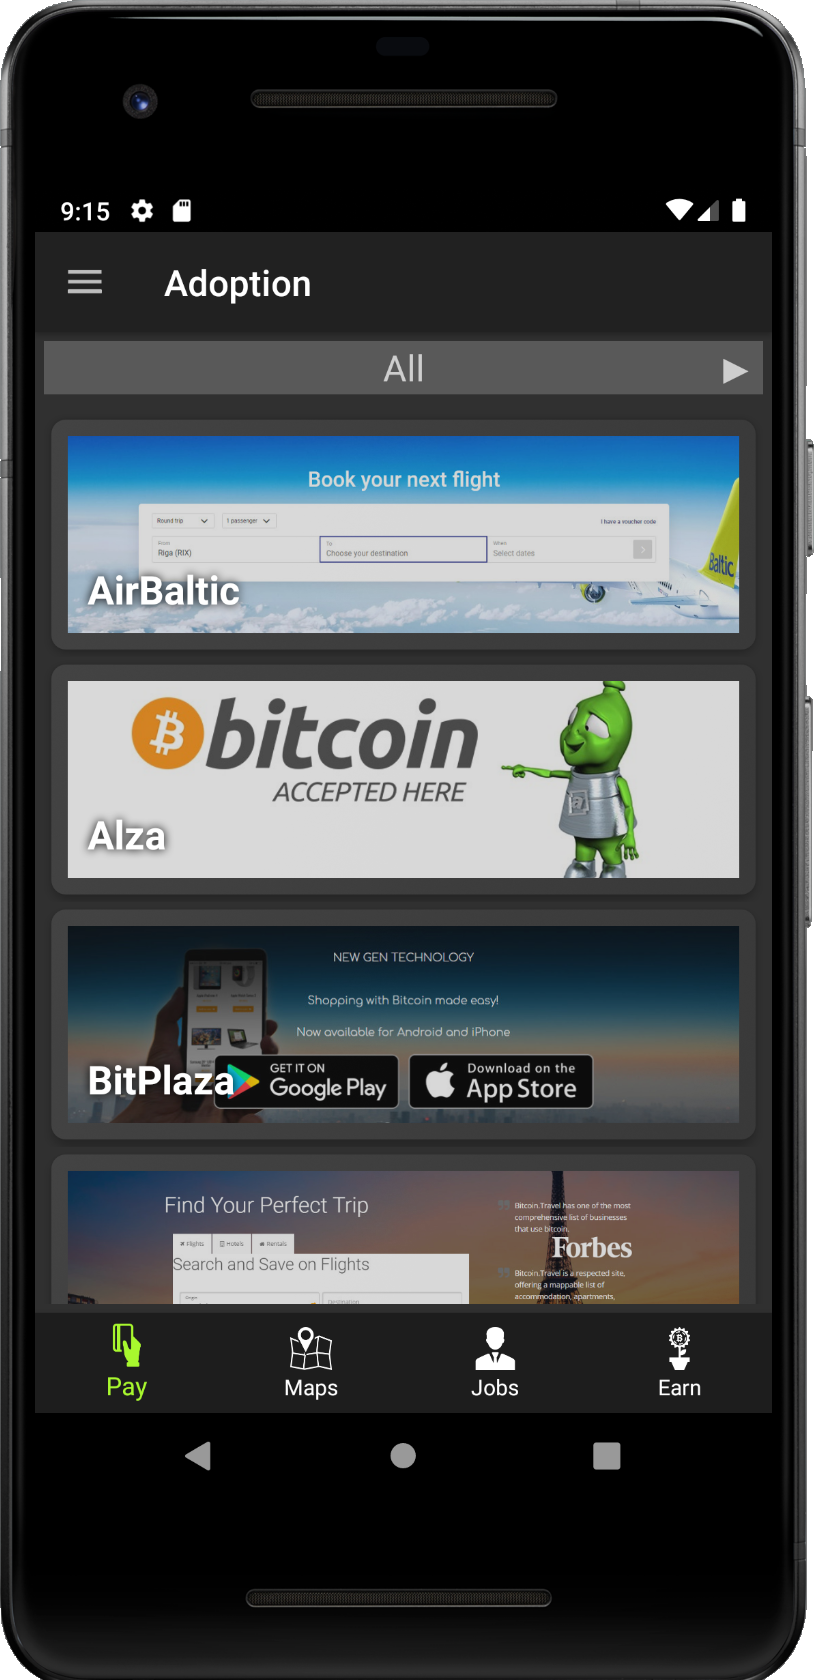
- List of services with crypto payments.
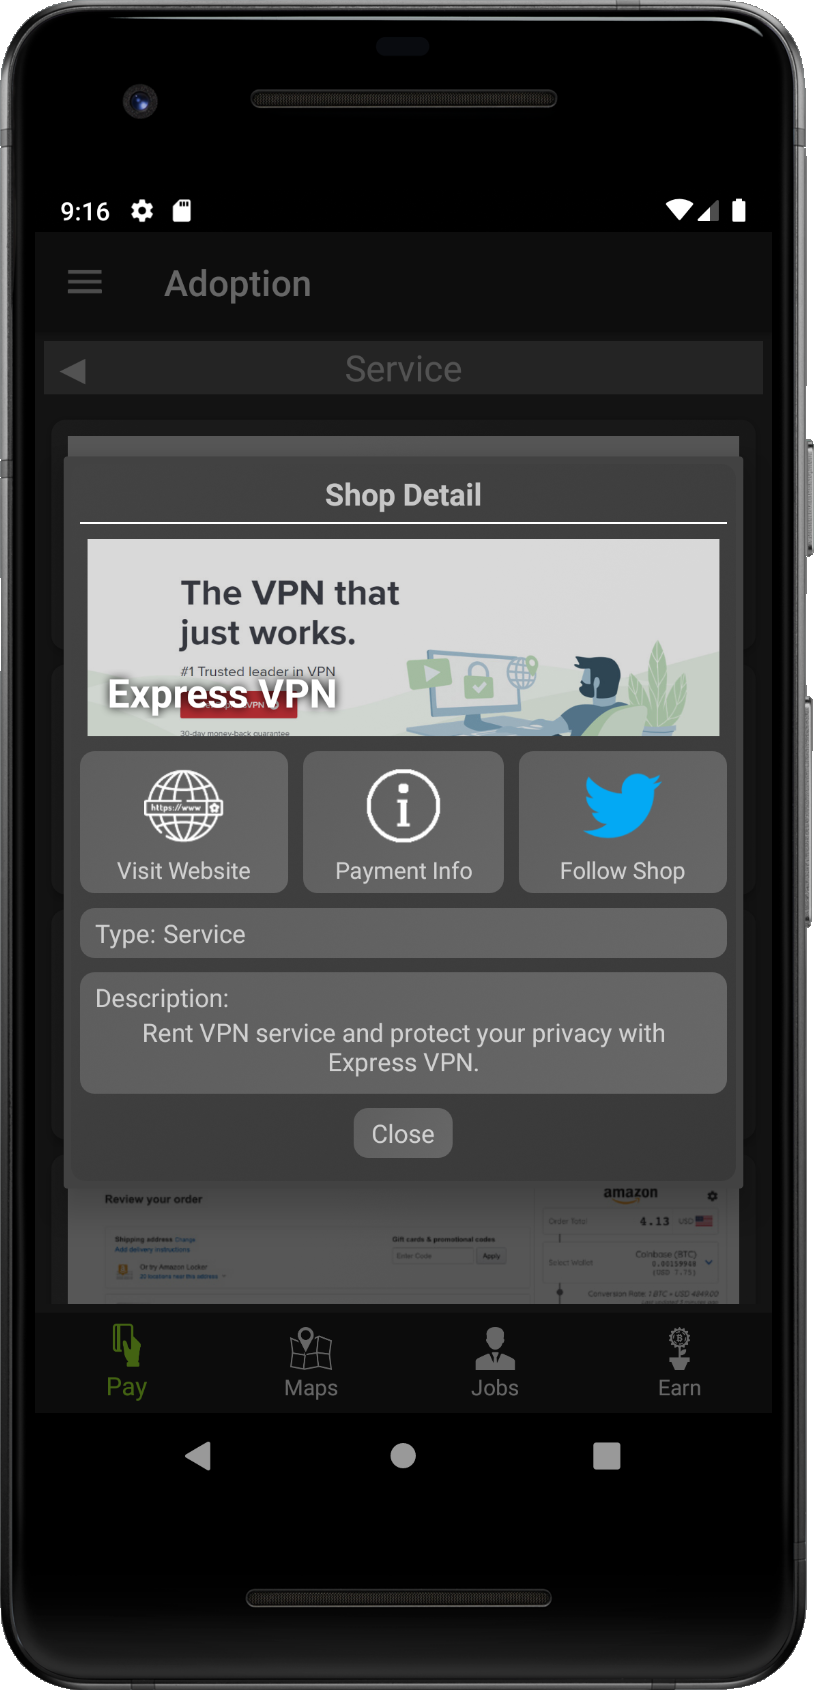
- Popup with details about the service.
Too get more details about the listed service, tap on the service you are interested in. Popup with more details will be displayed. The popup contains brief description and buttons, which will redirects you to the dedicated website: homepage, info page about crypto payments or twitter profile of the service.
Maps
This section lists map providers, which show places with cryptocurrency support. Currently we listed 3 providers:
CoinMap shows map of merchants and ATMs around the world.
ATM Radar shows map of ATMs and services where to buy/sell crypto.
Accept CryptoZ shows map of business accepting crypto payements.
You can go directly to the web page of given service, if you tap on the item. If your would like to check out the twitter profile
of the service, tap on the twitter logo in the top right corner of the given map provider.

Jobs
This section lists job aggregators, which aggragete offers from crypto related projects, which seeks for new talents to join them.
Currently we listed following job aggregators:
Crypto Jobs List helps to find a job in crypto space.
CryptoJobs connects individuals and companies in the cryptocurrency space.
Crypto-job is recruitment platform for blockchain and cryptocurrency specialists.
Crypto.Jobs offers blockchain jobs for crypto enthusiasts.
You can go directly to the web page of given aggregator, if you tap on the item. If your would like to check out the twitter profile
of the service, tap on the twitter logo in the top right corner of the given map provider.
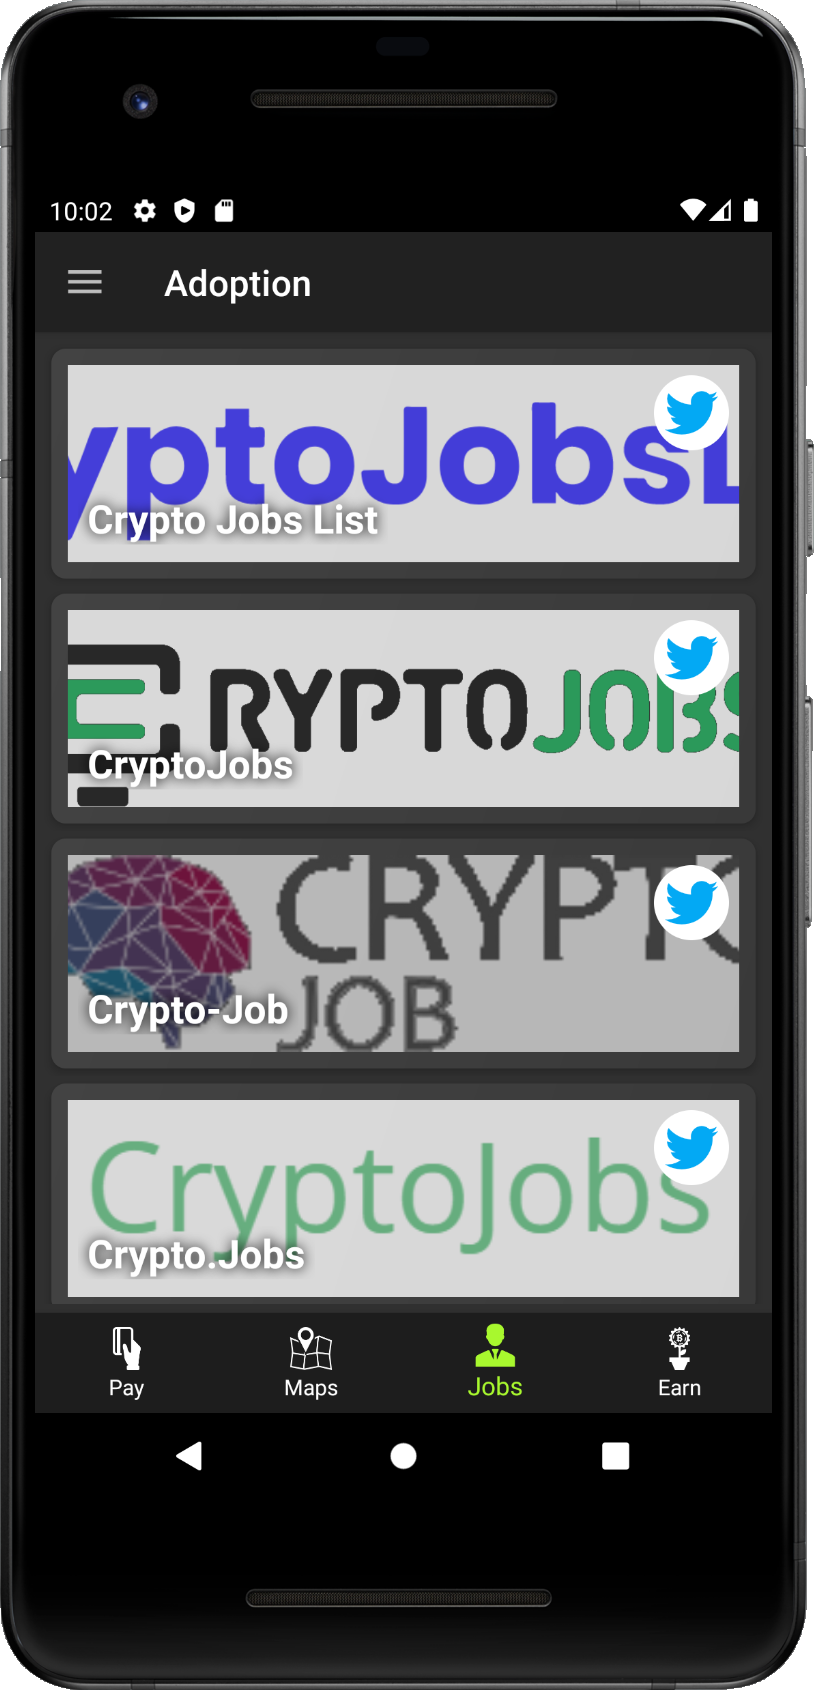
Get and Earn
This section tries to show different ways how you can get crypto currency for free or as reward. It can be as simple as faucet, solving captcha or watching video. Or it can be more complex task as filling questionaires, providing useful content or as hard as crypto mining.
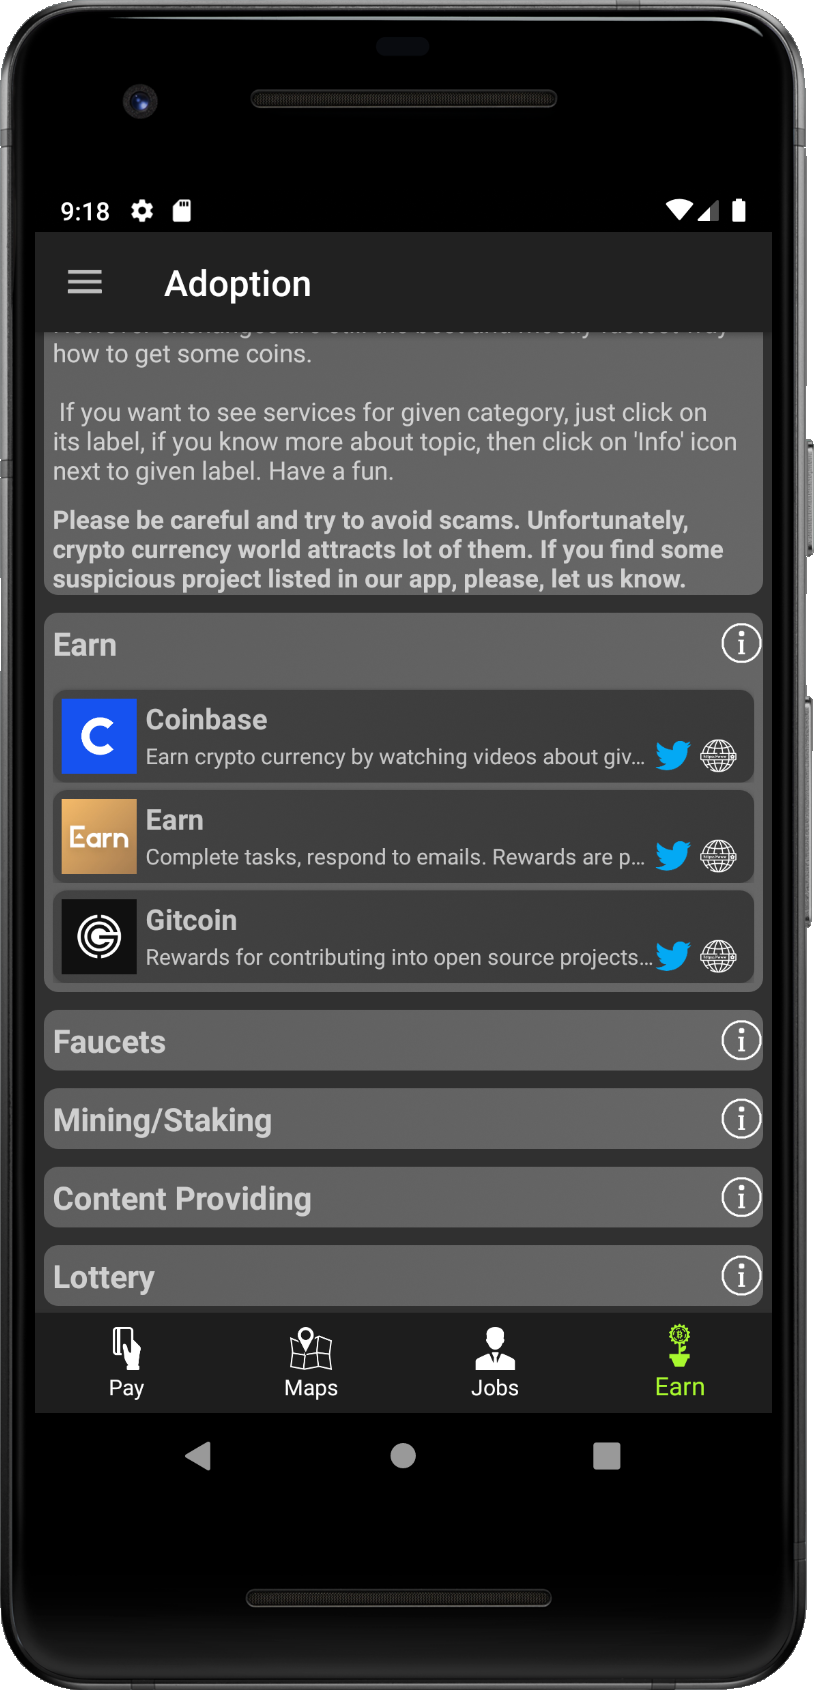
- Step 1 - Tap on Earn to extend the widget.
- Step 2 - List of projects, which let you earn crypto is shown.
- Step 3 - [Optional] To visit twitter of the service, tap on the twitter icon, to visit home page, tap on the icon of the globe.
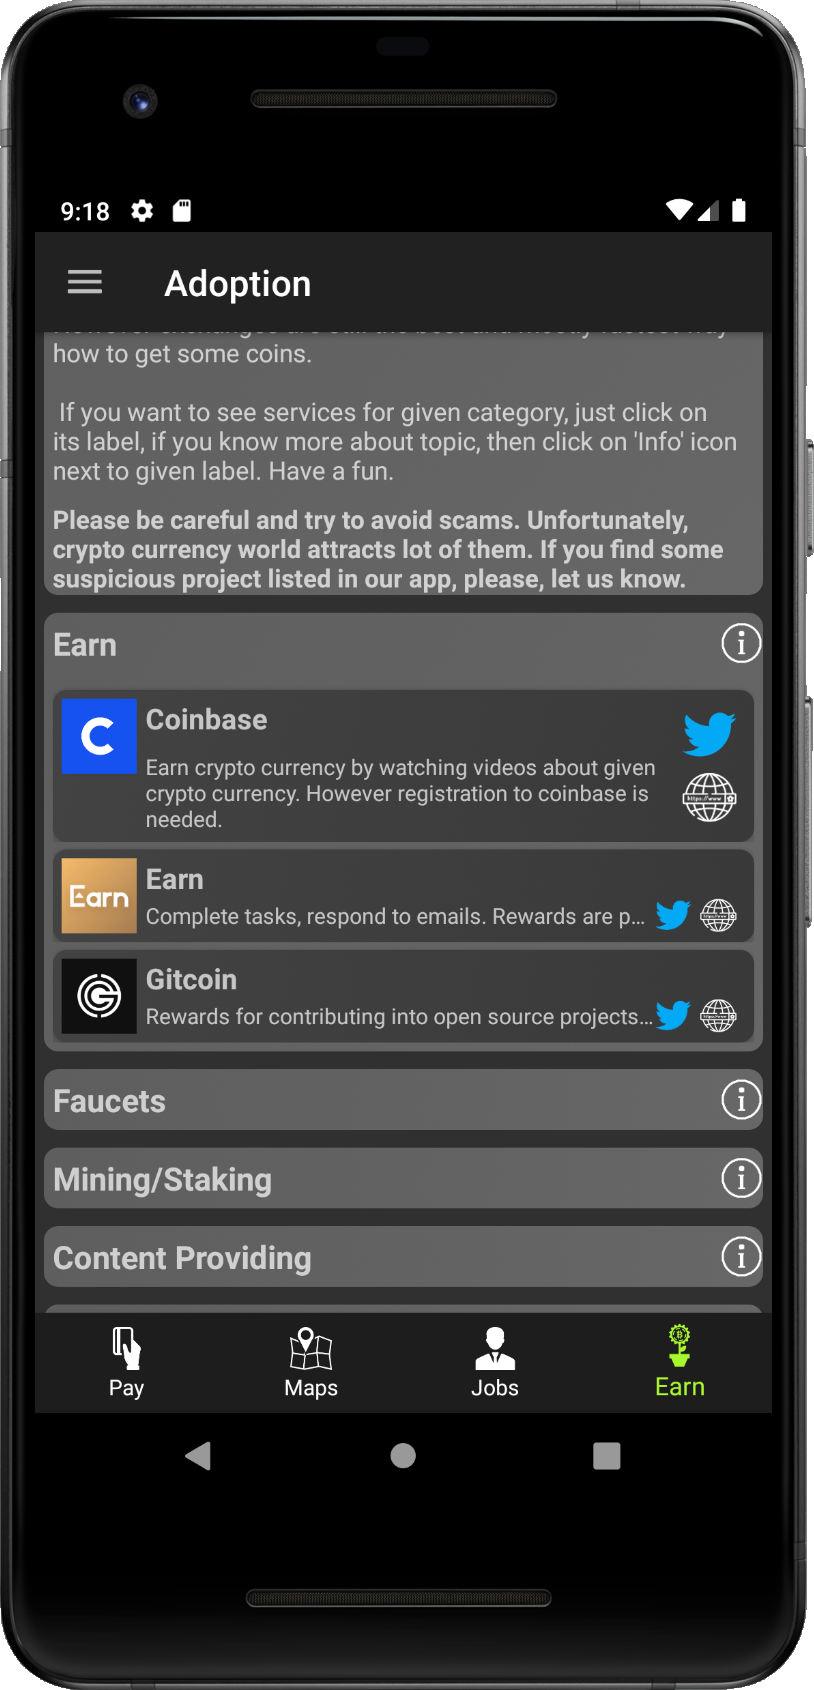
- Step 4 - Tap on the service to extend the info about it.
- Step 5 - Full project description is shown, tap again to hide it again.
- Step 6 - [Optional] To visit twitter of the service, tap on the twitter icon, to visit home page, tap on the icon of the globe.
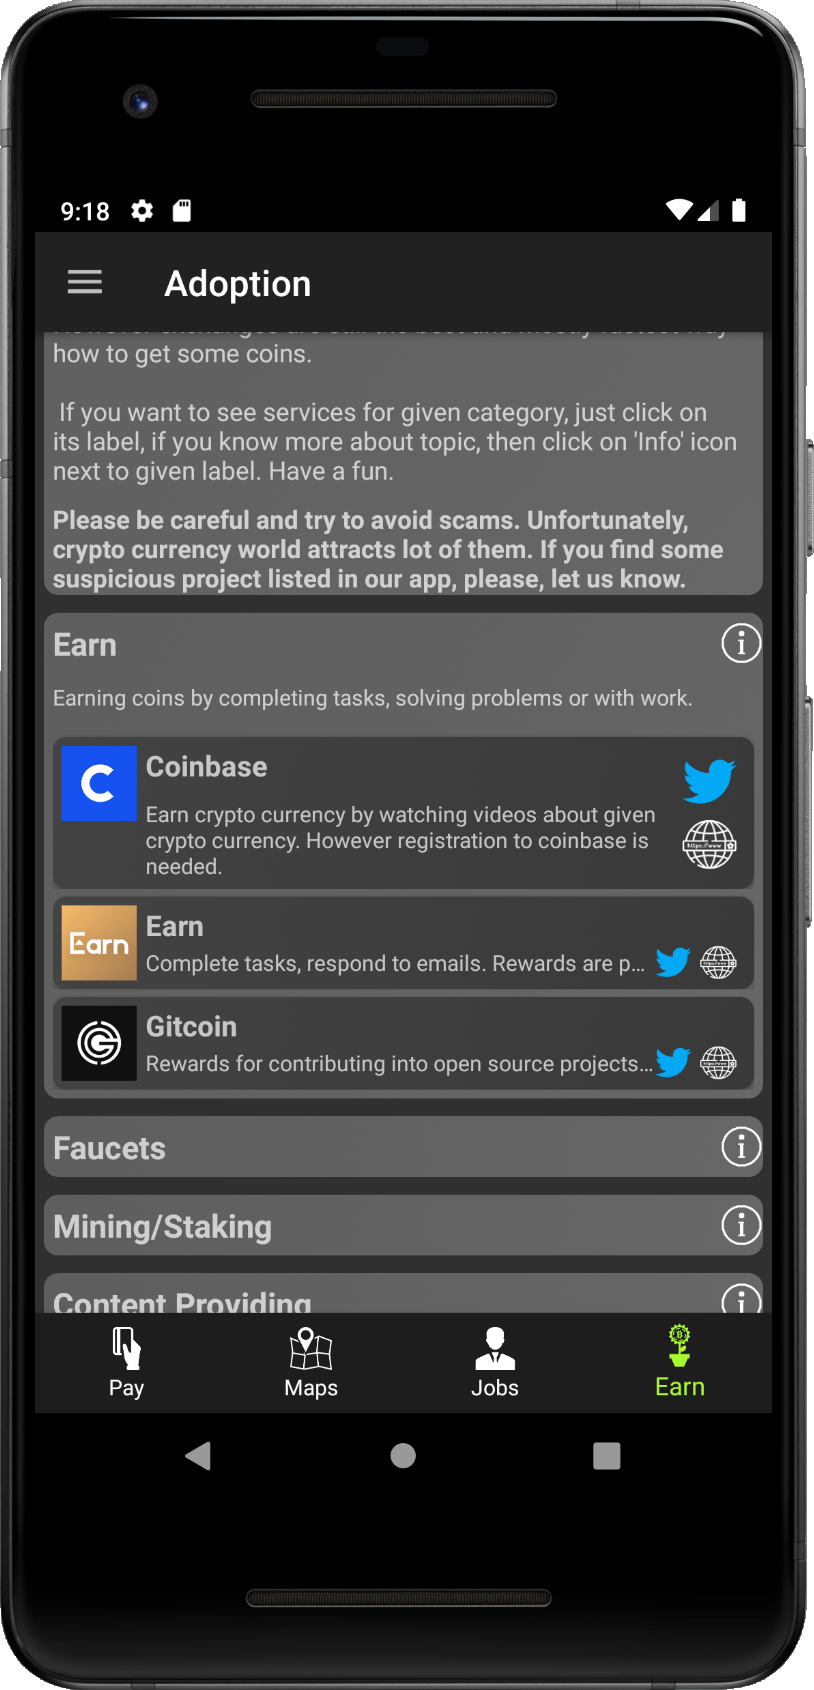
- Step 7 - To get info about category itself, tap on the info icon .
- Step 8 - Tap again on the info icon to hide the description.
Settings
Settings section is quite simple and sets basic parameters of the application. It is pretty straightforward,
but lets have a look on it.
App Theme
Allows you to switch Day/Night theme od the application.
Language
Sets the language of the app. All texts should be shown it the selected language.
Currency
Sets currency of the app. All fiat values should be shown in the selected currency
Change button
If you want to save all changes you set, tap on this button to confirm them. Otherwise
changes you made will not be applied!
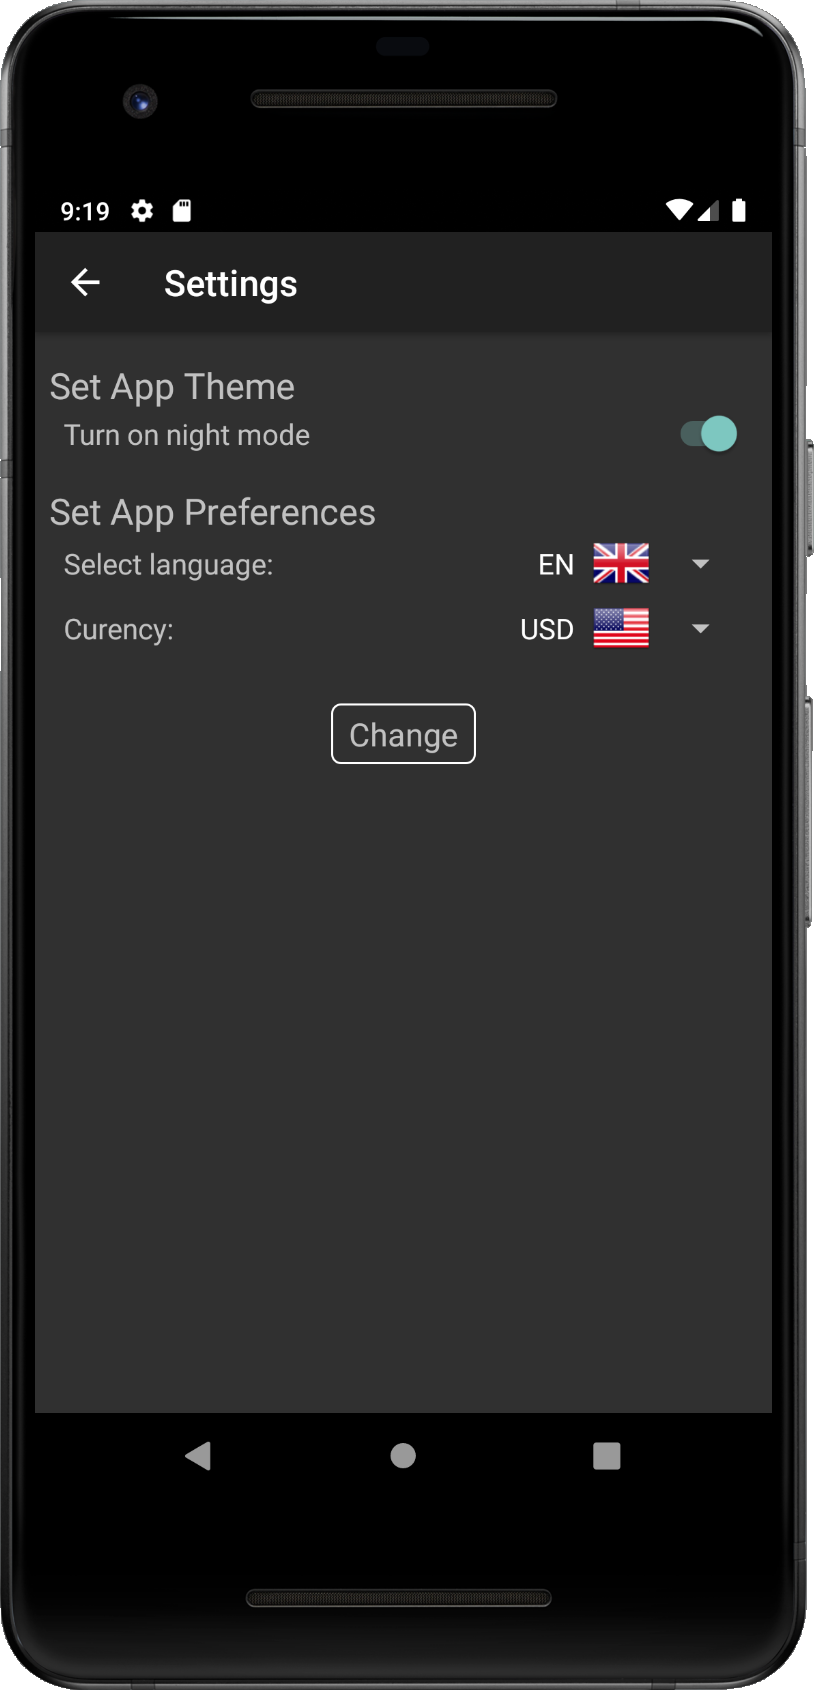
About
This section tries to provide basic info about the applications itself. Hopefully you will be able to find there info which will help you to use the app effectively. In the case of failing in it, we prepared this guide :-).
FAQ
Frequently Asked Question section gives answers to some basic questions, which we considered useful, when we
released first open beta version.
You can see list of topics, when you open this section.
If you want to see info about the topic, tap on the topic you would like to see.
When you tap on the topic widget, it will be extended and show the text. To hide the text, tap on the topic widget again.
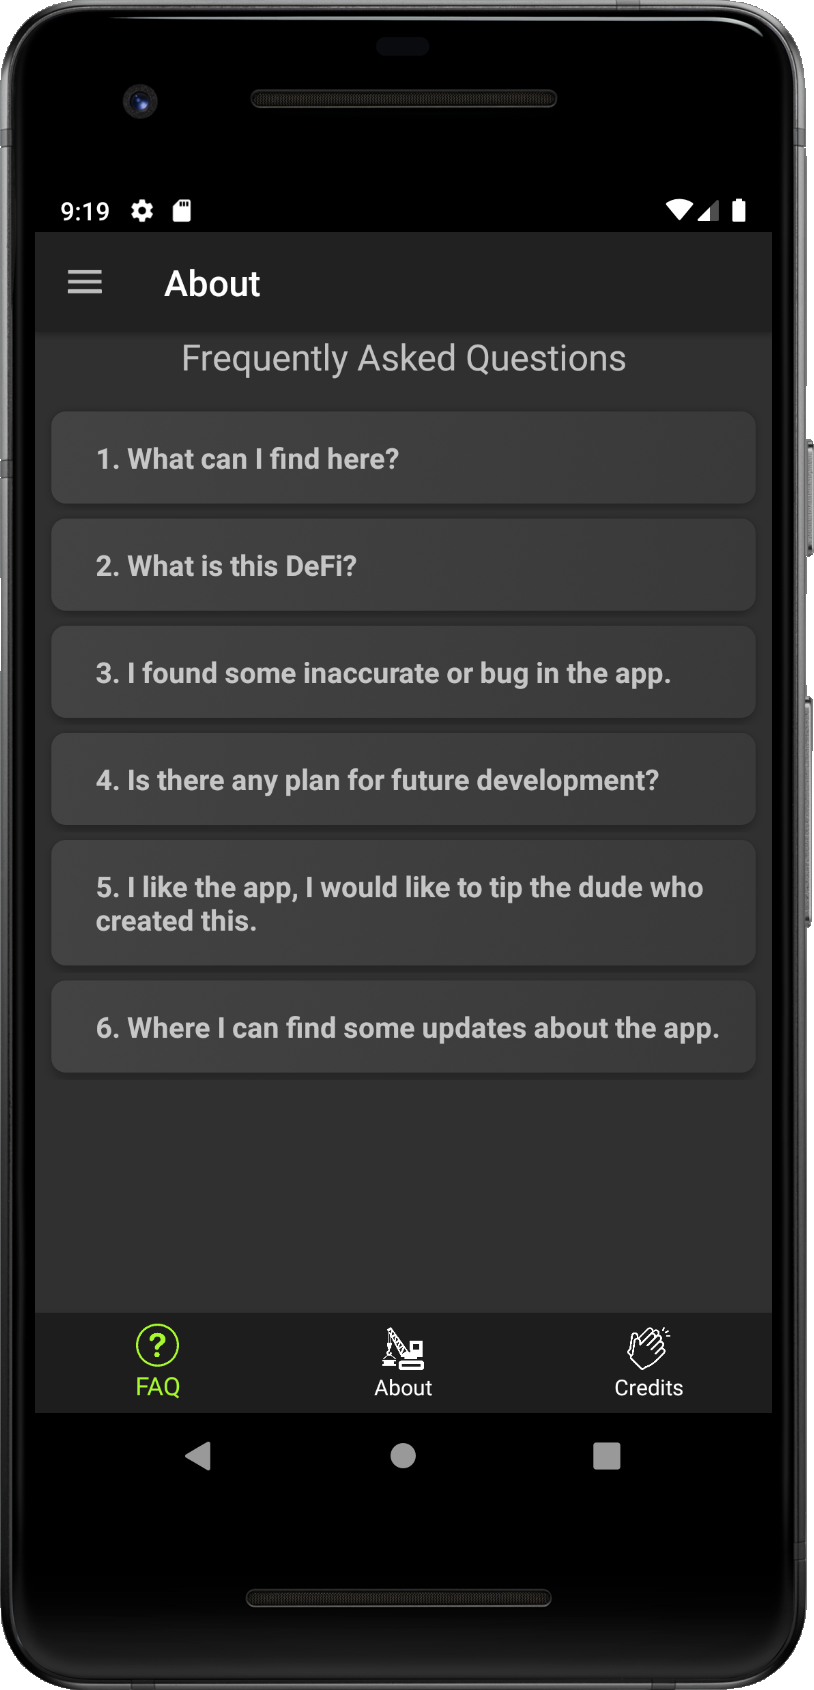
- FAQ section with main topics.
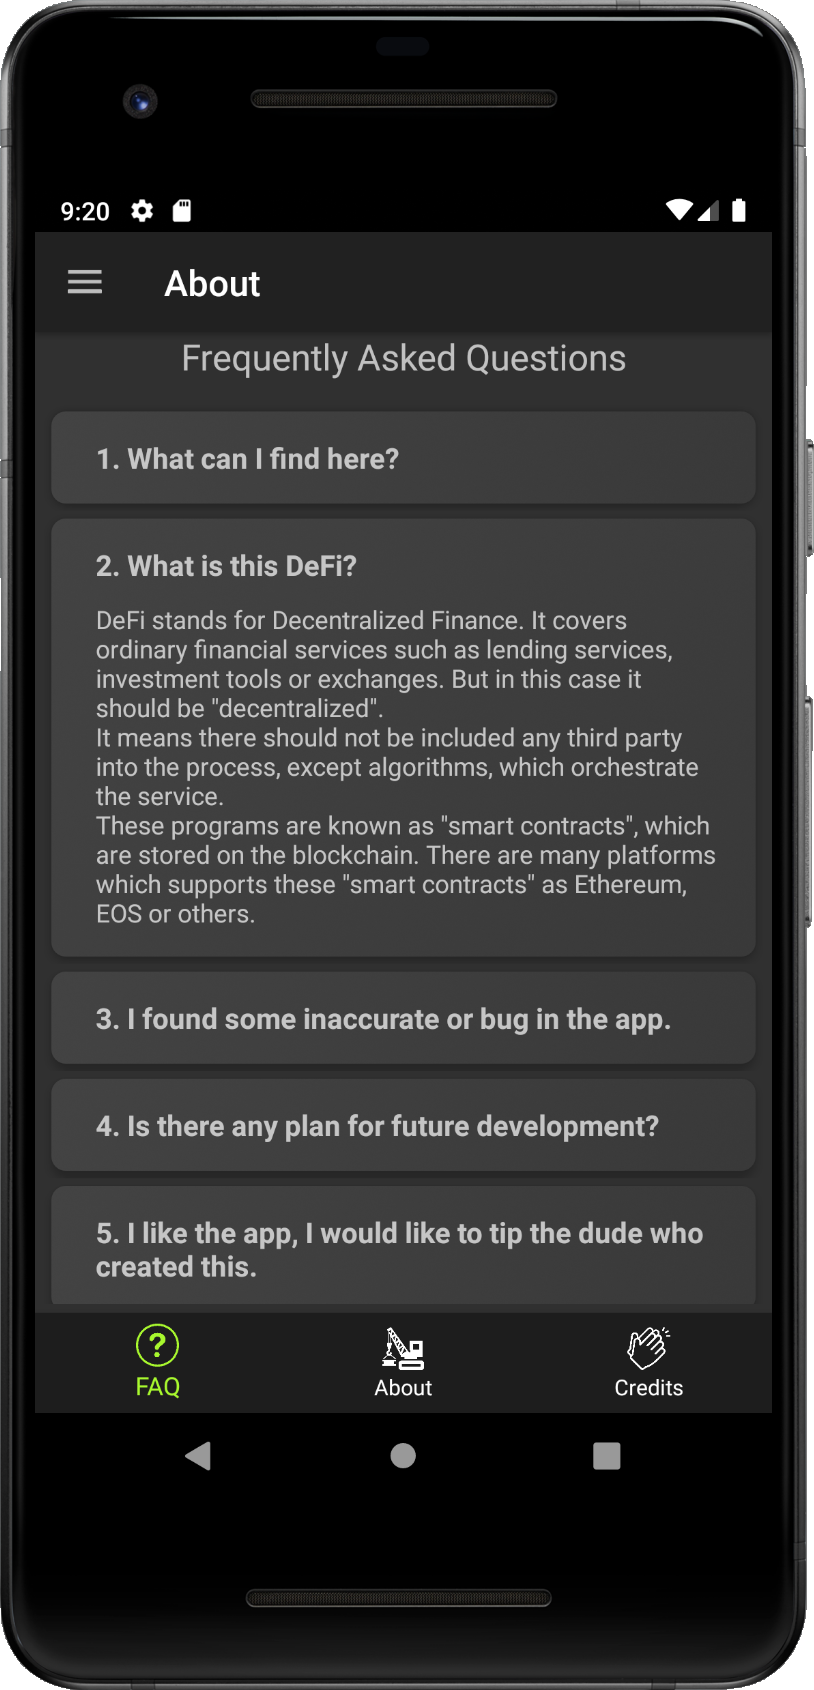
- FAQ section with extended topic.
Change log
Change log shows brief info about changes made within each release. If you want to see how the app evolved since its inception,
you can find it in this section.
Each release info contains the version of release and keynotes to the release to see what was changed, added or removed.
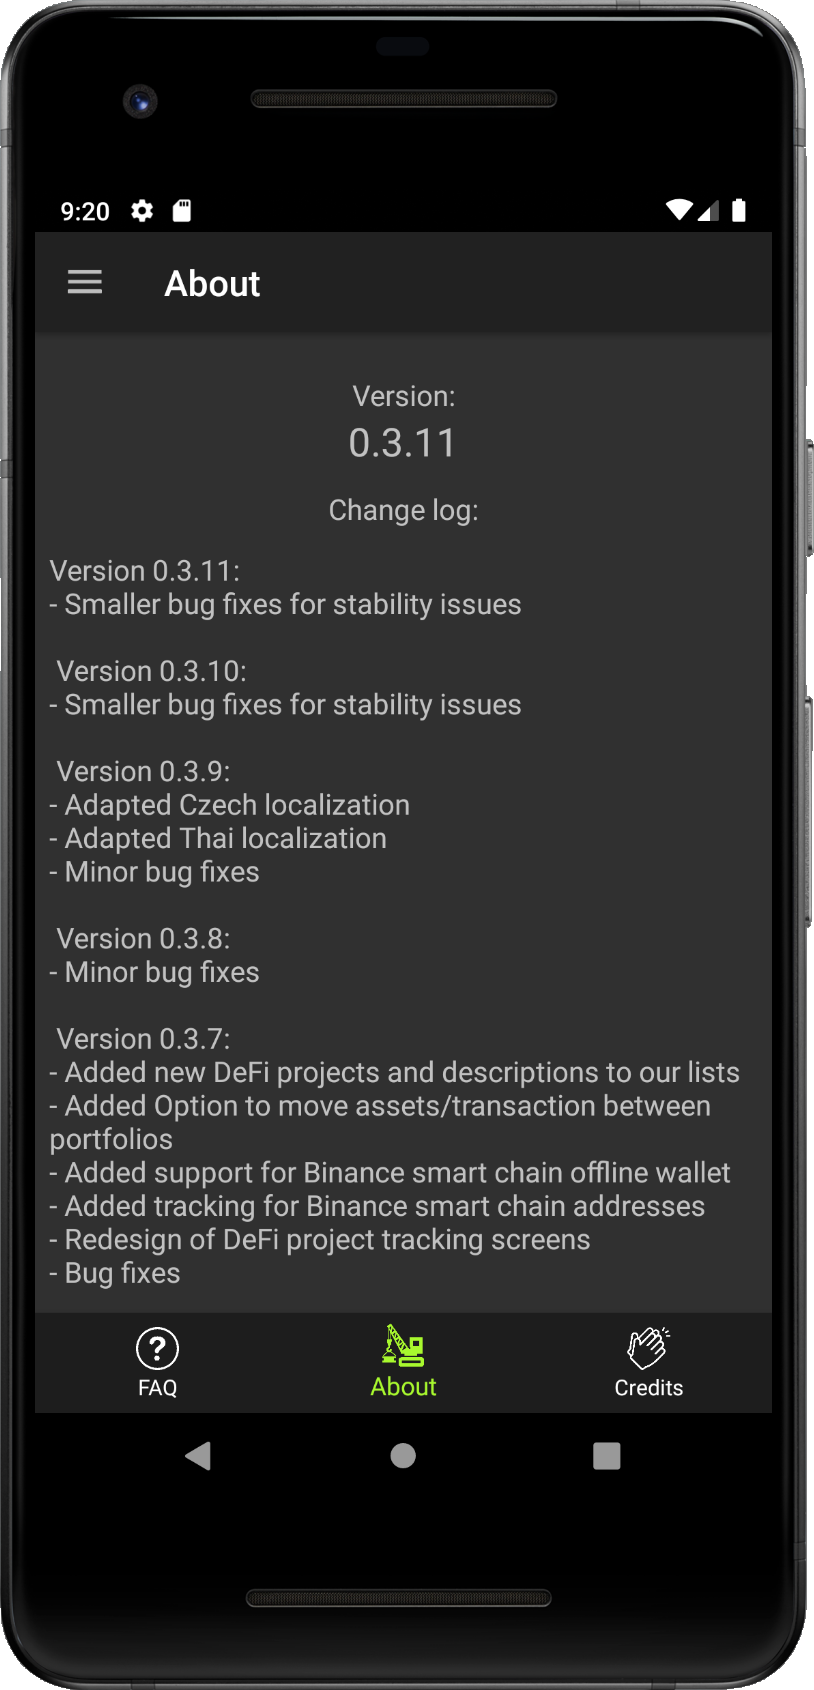
Credits
Credits sections lists all tools, which were used to build the app. There are dev libraries, data providers or graphic and icon
providers.
Each tool or provider record contains brief description and links to the website or twitter profile, in the case you would
like to explore them more.
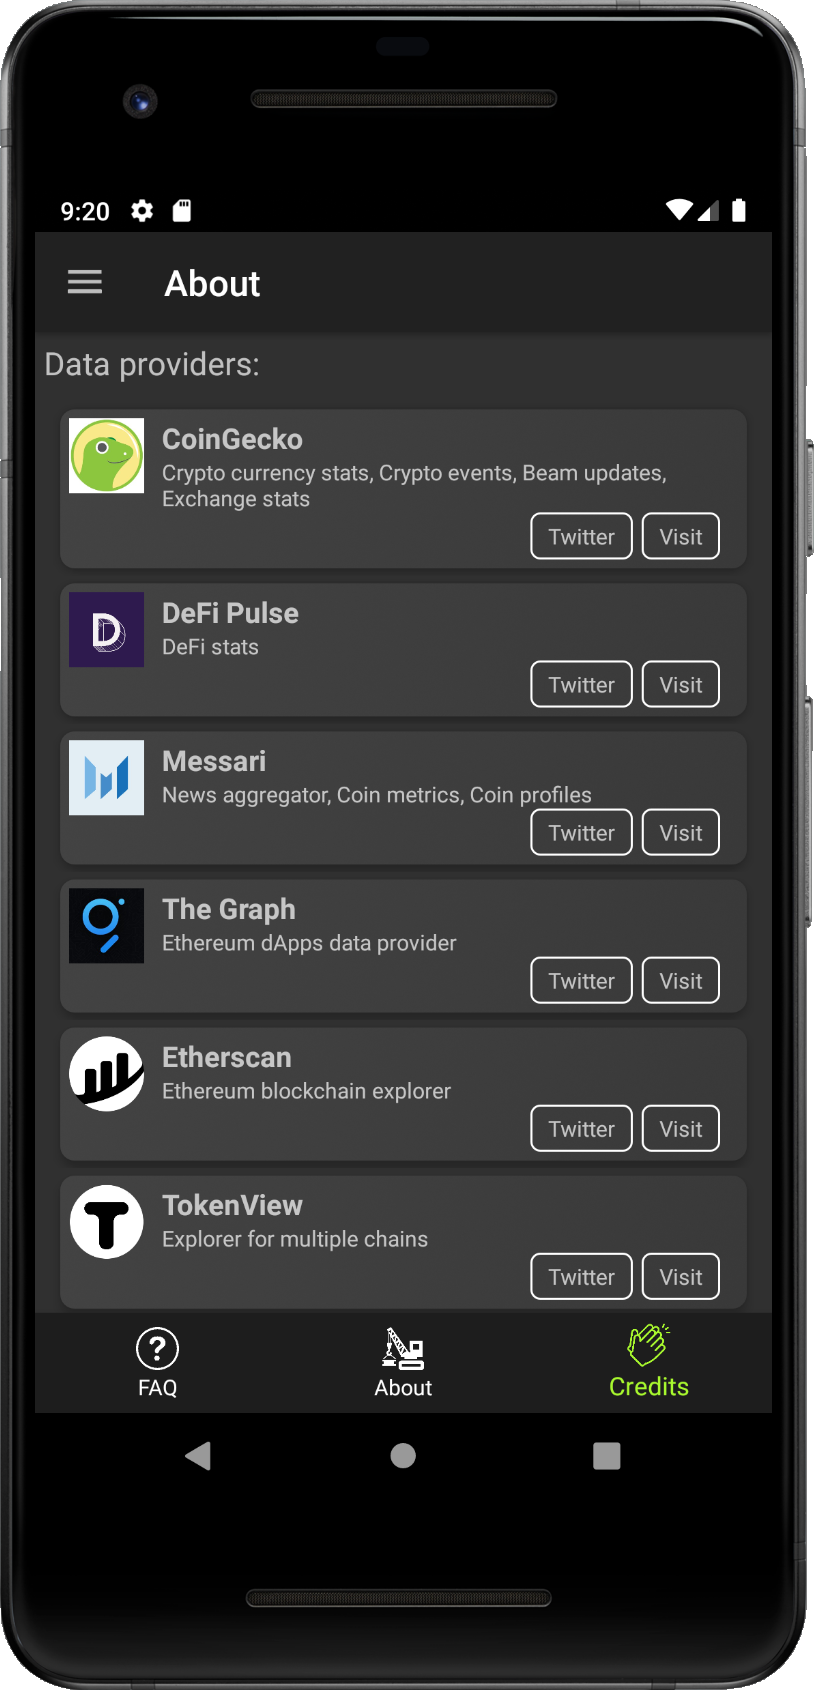
Contacts
Follow our community account on Twitter.
Follow our community account on Facebook. (In progress)
Leave us some feedback on our email.